By Richard Hoffmeister
FOR SALE: A number of assembled and detailed HO dioramas and buildings from Fine Scale Minatures kits. Located in Pierce County, Washington – cannot be shipped. For prices please contact richardhoffmeister@comcast.net
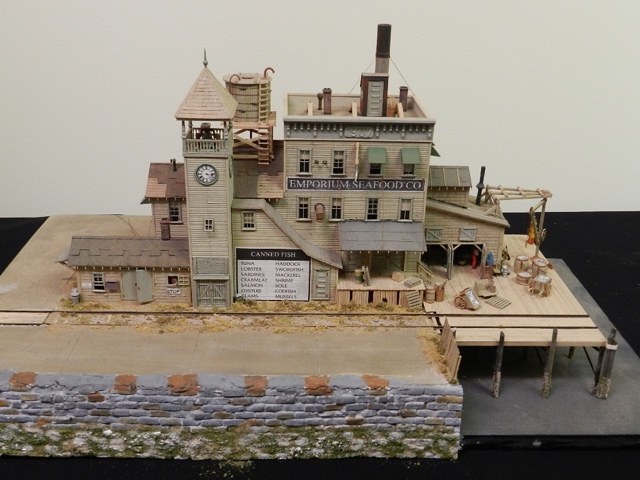
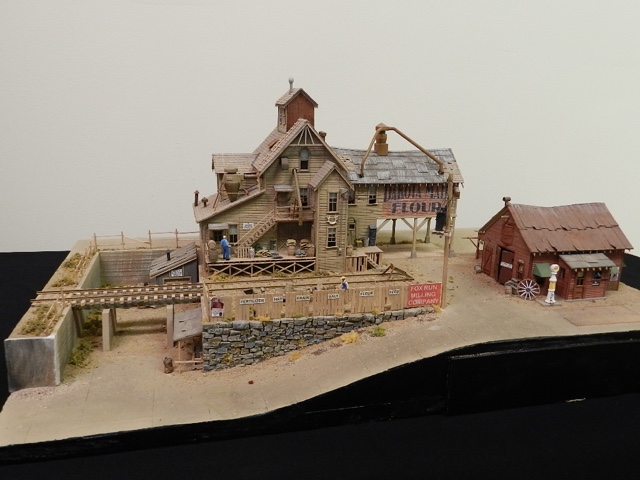
FOR SALE: A number of assembled and detailed HO dioramas and buildings from Fine Scale Minatures kits. Located in Pierce County, Washington – cannot be shipped. For prices please contact richardhoffmeister@comcast.net
Join the 4th Division this Saturday, Sept. 12, at 10:00am, on another pair of exciting Zoom virtual layout tours, by Brian Ferris and then Janice and Barry Dupler. Brian is from Olympia and has an HO layout to show us that features south sound scenery and structures, with an emphasis on realistic Timetable and Train Order operations made accessible even for first time operators. Janice and Barry Dupler have an HO/HOn3 layout in Bellevue that features some wonderful bridges, complex track work, towns, and soaring rock faces that only a narrow gauge line could conquer. Here are the details for joining the Zoom meeting:
Time: Sep 12, 2020 10:00 AM Pacific Time (US and Canada)
Join Zoom Meeting using this link:
https://us02web.zoom.us/j/88513613667?pwd=RDR4dGNJaU9vbkI3ckUzT09KREUzQT09
Meeting ID: 885 1361 3667
Passcode: 786815
Article and Photos by Rich Thom
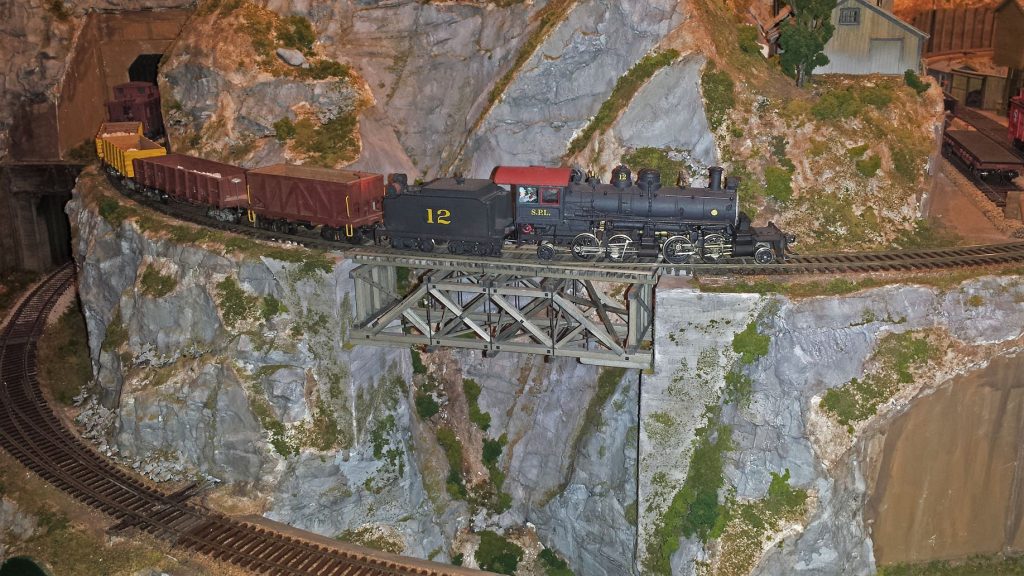
Readers who have crewed on my HO-scale Coldwater Creek & Cascade RR during the past eight years have been greeted when entering the layout room by the scene in Figure 1—a granite defile spanned not by proper bridges but two pieces of ½” plywood subroadbed. When I started my layout in 2008 (having been away from the hobby since 1962) I sought the advice of local experts about the construction sequence for a layout designed for operations, which was entirely new to me. All advised laying track and beginning op sessions as soon as possible, leaving scenery and time-intensive structures such as bridges until later, so that the operation scheme and track plan were debugged first. It was good advice, but I didn’t quite follow it. Unhappy with my bare plywood empire I charged ahead and completed the scenery next, leaving the plywood spans in place where bridges would be, well, “someday.” That left the conundrum shown in Fig 1: scenery 90-percent finished—but no bridges. I had two choices here. I could cut away the temporary spans, removing the track, cork roadbed and subroadbed entirely, then build the bridges the usual way, from the ground up. However, I had seen an article in Railroad Model Craftsman (“Building Trestle at North Crags” by John Olson, Dec 1978) in which the author described cutting the subroadbed away, but keeping the rails in place, then building the bridge and abutments underneath them. More or less bass-ackwards! The advantage, especially for a bridge or trestle on a curve, is the preservation of smooth curvature as well as precise level across the span. That seemed appealing so I have built most of my bridges in this manner.
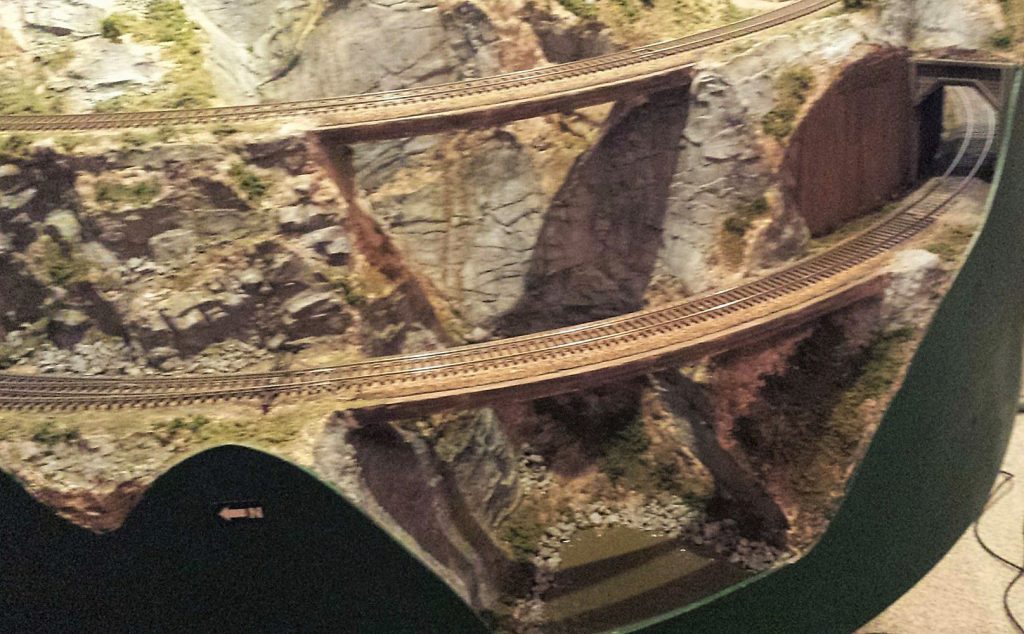
I’ll use the example of my Silver Falls Bridge, the upper span in Fig 1, to describe the construction sequence. The 1:87 pile driver crew came out to the site to have a look at the sheer granite walls on each side and, after a few unkind words about the railroad’s surveyor, announced that no piles could be driven there. Some sort of single span was needed rather than a pile trestle. My modeled year is 1928 so I could have prototypically selected a steel girder span—I have them elsewhere on the layout and it would have been far easier—but since this was a foreground model I chose a timber deck truss bridge, with its fussy tension rods and nbw’s. I used a Kalmbach publication plan, shortened by one panel to fit my 50-foot span.
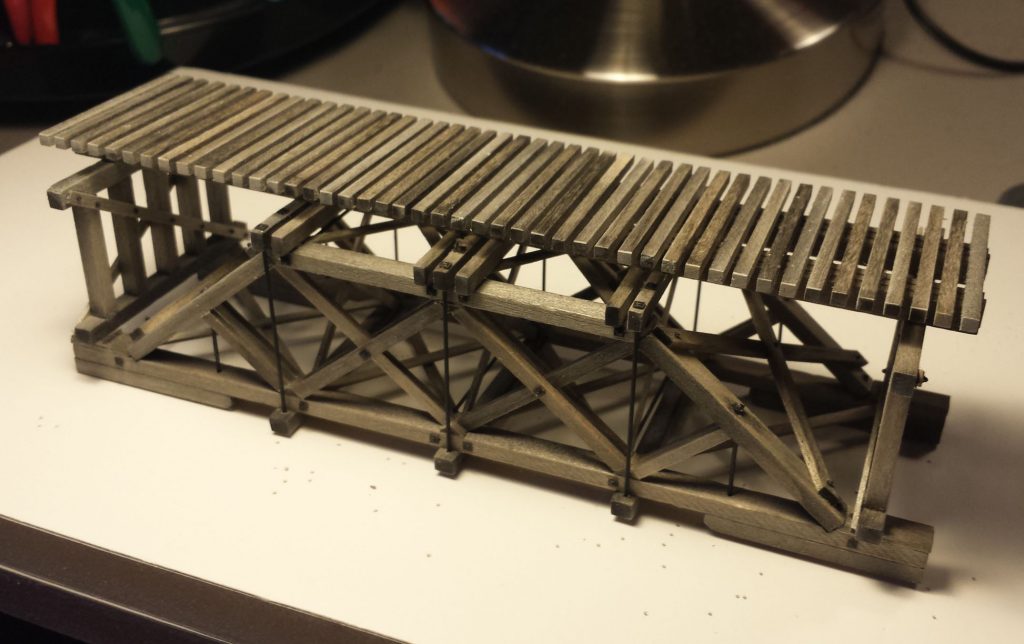
Building the deck truss bridge used standard methods at the workbench (Fig 2). Stripwood and bridge ties are from Mt. Albert Scale Lumber (now distributed by Fast Tracks), pre-stained with Micromark Bridge and Tie Stain. Having tried several glues, I use Aleene’s Tacky Glue, either standard or fast-grab variants depending on whether the workpiece is held tightly in a jig, or needs the fast-grab action. Nbw’s are from Tichy Train Group. Tension rods are 0.028” brass wire or 2.4” in HO, just slightly oversize but easier to see.
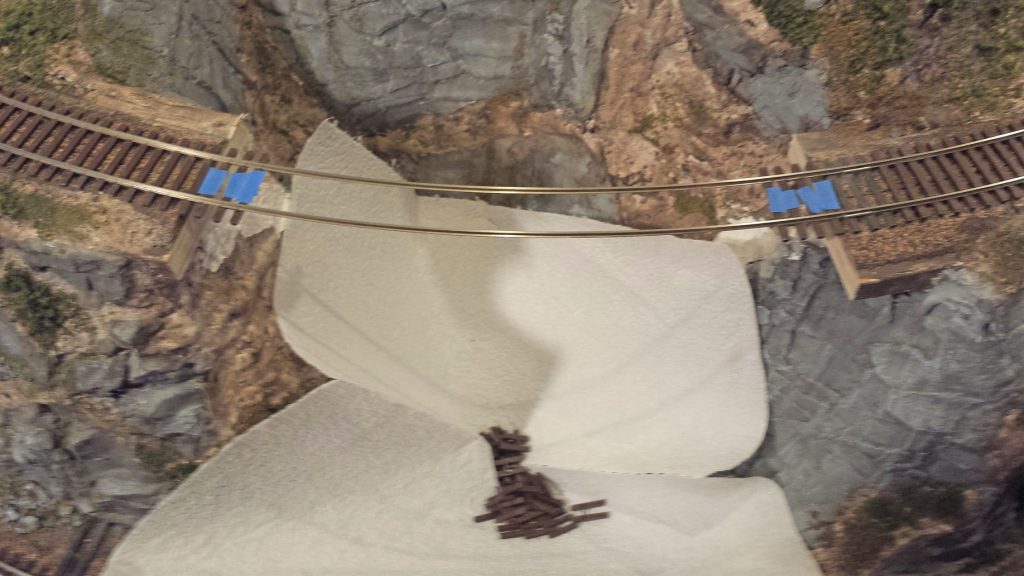
Now for the fun part! First the plywood subroadbed and cork roadbed were cut away (Fig 3) using a Zona 5” saber saw blade. The granite rock faces by the way are Cripplebush rubber rocks, which though more time-consuming to paint than plaster or resin alternatives, I am very pleased with. I presented a Skagit Valley & Whidbey NMRA clinic on their use in 2016. Next the flextrack plastic ties were removed. The blue painter’s tape marks ties that are to remain in place; these will be set in ballast on the concrete abutments.
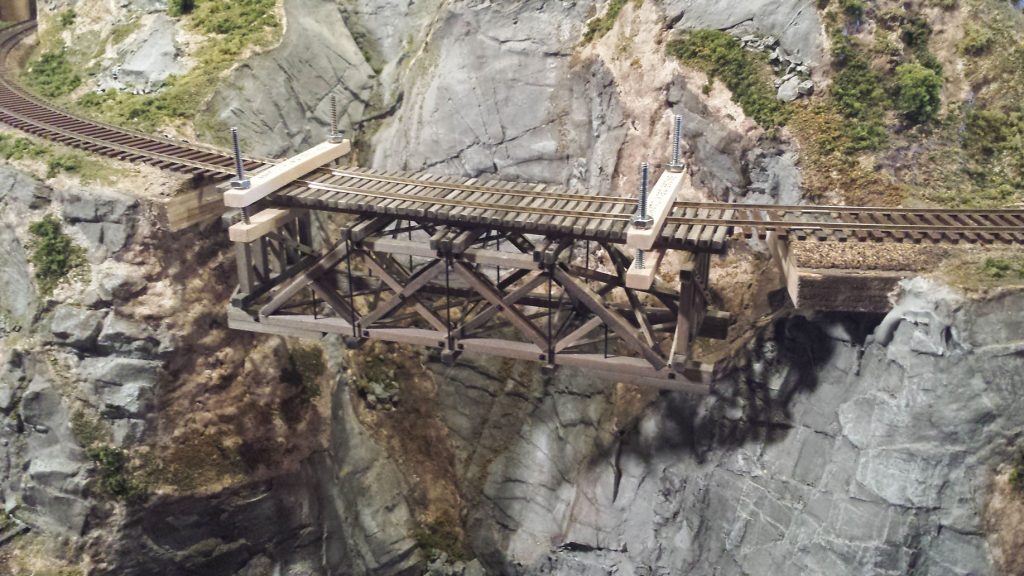
The next step, Fig 4, was to carefully clamp the pre-fabricated span to the rails. None of the clamps in my toolbox was quite right for the job, so I jury-rigged the pair seen here. Alignment is important; to get it right I drew pencil lines on the bridge ties for locating the rails.
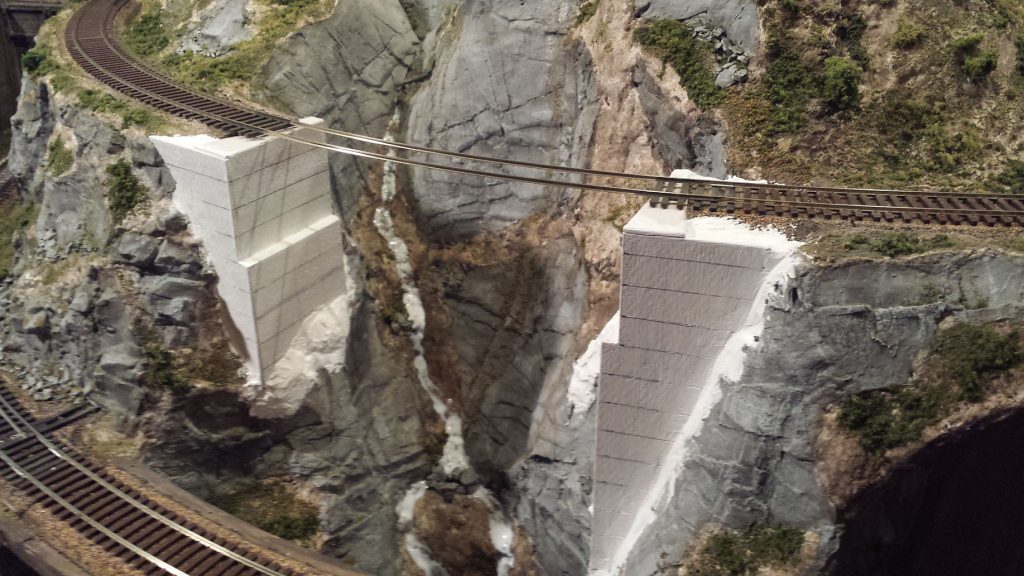
The next step was to build the abutments below the suspended bridge span. I used basswood and artist’s mat board to simulate concrete abutments, sealing the mat board well so that it didn’t warp with subsequent applications of acrylic paint. This is the most tedious step in the sequence, requiring a number of height measurements from tie level to the pre-existing terrain. In Fig 5, the abutments are completed and ready for painting. They were blended into the existing rock terrain with Sculptamold, which was then carved with striations to match the features of the rubber rocks. All was then given a coat of white acrylic gesso. I used gesso liberally in my scenery coloring as an undercoat, to even everything out over varying materials and increase reflectance and brightness, a trick I learned from my artist son. The white stream below the span is a coat of gloss mod podge which will dry clear; this was unrelated to the bridge work and just done at the same time.
The bridge span was repositioned into place and rails spiked to the bridge ties. Guard timbers and their nbw’s were added as a final step. The completed Silver Falls Bridge is shown in Fig 6, with the CC&CRR’s heaviest loco—a 2-4-4-2—giving the bridge an axle-load test; it passed. I sized timbers and other features for an E-55 rating, or slightly lower. The abutments were weathered with India ink washes and Bragdon powders, and some simulated foliage and moss added.
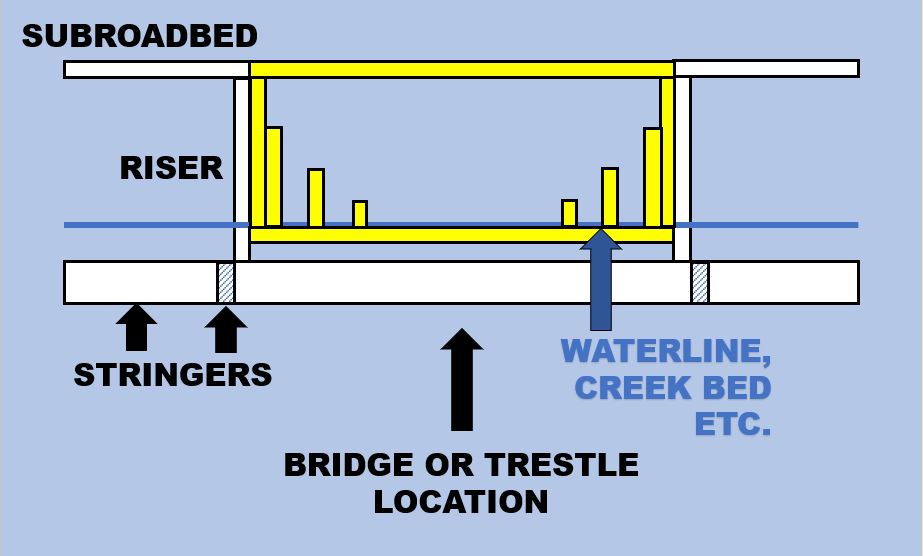
I’m not recommending that you build your bridges this way, but having boxed myself in by largely completing my scenery before tackling the bridges, it worked satisfactorily for me. There are several better ways, only one of which is illustrated in Fig 7. The idea here is, when you build your basic layout framework—stringers, risers, subroadbed—instead of keeping the subroadbed continuous across your future bridge locations as I did, construct a removable “bridge frame,” highlighted in yellow in the figure. It’s built of 1 x 3’s or 1 x 4’s or whatever your chosen lumber size is, and includes abutment and pier supports as shown. Lay your track and begin op sessions and run for years this way if you want to—but don’t complete the scenery around the bridge frame. When you’re ready to build your bridge or trestle, remove the frame, the top piece of subroadbed, and build the bridge on the frame at the bench. Reinstall the bridge frame with its completed bridge and fill in the scenery around it. Maybe on my next layout!
###
Click here to read the September 2020 issue of The Flimsy Board from the Bremerton Northern Model Railroad club.
The Seattle North End Clinic will once again meet virtually for September. There will be no in person meeting.
This month’s presentation will be on Layout Command Control (LCC) by Brian Pickering. Brian will be providing an overview of what LCC is and then demonstrate how you can implement it on your home layout.
These meetings are for NMRA members and guests. It’s a great way to introduce your friends to the hobby. Also, with our meetings being virtual, you don’t have to drive to North Seattle. A win-win all around.
Below is the information for the Zoom meeting. The lobby will open at 6:45pm and the meeting will start promptly at 7:00pm. PLEASE NOTE: We are starting a bit earlier than we did over the summer months.
Thursday, September 3, at 7:00pm (lobby opens at 6:45pm) — all times PDT
Zoom Meeting link:
https://zoom.us/j/96056774153?pwd=ZjdnaUlvc3R0YUwwTTg1TG0rV0VtZz09
Meeting ID: 960 5677 4153
Passcode: 621667
Looking forward to seeing you on Thursday!
Lisa Murray
northseattle_organizer@4dpnr.com
communications@4dpnr.com
The Dry Gulch & Western has a varied list of motive power. I currently use quite a variety of different brands and wheel arrangements. There are Broadway Limited, Bachmann, Con-Cor, Proto 2000, modified Kato, Trix, and modified Athearn locomotives on the roster. The vast majority of the locomotives are sound equipped. I have begun (finally) lettering the locomotives for my railroad. Yes, this took a while, but it is slowly progressing. I have also begun the task of re-motoring some of my brass locomotives. I plan to add quite a few of them to the layout since I have been collecting them for years. They really should not be in cardboard boxes all of their life! Unlike John Allen, I have several diesels on the layout. Several Kato NW2’s usually “play” in the yards at Ellison and Newport. They are painted in the early SP tiger stripe configuration. I have two cow and calf sets for that purpose. There is a rather large fleet of Santa Fe F7 diesels on the layout. I originally started with a vintage Athearn F7 A and B powered set that I did a sound decoder installation. Since then I have added some Proto 2000 F7s also in the Santa Fe Warbonnet paint scheme. Did I also mention I have a couple of BLI Pennsy Sharknose diesels that run freights on the layout? Yes, I am a Pennsy fan, so those locomotives are allowed to run on my layout. So, let’s get back to the layout photos.
In photo 26 you are still looking back at Ellison, Taylor Junction, and all points beyond. This gives you a good view of both large control panels. These panels house most of the turnout controls for layout. Since they are only a couple of feet apart from each other it makes one-person operation of the layout’s mainline fairly easy. Continuous running of trains can be accomplished by changing direction of just two turnouts.
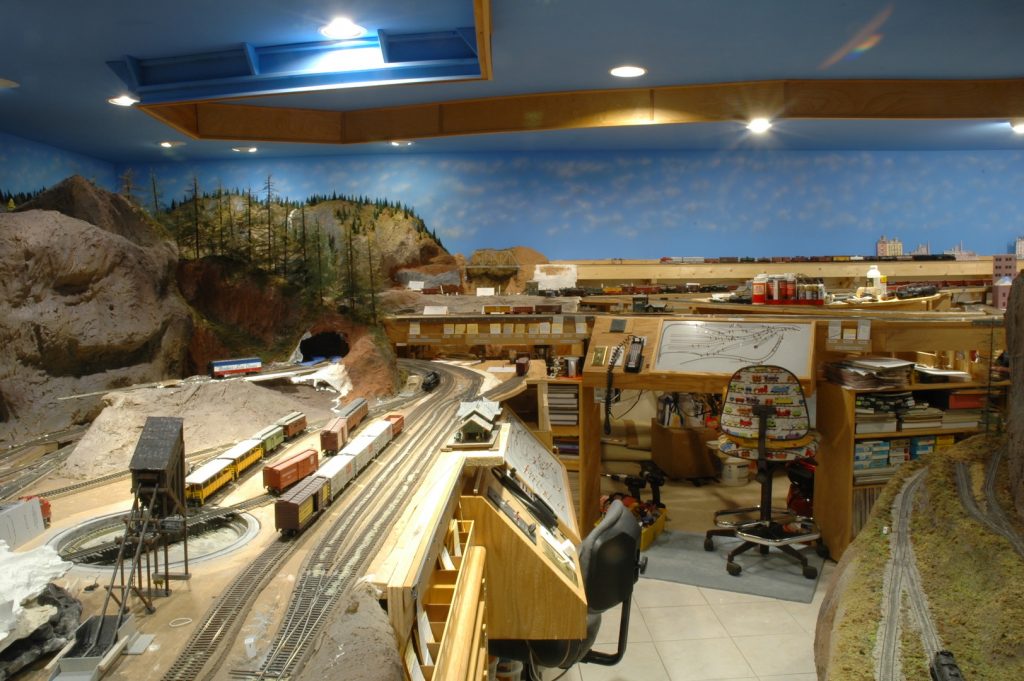
Photo 27 is a view of the very first bridge I built for the Dry Gulch & Western. It is located directly behind the tall gray mountain spire in photos 22 and 23 of part 4 of this series. It is a tall curved wooden trestle that carries the mainline. If it looks familiar this is my attempt to create the Ryan Gulch scene from the famous Gorre & Daphetid. This photo also shows the aisle in the floor to ceiling area of the layout. The blue colored carpeting mimics the color of a river.
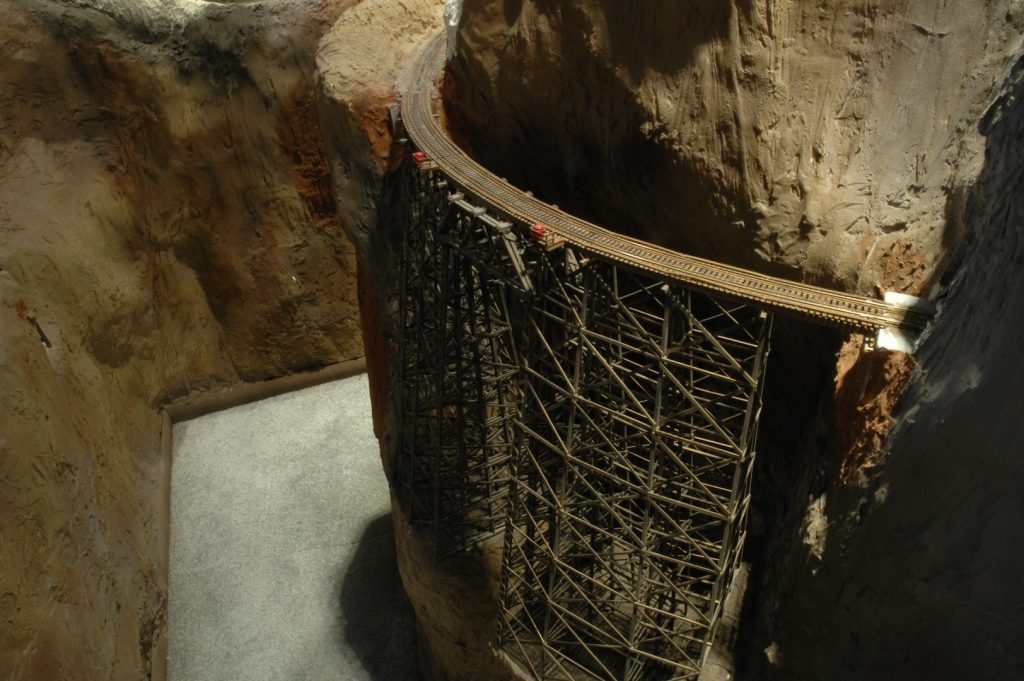
Photo 28 shows the view looking down the canyon. At the center top of the photo is the town of Alpine. Just around the bend from the wooden trestle is the hamlet of Raade Springs. Further around from the wooden trestle is the town of Potter Flats.
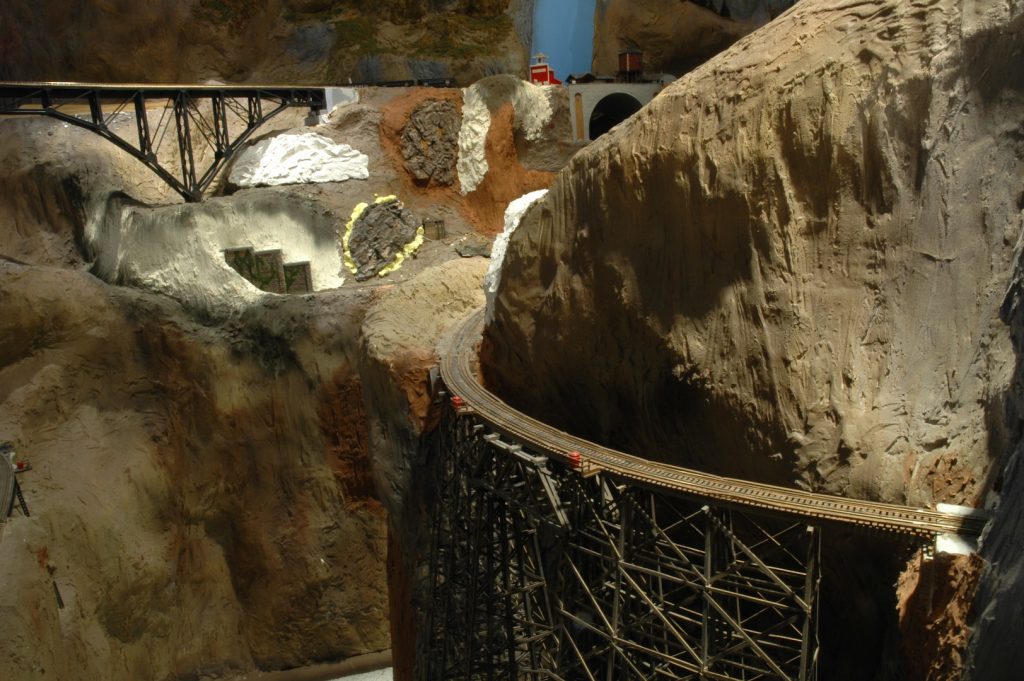
Photo 29 gives you the first view of Potter Flats. There is a mine and an oil drilling operation at that location. The little building above the rock outcropping in the foreground is Raade Springs station. (Please note that there is a lot of the scenery in this area that isn’t quite finished yet. That has significantly changed since Covid-19 and those pesky “stay at home” orders. At the end of this photo series I will try to post updated photos of this area.) On the left of this photo is my version of French Gulch, another borrowed or should I say “liberated” scene from the Gorre & Daphetid. Can you spot the large access hatch in this photo? It is almost in the dead center of the photograph.
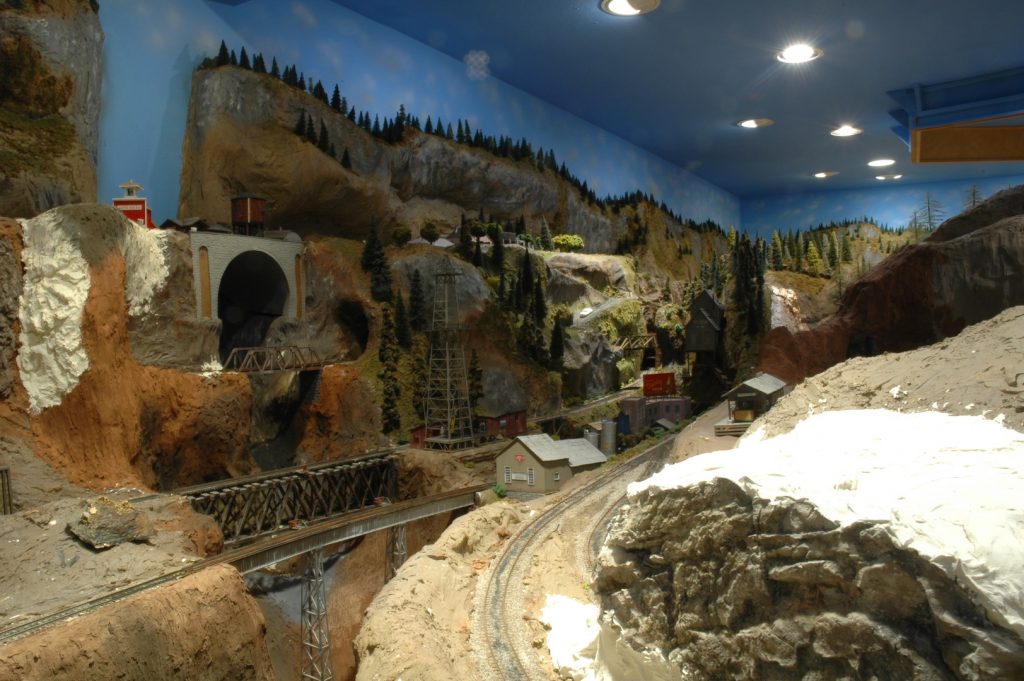
Photo 30 gives you a really good view of how things fit on the layout. It also shows the advantage of correctly placed view blocks. Let’s go across this photo from left to right. On the extreme upper left is the town of Alpine. As you go down into the valley you encounter Potter Flats. The rail line running straight up the photo travels to Gornitzka Crossing and beyond. The switch that sends the rail line off into the tunnel in the foreground is a sort of “backdoor entrance” to the town of Dry Gulch. Notice how the view blocks hide Gornitzka Crossing! In this photo to the right is Raade Springs with its small station. Even further to the right is Dry Gulch.
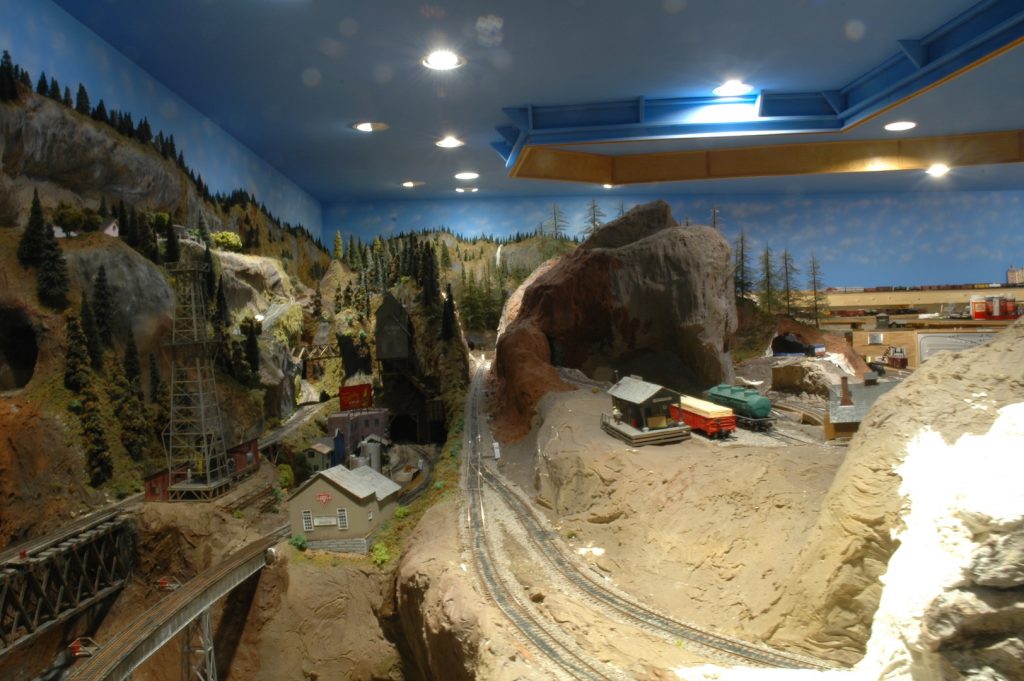
That is it for this week. Next time we will look at some more scenery under construction along with some of the bridges that hop from mountain to mountain. Did you folks ever find that access hatch in photo 29? Keep looking!
David
The 4dNTRAK Group will hold its annual meeting on Saturday, August 29, 2020 at 10:00 a.m. via Zoom. All members are encouraged to log in and anyone interested in joining the group is also encouraged!
Here’s the link to the meeting. See you at 10:00.
https://us04web.zoom.us/j/78100140403?pwd=bGMrMU9kQ1YzMExGQ2I2Rmd6M3FnQT09
Meeting ID: 781 0014 0403
Passcode: 5ivcTS

Check out the website of the St Louis National Narrow Gauge Convention. The meetings were cancelled, but much of it is online this Saturday, August 29 and on the 5th of September.
There are three clinics and two layout tours each Saturday.
Here is the link. http://40nngc.com/
Russ
Technology is upon us. Just in time, it seems since, all our normal gatherings have been shut in. No train shows and no clinics. No visiting others layouts. Bummer.
By now, many of you have discovered the power of meetings online. With Zoom, we can meet while sitting in the comfort of our own home. No need to drive across town in the rain and traffic. No need even to shave or get out of our very casual comfy clothes. Munch discreetly on a snack and sip a cold one while a well organized presentation is displayed before us.
Now we can visit beautiful layouts without fighting for a close parking space or elbowing into a crowded layout room. We get to really see all that is there. Our host has an opportunity to thoroughly tell the story of his railroad vision. And, since it is recorded, we can visit it again, anytime.
Our clinics can easily accommodate larger attendees and the presentations can come to us from anywhere in the model railroad world.
Thanks to Burr Stewart and Bill Messecar for organizing and presenting this to us. The schedules appear regularly in the Grab Iron. So, turn on the computer and tune in.
Russ
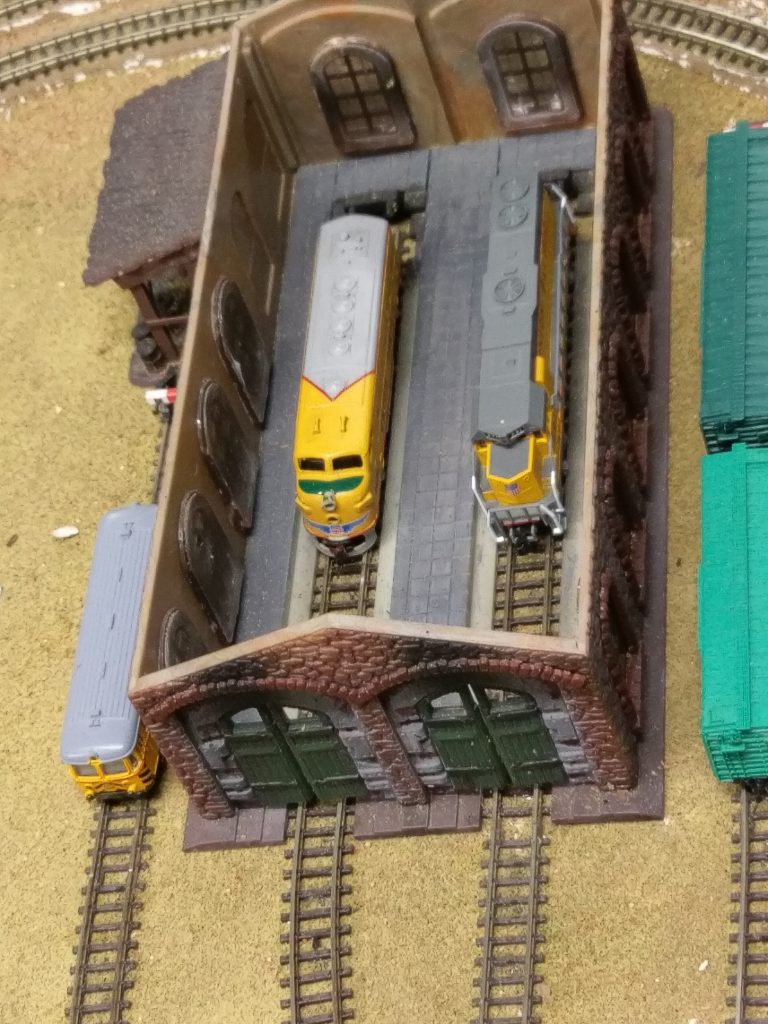
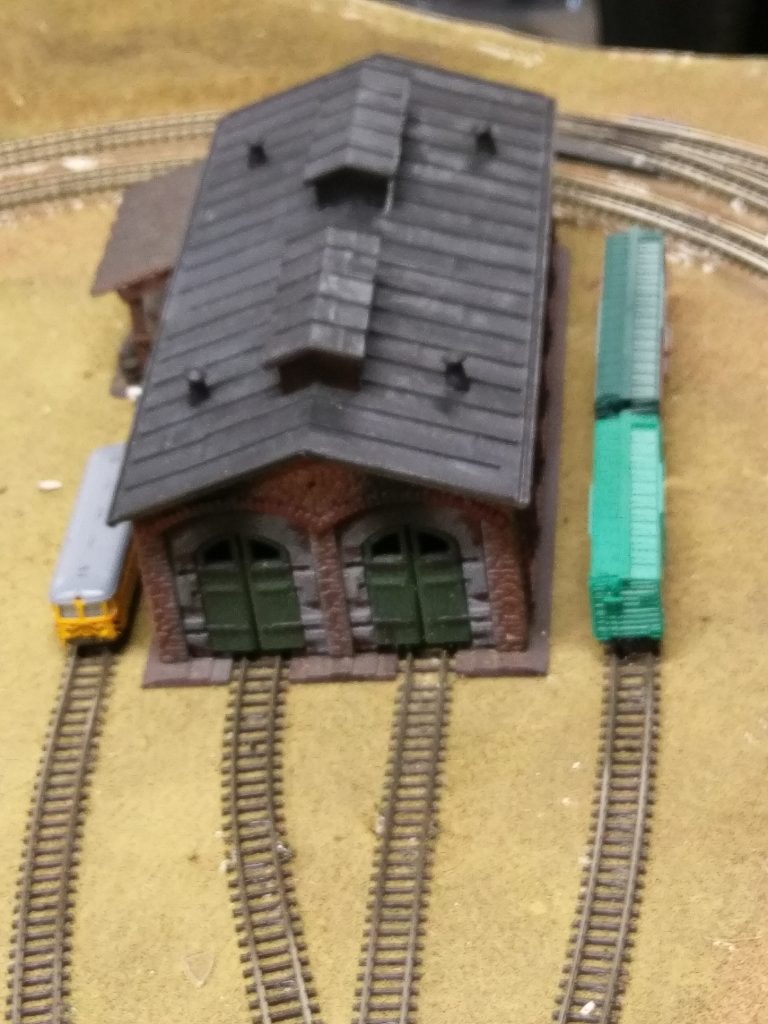
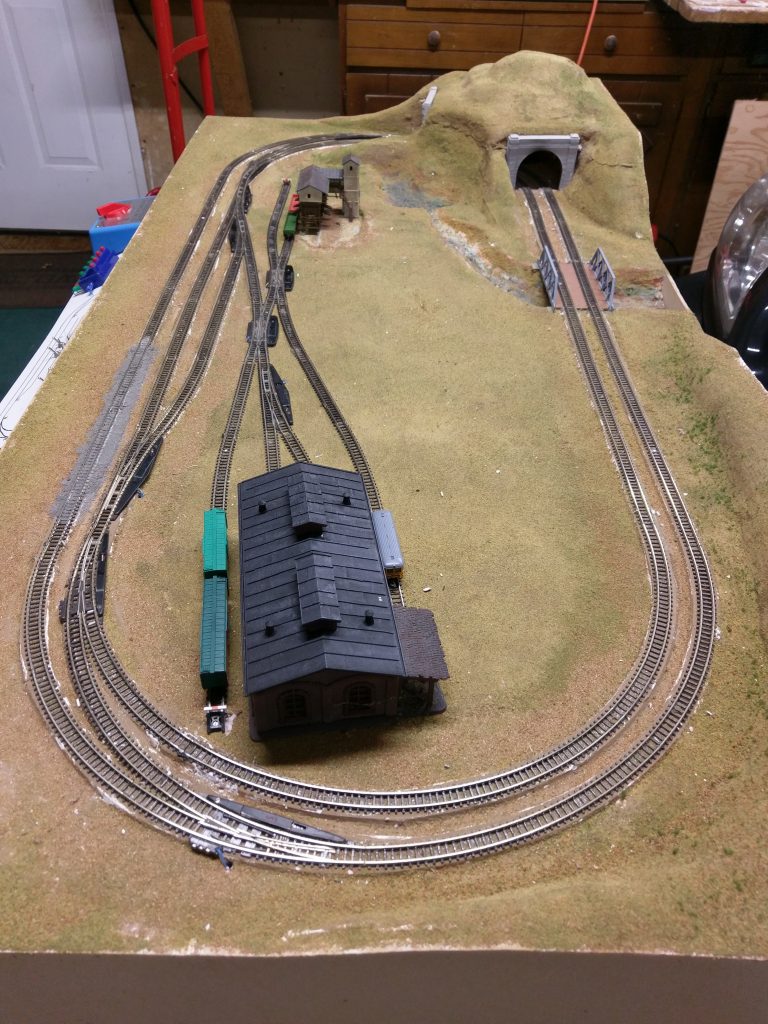
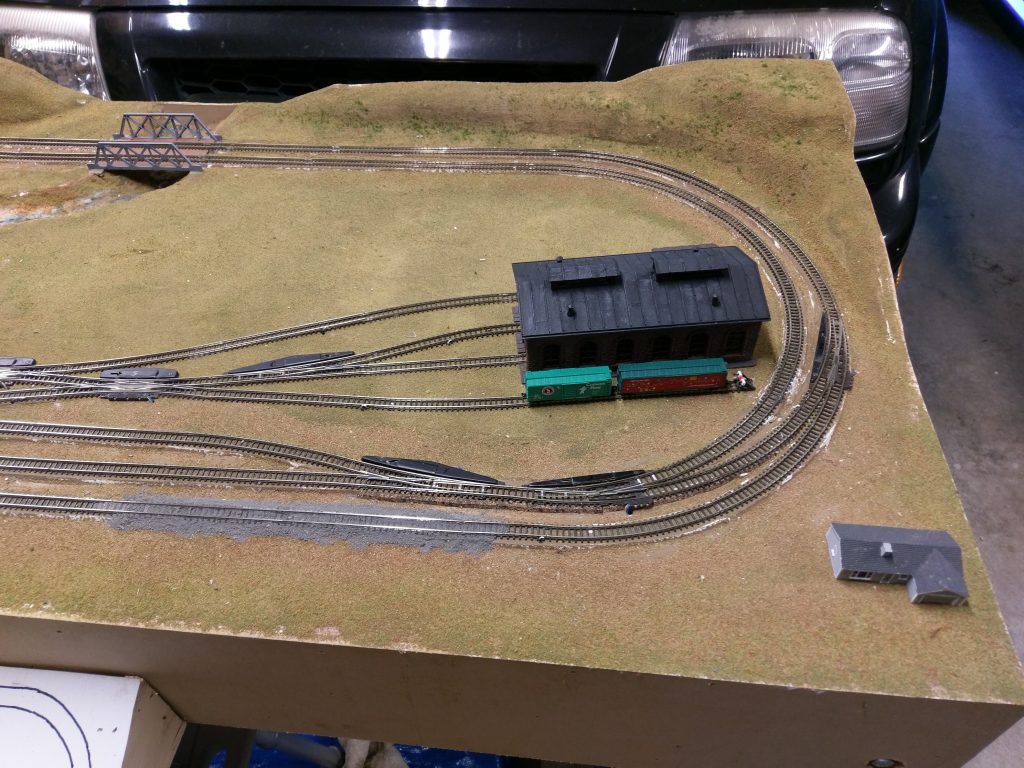
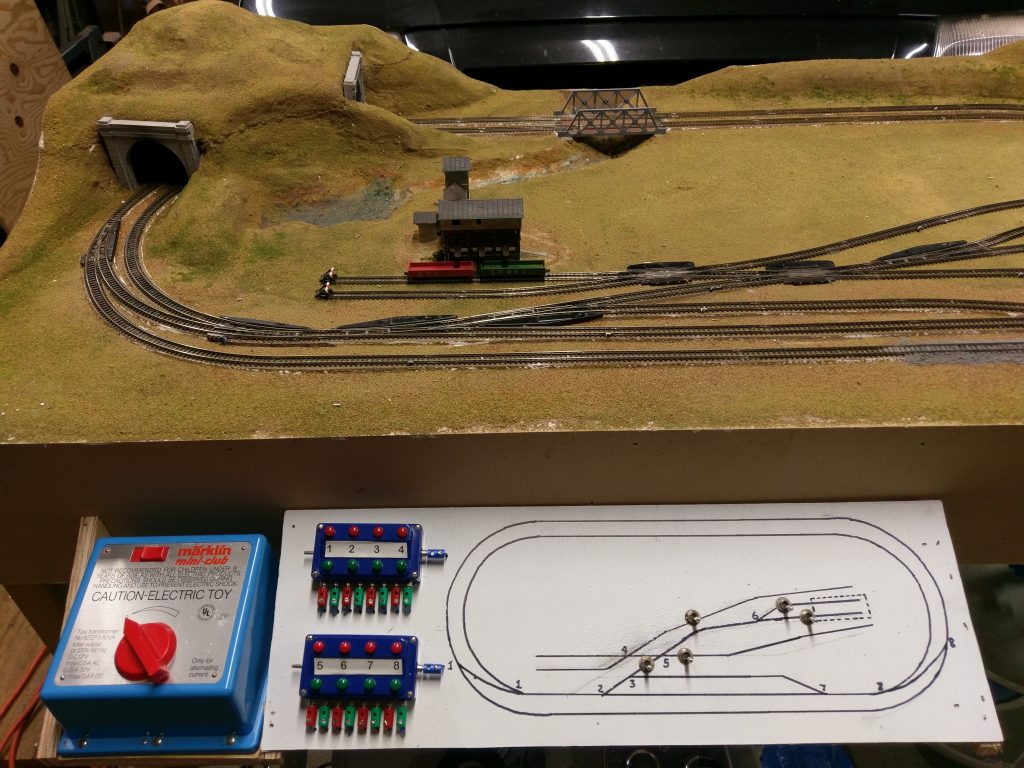
A Maerklin Z scale layout on a 2×4 table with removable legs. Come with lots of a accessories Amtrak F-7 and passenger cars, UP F-7 and GP -38 caboose and various freight cars and Maerklin track cleaning car. Two stall engine house, gravel loading facility and several buildings including a station. Layout not finished but is operational in analog only. Must be picked up or will deliver within Seattle area for gas fee.
Asking $ 300.00
Contact me at babinskya@comcast.net
Al