Click here to read the eighth article on Chuck Ricketts Fantasy Island Railroad.
Editor’s Note: Parts 6 & 7 from the series were lost in transit and had not been posted. That has been straightened out and the links are included here in case you missed them.
Join us this Saturday, October 10, at 10:00am for another 4DPNR layout Zoom tour. This week features two of the region’s finest narrow gage layouts – Dale Kruetzer of Port Orchard and Ron Hopkins of Edmonds. Dale’s layout is an Sn3 version of a portion of the RGS, and includes detailed photo backdrops, hand laid track and scenery and structures that just don’t quit. Ron has a smaller but very fine On30 layout depicting the Olympic peninsula, and he will be showing us a number of structures he built next to photos of the prototypes that inspired them. Here is the zoom info to join the meeting:
Eastside Virtual Get Together Clinic will be held on THURSDAY, October 15, 2020 at 7:00 PM (lobby opens at 6:45 PM ) PDT
I’m happy to announce our next Eastside Clinic will be held virtually on ZOOM next Thursday, 10/15, starting at 7:00 PM with our virtual lobby opening at 6:45 PM. We have switched back to Thursdays by popular demand! Since our clinics are virtual these days, I would like to extend an invitation to all the 4th Division to attend next Thursday. So be sure and save the date for the October Eastside Clinic next Thursday, 10/15 at 6:45 PM! The log in info for the clinic is below.
Our Clinic this month is titled “Wiring for DCC” and will be presented by Max Maginness. Max will give a short history of DCC systems as based in the same standards in use today as have been available for more than 25 years. This clinic will give an overview of the basics and some of the “nuts and bolts” for wiring a layout as a refresher, but the main topic will be a discussion of the many practical building and operating items that still seem a little mysterious and even controversial.
After the Clinic, we will have some time for other folks to show off their latest model work in our “Show and Brag” segment. The Clinic will wrap up with some administrative comments.
Tomorrow night you are welcome to a virtual operating session at the North End Clinic.
Keeping with our tradition of having our October meeting at Burr Stewart’s home, we are thumbing our noses at COVID and using technology at its finest to run trains over Zoom.
That being said, bring your sense of humor and patience as we navigate the Burrlington Northern from our homes. Multiple cameras have been set up all around the layout and participants will be able to run a train remotely from a web browser or a smartphone app.
The meeting will be a bit different than other Zoom sessions in the past. The clinic will start at 7pm with a quick overview of the evening. We will be utilizing the breakout room feature in Zoom for training/set up, so we’d appreciate your arriving on time. The lobby will be open by 6:50pm.
To help us prepare for tomorrow night, please complete this short survey to give us a sense of who will be attending and how you will be accessing the Zoom session.
A special thanks to Burr Stewart, Andy Dupree, Robin Peel, Dave Enger, and Aidan Murray for a laughter-filled proof-of-concept dry run on Monday afternoon.
We are looking forward to a fun evening tomorrow night. Do not hesitate to call or email me if you have any questions.
I’ve always had an interest in trains, cherished my trains as a child and at the age of 30-something time came to graduate to ‘Model Trains’, or so I thought. My interests lay with UK trains, the ones I grew up with and not those here. Sorry about that.
The options were to either scratch build with the use of machine tools like a lathe etc. which I do not have or kit build in O gauge or OO gauge. O gauge kits and bits were few and far between whereas OO parts were readily available and affordable, so OO kit build as a starter it was.
OO gauge is a bit of a compromise, 4 mm/ft for the structure running on HO track which is 3.5 mm/ft, so OO gauge trains are kind of narrow gauge. Perfection is needed, so I thought, true 4 mm/ft, hand built track and of course re-gauged stock. At that time in the UK there were three standards for true scale models; P4 and S4 competing standards using a track gauge of 18.83 mm and an older standard of EM gauge of 18 mm/ft. Hum, what to choose? Well 50 years ago both the P4 and S4 societies were in their formative years and maketed their own parts none of which matched what I wanted to build, LMS stock. I settled on EM gauge for the time being.
I chose to start with building some simple kits, passenger cars and choose the track standard later. I started with something really simple, or so I thought (are you getting the drift here?), a Graham Farrish kit of a LMS commuter passenger car, three of them. The kits could not have been simpler, a plastic molded body, four sides and a base as one piece, a metal channel as an frame to take the trucks and the framework between and lastly a metal curved roof, a shake the box and they are all assembled. I purchased separately sprung buffers to replace the molded ones, ventilators for the roof and lastly a book of drawings of LMS passenger cars.
A start was made on assembling the kits and using the reference drawing from the book as a guide.
Oops, the trucks lack the foot boards that came in two different versions. No problem I can make foot boards out of thin plywood and attach to the trucks with epoxy cement. Job done.
Oh dear the truss rod under frame was too short and made as a one piece white metal casting. Hum, do I throw them away and make new out of brass? I decided to save that for later.
Oh, again the drawing shows all the other stuff that hangs below the floor; dynamo, battery pack, vacuum cylinders and so forth not included in the kit. I go off and make these parts as best I can.
Door handles; grab handles and handrails were not included in the shell molding. I make these out of piano wire. The door handles were a real pain as there are so many of them about sixteen per car.
Ah, the roof does not fit correctly with gaps at the ends of each car and resists being reformed. I get this bright idea to mold the replacement roofs out of styrene sheet. A plaster mold was made and the first production drape formed roof made. Disaster! The styrene sheet shrinks when gently heated in the oven as well as curls up something like an oversize fortune cookie. My wife is concerned that I’ll ruin the kitchen oven and calls a stop to this effort. Go back to basics and fashion roofs from thin sheet metal which become quite effective. It shows that I developed skills repairing the bodywork on my first car while at college. Rain strips made out of piano wire again, is used and soldered to the roof. Holes drilled and the ventilators added. Now we’re getting somewhere I feel.
Oh, I wish for high frequency passenger car lighting. I build a high frequency power generator out of an old TV set and experiment with Plexiglas strips, grain of wheat bulbs and diodes to find a workable solution that fit nicely within the car. Someone suggested that I needed a license for the generator, license, what license, hum?
The molded buffers are cut off the car bodies and the replacement sprung buffers are added. I re-gauge the wheels for EM and mount in the trucks as a test. All complete less painting and interior, I put the assembled cars on a piece of track and they look great. The nagging issue is they each weigh a ton, feel like they are made out of solid material, way too heavy for the appropriate locomotive to pull. And it only took me THREE years to do and I still have that bum under frame to deal with.
Conclusion – Life is too short to build me a scale Model Railway.
There will be a General Meeting of leaders of the Board, clinics and modular groups this Monday evening at 7PM. We will look ahead based on our experience with the new ways we have made adjustments because of COVID 19. How can we do more and how can we do things better? How can you get involved?
Please feel free to look in and share any suggestions you may have to make our sharing of the hobby better. Here is the link to the meeting:
Topic: 4D General MeetingZoom Meeting Time: Sep 21, 2020 07:00 PM Pacific Time (US and Canada)
I’m sure many of you have been wondering about my freight car fleet. In the early years I had just about every siding and all the yards full of cars, but I learned! Now I keep around 100 or so cars on the layout. Since I have become involved with operations I try keep the yards about 1/3 full of cars. This helps or sometimes hinders car sorting for yard operators. I do have around 250-300 cars in total with most being stored on specially constructed shelves. All my cars have had metal Walthers Proto wheelsets installed on them along with standard Kadee #5 couplers. I did test Kadee “scale” couplers on some of my cars but found they did not couple well with the standard #5 couplers in certain situations, they have since been removed from those cars. My fleet of cars come from many various manufacturers and most are older non-superdetailed cars. I still can’t believe that some of my early cars that I have on the layout were purchased for 50 cents each! On my layout you can find a mix of AHM, Roco, Atlas, Athearn, MDC, Tichy, Varney, Ertl, Life-Like Proto, Ulrich, Tangent, and Accurail models all working on the layout. I still have the three original AHM freight cars from my very first train set, yes are on the layout! Regarding freight cars, I have found the key is to have them all run and perform well. If they do not, then they get pulled from the layout, tagged to identify the problem, and replaced with another car. There are plenty of replacement cars waiting in the wings to go onto the layout. Also, if you have been noticing, there are a lot of east coast railroads represented in my freight car fleet. Originally, I was thinking of creating a layout that would be based on the prototype Pennsylvania RR. That didn’t happen. I still kept the cars for the Dry Gulch & Western and used whatever road name that I liked. I admit, if the car has eye-catching graphics that is a plus. Another issue, the cars do not fit any specific era. Yes, I have billboard reefers that ride on arch bar trucks. I even have some ancient wooden passenger cars. I do try to have freight cars that are generally from the steam era. One thing I still do not have are some home road freight cars. I have a few but there are still a lot of freight cars in boxes that need to be built and lettered specifically for my railroad. Like with all model railroads there is always something that needs to be done.
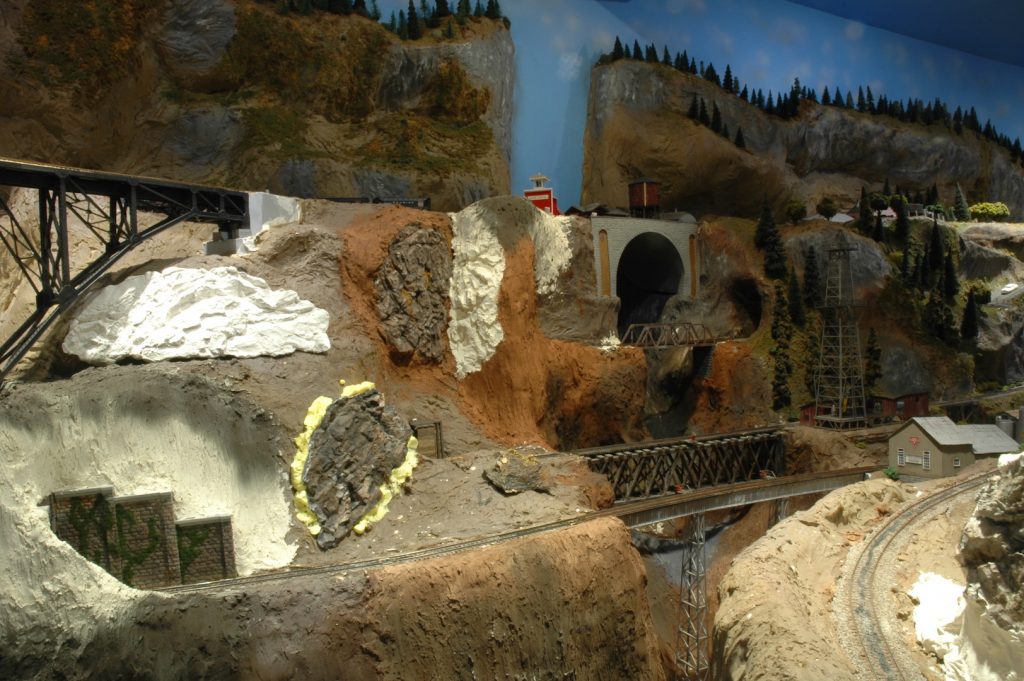
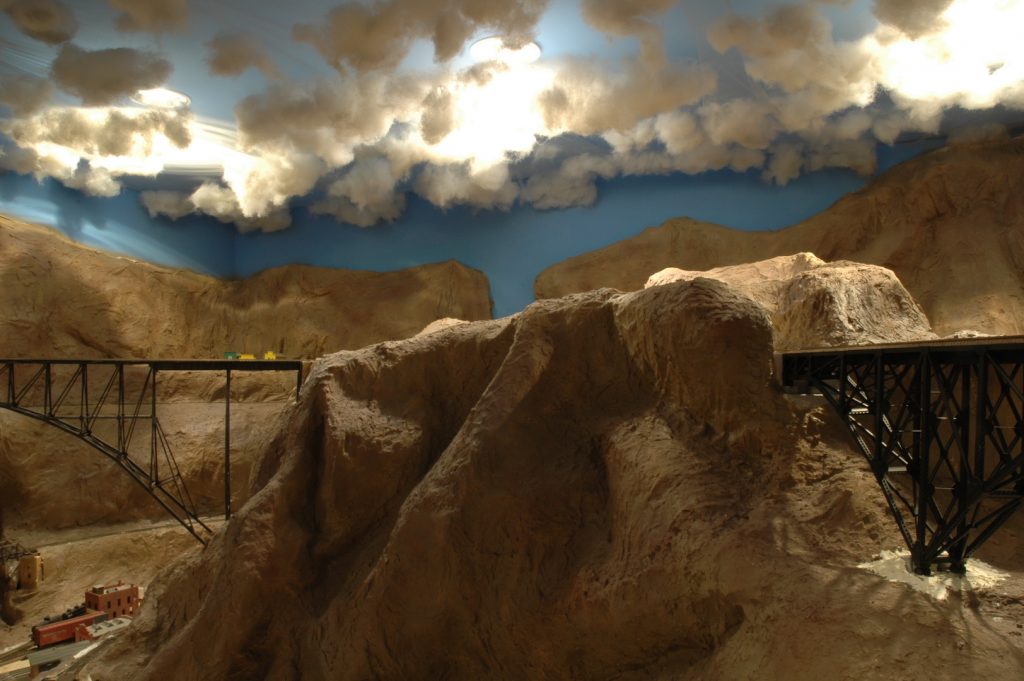
Photo 31 shows a closer view of the tunnels and the right abutment of my version of the Canyon Diablo Bridge. This view shows how I attach some rock plaster castings. I use expanding spray foam. The surrounding areas behind the casing will be filled with joint compound. The joint compound will be carved and then painted. Ground cover will be added later.
Photo 31
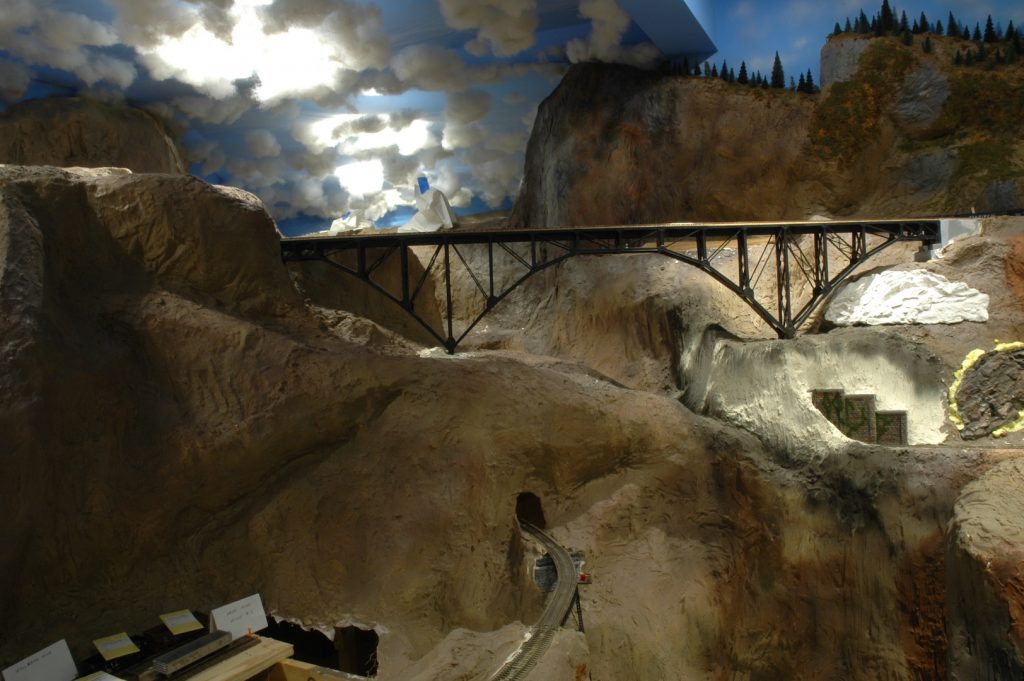
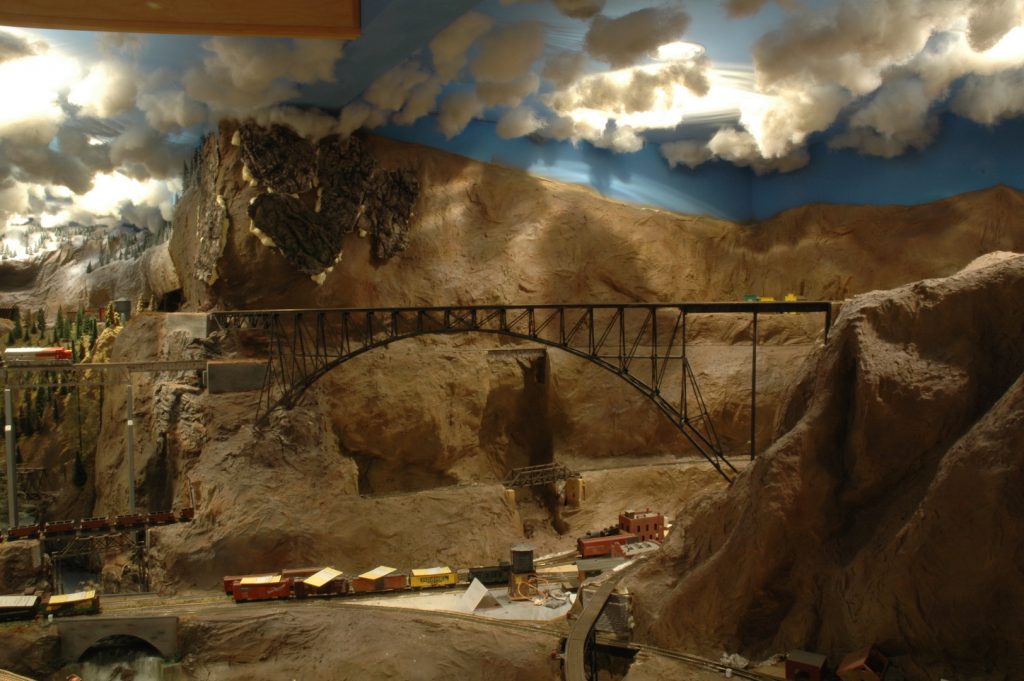
Photo 32 shows a full view of the bridge. In the bottom corner of the photo you will see a silver SP gondola, one of my original “trainset” cars! Note how the mirror in the corner allows the room to expand. The mountain to the left is completely hollow along the backside. That gives me plenty of access to the track in that area.
Photo 32
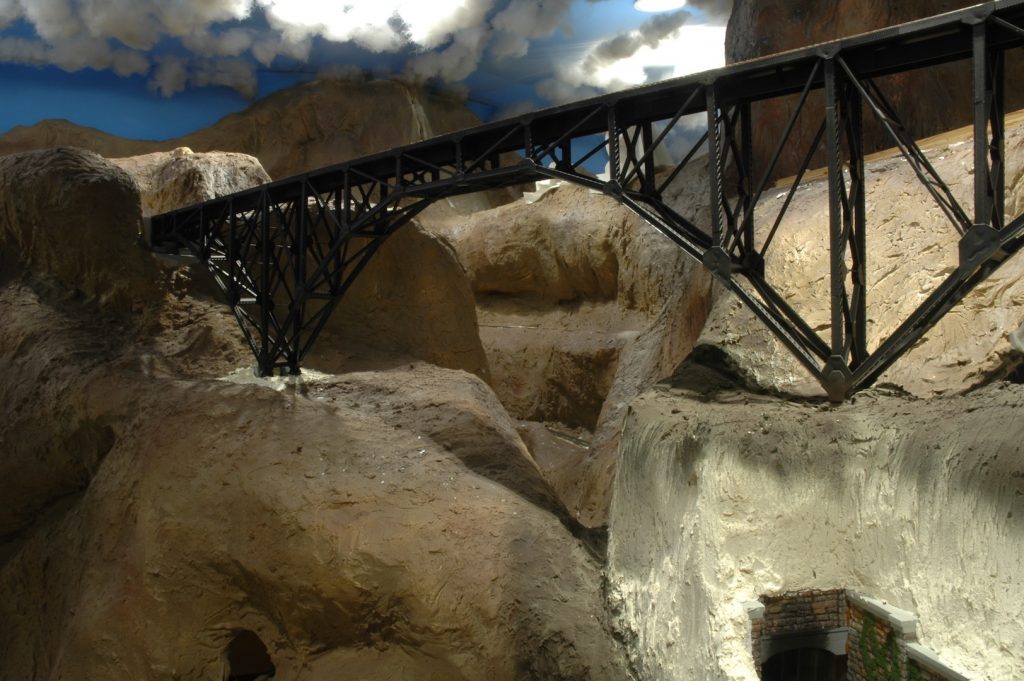
Photo 33 shows a closer view of the bridge. The bottom steel work does not support the bridge. There is a one-inch aluminum channel that runs the length of the bridge, it carries all of the weight. The channel is supported in both ends by solid wood abutments attached to the benchwork.
Photo 33
Photo 34 shows the central mountain. The mainline curves around to a second large bridge. Just like John Allen’s Gorre & Daphetid layout I have a spiral at the base of this mountain.
Photo 35 shows the second arch bridge. This is a close replica of the Vance Creek bridge located just out of Shelton WA. It is made from styrene with brass inserts for structural support. This bridge was constructed on a saddle shaped jig. Construction of this bridge was several months long. My model bridge towers over the town of Hayes River. To the extreme left you can see some of the snow-covered mountains and even more bridges. My freight trains are constantly gliding over bridges, blasting through tunnels or snow sheds, and battling tough grades with tight curves to move freight over the mainline through the mountains. Next time we will check out more of the bridges on the layout and give you a peek at the valley that is on the left.
I’m happy to announce our next Eastside Clinic will be held virtually on ZOOM on Thursday, 09/17, starting at 7:00 PM with our virtual lobby opening at 6:45 PM. We have switched back to Thursdays by popular demand! Since our clinics are virtual these days, I would like to extend an invitation to all the 4th Division to attend next Thursday. So be sure and save the date for the September Eastside Clinic next Thursday, 09/17 at 6:45 PM! The log in info for the clinic is below.
Topic: September Eastside Virtual Get Together Clinic
Time: Sep 17, 2020 06:45 PM Pacific Time (US and Canada)
Our Clinic this month is titled “The Everett & Monte Cristo Ry in Trainz” and will be presented by Didrik Voss. Didrik is a very talented local modeler and a NMRA MMR. He has prototype modeled the Everett & Monte Cristo Ry, circa 1900, in his basement. However, he was only able to model 2 miles of the 68-mile route. As a result, he began modeling the remaining 66 miles on the computer using Trainz. This clinic will be a walkthrough on what has been accomplished so far. Please realize, this is 68 real miles, plus all of Everett with the GN and NP lines overlapping. If the interest is there, he would be happy to get into more detail on how to create the Everett & Monte Cristo Ry in Trainz.
After the Clinic, we will have some time for other folks to show off their latest model work in our “Show and Brag” segment. The Clinic will wrap up with some administrative comments.