Eastside Virtual Get Together Clinic will be held on THURSDAY, December 17, 2020 at 7:00 PM (lobby opens at 6:45 PM ) PDT
Our next Eastside Clinic will be held virtually on ZOOM next Thursday, 12/17, starting at 7:00 PM with our virtual lobby opening at 6:45 PM. I would like to extend an invitation to all the 4th Division to virtually attend next Thursday. So be sure and save the date for the December Eastside Clinic next Thursday, 12/17 at 6:45 PM! The log in info for the clinic is below.
Our Clinic this month is titled “Unit Grain Trains, Burlington Northern Railroad, 1980 – 1990 Era” and will be presented by Bob Stafford. Bob will discuss today how they distributed grain cars out to the elevators to load and unload and also how unit grain trains were made up. Bob will also talk about how to add unit grain trains and their supporting industries to your layout to make them more interesting to operate.
After the Clinic, we will have some time for other folks to show off their latest model work in our “Show and Brag” segment.
With extra time on my hands due to COVID, I decided to build a classic DPM building while adding my own personal touches. I purchased this kit from an estate collection. After I began the assembly process, I noticed the back wall was missing. I substituted a piece of Walters brick sheet. Once I removed all the flashing and sanded the edges (without brick detail) to square them.
I spray painted the interior of the walls a flat black. Once that dried, I painted the exterior of the walls with a red primer. After drying for couple of days, I used a sponge to add a variety of acrylic brick shades; burnt umber, burnt sienna, brick red, and yellow ochre, in various “spots” over the brick walls. This provides a variety of colors in the walls like real brick! Once this has dried, I applied a grout mixture. This consists of joint compound, some dark gray acrylic paint, and a little water. I used an old flat 1/2” wide paintbrush to apply the grout mixture, then wiped it off with a paper towel. This leaves the mortar in the mortar joints of the brick walls. Since there was still a film on the brick faces I used a damp paper towel to wipe off the walls a second time. Using a fine paint brush and a chosen accent color, I painted the trim, doors, and windows. I use a medium gray and/or a concrete color for the concrete sills and lintels. Once all has dried, I laid the walls flat and coated them with alcohol and India ink. This leaves the walls a bit darker and somewhat weathered looking.
My next step is to install window treatments. You can use commercially available products, paper as shades, or simply paint curtains from the back side. Don’t forget to add addresses with dry transfer lettering.
Now it’s time to begin assembly! I used a solvent cement and an assembly jig. If you’re going to install a floor, roof, and/or base, measure and add bracing before assembly. Once assembled you can measure and cut the roof and floors from styrene or mat board.
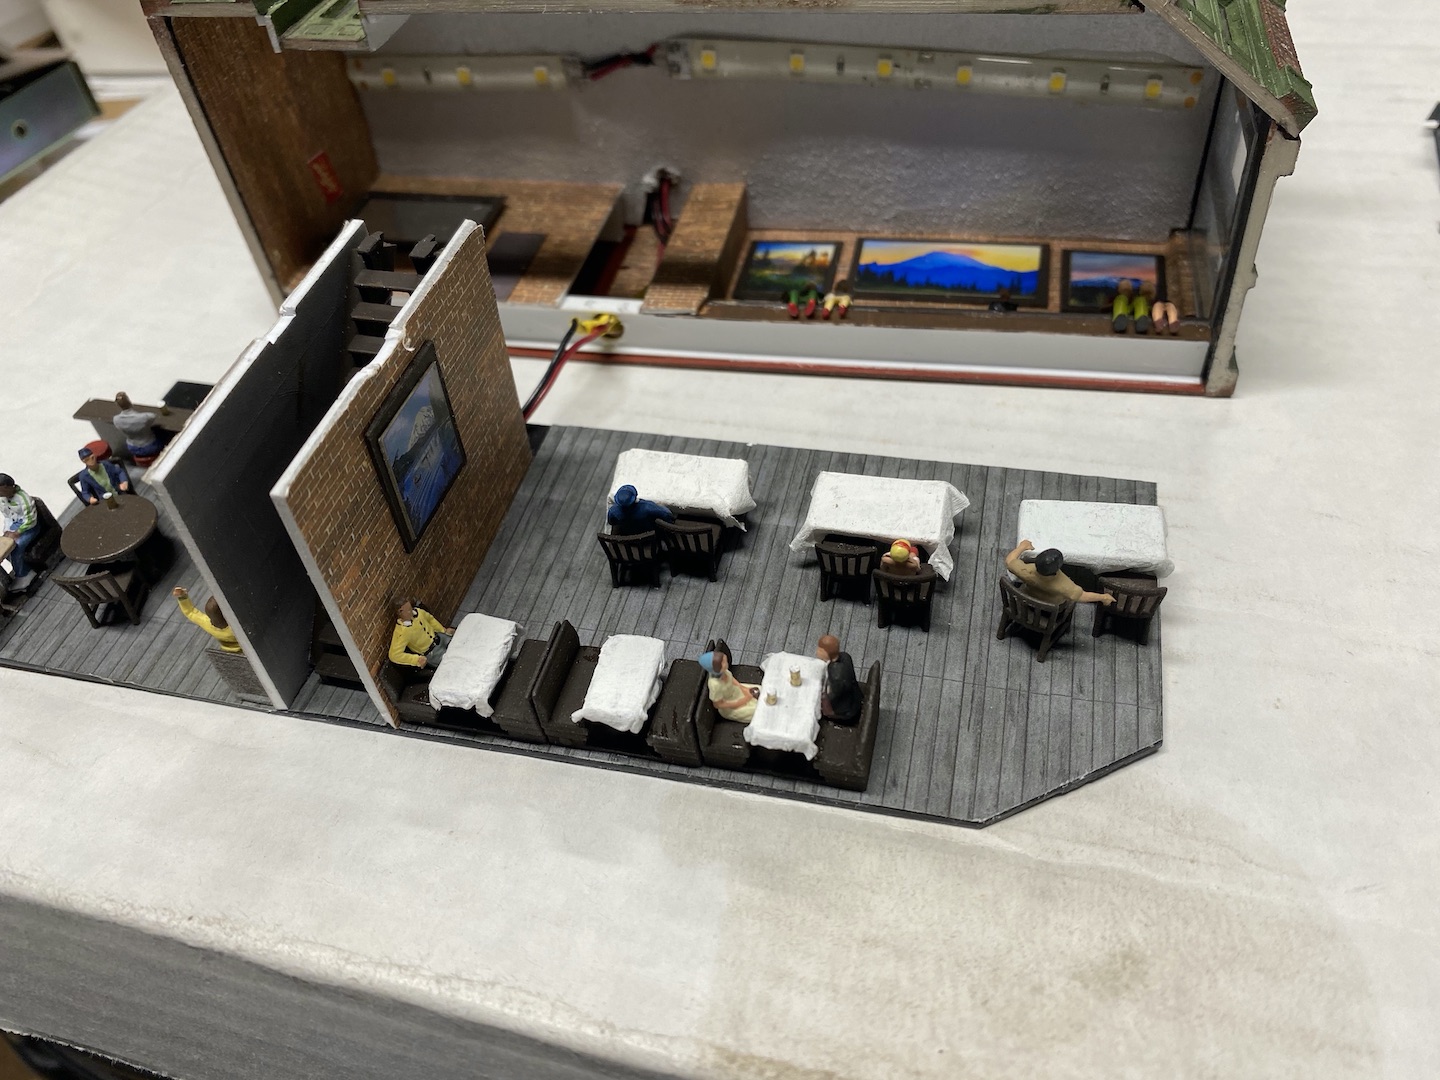
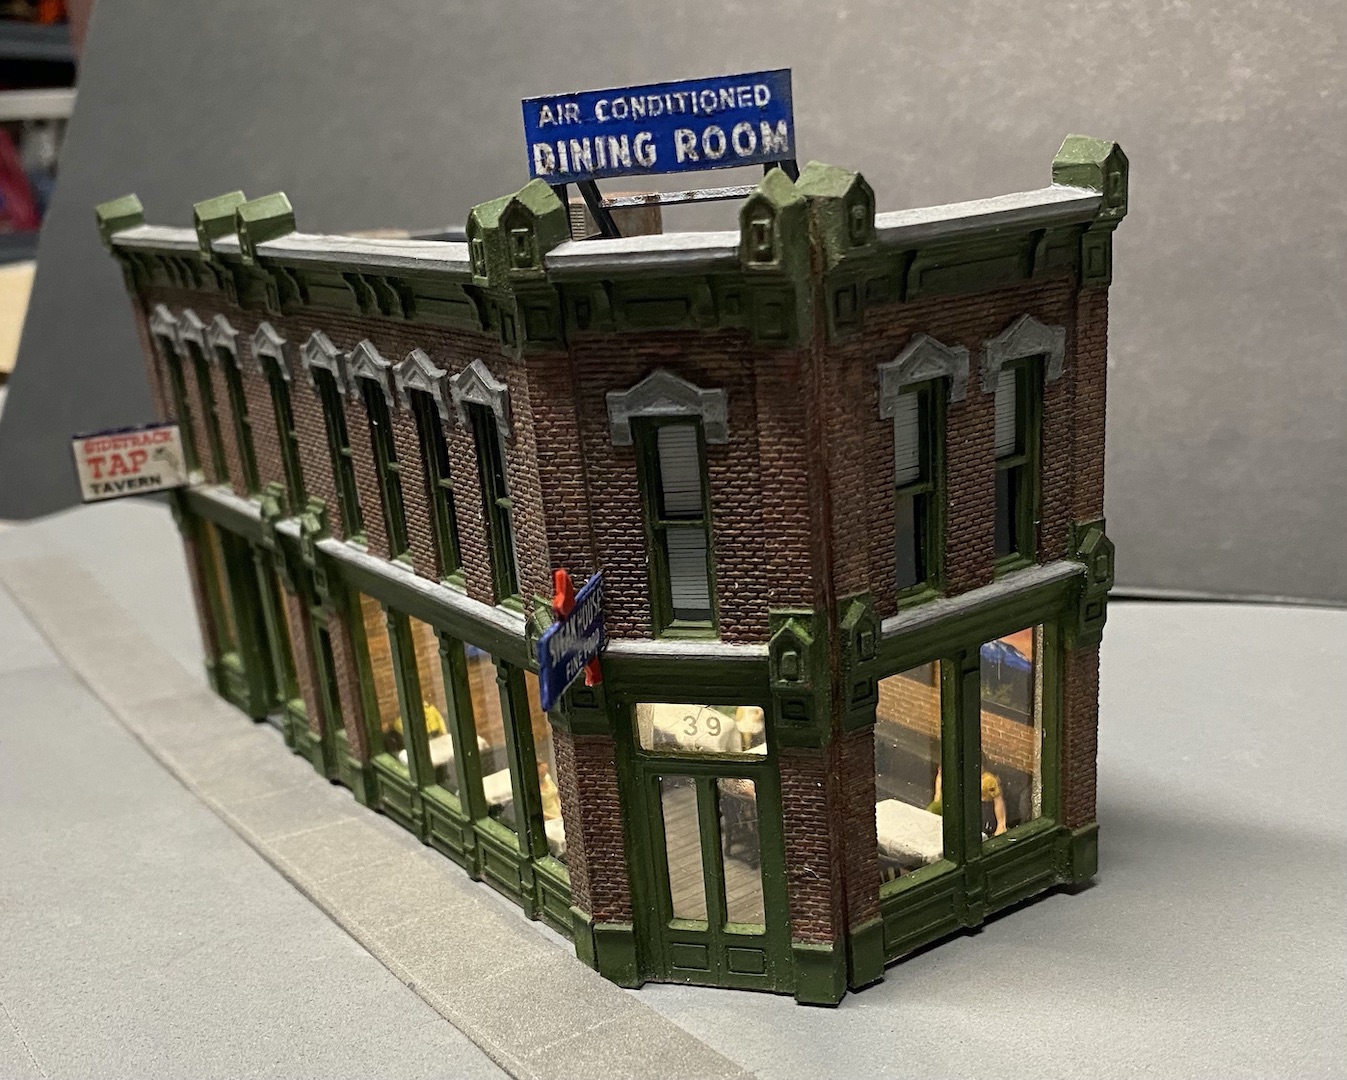
If I’m adding an interior, I will install brick sheet, wallpaper sheet, or something similar to the inside walls. I place wall dividers by attaching them to the floor. Speaking of floors, I’ll use paint or a printed paper floor. I use photo copies of paintings as wall decorations. I have scratch built tables, desks, beds, etc. I have also discovered “Shapeways” they produce a variety of 3D printed scale items. I used booths, tables, chairs, and bar stools for this build. The exterior signage is from Barmills. I use 12 volt strip LED’s for lighting the interiors.
Finishing touches include; weathering with Pastel chalks, roof details (vents, air conditioning, chimneys, signs, and access hatches). I encourage you to take some extra time and a little extra work and you can turn an inexpensive kit into an eye catcher!
Thanks for reading! Greg Price Matheson & Western RR
I know every model railroader that has constructed a layout has had issues with their layout. Mine is no exception. Some history of my layout, this time I will explain some of the pitfalls that I have experienced while constructing my layout. As some of you know, my layout was originally designed to be an analog DC system. Yes, I created a huge number of control blocks on the layout. Then, along came DCC during the early construction phase and its operating possibilities intrigued me. I continued with my DC construction but sort of waited to see which DCC system would suit my railroad. At the time there were two main systems available Lenz and Digitrax. They both had their good points and bad points. After a year or so of sitting on the fence I decided on Digitrax since it was based in the USA and had a very good service department.
I purchased a Digitrax system and began to install it. Unfortunately, all the turnouts that I had already mounted on the layout were not DCC compatible. For the next 6 months I painstakingly made all the turnouts DCC compatible while they were in place on the layout. Oh well, live and learn! In my unbridled haste with layout construction (a lot of folks do this) I was very sloppy with my wiring especially in my main control panels. I learned the hard way. Over the next 4-5 months I re-wired all the control panels and got rid of the “rats nest” of wire. Not a fun job, I should have done it right the first time! Oh well, live and learn, again!!
The next problem that I encountered was with my Tortoise switch machines. Several of them developed an internal short. These shorts would send my DCC system into a fit. Digitrax likes to beep at you when something is wrong, and it really beeped at me! After several days of trying to determine where the short was coming from I finally located the bad switch machine. It took a while since I have around 100 switch machines on my layout. I was able to find some flaking on the internal PC board which I fixed and put the machine back into service. Well, a few weeks later I had another short. Yes, I found another bad machine. After the 5th switch machine short I decided to resolve the problem and I made an external switch for all the Tortoise machines. They do not look pretty but they have completely solved the problem. Of course, I spent another several months modifying all of my switch machines. They were modified in place on the layout. Yes, you guessed it, live and learn!
The next major issue I had was actually caused by me. We replaced our living room carpet and kitchen ceramic tile. I saved the carpet and salvaged the tile. I decided to put the tile and carpet in the train room. Well, that was an experience. The problem I encountered was that I had to jack up the layout in sections to get the tile or carpet underneath the layout supports. Yes, you could hear creaking and popping as it was lifted upward. Amazing how much damage can be done when lifting a layout an inch or two one section at a time. Yes, several months had to be devoted to grade re-alignment and track repair. At the time I didn’t have very much scenery in place so that was fortunate. I guess the good thing is I now know what will happen to my track work if an earthquake hits this area.
The last problem really wasn’t a problem but more of a convenience factor for layout operators. I delved into this in my last posting on the Grab Iron. I wanted operators to have an easier time during operating sessions, so I migrated both of my main yards closer to the front of the layout. I rerouted my branch line trackage to make the run more visible to the operator and also increase the runs workload. I created some more sidings on the layout to give operators more things to do. The shipping basin trackage at Newport was enlarged to allow for freight car storage by the car ferry. This construction process was done over a year long period, but I think it has created a much better layout.
So, I consider a layout a work in progress even if some of the track or scenery is already in place. There is nothing wrong with making changes that will enhance the appearance or increase the operational capabilities of the layout. Now on with more of the tour.
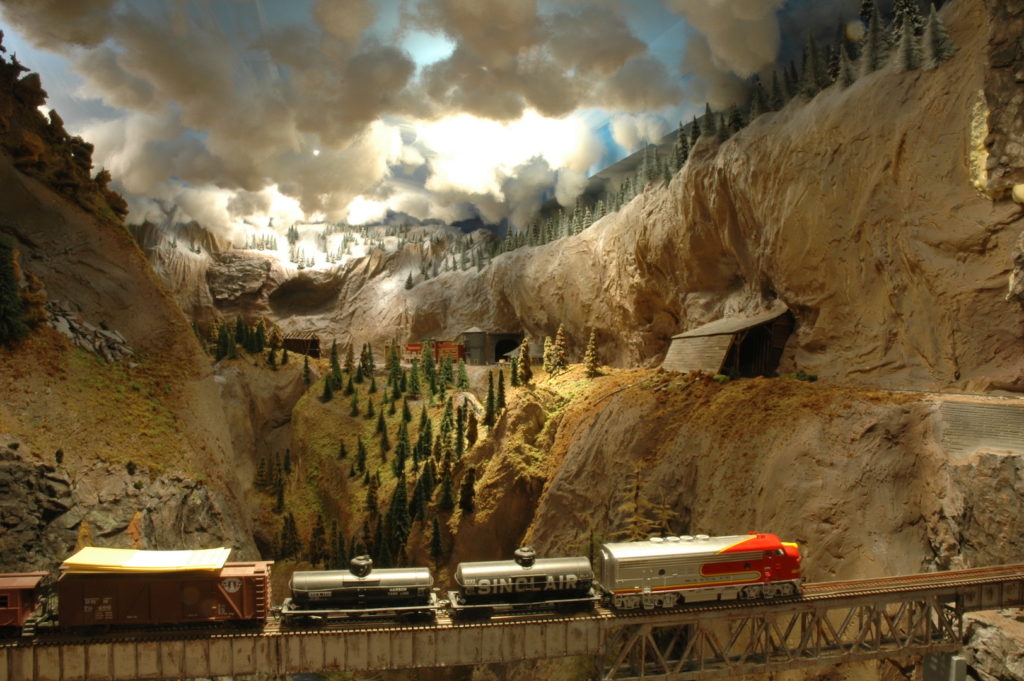
Photo 41 gives a better view of the small town called Tallyn Pass. It is high in the snow-covered mountain country. Note the two snow sheds. One is a level fall snow shed to the left of the town while the other is a glance snow shed protecting the mainline to the right.
Photo 41
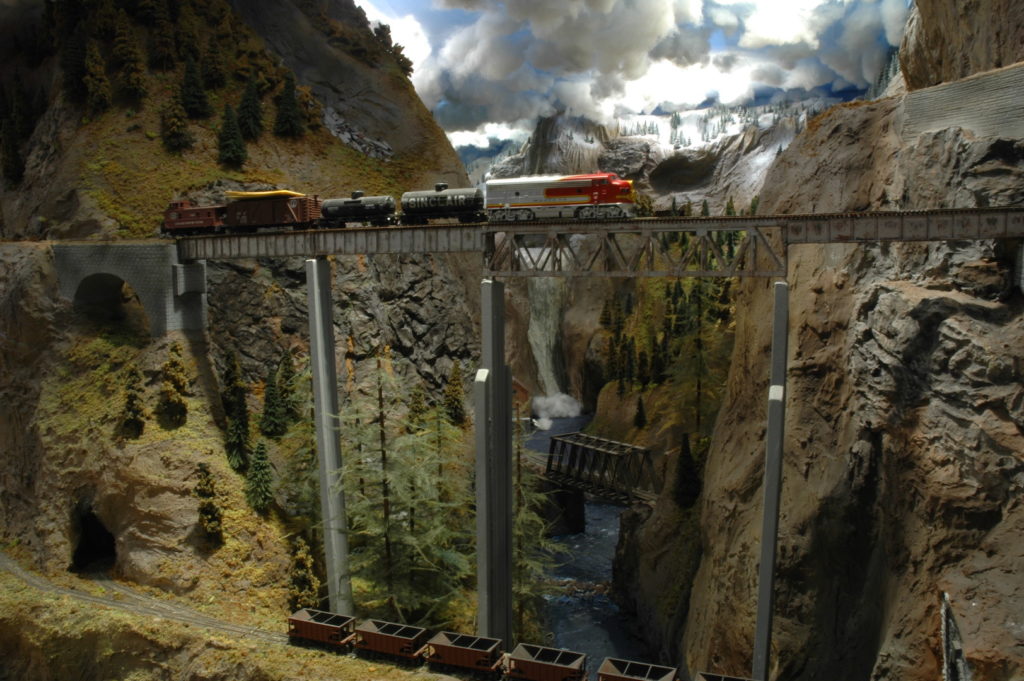
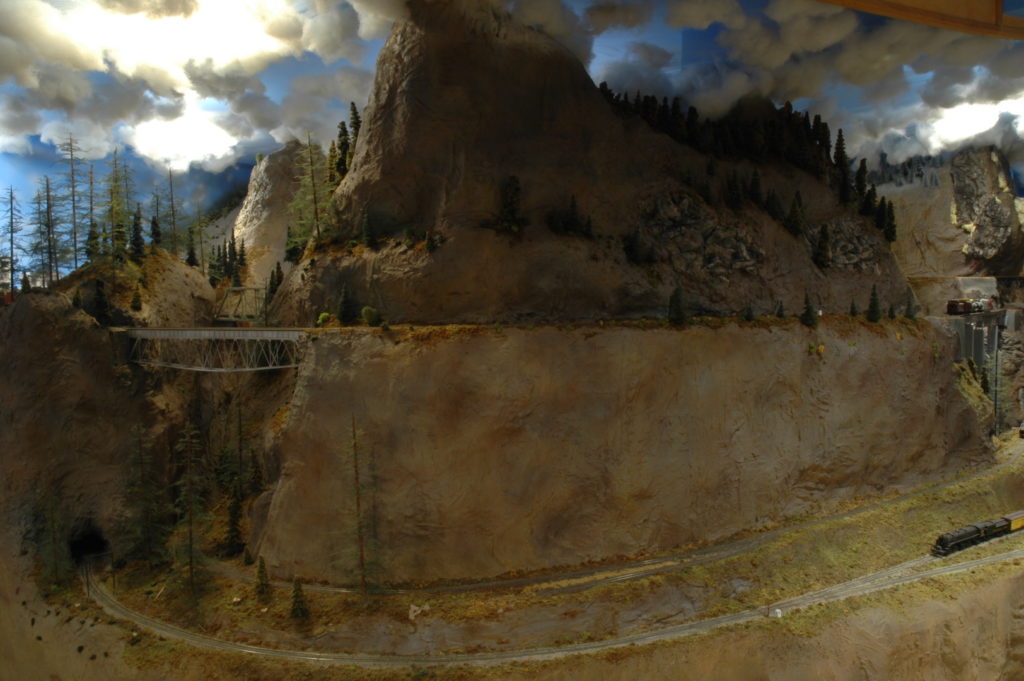
Photo 42 shows you how deep the valley is and how high my bridges can get. The waterfall in the center of the photo is about 8-9 feet away from the camera. To have access to this area there is a large access hatch and the river can be used as a walkway.
Photo 42
Photo 43 shows the view as the camera is turned towards the aisle. This view shows my large mountain that hides two large support posts. I use this mountain as a strategic view block for the turnback curves on the mainline and a way of hiding the town of Allentown from this wilderness scene.
Photo 43
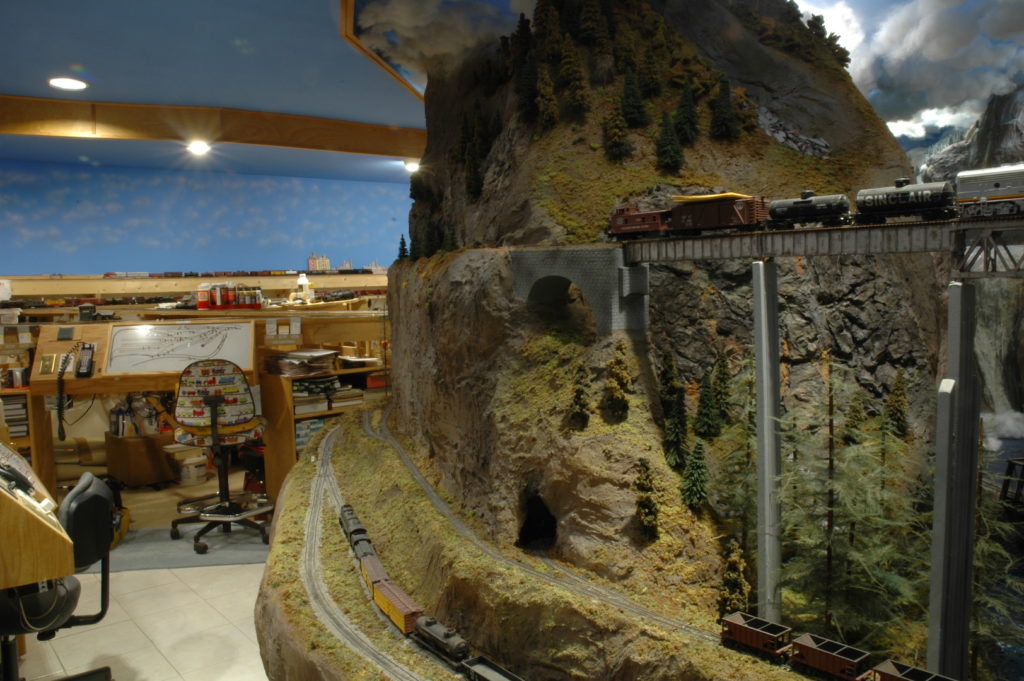
Photo 44 gives you an overall view of the mountain. The C&O 2-6-6-2 parked at the base of the mountain on the extreme right gives you an idea of the size. Yes, I can easily stand up inside of this mountain. Almost all of the track can be maintained from the aisle or from inside of the mountain. There is one carefully placed access located by the green bridge just behind the silver curved bottom chord bridge. Yes, the silver bridge was modeled after one that was on John Allen’s Gorre & Daphetid RR. The green bridge behind it is from a Central Valley kit. The kit is a 4-panel bridge but this bridge on the layout is a 3-panel. Yes, it was difficult to make this bridge from that kit. The other feature of that green bridge is that it is “free floating”. It must be since it is the only link between two sections of the layout framework. It allows for expansion and contraction of those two sections.
Photo 44
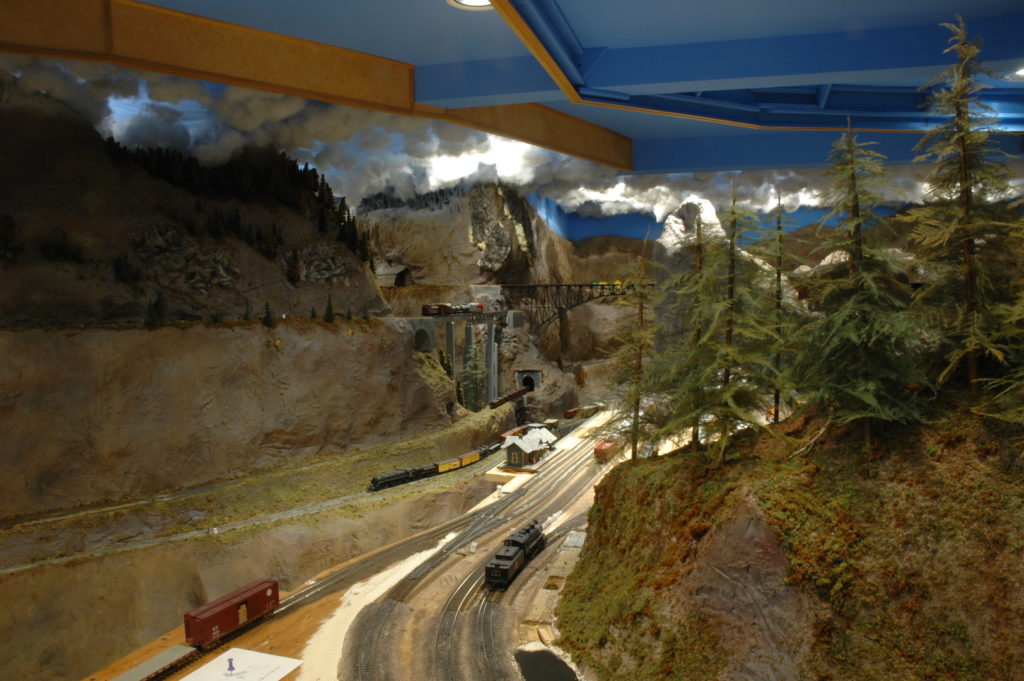
Photo 45 gives a view of the layout and mountain while standing in front of Gornitzka Crossing on the opposite side of the main aisle. Dry Gulch station is almost in the middle of this photo. Notice how the aisle that leads down my main valley to all the large bridges in this picture has disappeared. This allows for some great scenery shots with lots of depth. This photo also gives you an idea of just how long my mainline is and how much elevation my trains need to climb. For a train to traverse the entire mainline it takes about 45 minutes to an hour at freight speed.
Photo 45
That is it for this installment, next time we will travel even closer to Allentown. I hope everyone in the 4D and beyond had a safe and blessed Thanksgiving.
Walt appreciated the work done to make his work station more accessible, but after working with it a couple weeks it became obvious there was more work that needed to be done to make the train room really work for him.
Eastside Virtual Get Together Clinic will be held on THURSDAY, November 19, 2020 at 7:00 PM (lobby opens at 6:45 PM ) PDT
I’m happy to announce our next Eastside Clinic will be held virtually on ZOOM next Thursday, 11/19, starting at 7:00 PM with our virtual lobby opening at 6:45 PM. Since our clinics are virtual these days, I would like to extend an invitation to all the 4th Division to attend next Thursday. So be sure and save the date for the November Eastside Clinic next Thursday, 11/19 at 6:45 PM! The log in info for the clinic is below.
Our Clinic this month is titled “Steam Locomotive Appliances” and will be presented by Ted Becker. This clinic will finally answer: What is about all that “stuff” hanging on the locomotive with all those pipes running all over the outside, compressors, turbos, injectors, feedwater heaters, pumps, turrets, and why they are there. The clinic will also cover a little bit on how a steam locomotive works with a touch of history.
After the Clinic, we will have some time for other folks to show off their latest model work in our “Show and Brag” segment.