Article & Photos By Greg Price
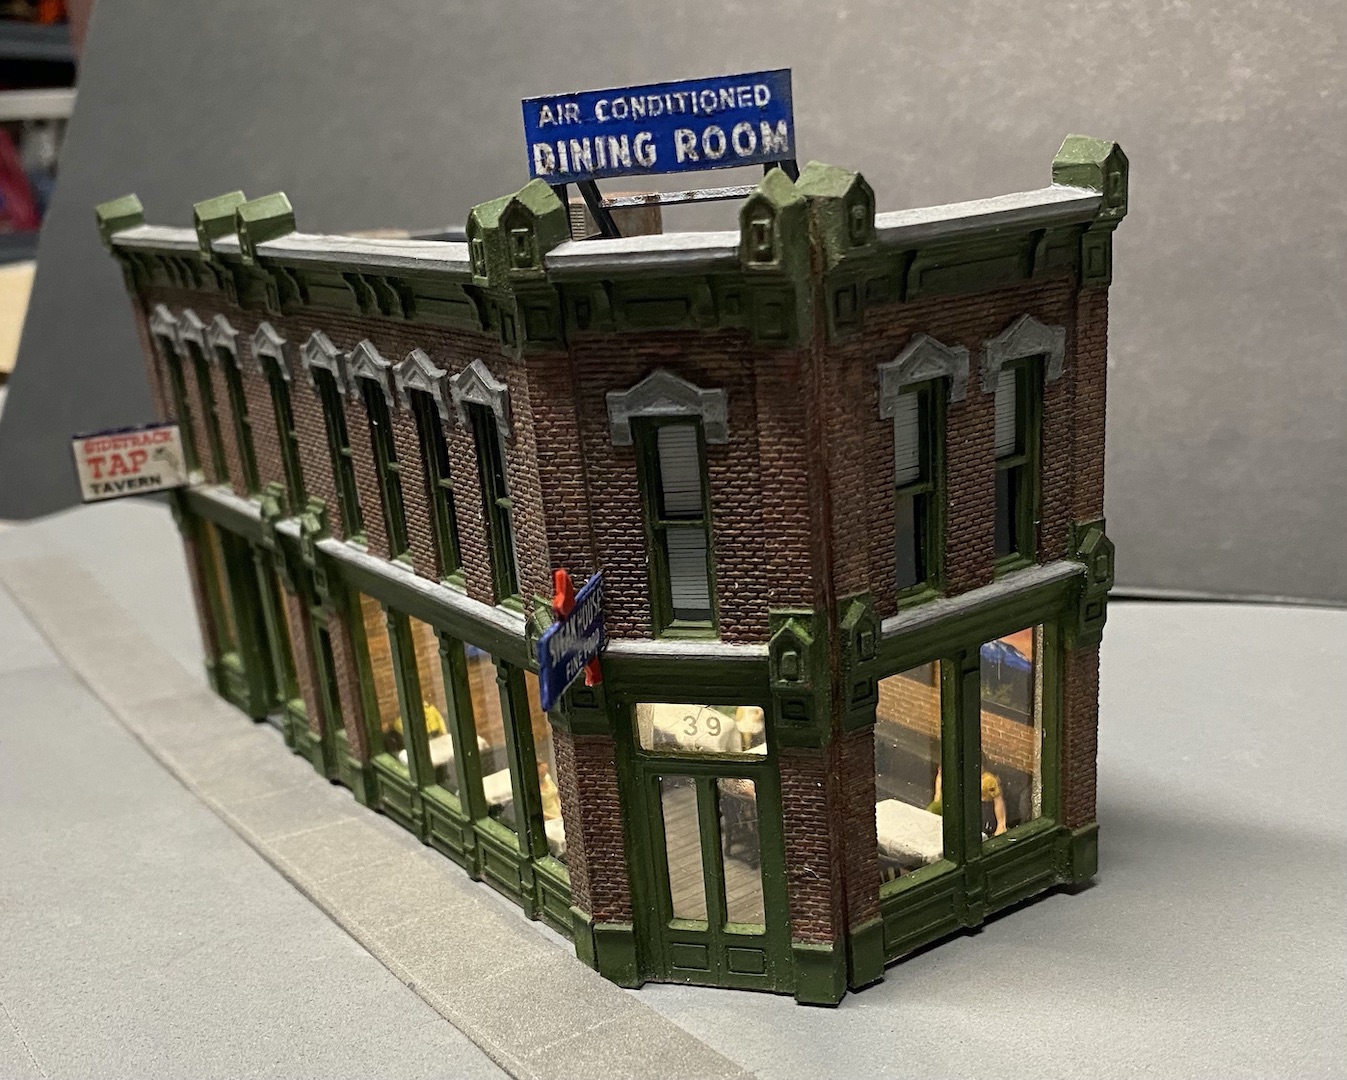
With extra time on my hands due to COVID, I decided to build a classic DPM building while adding my own personal touches. I purchased this kit from an estate collection. After I began the assembly process, I noticed the back wall was missing. I substituted a piece of Walters brick sheet. Once I removed all the flashing and sanded the edges (without brick detail) to square them.
I spray painted the interior of the walls a flat black. Once that dried, I painted the exterior of the walls with a red primer. After drying for couple of days, I used a sponge to add a variety of acrylic brick shades; burnt umber, burnt sienna, brick red, and yellow ochre, in various “spots” over the brick walls. This provides a variety of colors in the walls like real brick! Once this has dried, I applied a grout mixture. This consists of joint compound, some dark gray acrylic paint, and a little water. I used an old flat 1/2” wide paintbrush to apply the grout mixture, then wiped it off with a paper towel. This leaves the mortar in the mortar joints of the brick walls. Since there was still a film on the brick faces I used a damp paper towel to wipe off the walls a second time. Using a fine paint brush and a chosen accent color, I painted the trim, doors, and windows. I use a medium gray and/or a concrete color for the concrete sills and lintels. Once all has dried, I laid the walls flat and coated them with alcohol and India ink. This leaves the walls a bit darker and somewhat weathered looking.
My next step is to install window treatments. You can use commercially available products, paper as shades, or simply paint curtains from the back side. Don’t forget to add addresses with dry transfer lettering.
Now it’s time to begin assembly! I used a solvent cement and an assembly jig. If you’re going to install a floor, roof, and/or base, measure and add bracing before assembly. Once assembled you can measure and cut the roof and floors from styrene or mat board.
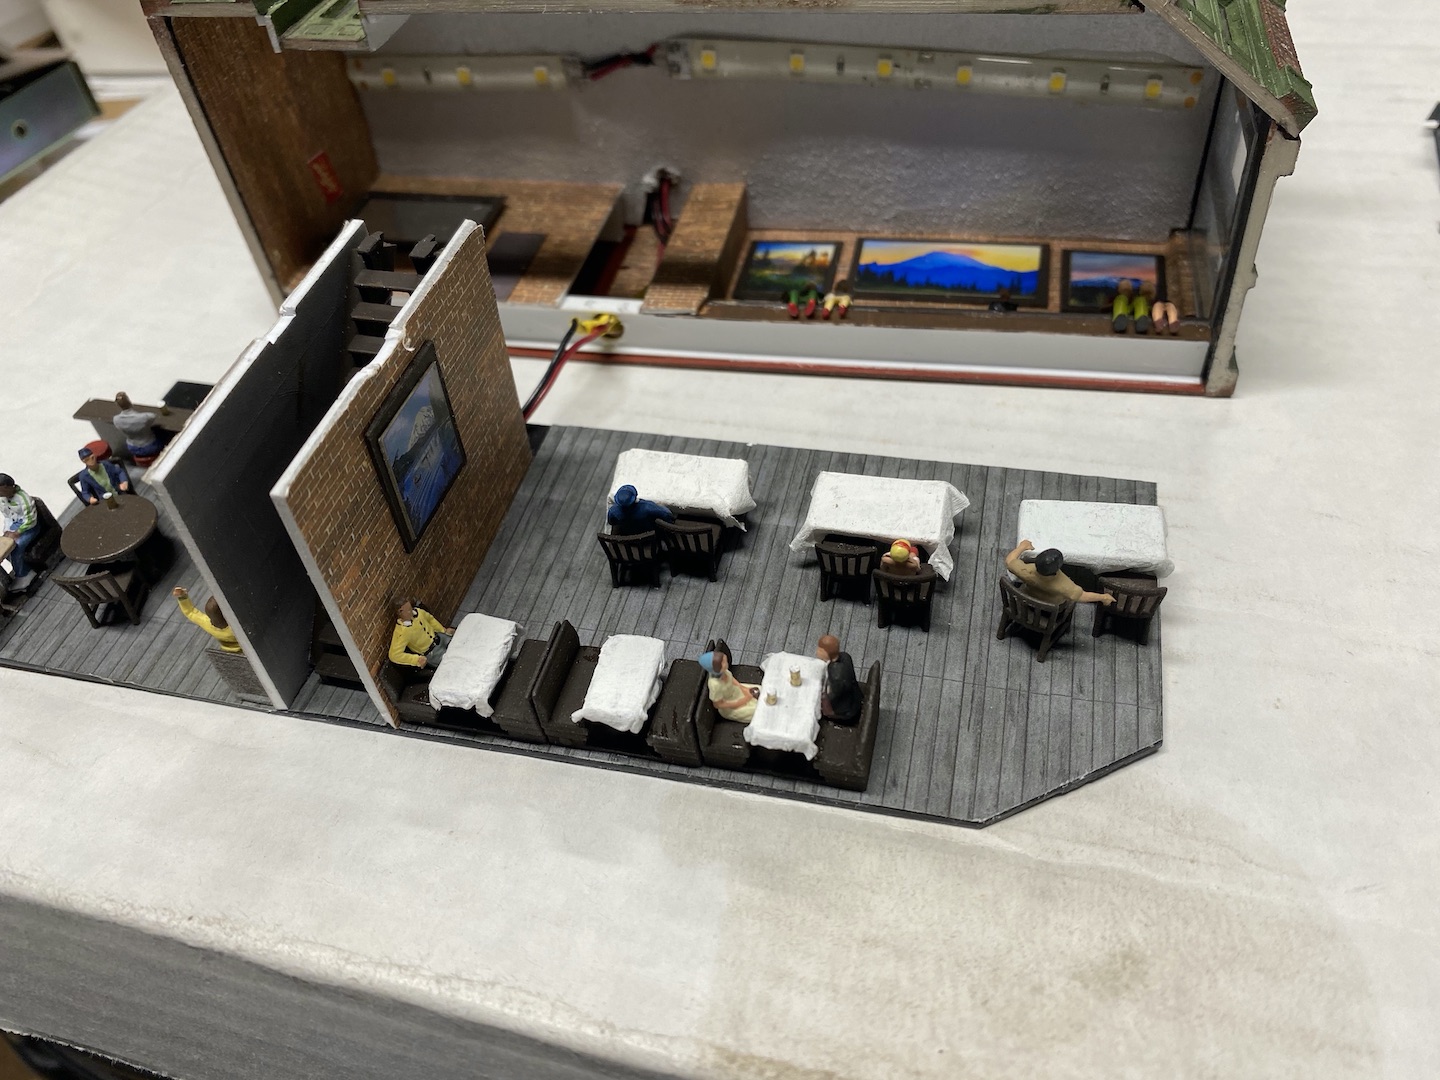
If I’m adding an interior, I will install brick sheet, wallpaper sheet, or something similar to the inside walls. I place wall dividers by attaching them to the floor. Speaking of floors, I’ll use paint or a printed paper floor. I use photo copies of paintings as wall decorations. I have scratch built tables, desks, beds, etc. I have also discovered “Shapeways” they produce a variety of 3D printed scale items. I used booths, tables, chairs, and bar stools for this build. The exterior signage is from Barmills. I use 12 volt strip LED’s for lighting the interiors.
Finishing touches include; weathering with Pastel chalks, roof details (vents, air conditioning, chimneys, signs, and access hatches).
I encourage you to take some extra time and a little extra work and you can turn an inexpensive kit into an eye catcher!


Thanks for reading!
Greg Price
Matheson & Western RR
Wow! Very nice!
Great job. Too bad it is in the wrong scale. I could find a spot on my layout for such a handsome building.😜
Kurt is right. Greg should have made it O scale. Smile.
Greg, great job turning a routine DPM building into one that stands out and should be a foreground model. BTW, I’m using the same Shapeways booths and bar stools in a cafe I’m just about done building. Shapeways has an incredible amount of detailing available for the model railroader.
Al Carter, Mount Vernon