This Saturday, July 25, 10:00am to noon, will feature another pair of local area layout tours on Zoom, sponsored by the NMRA’s PNR 4th Division. The first is a tour of Russ Segner’s Sn3 layout, looking at 9 specific scenes that he has created and detailed around his layout. The second is Ray Wheeler’s outdoor Fn3 layout with a bunch of eye-level footage taken with GoPro cameras mounted on tripods. After each 30 minute presentation there will be 15 minutes for Q&A. Here is the Zoom information you need to watch it:
Topic: 4D PNR Layout Tours
Time: Jul 25, 2020 10:00 AM Pacific Time (US and Canada)
It’s with deep regret that I am reporting the death of my good friend and railroad buddy, Doug Walters.
Doug and I had over 30 years of fun and fellowship together, as we shared many of the same interests and much time together. In all that time together, I don’t think Doug ever met a person that he didn’t like. I never once heard him say a bad word about anyone.
Doug had numerous friends in the model railroad community and participated as an operator and advisor on many layouts throughout the Puget Sound. But the layout that he was most influential on is the Olympic Northern, in my basement.
The ONRR is truly as much Doug’s layout as mine. Not only did he develop the operating system, but he worked hard to make every op session enjoyable for the participants. He was always concerned about the “play value” that each operator would experience and took copious notes during op sessions so that he could increase the “play value” per session for next time.
When Doug was diagnosed with glioblastoma, he told doctors not to tell him how long they thought he had, as he preferred to live each day to the fullest. That really exemplified the Doug I knew; always getting the most out of every experience.
I definitely miss my close friend, Doug, and I know that many others, that knew him, miss him as much as I do. Just a few weeks ago, Doug committed his life to the Lord, Jesus Christ, so I know that I will see him again. And what a happy reunion that will be! Until then may the glory of the Lord shine upon you and our friend Doug.
Need to add a few ounces to your box cars (or any covered car)? Ten US pennies weigh almost exactly one ounce. Stick them together with superglue and cement them in the car. Since each penny weighs 1/10 oz., very accurate weighting can be done. This works well for box cars, tank cars, covered hoppers and gondolas, and passenger cars.
Continuing along with this series about the Dry Gulch & Western I’ll explain one of the scenery techniques I used for the layout. I decided early on to use some “old school” techniques. Due to the size of the layout and various cost considerations I used the tried and true method of chicken wire and plaster. I started with a rough frame using dimensional pine boards. That created the contours of the mountains. I then covered the wood framework with chicken wire to further form the shapes of the mountains. After that was done, I draped plaster-soaked Crown C-fold paper towels to the wire. Some of that work was difficult to accomplish since many of the mountains are very vertical. Once that plasterwork was done, I added more plaster to cover the paper towels. This added more strength and texture to the mountains. The plaster I used was standard Hydrocal plaster. The one issue I encountered was that it is very quick drying and would usually set within about 20 minutes. So, the plaster work had to be done in small batches. I would speed up the entire process by using multiple aluminum turkey roasting pans to mix the small batches of plaster. These are inexpensive and very flexible. The flexibility of the pan allowed for easy cleaning. They were also large enough to allow the paper towels to be dipped into the thin plaster. I used around 8 pans at a time and by the time I got to using the 8th pan the plaster in the first pan was completely dry and could be cleaned out just by flexing the sides of the pan. I could usually do about 15-20 batches in an evening! By the way, there was around 900 pounds of plaster used for the mountains. Now, lets see some more of the layout.
Photo 16
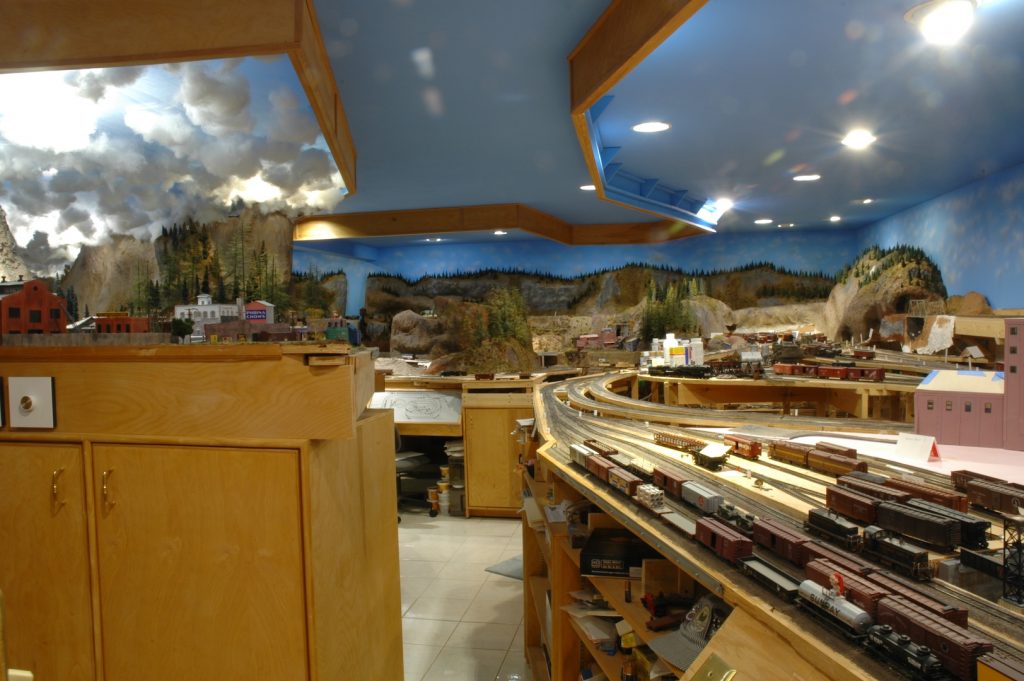
Photo 16 gives you a view of the aisle that you just walked down in the previous photo set. Allentown is on the right of the aisle and Newport is on the left. This photo gives a really nice shot of the Newport yard and the shipping basin tracks. It also shows the small control panel for Allentown on the right.
Photo 17
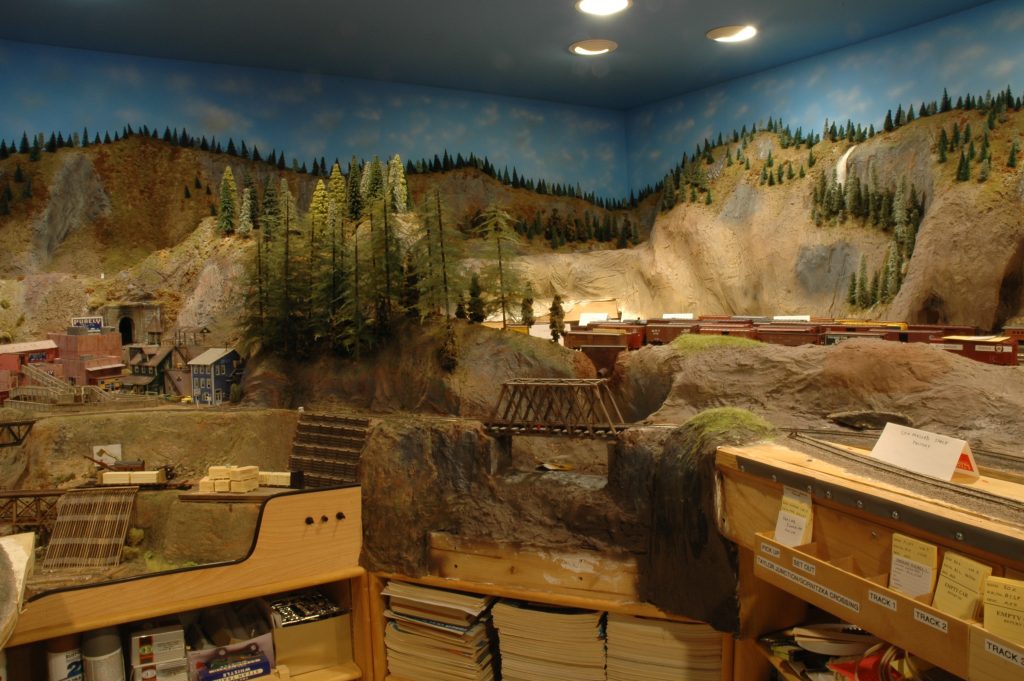
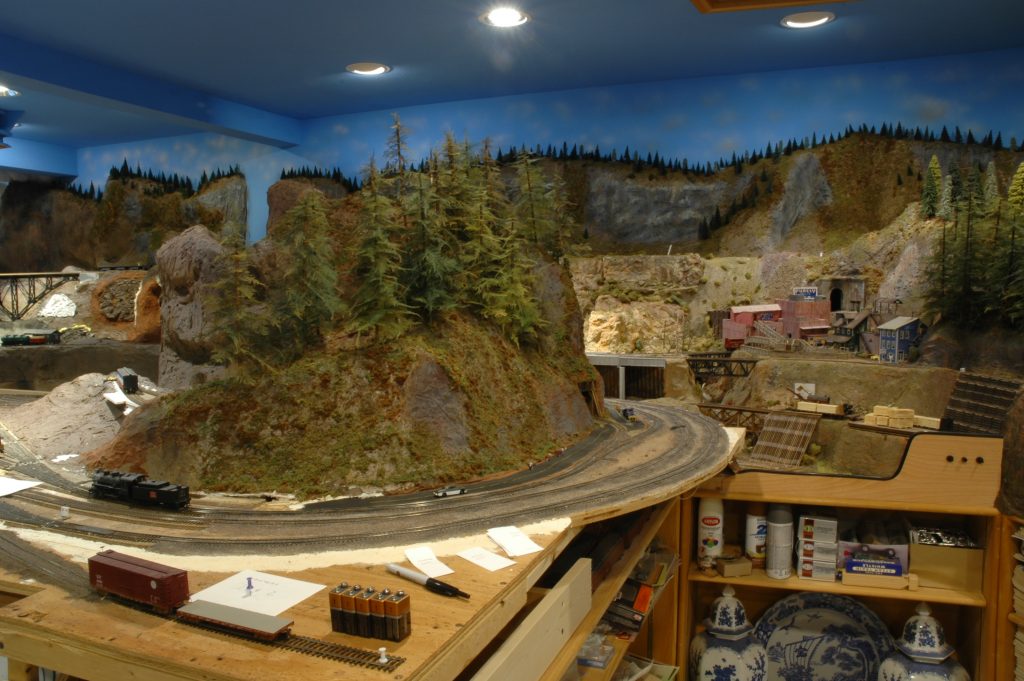
Photo 17 shows the small wooded bridge on the way to Gornitzka Crossing. It is a Campbell kit. At Gornitzka Crossing you will find a sawmill operation (only the log off-loading and finished lumber loading areas are on the layout), a stockyard, and a meat processing plant. As mentioned earlier in this series there is a bi-level station fashioned after John Allen’s station at Corsa/Cross Junction. My station copies the same station naming idea by having the lower station named Gornitzka Crossing and the upper part of the station named Hunter’s Glen. The blue building in the photo is Scole’s Hideout, a speakeasy of sorts. The tall timber trees in the center of the photo are constructed using Jack Work’s method of making trees. Each tree takes about 2 hours to construct. To the right of those trees is the Ellison main yard. The hill and forest functions as a view block.
Photo 18
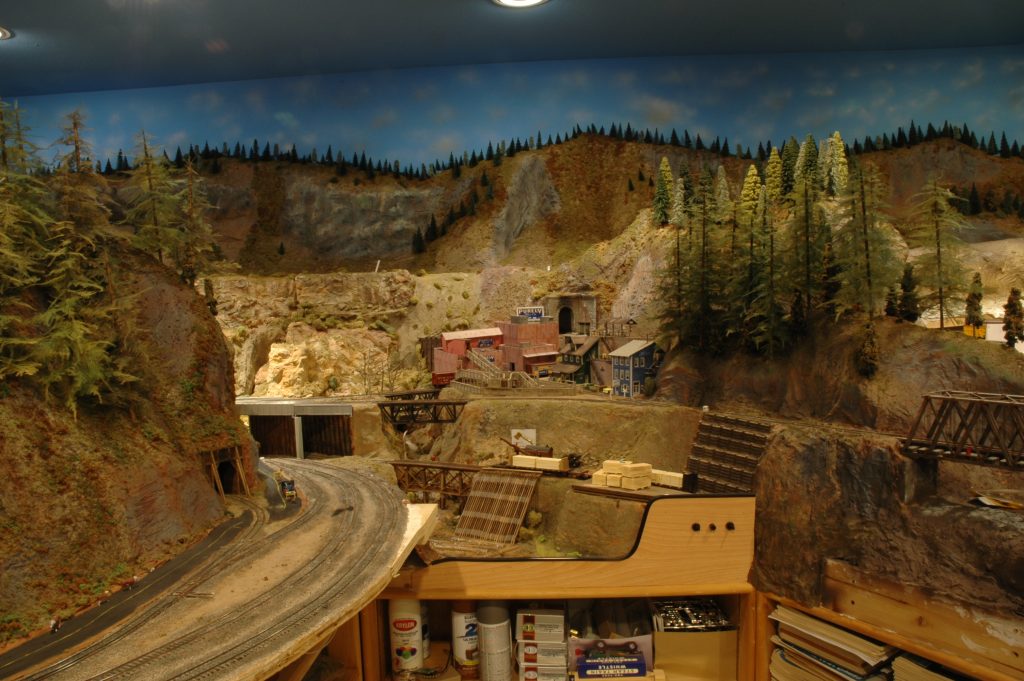
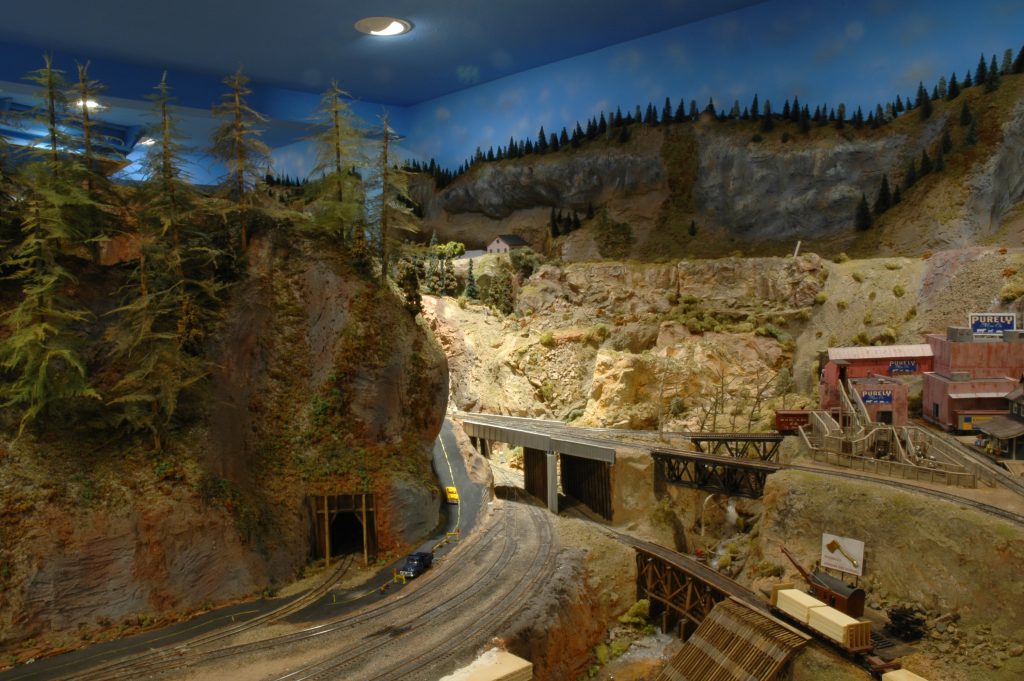
Photo 18 shows a more expansive view of Gornitzka Crossing. Some of the scenery in this area was originally on Paul Scole’s layout. I was able to salvage some of it and place it on my layout. That was very challenging. The tracks on the left are the mainline to the town of Dry Gulch. The wooden tunnel portal on the left allows a narrow-gauge line to join up with the standard gauge mainline.
Photo 19
Photo 19 gives a better view of the narrow-gauge tunnel portal and the mountainous scenery to come. Yes, the mountain on the left is another view block. If you look closely you will be able to see the town of Alpine at the top of the photo.
Photo 20 gives a more panorama view of the overall scene. We are almost ready to enter Dry Gulch; it is on the bottom left out of view. This photo shows yet another forest of tall timber trees. You can also see a hint of one of my largest bridges in the distance on the extreme left. The mountain in this photo completely hides the town of Alpine that resides against the upper back wall of the layout.
Next time we will enter Dry Gulch, the namesake town of the layout. There will be even more views of the mountains and some of the many bridges that traverse them.
Announcing the Eastside Virtual Get Together Clinic to be held on THURSDAY, July 16, 2020 at 7:00 PM Pacific Daylight Time
Hello, everyone!
Yes, the Eastside Get Together Clinic is alive and well during the Coronavirus/COVID-19 pandemic. Although for the time being (and that may be a while), the Eastside Clinic has become the Eastside Virtual Get Together Clinic. Our next virtual Clinic will be held using ZOOM next Thursday, 07/16, (We have switched back to Thursdays by popular demand!). One of the benefits of virtual clinics and meetings is that the barriers of geographic distances (and traffic woes) are removed. All you need is a computer and an internet connection! So I would like to extend an invitation to the entire 4th Division and encourage you to join our Clinic next Thursday, meet some of the modelers here in the area and see some of the outstanding model work that is being done in this area. The log in info for the clinic will be published in the Grab Iron a couple of days before. So be sure and keep an eye out for the log in announcement in the Grab Iron.
Our virtual Clinic this month is titled “Modeling Lighting on a Modern Era Layout” and will be presented by Larry Sloan. Larry is a very talented local modeler that is in the early stages of building a new layout. He will talk about products and the techniques that he has used for layout lighting, building and street lighting.
After the Clinic, we will have some time for other folks to show off their latest model work in our “Show and Brag” segment. The Clinic will wrap up with some administrative comments and quick announcement about our future virtual Clinics.
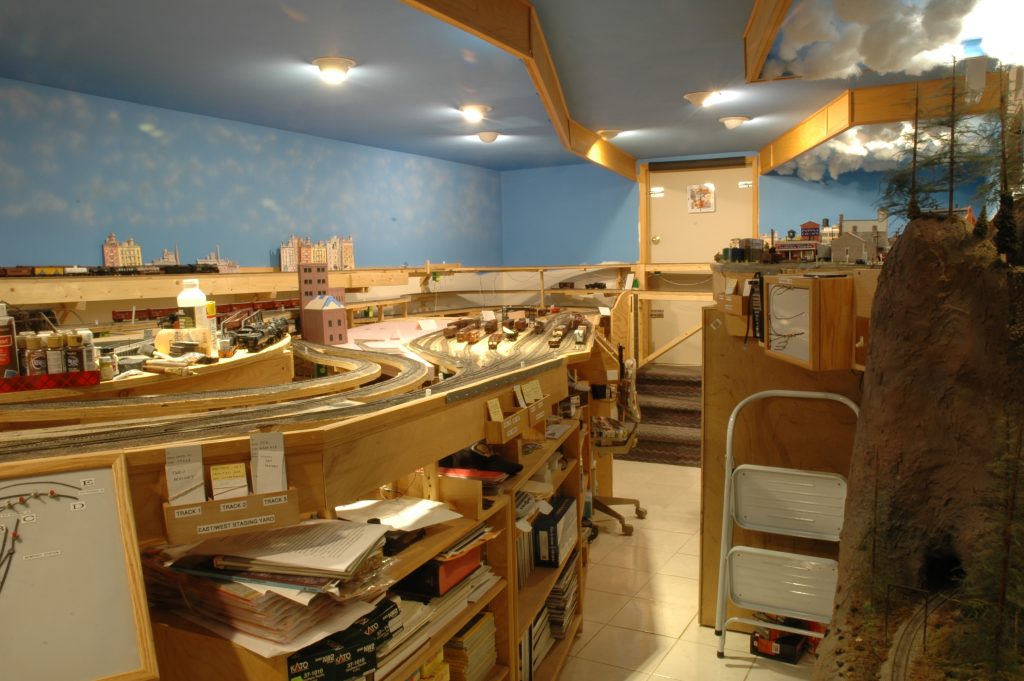
A little more about the Dry Gulch & Western. As you can see in previous photos the layout is illuminated with 37 recessed can light fixtures. They are really nice to have unlike surface lighting, that type of lighting usually detracts from the layout scenery. All the bulbs are LED large spotlights and were swapped out a few years ago. Each light is between 800 and 1100 lumens. Originally there were quartz lights that lit the layout but they produced a tremendous amount of heat in the train room. The cabinets in the room are constructed out of birch veneer plywood and I custom made them to fit the layout. They provide a large amount of shelf storage space.
Now on to the layout. Turning to the left from the previous photo series and moving down the main aisle of the train room we finally see a hint of Allentown on the left in photo 11. We can also see more of the actual layout and the mountainous scenery. About dead center in the photo is the Dry Gulch control panel. All control panels are back lit to allow for night operations.
Photo 11
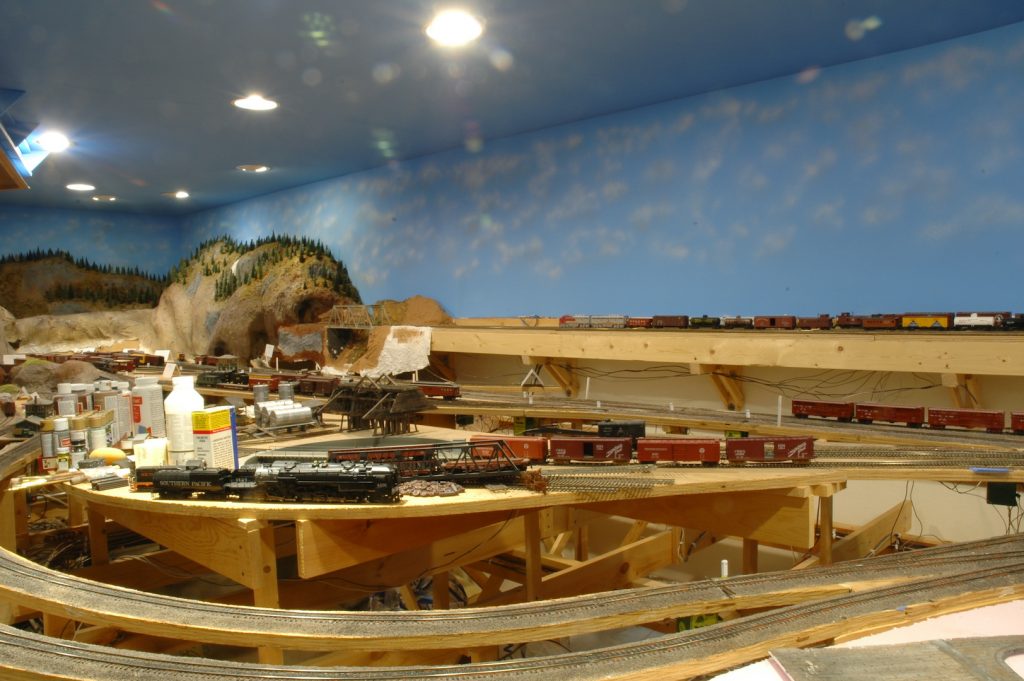
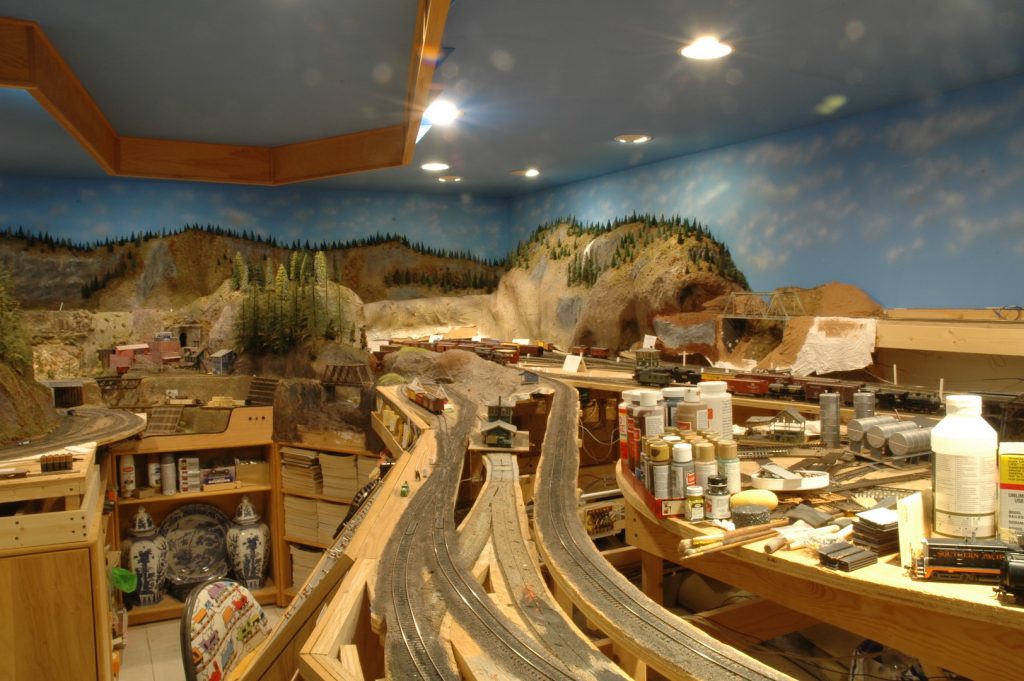
Photo 12 shows the turntable and that SP cab forward. Yes, amazing how flat surfaces collect “stuff”, a lot of my paints and supplies have taken residence near the turntable! This photo shows the staging yard, the high line (mainline) passes directly in front of that yard, goes over a bridge, and then enters a tunnel. The mainline continues around the room corner. Those mountains help hide the room corner. Please note the two tracks that make a sweeping curve at the bottom of the photo. This is one of the junction areas that join the high line to the river line. The closest track at the bottom of the photo goes to Taylor Junction and on to the river line. The next track up goes to South Ellison Yard and on to the high line.
Photo 12
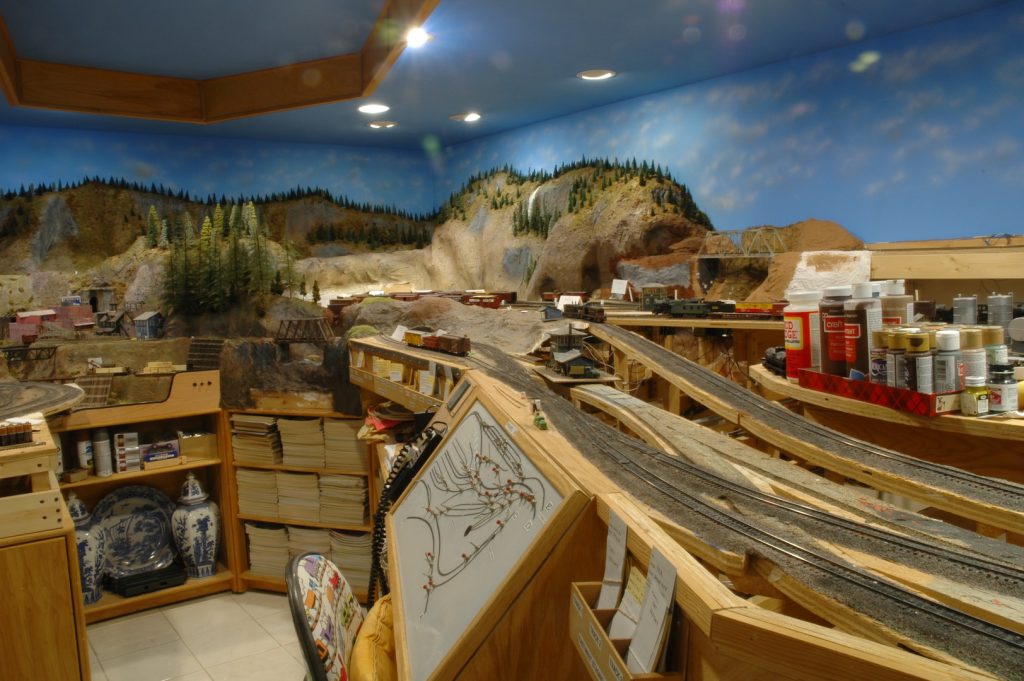
Photo 13 gives a great view of some of my paints and paint brushes! In the dead center of the photo is Taylor Junction. Directly above all my paints is South Ellison Yard. It is a 3 track thru yard. It functions as a ready track and small sorting yard. Tucked into the corner between the mountains is the city of Ellison and its 7 track stub yard. I did install one thru track in the yard to allow for easier passenger train entrances and exits. The yard somewhat follows John Alllen’s design and includes on the right of the yard his famous “cut-off” track. Yes, that is another junction track to allow trains to go from the high line to the river line. It enters a tunnel, dives down and then tucks around Ellison yard. The track comes out of a tunnel at Gornitzka Crossing, that town is located to the left of that stand of tall timber trees. Yes, it features a scratch-built rendition the famous two-level station that was on the Gorre & Daphetid.
Photo 13
Photo 14 gives a view of the Ellison control panel and my collection of paints. You can see that I use car cards for my train operations. Taylor Junction station is right above the control panel. The first track at the bottom right of the photo takes you directly to Newport yard. The second track up takes you to Newport station while the third track comes from Newport station.
Photo 14
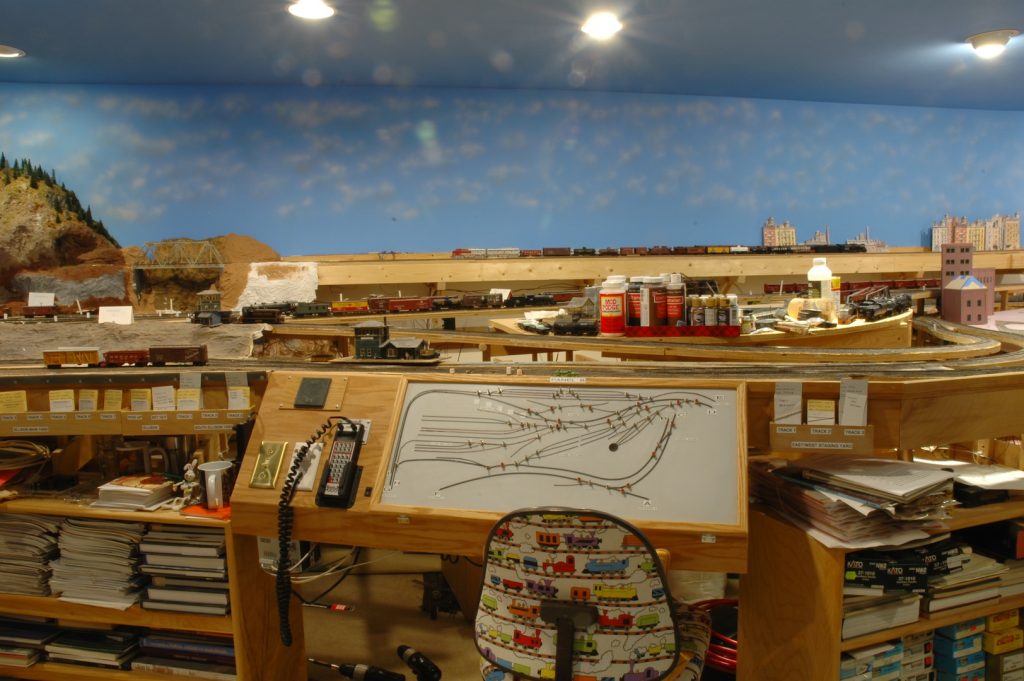
Photo 15 gives a front view of the control panel and car card boxes. Again, Taylor Junction station is right above the control panel. It is a Campbell kit. Directly above the station is South Ellison Yard. To the extreme right you can see how Newport station serves both lower level tracks and upper level tracks.
Photo 15
That’s it for this portion of the tour. Next time we will travel further down the mainline and see more close-up photos of the scenic Gornitzka Crossing area.