David Yadock’s Dry Gulch & Western Update 8

Article & Photos By David Yadock

Dry Gulch & Western, Update 8

It is now time to travel down the mainline into the town of Dry Gulch.  This town is the terminus for the narrow-gauge railroad.  As mentioned in the last update Dry Gulch is the last puzzle piece but had to wait for completion while all the other sections were worked on and the branch line was realigned.  The area has a small business district and a few industries.   A small two-stall engine house provides facilities for minor locomotive repair and servicing.  A tiny turntable provides for locomotive turning.  In this update we will specifically examine the access hatch area.

Photo 41 shows the Dry Gulch area before scenery and branch line realignment was completed.  Yes, a station, turntable, and small coaling tower were there but the scenery was lacking.  You will also note in the center of the photo a large hole directly behind the 6-dome yellow tank car!  The citizens of Dry Gulch petitioned the layout owner to remedy this problem since it was a danger to the public.  The hole is actually a large access hatch that is needed to service the track and switches located at Potter Flats, Raade Springs, and the interior portion of Dry Gulch.  The access hatch is about 22 inches by 36 inches and is another vertical lift type of hatch.
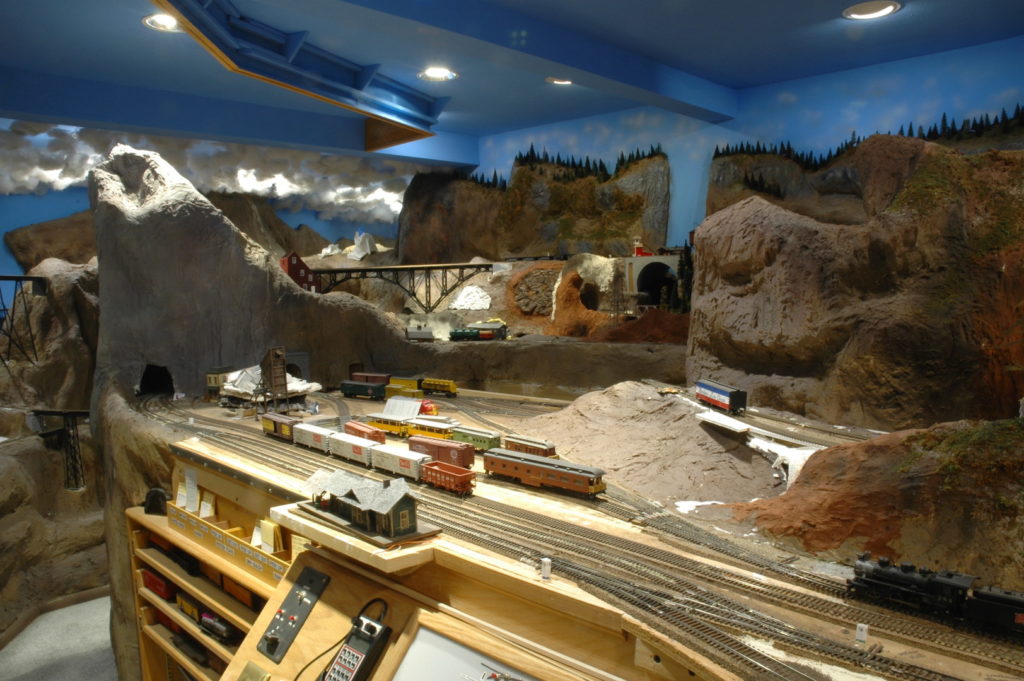
Photo 41

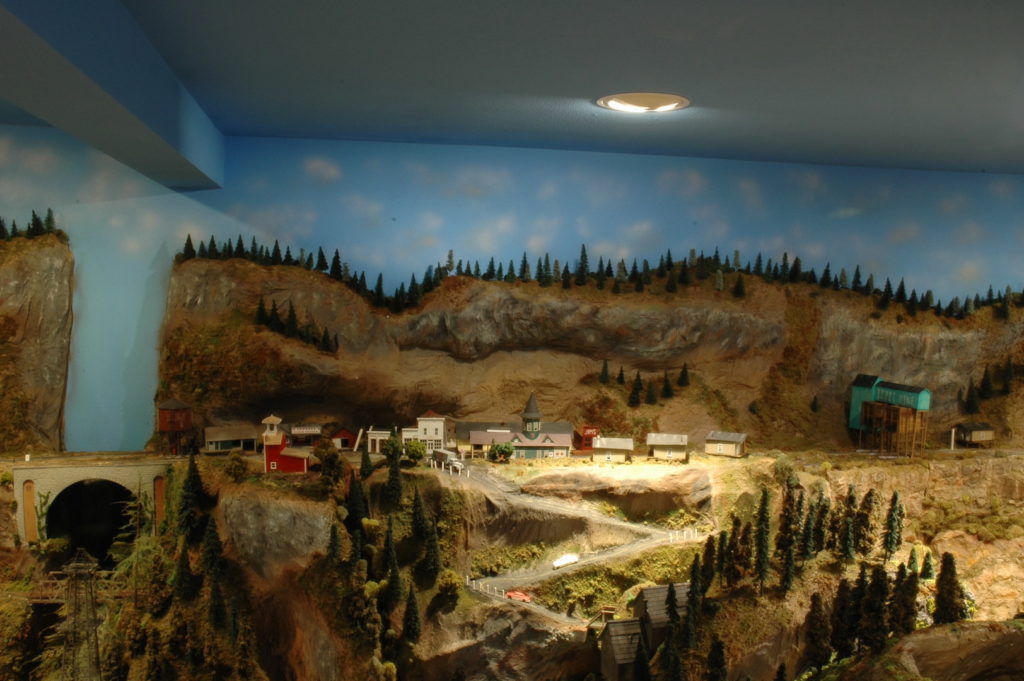
Photo 42 is an arial view showing the hatch in the closed position.  A lot of care was taken to hide the edges of the hatch.  Since the hatch can’t have an odd trapezoidal shape it made it difficult to blend in the edges and seam.  Careful placement of fencing, guardrails, and shrubbery helped hide the seam along the front of the hatch.  The sides of the hatch did not require much effort, they are hidden from view by the other portions of the layout.  The back side of the hatch was also difficult to hide.  I have found it best to have access hatch holes with odd shapes, that allows them to be hidden much better.  Of course, sometimes this can’t be done.
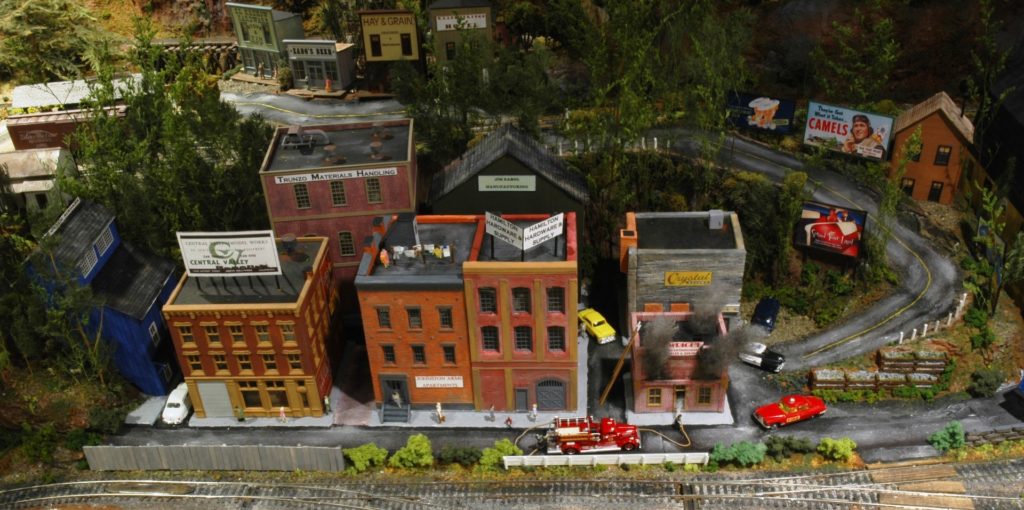
Photo 42

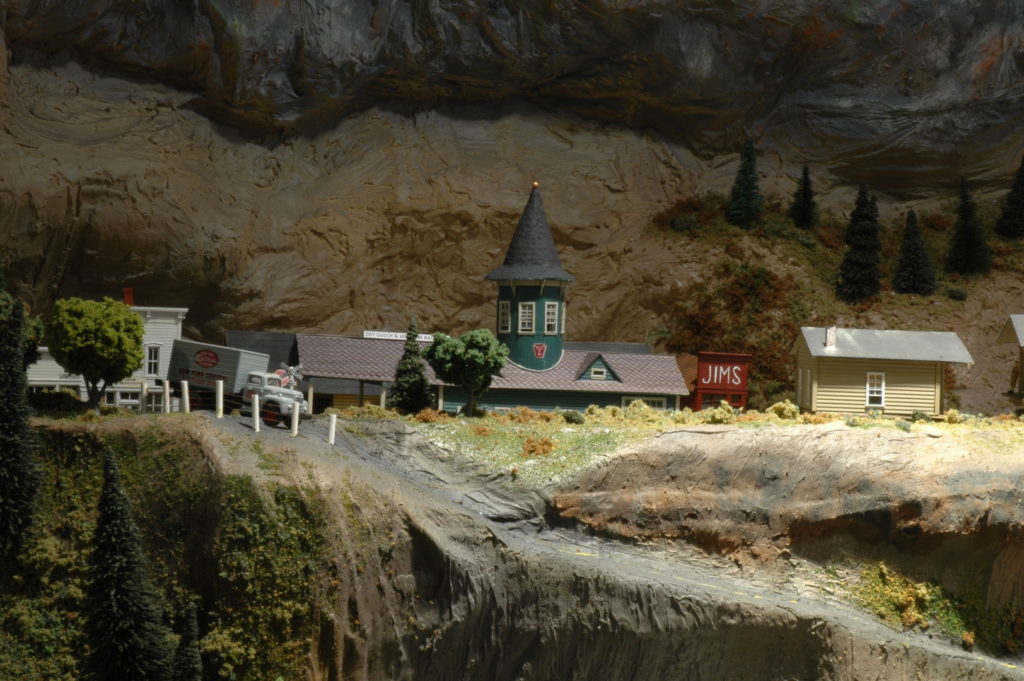
Photo 43 shows an up-close view of a couple of the businesses that cover the hatch.  All the buildings have interior lighting.  Wright’s fire extinguishers building has some special flicker LED lighting installed.  Greg, you should know better than to place oily rags next to open flames!  The police car and fire chief’s car roof lights also function.  Note the curved roadway, retaining walls, old-style wire guardrails, and multitude of billboards to help add visual interest.
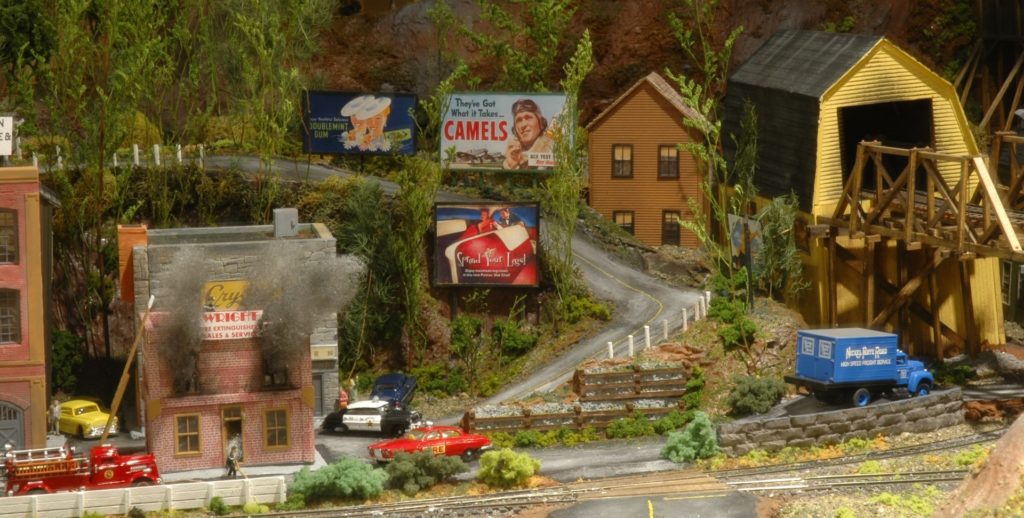
Photo 43

Photo 44 shows another view of the structures.  Some of you will note the names of the structures.  Greg Wright was poked fun at with his structure, I couldn’t resist it.  JJ Johnston is the landlord of Johnston Arms apartments.  Both Fred Hamilton and Jack Hamilton can fight over which side of the building belongs to them!  Which one of you handles the hardware and the supply?  Jim Sabol builds something in that large green structure.  Trunzo Materials Handling is named after Jim Trunzo.  He is head of the local Pennsylvania Railroad Technical and Historical Society chapter.  Most of the structures are from kits, but there are a few scratch-built structures as well.  All of this scenery was placed on a rigid foam base and attached to an L-shaped sliding lift mechanism.  The weight of the hatch is about 15 pounds, so it is easy to operate.
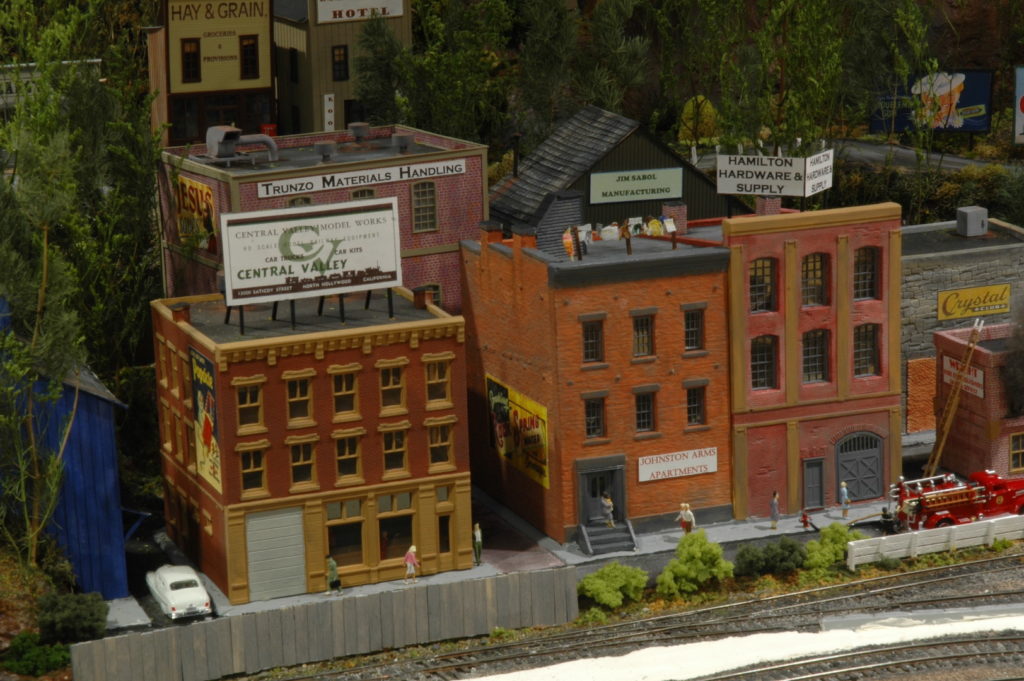
Photo 44

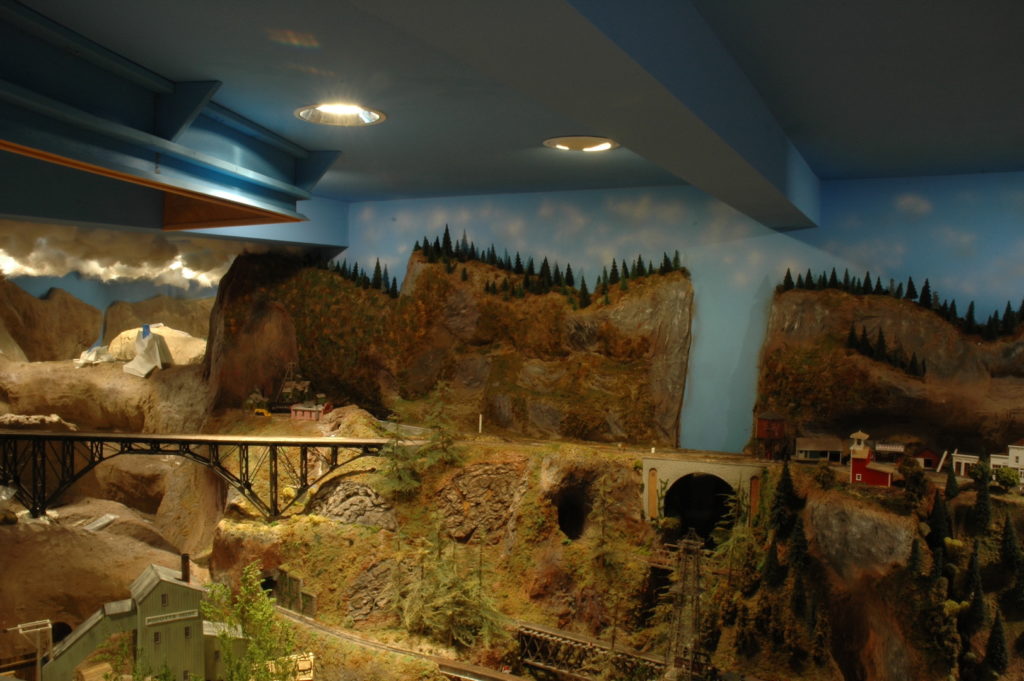
Photo 45 shows the back of the hatch, looking from Raade Springs.  Trees, shrubs, and a small ravine help break up the seam of the hatch.  Natural features such as small ravines can help hide or break up the straight line of an access hatch.  Small hills or rises in land can accomplish the same.
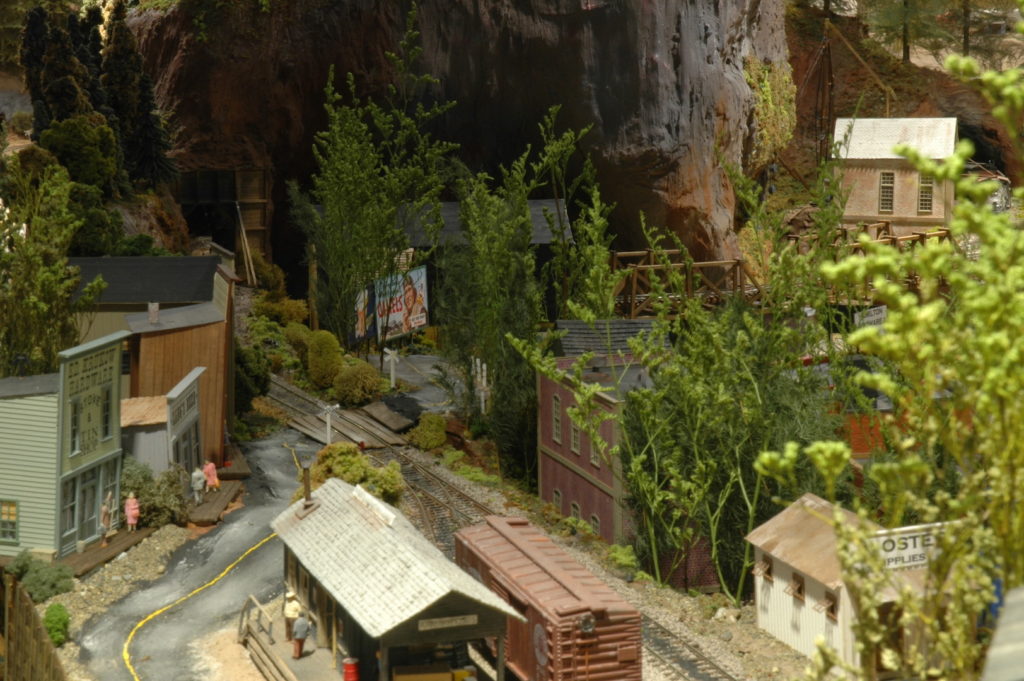
Photo 45

Photo 46 gives you another view of the structures that are in Dry Gulch and Raade Springs.  You will note just how close these towns are in relation to one another.  A road and careful placement of trees helps hide the fact that they are only a few inches away from each other.  Must be wash day at the apartment complex!  Ed Liesse provided the Central Valley billboard sign.  It is from a 1960’s era NMRA convention handout.  I made a photocopy of it and made the roof sign.
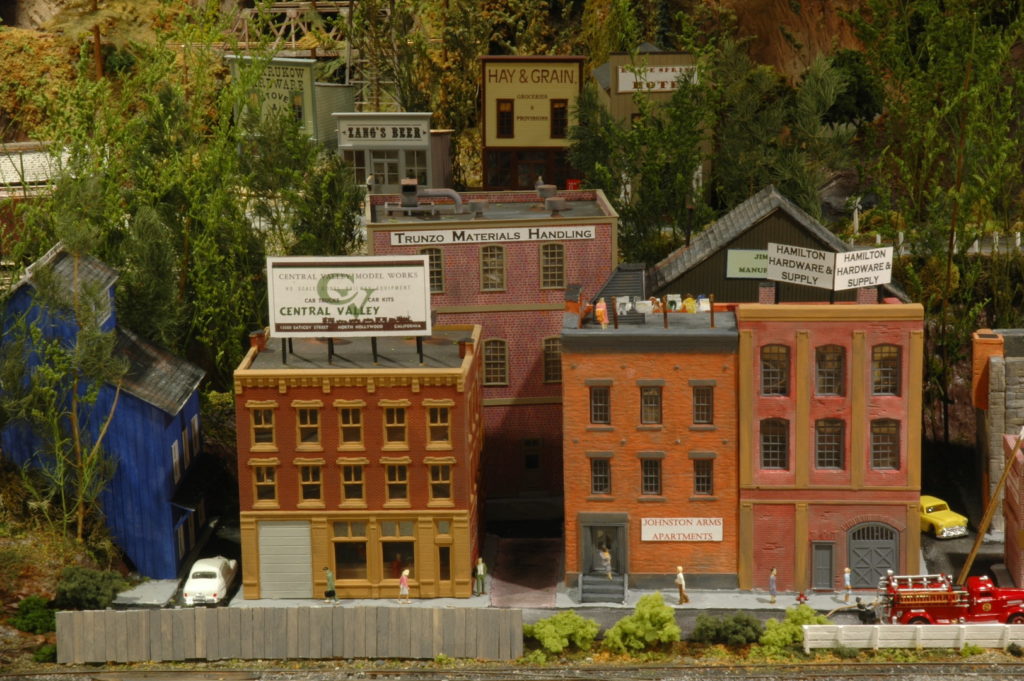
Photo 46

Next time I will provide a photo of the hatch in the raised position to give you an idea of how the edges were hidden.  Also, we will look at the changes happening with the Dry Gulch foreground area.  As of this point it is still a work in progress.  Some of the features have been installed, but most of the ground cover and especially the two-stall engine house is still waiting for final placement.  I was hoping for it to be further along, but a shoulder injury has slowed its progress.  Have a safe and blessed Thanksgiving.

David
David Yadock’s Dry Gulch & Western Update 7

Article & Photos By David Yadock

Dry Gulch & Western, Update 7

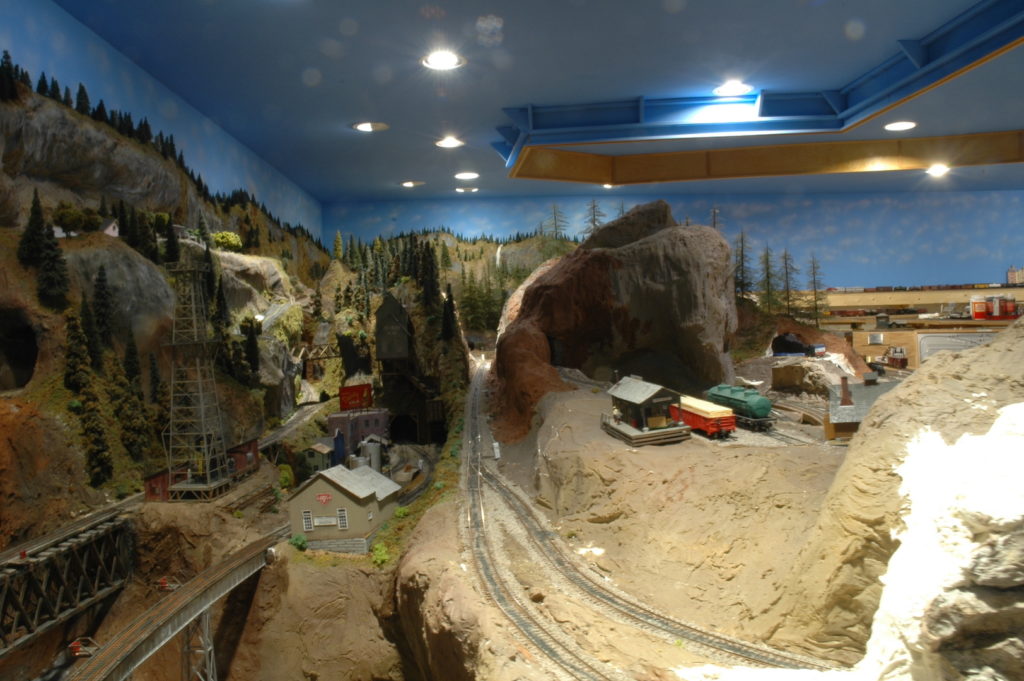
All of you that were able to see my Zoom layout tour on September 11th will know what this update is all about.  I will go over some of the subtle changes that are in and around the Potter Flats/Raade Springs area.  Some more scenery was added along the mainline.  Trees were planted and Raade Springs was completed.  That scene was finally joined in with all the other areas.  The last piece of the puzzle is the Dry Gulch access hatch, you may see it hovering up in the air in some of these photos.  That access hatch has been a slow work in progress but once completed it will allow the scenery to be finished off in the Dry Gulch peninsula area.

Photo 34 shows what Raade Springs, and the surrounding area looked like prior to adding scenery.  I only had a small station placed in the town.  The branch line that serviced Raade Springs was never really operational and most of the track was buried in tunnels.  This was not good for operational capabilities, so this area was never fully developed.  A remedy for the buried track was needed if I was to apply scenery to the entire area.  The track to Raade Springs was relocated and now most of the track is no longer in tunnels.

Photo 34

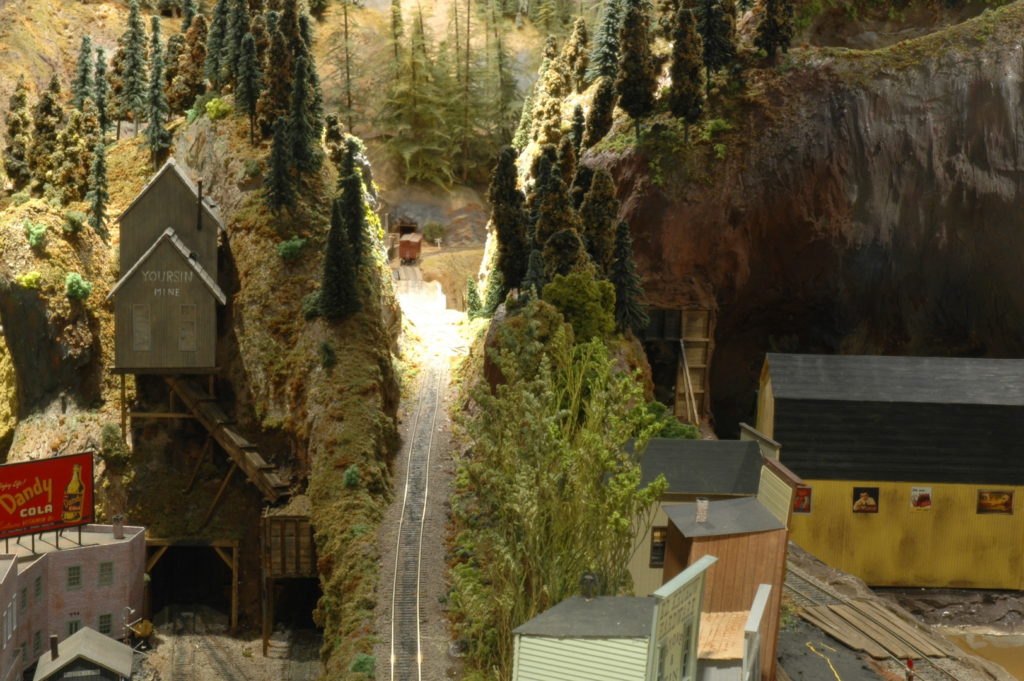
Photo 35 is a nice view looking down the mainline that also serves as a branch line to Raade Springs.  Potter Flats is on the left while Raade Springs is toward the right.  The large yellow barn-like building on the right is a coal pocket that is accessible via the town of Wapwallopen on the branch line.  A nice stand of trees has been planted to act as a view block.

Photo 35

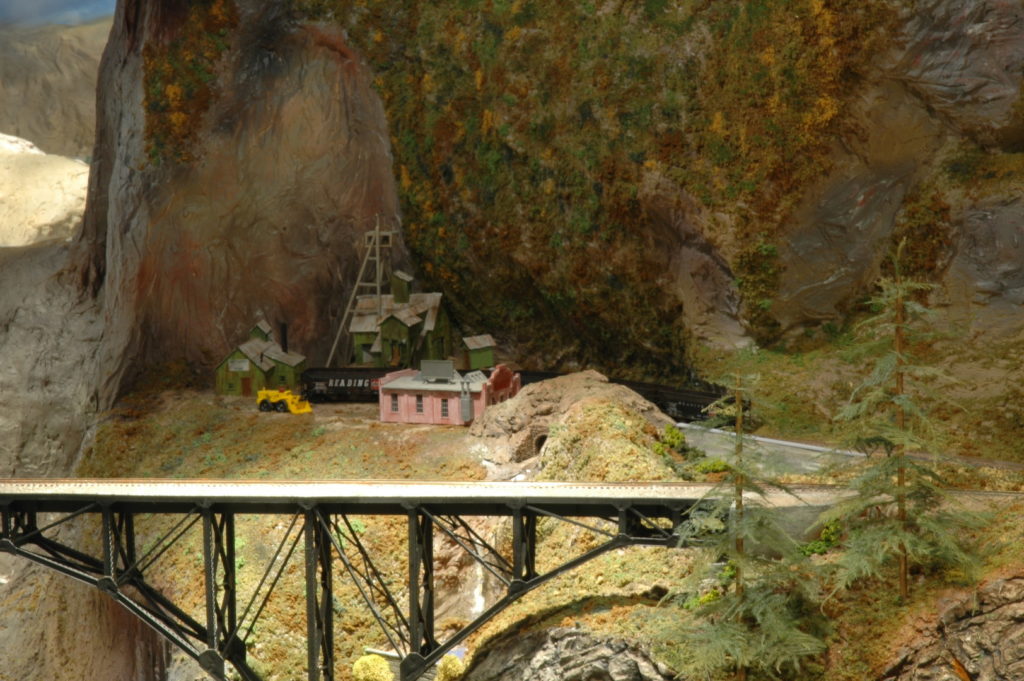
Photo 36 Raade Springs is a small hamlet served by the branch line.  It has two mining operations.  The Cantby mine and the Higotta mine are both located on one side of the town.  The Higotta mine ore bin is placed on the combination branch line and siding.  This siding leads directly into Dry Gulch through a short tunnel just out of the picture by the ore bin.  This becomes a dual-purpose track for either branch line or siding use during operating sessions.

Photo 36

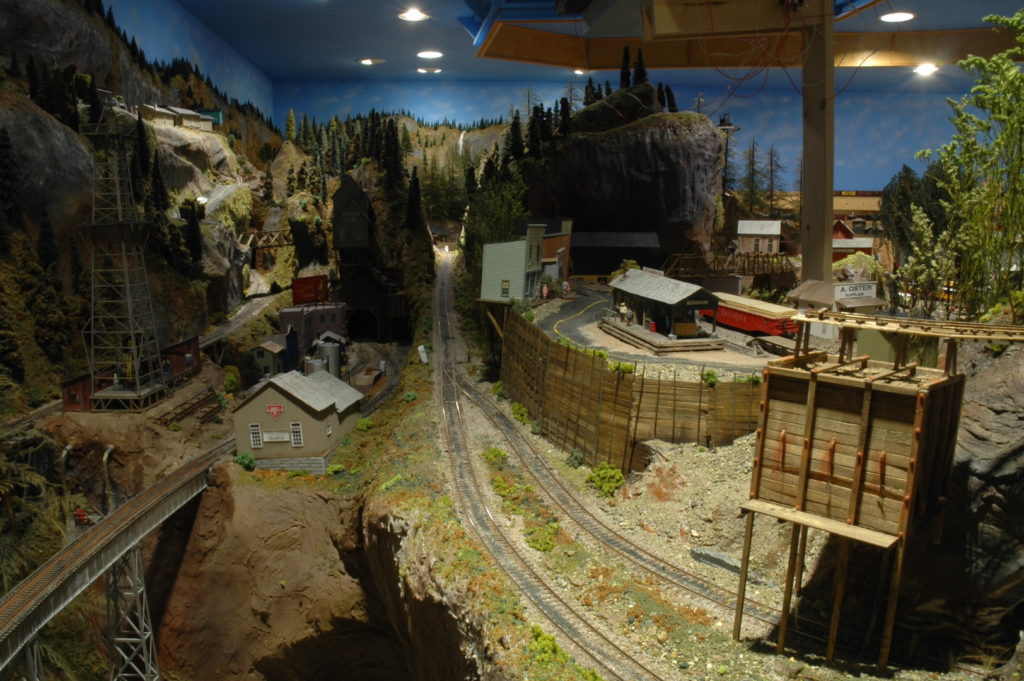
Since Raade Springs is placed on a very narrow strip of real estate I cantilevered three structures so that they hang off a short cliff.  This allowed me to place the buildings in front of a small road.  The rest of the area was built up and many wooden retaining walls are placed in the area.  This gives the location a mining town charm.  You can see the main support for the Dry Gulch access hatch just above the ore bin.

Photo 37 Here you can see how small an area Raade Springs occupies.  To the right is Higotta mine and its ore bin.  In the photo at the top right is Cantby mine.  To the left of A. Oster supplies is the vertical support for the Dry Gulch access hatch.

Photo 37

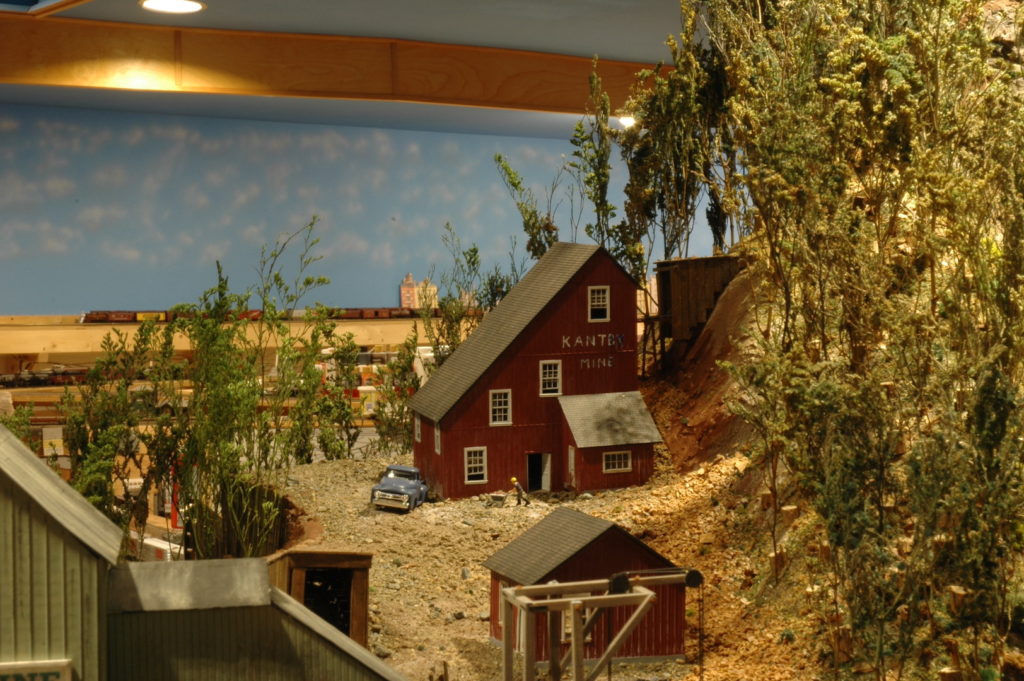
Photo 38 Cantby mine is next to Higotta mine and features a forest the was logged off years ago to supply wood for the mine.  Opportunistic trees have taken over where the forest was cleared.

Photo 38

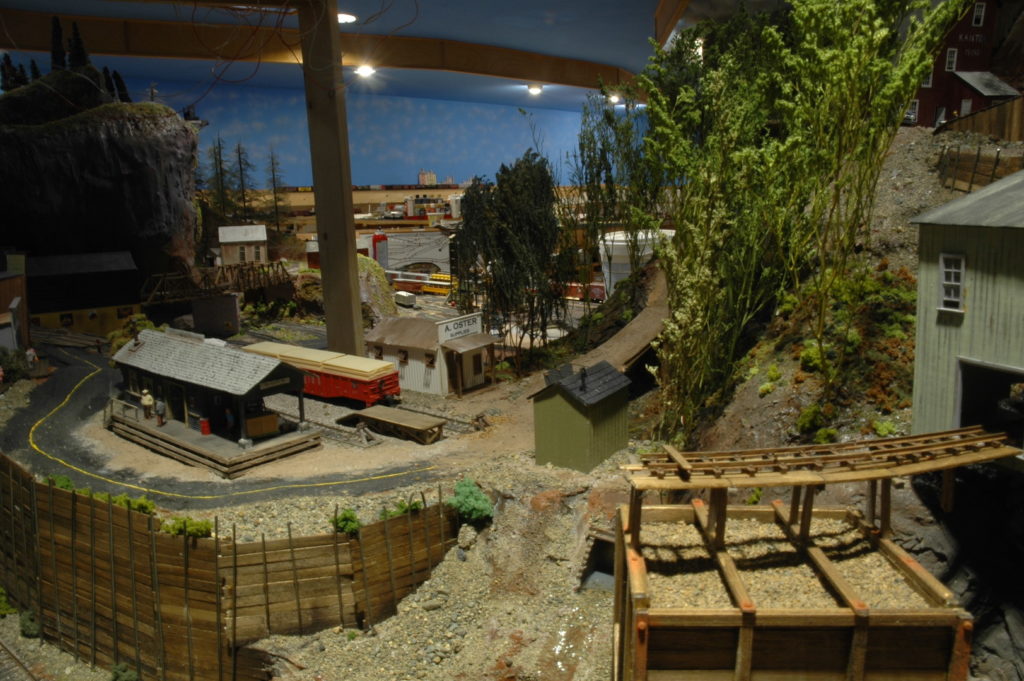
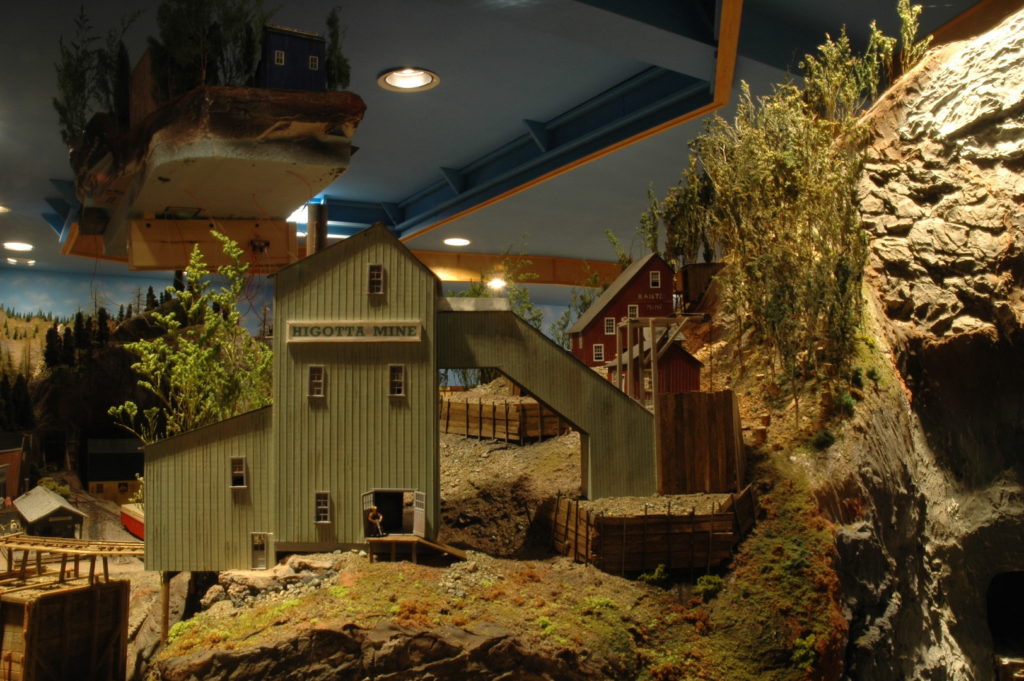
Photo 39 Give a clear view of Higotta mine with Cantby mine in the background.  You can also see the many wooden retaining walls placed in the area.  Floating in the top left portion of the photo is the Dry Gulch access hatch!  This hatch gives me complete access to Potter Flats, Raade Springs, a good portion of Wapwallopen, and the backside of Dry Gulch.

Photo 39

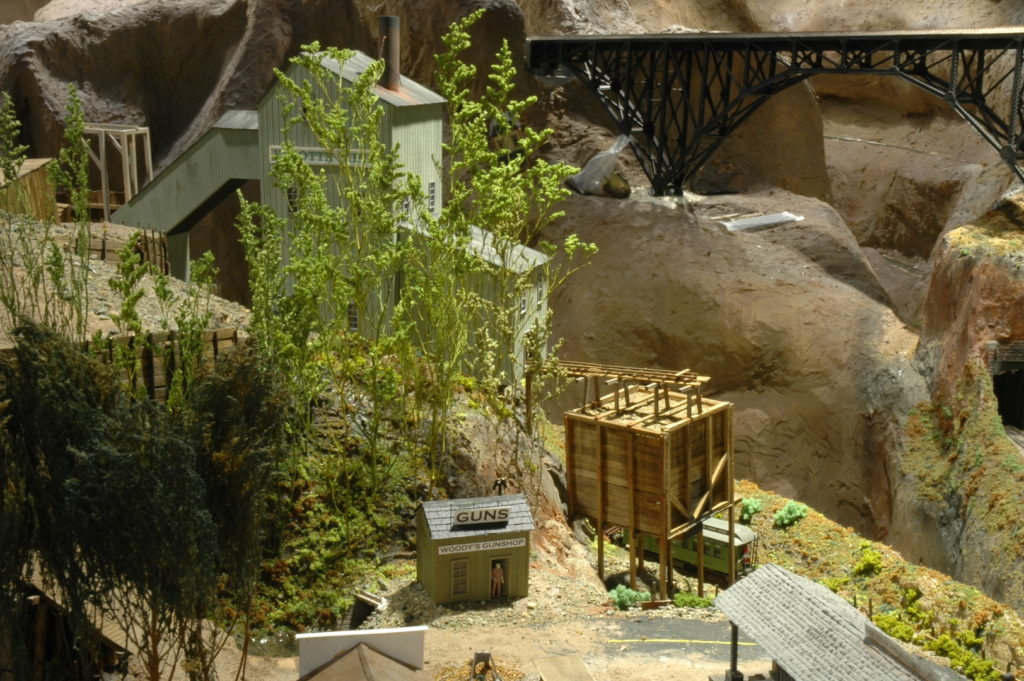
Photo 40 shows the other side of Higotta mine.  The little green building in the center bottom of the photo is Woody’s Gun shop named in memory of Woody Matthews, longtime member of the 4D. That covers this area of the layout. 

Photo 40

Next time we will finally have a look at Dry Gulch and all the changes that have occurred over the past few months.  This entire area of the layout has been akin to assembling a large puzzle.  There have been many “mini” scenes needing to be tied together.  The last piece of the puzzle is Dry Gulch and its scenery.  Most of Dry Gulch’s scenery had to be put on hold till all the other scenery was in place.  

David

Maple Valley Train Show Wrap Up

Article & Photos by Ed Ives

The Maple Valley train show was started some twenty years ago by fellow Hi-Railer Henry Holwedell. Henry is long gone now but we like to attend this show in his memory. The show is a small community fundraiser located in a gymnasium, the Gracie Hansen Community Center. There obviously was no show last year due to the COVID and it was uncertain if there would be one this year. I was fearful that if there were no show this year it may be too difficult to resurrect further downstream. Not to worry though, the show went ahead.

The show consisted of eight layouts; two group O gauge layouts, the Hi-Railer’s and Pierce County Lionel group; a Marklin HO group; a live steam group; a LEGO group and three individual presentations including a suitcase Z gauge display. Set-up on Friday went quite well in spite of access only through one door. We, the Hi-Railer’s, were up and running by 3.30 PM, a record for the location for us.

Saturday morning dawned at 7 AM where we were to do further development to the ex-Sam modules. Sam Hayden passed away three years ago and we managed to retain three of his modules and six of his accessories. Over the last two years we incorporated the accessories into the modules, added wiring, power supplies and button controls on the public side. Now we were to add the 1/43rd scale vehicles and people to add life to the scene. Thanks to the efforts of Ed Pennington, Dan Peters and Gordon Sandell who donated a plethora of material, the scene became alive with still action and a veritable traffic jam of vehicles. 

The show opened at 10 AM and immediately a steady stream of people came in, not crowds. Masks were the order of the day and full compliance was observed without any complaint. There were many families with children, all very well behaved. The Sam modules gathered quite a lot of attention which was gratifying. Over the two days some 520 paying visitors came to the show which was considered a success. A typical show there would garner anything from 400 to over 600 over the weekend depending on weather and sports events.

A BIG personal thank you to Jack Klapwyk, Ed Pennington, Dan Peters and Gordon Sandell who did the set up, running both days and the teardown at the end. Without them we could not have participated.

Ed Ives

Lynden Train Show Wrap Up

By Ed Ives

It’s been a while since we’ve had a train show but they are coming back. The Lynden train show was the first out of the blocks, for this area at least on October 2nd and 3rd. The venue is a large modern (nice even floor) agricultural hall and both of our Hi-Rail and HO modular groups attended with layouts.  There was more space between layouts and more space between vendors with some usual displays and vendors being absent. All the same, the atmosphere was very nice even though all in attendance, both public, vendors and train groups were required to wear face masks at all times inside the building. All were very compliant which was very gratifying.

The public came in considerable numbers with a sizable contingent of children. Maybe the attendance was down a bit in prior year’s but it is hard to tell with the more open spaces.

I did contact the organizers after the show for their perspective and here’s their response:

“Yes, you are correct, a major event like Covid changes things.  Attendance was down some from two years ago when we last had the show, but not horribly and several vendors told us they did very well so it looks like those who did come were in a buying mood.   Also some exhibitors dropped out for various reasons, but then we added a couple new ones so it kind of balanced out.   Actually it was good for Covid protocols to have the aisles a little wider and a few more open spaces,   Glad you guys came and hope to see you next year when the situation is (hopefully) more normal.    Cheers.  Gordon”

From the Hi-Railer’s perspective the public, both adults and children, kept their hands off the trains and layout, more so than in the past which was gratifying. A considerable number of children spent their day circling the layout keeping pace with their favorite train. I bet they slept well that night. The only downside we had was dealing with the effects of having train modules sit unused for so long and being stored in a trailer summer and winter. As with the prototype railroads, the Hi-Railer’s run our trains on steel tracks and like the prototype the rails rust when not used. Much elbow grease was spent with a Scotchbrite derusting the track. Oh for environmentally controlled storage! Overall the Hi-Railer’s at least had a good showing and a good time. We look forward to the show next year.

Ed Ives

Steam Still Runs – Continued

By Dan Peters

My personal thanks to everybody who provided feedback to the previous article about the “working steam engine” on the Snoqualmie Valley Railroad, at the Northwest Railway Museum. And especially to those whom I spoke with at the Snoqualmie Railroad Days festival over the weekend. Just my personal opinion, but we cannot have too many working steam engines here in Washington state. As modelers, preserving railroad history is what we do all the time.

Because of a scheduling conflict, there were too many authorized steam crew members on Saturday and not enough on Sunday. So there were no photo run-by’s on Sunday. But the good news is, those extra crew members have made themselves available for continued operation through the fall. Problems with the tender water tank have been fixed, but there is still work needed on the air brake system before Northern Pacific number 924 is certified for passenger train operation.

So, if you missed it this past weekend, you still can see our “working steam engine” in operation this fall. Plans are for the Northwest Railway Museum to continue brake testing, and photo run-by’s, on the first Saturday in October ( October 2nd ) and November ( November 6th ). As always, it’s smart to call the museum first at (425) 888-3030, or check the web site at https://trainmuseum.org.

If you’ve ever wondered what it might be like to run a prototype steam engine, the museum is always looking for volunteers. Steam engine crew members must be certified to run the diesel train first, and then go through additional training on the steam engine. But heck, our grandpa’s and uncles did it, why can’t we? For more information, contact Emily Boersma, Volunteer & Program Coordinator, at Emily@TrainMuseum.org or 425-888-3030 x 7203 or 425-772-8870. You can tell your grand-kids you ran a steam train “back in the day”.

Before picture of the NP 924:

http://www.rrpicturearchives.net/showPicture.aspx?id=1264131

After picture:

http://www.rrpicturearchives.net/showPicture.aspx?id=5431490

David Yadock’s Dry Gulch & Western Update 6

Article & Photos By David Yadock

Dry Gulch & Western, Update 6

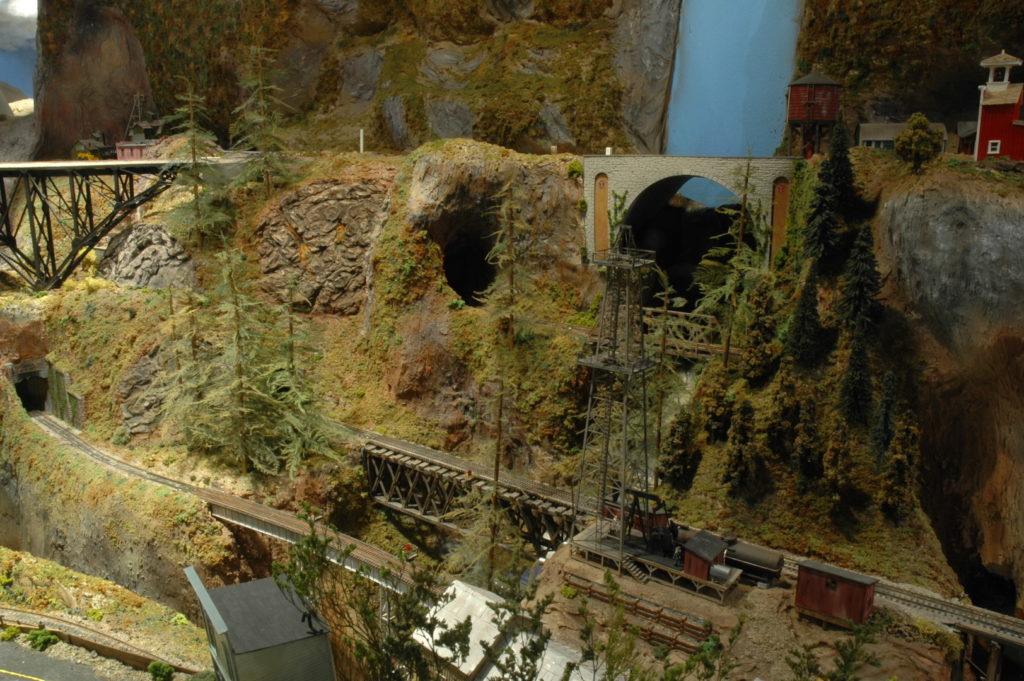
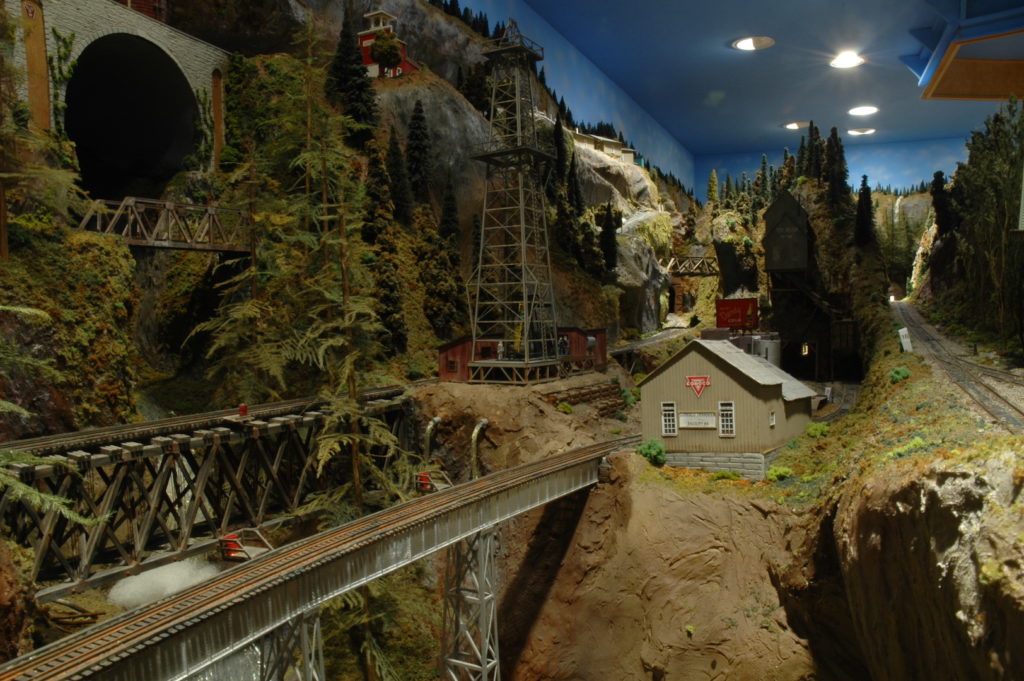
One of my favorite locations is the steep, narrow gulch that is next to Alpine on the layout.  This is my attempt to copy the famous French Gulch scene that was on the Gorre & Daphetid.  A swift moving river with several cascading waterfalls provides plenty of visual interest to this gulch.  Just like John Allen’s layout all four levels of the mainline traverse this area.  This creates an excellent photographic location, but also created a very difficult scene to complete.  Like with other areas of my layout there are lots of things going on in a very small amount of space.  Six bridges, 4 tunnel portals, and a major water feature all had to be carefully planned and executed.

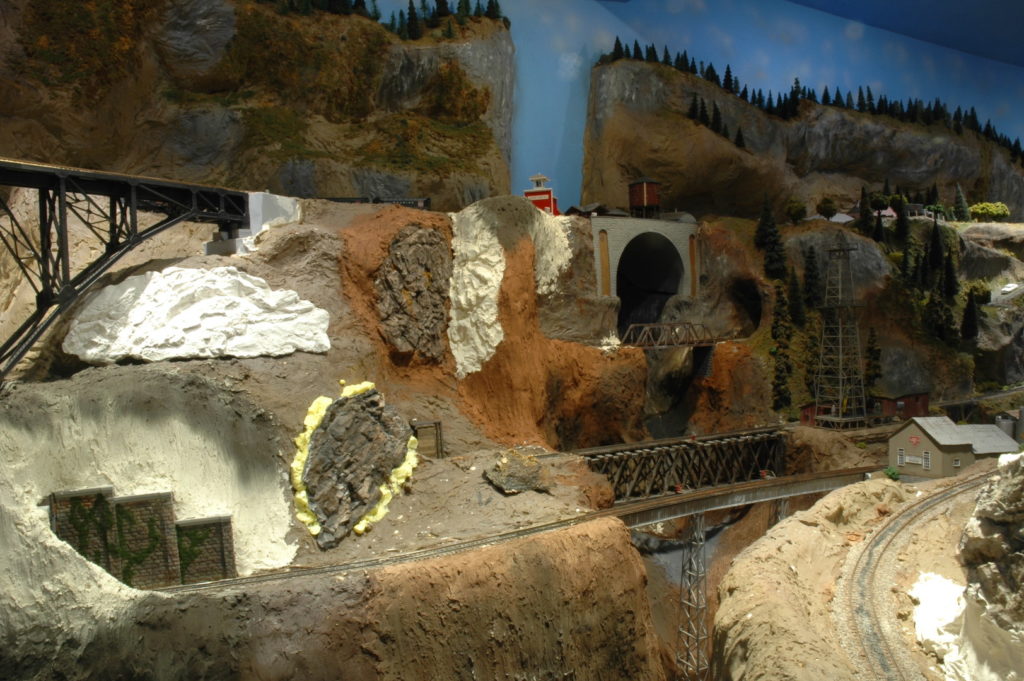
Photo 28 is probably very familiar since it was used in my last update but gives a very good view of the gulch in its infancy.  It also shows how I attached some of my rock castings.  I usually “glue” them in place with simple expanding foam, I then cover the exposed foam with joint compound.  Once the joint compound is dry, I then paint it with earth colors.  Later on, I blend the colors with other paints and ground cover.  I used to use primarily lacquer-based paints but have switched to more water-based paints.  Yes, there are 6 bridges at this location.  One is on the left, 4 are in the center of the photo, and the last is a small wooden trestle just past the oil rig.

Photo 28

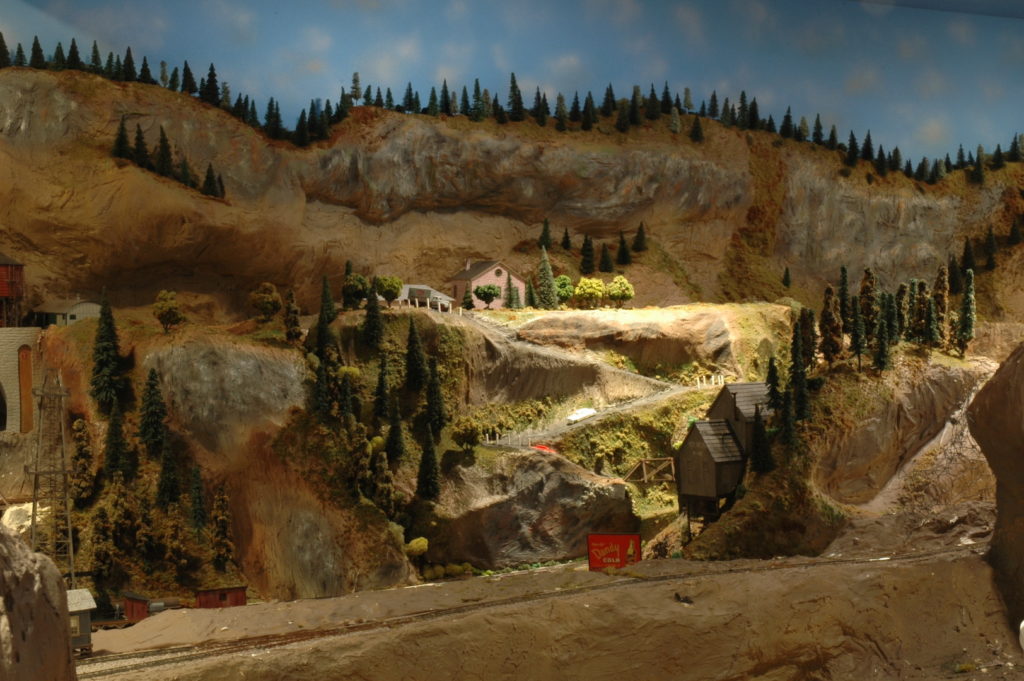
Photo 29 is taken from the Dry Gulch access hatch.  This view normally can’t be seen from any aisles.  The photo shows just how close the various towns are on the layout.  At the top right is Alpine, just to the right of the oil rig in the center of the photo is Potter Flats, and down at the bottom left is the town of Raade Springs.  The raised elevation of land that Raade Springs sits on completely hides Potter Flats from the front of the layout.  Using these types of scenery dividers helps with making the towns seem further apart from each other.  You can also see the completed rock castings and how they have been blended into the rest of the scenery.

Photo 29

Photo 30 gives you a close-up view of the bridges and the Conoco oil operation at Potter Flats.  It also shows how little space Potter Flats occupies!  Lots of tall timber trees surround the gulch giving it a wilderness atmosphere.  I made those trees following Jack Work’s method of using tapered wooden dowels.  Dyed asparagus fern “branches” are then glued into tiny holes drilled into the dowel.

Photo 30

Photo 31 is an “action shot” of a freight train crossing the steel trestle while Shay #9 pulls an empty log train over the wooden bridge.  The wooden bridge is scratchbuilt and carries my dual gauge line.

Photo 31

Photo 32 gives you an idea of the vertical separation of the tracks on the mainline.  Those little locomotives have some steep mountain terrain to climb!  This follows John Allen’s idea of using the same scenery on some of the sections of his layout for the mainline tracks.  Stacked multi-deck shelf layouts with divided scenery limits a photographer’s ability to produce dramatic photos.  John Allen’s method allows for continuous scenery between the levels to create photos with depth.

Photo 32

Photo 33 has the Dry Gulch & Westerns lone diesel in the photo.  I guess the engineer in Shay #9 decided to take a break since the locomotive hasn’t moved since the last photo!  When compared to photo 28, this photo gives you a good example of how the addition of rock castings, trees, and ground cover can change a scene.  Note how this photo really doesn’t need a backdrop, the layout, due to its depth, becomes the backdrop for this photo.

Photo 33

Next time we will take a second look at Potter Flats and the use of the mainline as part of the branch line. I will also show you the completed scenery in that area. There have been several subtle changes made in that location, so it warrants a second look.

David

David Yadock’s Dry Gulch & Western Update 5

Article & Photos By David Yadock

Dry Gulch & Western, Update 5

Moving along from my previous posting of the Wapwallopen area on my layout we find ourselves looking to the mountain mining town of Alpine.  This town finally saw completion early on during the Covid-19 stay-at-home mandates.  I decided to get this town completed since it is poised along the north wall of my layout.  Due to its location, it would be more difficult to install scenery once many of the other areas are completed in front of it.  Alpine required some scenery and several structures including its distinctive station.  Unfortunately, I do not have a very good “pre” shot of the Alpine area.  The ones I have included in this update will give you an idea of the scenery changes that have taken place.  Overall, the addition of two mining complexes and the witch’s hat station give this town its unique appeal.  Yes, this town is tucked way up high on the layout which makes switching the mining areas a challenge for the operators.  This town along with some of my other towns are located in what I consider my central mining district of the layout.  The Betterby mine is located on the west end of the town while the larger Izzit mine is located on the east end of the town.

The town of Alpine had some difficulties with both scenery blending and the many varying details needed to complete the scene.  This small section of the layout containing Alpine is only about one foot wide and 8-10 feet long. There is not much space for large structures even though it has a long combination passing siding and ore loading area.  Building flats would not look or work well in this area of the layout.  Additionally, that pesky mountain scenery background chews up most of the real estate for structures!

Photo 22 gives you an idea of the space and location.  Alpine is just to the upper right of the stone arch bridge.  In this “pre” shot I had several structures just placed in the area.  None of them were permanent.  As you can see, scenery was still taking shape.

Photo 22

Photo 23 gives you a straight on view of Alpine and the lack of scenery.  This needed to be remedied with more trees, ground cover, and structures.  A nice train station would help too!  The building at about the center top of the photo is no longer at Alpine since it was too large.  That structure was crammed into the available space and its placement looked very awkward.

Photo 23

Photo 24 gives a close-up view of the new station and some of the surrounding structures.  The station is actually quite compact but the turret spire with its witch’s hat roof makes it appear much larger.  The station fits between the mainline track and the siding.  It was completely scratchbuilt.  For those John Allen fans, the station mimics his “Angel’s Camp” station.  You can also see Jim’s structure in the background too!  Can anyone guess what item I used to top off the witch’s hat spire?  Don’t worry, I didn’t shoot my eye out with it!

Photo 24

Photo 25 is an overall view of the Alpine area.  The Izzit Mine complex is off to the far right of this photo.  Alpine has quite a few structures.  Please note that the central section of the layout just below the station slides upward to allow access to the Alpine area for maintenance.  The stone arch bridge is also removeable to allow access for switch motor maintenance.

Photo 25

Photo 26 shows the western side of the Alpine area.  Just above the steel arch bridge is the Betterby Mine complex.  It boasts a long siding which helps for switching and car storage.  The small white line about dead center in the photo denotes a fixed uncoupling ramp.  These are positioned throughout the layout to help operators know where the permanent ramps are located.  These rods can be removed for photos of the layout.

Photo 26

Photo 27 is a close up of the Betterby Mine complex.  It was constructed from a Campbell kit.  Again, this location has just a tiny amount of real estate for an online industry.

Photo 27

That concludes the tour of Alpine.  Next time we will look at the waterfalls and gulch area west of Potter Flats.  This location had lots of scenery that needed to be added or completed.  It also mimics the famous “French Gulch” scene from John Allen’s layout.  This was a key scene I wanted to have on my layout.

David