Grab Iron Posts

Seattle-North Clinic – Next Meeting is May 1, 2014

By Jeff Moorman

Please join us for our next meeting on Thursday, May 1, 2014. We are scheduled to have a discussion with a retired railroader whose experience ran the gamut from roundhouse laborer to road foreman. He has some great stories.

Last meeting I previewed a clinic, titled “Vision and the Aging Model Railroader”, which I’ll be doing at PSX2014 in June. It basically covered the effects of aging on the eyes, how those effects might impact model railroading, and what can be done to mitigate them.

Here is a high level summary of the key points:

  • This clinic is not “medical” advice
  • Make sure you see your eye care professional regularly
  • As we get older our eyes:
    • Have trouble focusing closely
    • Let in less light
    • Adapt more slowly to changes in the environment
    • Tire more easily
    • To deal with these changes we should:
      • Practice the 20-20-20 rule – once every 20 minutes focus on something at least 20 feet away for 20 seconds
      • Increase intensity of light
      • Use cooler [higher K] light sources that render color accurately
      • Make judicious use of magnification


For show and tell 7-year old Allison J brought along some freight cars she had built with the help of her Grandfather. Here’s a picture of one.  Notice her name in graffiti on the side.

Allison's Boxcar

Allison’s Boxcar

We meet at the Ronald United Methodist Church, 17839 Aurora Avenue North, Shoreline, WA. That is on the west side of Aurora (State Route 99) between 175th and 185th Streets and more specifically, between the Cadillac dealer on the south and Deseret Industries to the north. Going southbound on Aurora, make a right-hand turn into the church driveway immediately after passing the Deseret location. The parking lot is at the rear of the church. For regular meetings enter the lower, left side of the church from the rear lot.


Meetings are the first Thursday of each month, September through June. However in June we often do something different, like a layout tour. Doors open around 7:00 PM and the program starts at 7:30.

Remember the next meeting is May 1. Hope to see you there or at least sometime on down the line.

Eastside Get Together April Meeting

Ed Liesse / Photos by Ed & Lee Marsh

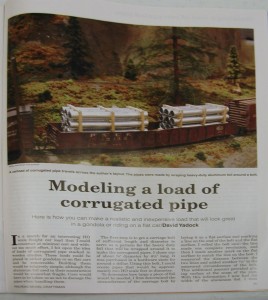
Our “Beloved Host” JJ Johnston welcomed everyone to the Eastside Get-Together and, following the script for our meetings, introduced the members of the 4D Board of Directors and the MMRs in attendance. He then mentioned a new product from Chooch Enterprises, a peel-and-stick flexible cribbing wall similar to the flexible stone walls introduced a few years ago and thanked Mike O’Connell for personally bringing some as door prizes. JJ also mentioned the article by our own David Yadock in the April issue of Railroad Model Craftsman on “Modeling a Load of Corrugated Pipe.” David shared this very model with us a couple of months ago.

Ken Liesse's cherry trees

Ken Liesse’s cherry trees (Click to enlarge)

Announcements included Ken Liesse telling about Tacoma Trains celebrating 20 years in business this coming weekend with a big sale; Russ Segner commenting on the 4D Ballot being in the mail and be sure to vote and reminding those attendees not yet registered that the PNR Convention is drawing near (June 18 – 21) with several fine prototype tours available as well as clinics, layout tours and other activities; Rob Jones said the SPROG’s are back in stock at Eastside Trains and brought a number of items available for purchase with an additional 10% off the price; Alex Brikoff talked about new projects in development under the Education Committee and needing volunteers to help carry them out; and Di Voss mentioned that a group of 4D members in Alaska are putting together a bid to hold a NMRA Convention up there, possibly 2019.

David Yadock's RMC article

David Yadock’s RMC article

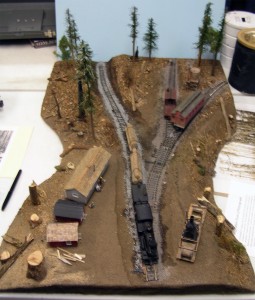
The Model of the Month had three entries plus several display items. Ken Liesse brought in several cherry trees he built using what he called the “Jack Hamilton Method,” using dried flowers from Michael’s as the base; David Yadock had his RMC article; and Bob Rorabaugh had a diorama inspired by a photograph showing the vanishing rails and other materials reaching toward a vanishing point on the horizon (you really had to see it to understand the concept!).

Bob was the eventual winner of the Model of the Month. The display items were: Russ Segner’s photographs showing the tram that ran from Newcastle down to Lake Washington bringing coal to the docks and one showing the narrow gauge railroad that ran to Renton; and, John Morrison’s large 2-8-2 modified locomotive that he painted since he last showed it several meetings back.

Bob Rorabaugh's vanishing point diorama

Bob Rorabaugh’s vanishing point diorama

After our usual short break for refreshments and looking over the “goodies” Rob brought, we regathered for a presentation by Lee Marsh on Helicon Focus Lite, a computer program that makes your photography look marvelous! As you all know, trying to take a photo of a stationary train by standing at the front of the train and shooting toward the end, it’s impossible to keep a nice sharp focus over the full length.

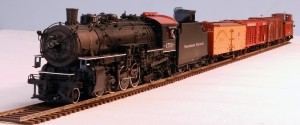
Lee Marsh's Helicon Focus demo

Lee Marsh’s Helicon Focus demo (Click to enlarge)

Lee set up a display train on a table to demonstrate how this program solves that problem. You do need a manual digital camera, a tripod and a cable shutter release or timed release of the shutter. You don’t want the camera to move once you have it set for the angle you want on the subject. You then select the f-stop and exposure time you want and then take a series of photos with a different focus point for each shot. Lee took 12 photos of the train on display to demonstrate. You then transfer the photos to your computer, run the program and watch the screen “assemble” the twelve photos into one photo that’s completely in focus! It was fascinating to watch the Helicon Focus program do its thing, and all in a matter of seconds!

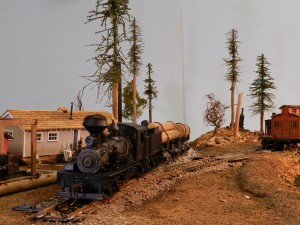
Bob Rorabaugh's diorama after Lee Marsh's Helicon Scan (click to enlarge)

Bob Rorabaugh’s diorama after Lee Marsh’s Helicon Scan (click to enlarge)

You can probably get a better explanation of this whole presentation from Model Railroad Photography – April 2014, provided by Lee Marsh. Lee also used Bob Rorabaugh’s diorama as another example. If you enjoy taking photos, this was a clinic that, in effect, kept you on the edge of your seat watching the presentation and anticipating the outcome!

The next Eastside Get-Together will be on May 15. The clinic will be presented by Inside Gateway hobby store owner Steve Depolo and the subject of weathering. Come join us!

Mail in your 4D ballot!

Michael Highsmith, Election Committee Chair

So far, we have received more than 125 ballots, but that’s barely 25% of what we mailed. You can do better! Please take a moment, mark your ballot, and send it in. Ballots are due May 10th, so you still have plenty of time. But get them in soon to avoid confusion over whether your vote counts. Thank you for your time and consideration.

April 2014 Skagit Valley/Whidbey Clinic

Article and Photos by Al Carter

Clinic Chairperson Rich Blake called the April 2014 meeting to order shortly after 7:00 pm with 40 members in attendance. Three new visitors joined us: Roger Johnson (HO) from Sedro Woolley,Wes Wilson (HO) from Oak Harbor, and Scott Barney (HO) also from Oak Harbor. Welcome!

Rich appealed to the audience for someone to step up and take over the job as snack coordinator, as Phil and Susan Gonzales have provided us with goodies for 7 years now and have decided they need a break. Thanks, Phil and Susan! Rich also asked the group for ideas for clinic topics for next season (September 2014 – June 2015), and the idea of an alternate meeting place once or twice a year was discussed. Another note: we average about 29 people per clinic, which is up considerably from an average of 5 per clinic in the year 2000.

The evenings clinic was actually a “Two-Fer” – two clinics on the agenda. First off, Norm Myers showed us how he has made several removable tunnels from his layout. Norm had to design these for access to some hard to reach areas of his layout. He starts out by making a gridwork form for the tunnel, out of Gatorboard, which is like foamcore, but will not bend or warp. He cuts it up and hot-glues it to the basic shape he wants, then covers the formwork with plaster cloth and finishes it up with the usual scenery methods. The result is a very lightweight and very strong mountain/tunnel that can easily be lifted off the layout. Norm brought several of his creations; one was near 5 feet long!
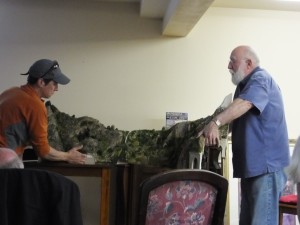
Rich Blake and Norm Myers easily moving one of Norm's removable mountains.

Rich Blake and Norm Myers easily moving one of Norm’s removable mountains.

Norm makes tunnel liners out of ¼” hardware cloth, which bends easily to the shape of the tunnel interior. The interior, or underside, of the mountain/tunnel is painted black, so it looks like the tunnel might be quite long.

Norm also regaled us with a tour of his layout. Norm has built 2 viaduct arch bridges out of pink foam, which were gorgeous. He also showed photos of a lot of buildings he has kit-bashed into building flats. Hmmm…  We’re seeing the possibility of another clinic or two here… Norm?

The second part of the “Two Fer” clinic was on roof top detail and materials by Al Carter. It was noted that although some layouts are made at eye level, most are lower and we therefore look down upon our layouts and our miniature structures. That brings the rooftop of the structure into more of a prominent view, and in many cases, these miniature roofs are quite neglected. It seems as if the default method of finishing a roof is to paint it black and stick a chimney on it.

Roofs are models, too. If we as modelers can spend a lot of time detailing the interior of a building (which is often hard to see even with interior lighting), we should be able to give a little more attention to our roofs. Besides chimneys, unless you are modeling in the “outhouse era”, your building probably should have some plumbing vents sticking up over the bathroom and kitchen areas. Very small tubing will work, or even just some brass or styrene rod painted black.

Air conditioners and HVAC systems are another detail that could/should be added, depending on the structure size and use. There are commercial castings available for this use, but also, one can make such details out of other items. For example, Walther’s 933-2120 Coke Containers sure look to me like they could be a rooftop HVAC unit. Same for Chooch Enterprises #7287 Tote Bins for Barium Oxide – perfect HVAC units. Of course, these need various piping and ductwork to make them look like they are in use, and a simple way to make ductwork is to save those styrene sprues from your model kits, file them to shape, and install. Also, not all rooftop “stuff” is painted silver.  White, light green, blue, tan, and grays are also common colors, even back into the 1950’s.

Roofs are not always black! Maybe back in the 1950s and prior, roofs were black when new roofing was applied, but even that doesn’t stay black very long. Some simple weathering if you are modeling in those early years will do wonders to add some variety to a roof. From the 1960s onward, different colored roofing materials became common, both residential and commercial. This helps us add some variety to our towns by varying the color of the roofs.
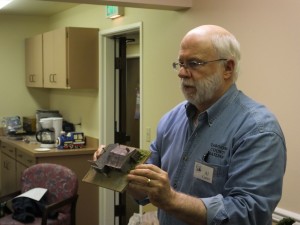
Al Carter showing a corrugated roof made from thin paper

Al Carter showing a corrugated roof made from thin paper

There is a huge variety of roofing material available to us modelers these days, including products from Rusty Stumps, Builders In Scale, Wild West Models, to name but a few. However, one can easily make rolled roofing from common materials such as ½” masking tape, newsprint, floral tape, etc, painted appropriately (not black!  Well, not all black…). My personal favorite method is to use toilet tissue (Cottonelle brand) cut into 3’ sized strips and laid over wet paint (gray, green), then finished with another light coat of paint, then weathered. It is important to note here to use toilet paper that does not have a pattern embossed in it. And for a “membrane” roof on a factory, try gift wrap tissue paper (the kind you find a new shirt wrapped in), glued down, then finished with a few applications of A&I (alcohol and India ink). Crumple the tissue paper first, then smooth it out before gluing down.

Finally, for those of you who use the internet, check out: CGTEXTURES.COM – this site has a huge variety of images of textures, including a bunch of roof textures. This site requires that you register (name and password; no credit card or any other stuff), and you can download any images you may want and save to your computer (there is a 15mb download limit per day). This goes beyond roofs, too, as they have images of concrete, roads, walls, metal, etc. This is a tremendous resource for us modelers.

These are but a few of the ways to improve our model roofs, and I’ve only scratched the surface on methods and products available. The important part is to break away from the “normal” and show some variety on your roofs. Experiment, and keep your eye open for other ideas for rooftop detail.

Next month’s clinic (May 14) features Dr. Nick Muff showing us how he adds working headlights and taillights to his fleet of HO vehicles, a clinic not to be missed!
Want to Learn Timetable and Train Order Ops?

Tom Enloe

Tom Enloe has been running Time Table and Train Order operating sessions for over eight years on his Pacific Northwestern layout. During this time, the PNW has hosted sessions on the 2nd Saturday monthly where operators from all around the PNR Fourth Division have gathered to enjoy an afternoon of fun, putting the layout through its paces. The PNW has hosted ops sessions for the PNR Cascadian International 2010 regional convention and operators from around the country for Soundrail 2012 and Soundrail 2014. It is planned to operate as part of the Portland 2015 NMRA national convention.

Recent completion of the Cherry Valley timber and mining line, and the relocation of a couple of regular operators, have created opportunities for new operators to join the current crew. A crew of 18 is needed to fully exercise the railroad. With that in mind, Tom is soliciting new operators to be added to the call list for ops sessions.

Come and Learn! Tom and his regular crew have always placed a strong emphasis on teaching and coaching folks in the various facets of operation, in particular, Timetable and Train Order. To this end, Tom and his crew have created three trainee positions for those with no TT&TO experience, or who aren’t yet comfortable with their operating skills. Trainees will be accompanied by an assigned coach during their first session(s) to coach them on TT&TO and the PNW itself.

If you are interested or have questions, contact Tom at 425-788-1291, TomEnloe@Aol.com or Steve Haas at 425-441-8541, Steve.Haas@comcast.net.


4d Board Meeting May 17

Russ Segner, Superintendent

The next meeting of the 4D Board of Directors will be May 17 at 1:00 PM at Mitzel’s Restaurant in Kent. The major focus of this meeting will be preparation of the budget for the next fiscal year. If you or your group within the Fourth Division has any requests for consideration, please email Sherman Stevens at shermanlss@earthlink.net. Include as much specific information as possible with rationale explaining your request.

As always, any 4th Division member in good standing may attend the meeting.

Mitzel’s American Kitchen
22330 84th Ave S, Kent, WA 98032
(253) 395-3635

Tacoma Clinic

Al Babinsky, photos by Chip and his Ipad

MMR Gene Swanson welcomed all back at our usual location which is a little more on the space side then last month location. We did not have any newbies at this time but did have a few junior modelers accompanying their dad and granddad and 40 regulars at hand.

Under the announcements we found out that there was free stuff available on the tables in back, such as G scale items, DigiTrax stationary decoders, GN reference material and old model railroader magazines. The Tacoma Clinic layout tour will be held on Saturday May 10th and is split up into two segments with a break for lunch in between. The layout maps will be available at 8:00 AM at the Pierce County Library Admin. Bldg. prior to the tour start.

One of our new features is; introduce your layout and invite fellow modelers to visit your layout when in the neighborhood, of course with prior announcement and you being available. Walt Huston introduced his layout which is in a building behind his house. The building has a double garage door which was required by Pierce County. His N scale layout covers all but 7 feet along one side which is used for workshop and storage.

Stu had the video library on hand, in order to get a video let him know what you want and he will bring it the next time. He will also convert the tape into a DVD if you prefer that but the DVD remains property of the library. He is also looking for a replacement librarian so he can pursue other endeavors.

What’s new at the hobby shop presented by Tacoma Trains and Bill Sandstrom had a number of items such as a SP work crane along with an idler car, a Bachman standard line decoder equipped Milwaukee road GP40, Athearn a five pack of N scale bethgons and cars from Micro Trains, vehicles and a book on the Milwaukee Road.

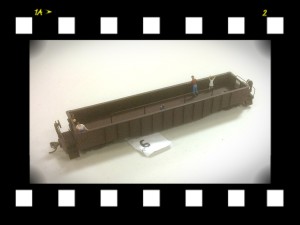
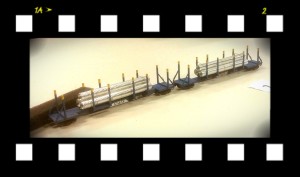
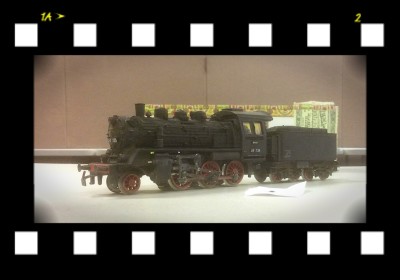
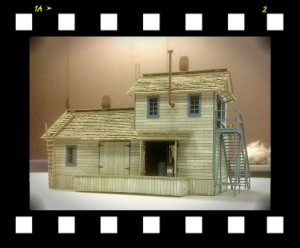
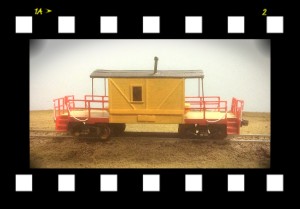
In the Bring and Brag category, Jim Clowers brought an old kit of Dollar Brothers Transfer Building. Dale Kraus brought a German steamer that he kit bashed from three separate locomotives. Walt Huston had two N scale lumber cars that he modified to carry culvert pipes, the pipes were made from tin foil wrapped around a bolt and the bolt was then un-screwed from the foil pipe. John brought an excursion car that he kit bashed from a gondola. Chip had a transfer caboose that he designed with the Sketch-up program which was used to 3D print the car. Jim Clowers was the winner of the Bring and Brag with his transfer building kit.

photo 4

After the break Jack Hamilton presented his clinic on the AP Program supported by an excellent slide presentation along with humorous comments. Very well done Jack and he probably won over a few to try and participate in the program, yours truly included.

Next month clinic will be given by Dale Kraus and is on Stumps; I’m stumped and will be at our usual location at the Pierce County Library Admin. Bldg. at the corner 112th Street and Waller Road at 7:30 PM. Hope to see you there and bring a friend to share in our hobby.

photo 1

photo

photo 3

photo 2

Lee Marsh Returns to Eastside 4/17

JJ Johnston

Following Lee Marsh’s fabulous home layout tour, Lee returns for a special clinic on using Helicon Focus to achieve incredible depth-of-field photographs. Lee will have an actual demonstration with his camera and computer. Everyone is invited to bring their camera and try it out. Camera must be able to manually focus to create focus stacking and be digital for computer downloading. We start at 7:30.

We hope to see you at our next Eastside Get-Together April 17. Don’t forget to file your income tax return before the 15th!

REMEMBER:  Eastside Get-Together, Thursday, April 17, Bellevue Foursquare Church

Glenn Farley, MMR, Stars at Eastside March Meeting

Ed Liesse

JJ Johnston, our exuberant leader of the Eastside Get-Together, welcomed about 35 attendees for the March meeting. As usual, he did his introductions of the officers and committee chairs of the 4th Division and the MMRs in attendance.

Asking for new attendees, he found three: Jerry Madsen who said he wasn’t new but hadn’t been there for awhile being busy as the VP of the Puget Sound Garden Railroad Society; Steve Kyle who is a “high-railer” came to see what we’re all about; Ben Wong who is looking for something to do after retiring! All were welcomed to the group and encouraged to join us again.

Announcements were made by JJ on the upcoming convention and the special building contest; Alex Brikoff, 4D Education Committee Chair, mentioned that the Video Library function was being moved to the Education Committee and looking for volunteers to help with the video library; Alex also hopes to create a database of clinicians and clinics; Rob Jones, 4D Membership Chair, said that membership was going okay so far; Ken Liesse mentioned that the Northwest Railroad Museum in Snoqualmie is looking for new volunteers for the conservation/restoration project they have going (both Ken and Russ Segner are volunteers at the Museum, Ken in Operations and Russ in Restoration); Rob mentioned that he could offer an additional discount on the items he brought from Eastside Trains.

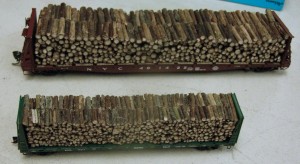
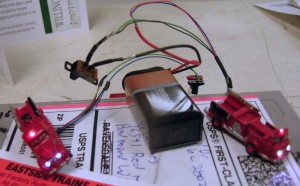
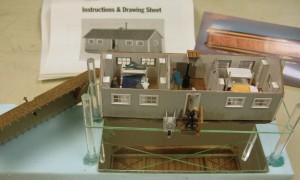
Model of the Month had three entries: Mike Donnelly displayed pulpwood cars using real branches for loads; Rob Jones displayed fire trucks in N and HO using N’gineering Products for lighting; Bob Rorabaugh displayed a logging camp car kit with many details. The ultimate winner of the Model of the Month was Bob Rorabaugh.

After a short break for refreshments and voting on the Model of the Month and looking over the items Rob brought, it was time for our feature presentation.

We were privileged to hear from the 4D’s newest MMR, Glenn Farley. He actually had two different topics for presentation, one on Coal Loads and the other on Realistic Headlights. He had projected photos to show his methods and examples for us to see and, in some cases, handle.

For coal loads, he makes a base from blue foam to fit inside the car or tender. In his case, several years ago he happened on a sheet of thin blue foam which he claims he will never use up! He cuts a piece to fit the car then shapes the sides and the ends to look like the basic shape of a coal load. This shape goes back to before the days of the current flood-type coal loaders being used in the PowderRiver Basin in Wyoming and other locations. He then coats the load shape with an acrylic artist color to cover the blue foam. For coal, he finds a lump of coal (we won’t say where he finds it), puts it in a strong bag or several bags and proceeds to pound it to small pieces. He uses several plastic pipe end caps with holes drilled in the bottom to serve as filters for the coal, decreasing the hole size on each end cap until he has the size of coal he wants. When he has the right size of coal, he coats a small area of his shaped load base with Testor’s Gloss lacquer and sprinkles on the coal. Then he moves up a little on the load and repeats the lacquer and coal application and repeats this until the load is covered. After it has a chance to dry he comes back and repeats the process to fill in any holes.

For realistic headlights, he uses MV lenses and incandescent bulbs rather than LEDs. He finds the center of the lens on the back and drills hole just larger that the bulb size. He then checks the bulb for fit and glues it in place. This procedure works quite well for the diesels. For steam engines he turns down a Lucite rod to fit into the lens, uses a hot soldering iron to form a mushroom end on the rod (sort of a lens shape) and then places the bulb behind the mushroom end. All this goes inside the headlight housing! Luckily, with all the photos and the examples he brought, it was much clearer than trying to put it into words!

We hope to see you at our next Eastside Get-Together April 17. Don’t forget to file your income tax return before the 15th!

Mike Loads Pix 2


Rob Jones Pix 2


Click images to enlarge

Click images to enlarge

4dPNR Ballots are in the Mail

Michael Highsmith

The nominations committee wants all 4dPNR Members to know that your 2014 Election Ballots are in the mail. They are ivory in color and will start arriving as soon as Friday, with many being delivered be-tween Friday and Tuesday. Some of our outlying members may take slightly longer. Please watch for them.

To be official, ballots must be postmarked by May 10th and received via mail no later than June 1. The election results will be announced at the Annual 4d Membership Meeting during the 2014 PNR Conven-tion. Thank you for your time and consideration.