Rich Thom, photos by Ted Becker except as noted
Clinic Chair Rich Blake welcomed 22 others to the SV & W Clinic’s May meeting at the Summer Hill facility in Oak Harbor. Rich reminded all of two upcoming NMRA events, the 4th Division PNR’s Spring Meet at the Sheraton Bellevue on June 6th (with layout tours on the 7th) and the NMRA National Convention in Portland in August. Jack Tingstad discussed next season’s model contest. The theme will be a flatcar with a load, with a scratch-built load as the main feature to be judged. The flatcar can be scratch-built, too; Jack mentioned that an excellent reference for building a generic wood flatcar can be found under Tutorials on the Kappler scale lumber website, www.kapplerusa.com. Detailed contest guidelines will be distributed in the fall.
John Marshall brought one model for Show-and-Tell, another piece of essential machinery for his F-Scale (1:20.3) sawmill: a stationary steam engine (Fig 1).
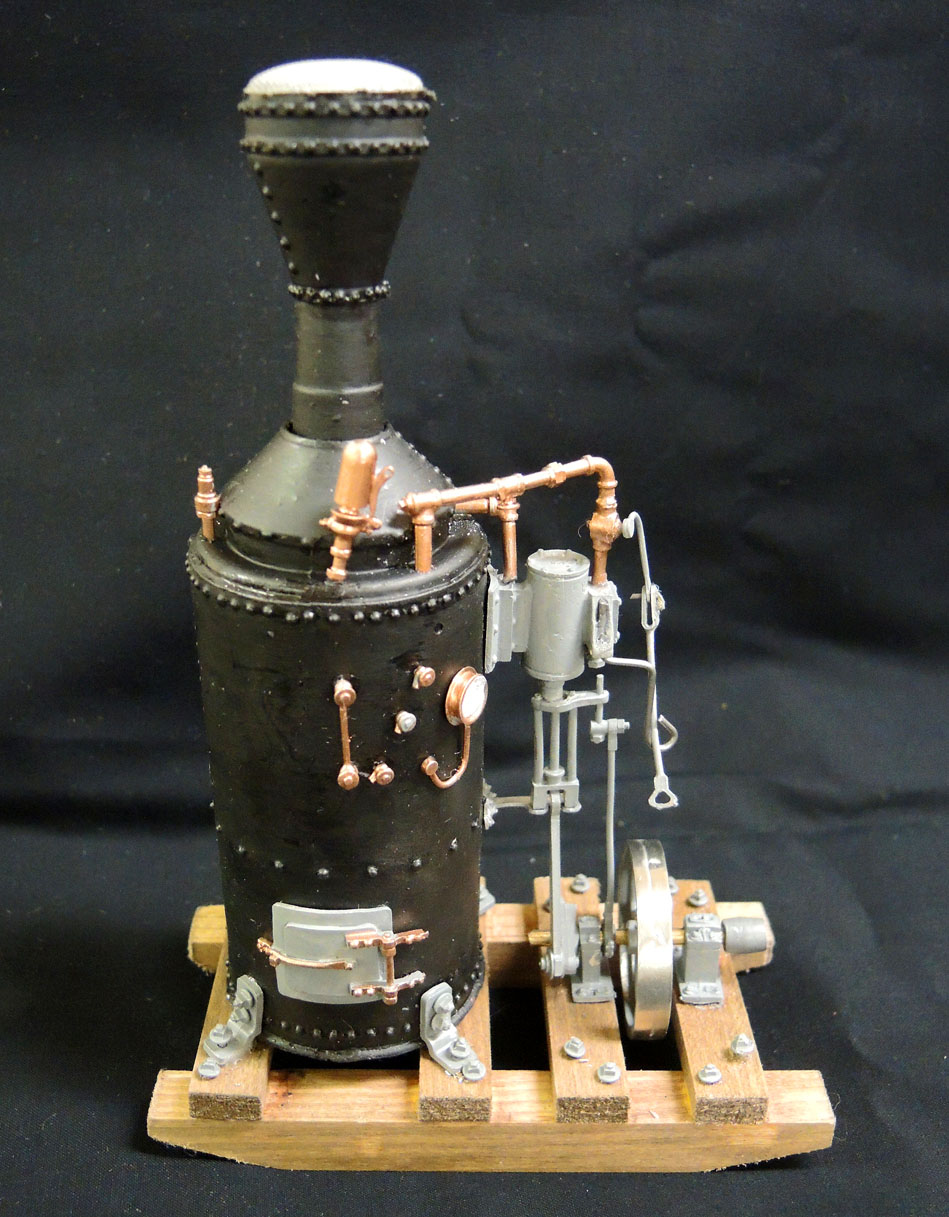
Fig 1 – John Marshall’s F-Scale Steam Power Plant (Photo: Rich Thom)
This is a kit from Ozark Miniatures, their “Frick Portable Steam Power Plant.”
Ted Becker presented the evening’s clinic “Utilizing R/C Servos as Switch Machines“. “Servo” is short for servomechanism — in this case, a mechanism that provides a mechanical output position controlled by an electronic signal and actively held in that position via a feedback signal. Sophisticated servos see widespread use in aerospace and other industries, but less expensive ones were originally developed and adapted for use in radio-controlled (R/C) airplanes.

Fig 2 – Smaller Size is One Advantage of Servos
One advantage of servos for model railroad applications is smaller size compared to commercially available stall-motor switch machines, such as the Tortoise by Circuitron (at left, Fig 2). Although an excellent product, it requires a fair amount of volume below the benchwork. Another servo advantage (Fig 3) is ease of installation, in a variety of possible orientations (discussed later).

Fig 3 – Ease of Installation is Another Advantage
The third advantage is possibly cost (Fig 4). The qualification is due to the fact that servos require an electronic signal provided by a servo controller or driver, so that the total cost per servo (the figure to compare to the cost of a Tortoise, for example) includes the cost of the servo plus the electronics to drive it.
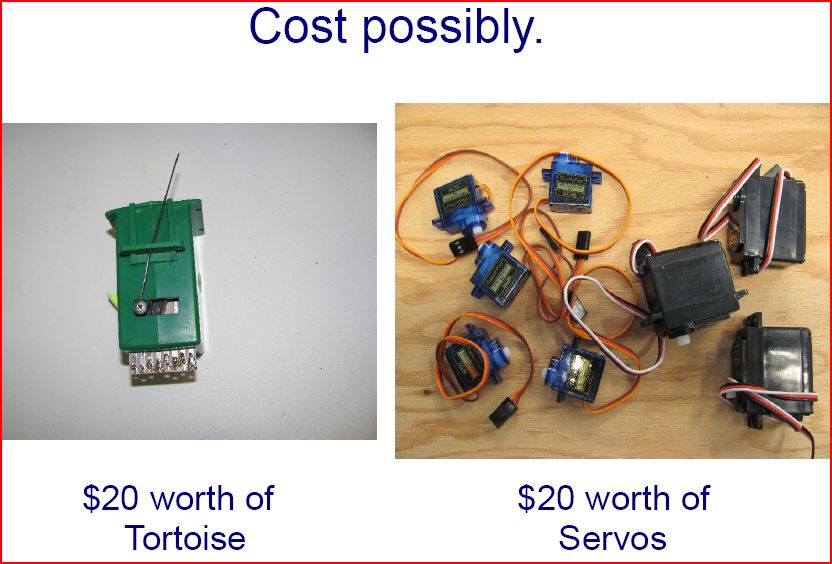
Fig 4 – Cost is Possibly a Third Advantage
There are many suppliers of suitable drivers, and the products offered vary widely in features and cost that result in a very wide spread in the final cost/servo for the modeler. Ted thoroughly researched the products of some of these suppliers which include:
- Tam Valley Depot
- Team Digital
- Iowa Scaled
- Micro-Mark
- ANE Smart Switch
- Berrett Hill Shops
- ESU
- MERG
- MegaPoints
- Arduino
Ted tabulated the characteristics, features and cost of the servo controllers offered by these suppliers, and then calculated the resultant cost/servo for each. The resulting table is too large to reproduce in this article, but interested readers can email Ted at rail.bird@att.net and request the spreadsheet. It also includes the website addresses of all the suppliers for exploring further.
The models available from these suppliers can drive anywhere from one servo up to as many as 48. Some are compatible with DCC, while others are not; some products also include relays (for powering frogs) whereas others don’t. The resultant cost/servo calculated by Ted ranges from a low of about $6, to $36 — quite a range, so buyer beware!
As a result of his research, Ted selected the servo controller product line manufactured by Arduino which, depending on the model, yield a cost/servo between $6.25 and $7.50. In addition to lowest cost of all the products on a per-servo basis, the Arduino boards are versatile and easy to program (a simplified version of C++). Arduino was developed, in fact, to make micro-controllers accessible to artists, students, and hobbyists without extensive digital circuit knowledge.
Back to the servos themselves, regardless of manufacturer the servos all have three wires with a standard color code, a connector with connections on 0.1” centers to match common header pins, and an operating voltage range of 4.8 to 6 volts. Mounting and installation can be accomplished in a number of ways. Some commercial mounts are available, but Ted makes his own, some customized to the location; again, the relatively small size of servos permits squeezing them into tight or awkward locations, such as the four examples on Ted’s layout shown in Fig 5.

Fig 5 – Four Installations of Servos in Tight or Awkward Places on Ted’s Layout
Installation requires selection of throw arm (available in a number of configurations and sizes) and wire linkage between the throw arm and turnout point tie bar. Depending on location, you can use (1) push-pull linkage; (2) “waving wire”; or (3) “pivoting wire” (such as the Tortoise employs). Ted finds that 0.032” and 0.047” diameter music wire is the most useful for linkage in HO scale, while the next smaller size, 0.025,” is too flexible except for some push-pull installations. Du-Bro makes 0.032” pushrods (wire within plastic tubing) for model aircraft applications which can also be used for switch machine linkage.
One of Ted’s “standard” mounts, useful for straightforward “pivoting wire” installations where the servo is below the sub roadbed, is shown in Fig 6. He cuts a 2” length from aluminum channel (e.g. Hillman Aluminum Trim Channel for ½” Plywood), and then drills a 0.045” to 0.05” pivot hole (#55 or 56 drill) for 0.032’ music wire, as shown in the figure. If you want to mount with screws instead of double-sided tape or adhesive, add two screw holes. The resulting simple mount is shown at the lower left. At the upper left, “Z-bends” in the music wire are typically used in the installations to secure the wire to the servo throw arm.
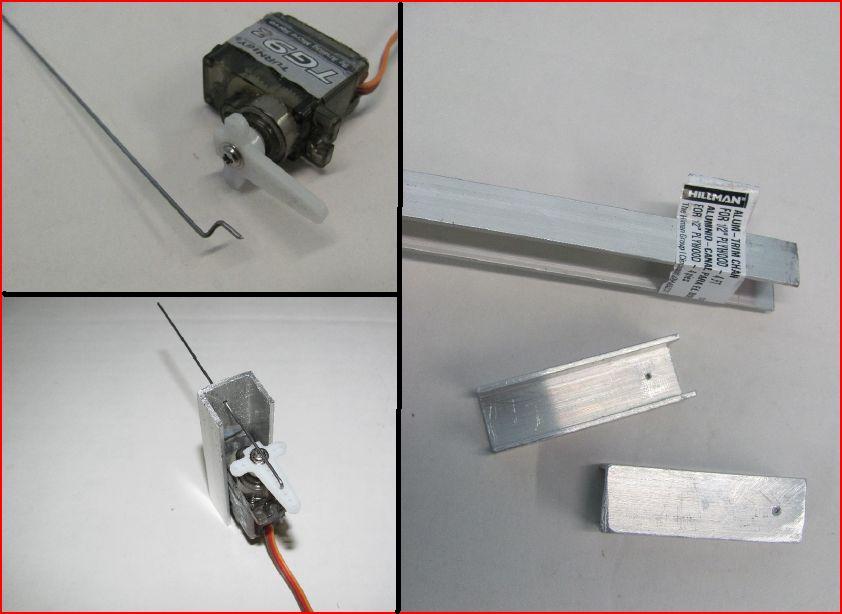
Fig 6 – One of Ted’s “Standard” Mounts Uses Aluminum Channel
Finally, if you want to power a turnout frog (or a signal), you can add a SPDT microswitch to the servo/throw arm assembly as shown in Fig 7.

Fig 7 – Adding a Microswitch for Powering Frogs or Signals
In summary, if you are planning a layout with a large number of turnouts where switch machine cost might be a factor, and/or have tight locations where their small size and versatility might be an advantage, consider using R/C servos!
No Comments Yet