Click here to read the November 2020 issue of The Skagit Valley & Whidbey Clinic Newsletter.
Grab Iron Posts
Bremerton Northern November 2020 Flimsy
Click here to read the November 2020 issue of The Flimsy Board from the Bremerton Northern Model Railroad club.
Seeking Lost Belongings
By Robert M. Martin
A good friend of mine, Jeffery D. Craig, passed away on May 8th of this year. Some of my belongings were being stored at his rental house. When I was informed of his passing some friends of the family had already packed up his stuff and moved it out. I was informed that a member, or members, of the Boeing club picked it up. But I am not sure. Does anyone in the 4D have any information about this? Please contact me at railroadbob55@gmail.com if you have any information that can help me find my belongings.
Here is the list of items:
- A homemade air-regular with a blue water trap on a yellow triangle stand. (I built this with a friend when I was in the navy).
- A white homemade paint booth, (I built when I was Jeff’s roommate).
- A red air compressor, (he borrowed for painting).
- A green footlocker (with some personal stuff inside).
- My old regular clock, (a gift to me in the 1970s).
- A model of a lighthouse with working light.
There is one last item that was to be passed down to the old guard, (the group). It was a passenger set: a Great Northern Empire train. Upon the wishes, of the last guards, we would like to see this train go to the Boeing club, that my friend Jeff has visited many times.
So I am asking for help from the 4th division membership to see if I could find my stuff. I know that one of the family members live in Puyallup, WA.
Thank you for your time.
Robert M. Martin
Life Member L5208 & L 4-221.
Thank You Mike
By Russ Segner
Thank you, Mike Donnelly.
I want to make known to all the Fourth Division membership my deep gratitude to Mike for his superb performance as our Treasurer. Mike has served in that position for 7 years. He has been diligent in reorganizing some of our approaches to budgeting as well as documentation of expenditures for reimbursements. Our finances are in good order.
Mike has been an active member of the 4D Ntrak modular group for many years. He designed their superb carrying carts for loading and storing their modules. Mike’s skills as a designer at Boeing came in handy when he measured and drew plans for the new wood cab for the rebuilt Northern Pacific 0-6-0 at Northwest Railway Museum in Snoqualmie. He is now preparing the working drawings for the new headlight.
Mike continues his volunteer work at the shops in Snoqualmie. Better yet, now he is busy expanding his home HO scale layout. It is designed for operation with an industrial theme of a railway in Maine. It will be well done I am sure.
Thanks again, Mike
Russ Segner, 4D Superintendent
Mt Vernon Fall 2020 Non-Clinic Report
Click here to read the Mt. Vernon Non-Clinic Report for Fall 2020.
David Yadock’s Dry Gulch & Western Railroad – Part 8
Article & Photos By David Yadock
Dry Gulch & Western, A Photo Series Part 8
I’m sure there are some of you that are interested in operations and how it plays out on my layout. At first, I was only interested in “running trains” and layout photography. After an invitation to participate in the Oly-Ops operating sessions from Ed Liesse my view on operations changed. I admit my layout wasn’t specifically designed for operational running of trains, but I have made some significant changes to lend itself to be more operations friendly. The two main yards were migrated closer to the aisles and additional sidings were added to the track plan.
Yes, being an operator on my layout requires some skill but running a freight or yard can be an enjoyable experience even for the novice. The easy jobs are passenger trains and fast freights. These allow a first-time operator to learn the basic operation of the layout and to determine exactly where cities/yards are on the layout. They also learn the location of critical passing sidings. Another element on my layout is tonnage. Yes, trains can stall on some of my main line trackage. Operators really need to follow their train and be aware of the tight curves on steep grades. This can cause a standard freight to come to a dead stop and just sit and spin its drivers. Some trains may need to double a mountain grade while other freights need a pusher locomotive to help with the grade. This is all part of the fun!
For the basics, I use car cards and the “mother may I” approach for dispatching/yard control. There is no distinct schedule for trains to run but that may change in the future. There are a variety of jobs, some can be easy, some can be challenging, but all are a lot of fun. The jobs range from passenger trains, mixed freights, peddler freights, fast freights, transfer runs between yards, branch line local runs, and a couple yard jobs. There are enough jobs for 6-7 operators. Operating sessions run about 1-1.5 hours. Now onto more of the layout tour.
Photo 36 shows the view looking down my large canyon. To the extreme left is my curved wooden trestle that carries the mainline out of Dry Gulch. On the upper right is the arch bridge spanning the valley where the town of Hayes River is located. The scenery in the foreground is still incomplete but most of the scenery further into the canyon is finished. For you John Allen fans this photo may remind you of his layout. Again, I tried not to copy his layout but to produce similar scenes. Please excuse the car cards sitting on top of the freight cars!
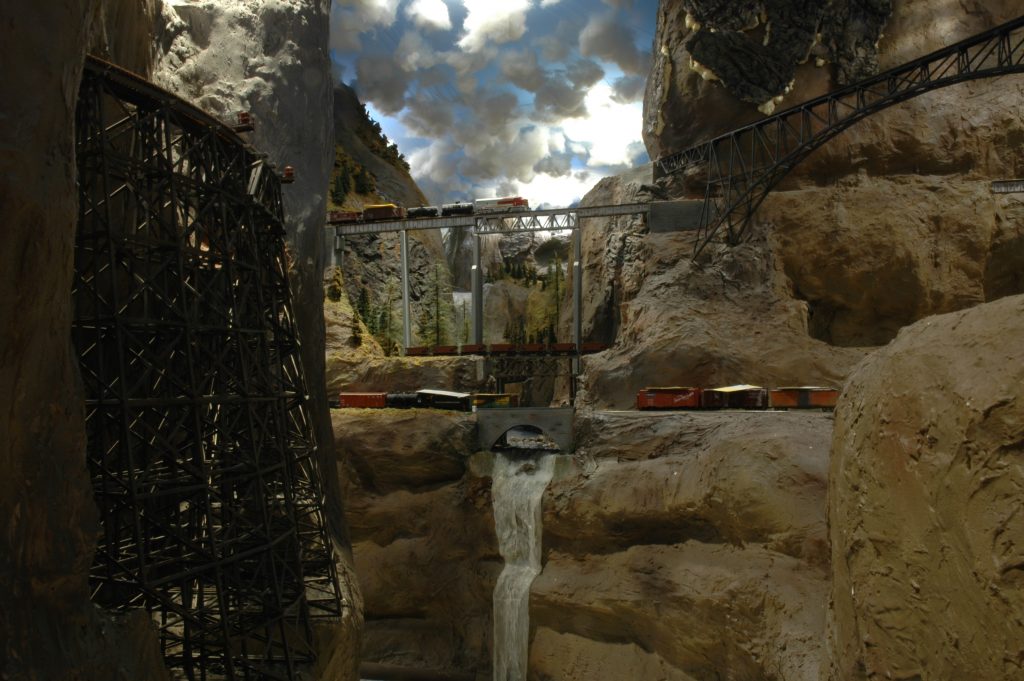
Photo 37 gives a low angle view looking at the town of Hayes River. A smaller yet to be named town resides higher up in the photo. During the Covid-19 stay at home situation I have done some plaster surgery in this area, so it has changed a bit from when these photos were taken. The track that has the ore cars on it is the narrow-gauge line leading to Electric City. The bridge in the lower right carries the mainline spiral around the mountain. You may note the white block with number 25 on it in front of the “Selecto” reefer, those marker buoys help identify the turnout on the control panel. These were a great suggestion made by Russ Segner. I did make them removeable for photos but since these photos were taken right after an operating session I chose to leave them in place.
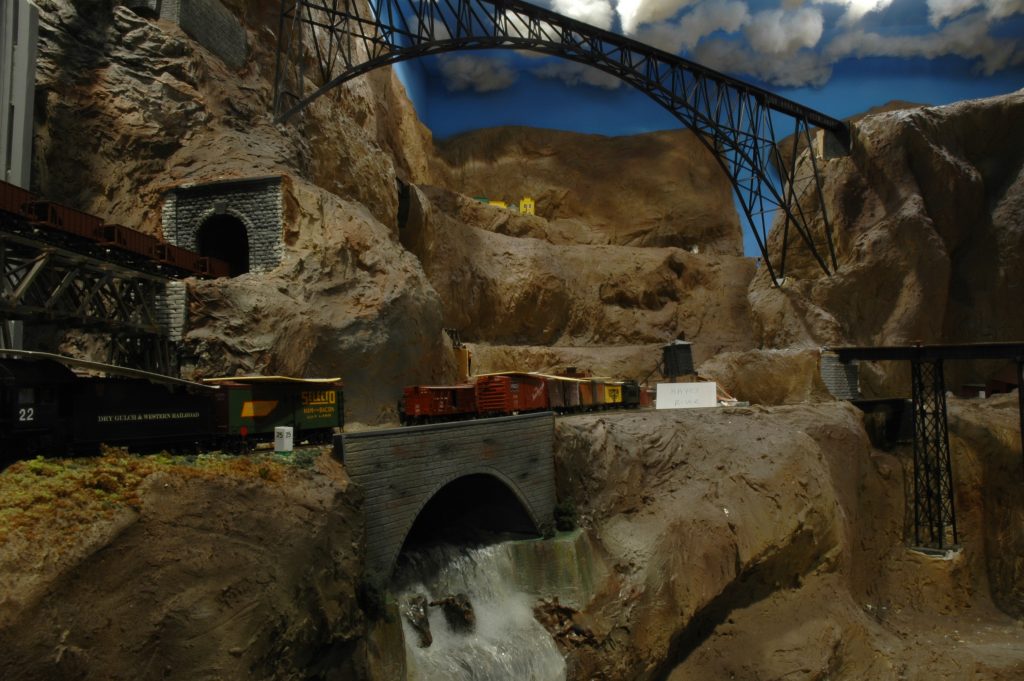
Photo 38 is a high view of the arch bridge. The town of Hayes River is below with its access hole. The “no name” town is in the corner of the room. Hmm, I have lots of scenery to complete!
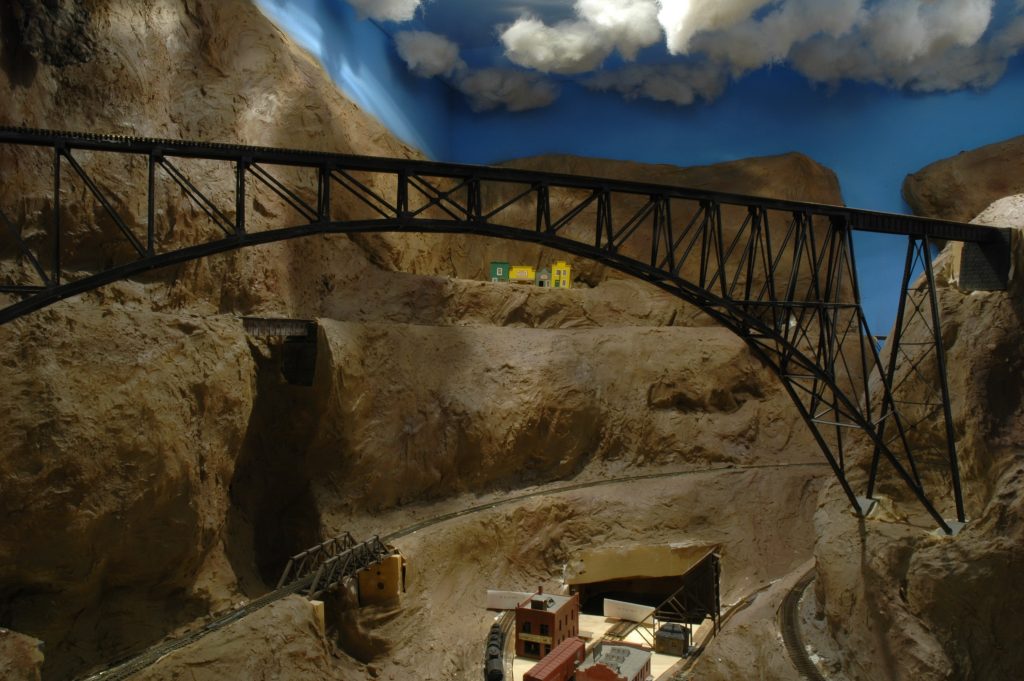
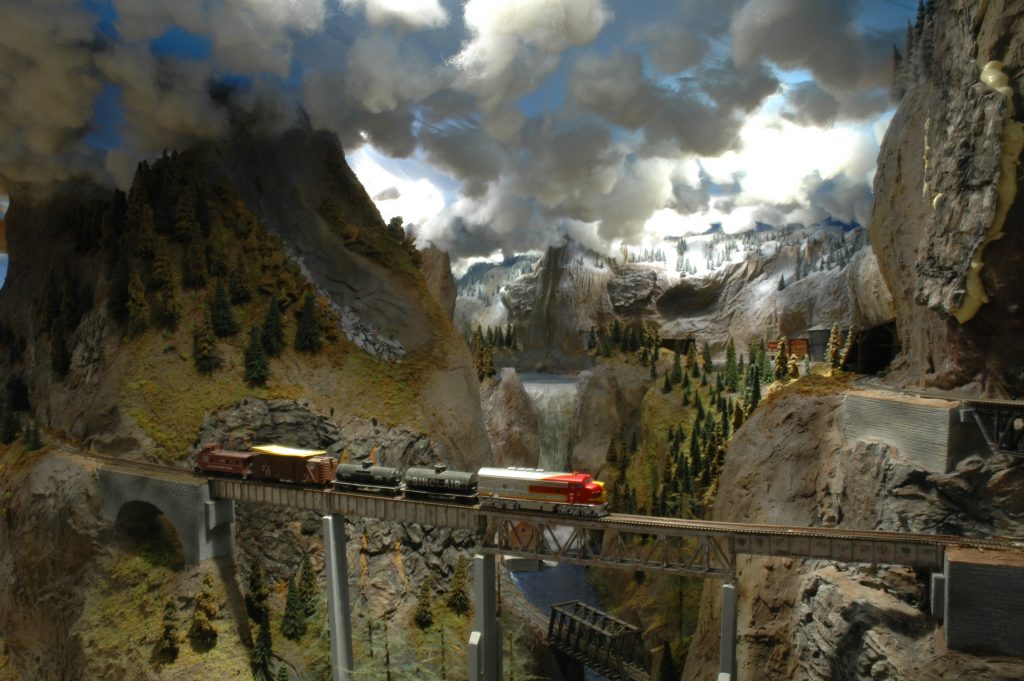
Photo 39 is a view of all the bridges that traverse the Hayes River. Way in the back is a wooden thru-span, up front is the silver colored high bridge, beneath it is the wooden deck truss that the narrow-gauge line uses, and finally up front is a stone arch bridge. The tunnel to the left in the photo leads to Electric City far in the valley by the tall waterfall in the background.

Photo 40 is a helicopter view of the valley taken just in front of the high bridge. This photo gives a better view of the wooden thru-span bridge from photo 39. On the right you can see the gray painted water tower and part of the town called Tallyn Pass. Most of it his hidden in this photo. It has a nice witch’s hat roof station. The station was built from plans of the South Lyon station that is still located in Michigan. You can also see the snow-covered mountains in the background. Can you spot where the mirror is located? How about the location of the access hatch? If any of you have seen my clinic called “Art of Deception” then you will know where they are located. Directly behind the mountain to the left is the small town called Electric City. It has a small station and an electricity generating facility at the base of the waterfall. The mountains along the wall in this area have multi-color LED strip lights behind them. Those lights can be turned on to produce a realistic sunset lighting effect.
Next time we will move further down the mainline. Could there be even more bridges?
David
October 14th Whidbey Island Virtual Clinic – Locomotive Kitbashing for Realism and Operations
Adding to the library of 4D online clinics, SV&W will be kicking off monthly virtual clinics starting this Wednesday at 7:00pm. Rich Blake will be describing some of his techniques modifying and detailing some of his steam locomotives to enhance their appearance as well as better operation. Disassembling and modifying a brand new locomotive can sometimes seem like a daunting task. Emulating a prototype and super detailing a locomotive can however be one of the more interesting and rewarding parts of your modeling.

This will be a Zoom clinic with link details below. For most people on a computer you just need to click the link below and run Zoom from a browser like Chrome or Explorer. After the presentation portion we will also allow time for short show and tell segments if you want to share anything. All you need is webcam and microphone enabled on your computer or device for sharing.
4dpnrOrganizer SkagitValleyWhidbey is inviting you to a scheduled Zoom meeting.
Topic: SV&W Clinic
Time: Oct 14, 2020 07:00 PM Pacific Time (US and Canada)
Join Zoom Meeting
https://zoom.us/j/98606087342?pwd=WDZnaWxuVHJvTWJwLzBzRjlMK1Brdz09
Meeting ID: 986 0608 7342
Passcode: 295294
One tap mobile
+12532158782,,98606087342#,,,,,,0#,,295294# US
Dial by your location
+1 253 215 8782 US
Meeting ID: 986 0608 7342
Passcode: 295294
Find your local number: https://zoom.us/u/acKkEO4FoH
Chuck Ricketts Fantasy Island Railroad – Parts 6, 7 & 8
Click here to read the eighth article on Chuck Ricketts Fantasy Island Railroad.
Editor’s Note: Parts 6 & 7 from the series were lost in transit and had not been posted. That has been straightened out and the links are included here in case you missed them.
Click here to read part six.
Click here to read part seven.
4DPNR Virtual Layout Tour on Saturday, October 10
Join us this Saturday, October 10, at 10:00am for another 4DPNR layout Zoom tour. This week features two of the region’s finest narrow gage layouts – Dale Kruetzer of Port Orchard and Ron Hopkins of Edmonds. Dale’s layout is an Sn3 version of a portion of the RGS, and includes detailed photo backdrops, hand laid track and scenery and structures that just don’t quit. Ron has a smaller but very fine On30 layout depicting the Olympic peninsula, and he will be showing us a number of structures he built next to photos of the prototypes that inspired them. Here is the zoom info to join the meeting:
Topic: 4DPNR Layout Tours
Time: Oct 10, 2020 10:00 AM Pacific Time (US and Canada)
Join Zoom Meeting
https://us02web.zoom.us/j/89029709298?pwd=N1Q1QjBobVN3bXVBTGFFcHRRT1lxdz09
Meeting ID: 890 2970 9298
Passcode: 461488
October 2020 Eastside Virtual Get Together Clinic
Eastside Virtual Get Together Clinic will be held on THURSDAY, October 15, 2020 at 7:00 PM (lobby opens at 6:45 PM ) PDT
I’m happy to announce our next Eastside Clinic will be held virtually on ZOOM next Thursday, 10/15, starting at 7:00 PM with our virtual lobby opening at 6:45 PM. We have switched back to Thursdays by popular demand! Since our clinics are virtual these days, I would like to extend an invitation to all the 4th Division to attend next Thursday. So be sure and save the date for the October Eastside Clinic next Thursday, 10/15 at 6:45 PM! The log in info for the clinic is below.
Topic: Eastside October 2020 Get Together Clinic
Time: Oct 15, 2020 06:45 PM Pacific Time (US and Canada)
Join Zoom Meeting
https://zoom.us/j/99423361465?pwd=WFBtL3YyRmZ0dzcyZEordlVkU3RRZz09
Meeting ID: 994 2336 1465
Passcode: 311592
Our Clinic this month is titled “Wiring for DCC” and will be presented by Max Maginness. Max will give a short history of DCC systems as based in the same standards in use today as have been available for more than 25 years. This clinic will give an overview of the basics and some of the “nuts and bolts” for wiring a layout as a refresher, but the main topic will be a discussion of the many practical building and operating items that still seem a little mysterious and even controversial.
After the Clinic, we will have some time for other folks to show off their latest model work in our “Show and Brag” segment. The Clinic will wrap up with some administrative comments.
Alex Brikoff, 10/08/2020