Newsletter Editor Moves on to OPSIG

Rich Blake

After six years of fantastic service to the Skagit Valley and Whidbey NMRA Clinic, our newsletter editor Al Frasch is stepping down to assume greater responsibilities nationally for OPSIG.

Over the years he has provided us with a very illustrative newsletter and has done a great deal to promote the hobby.  Many new members that we have received from the local area over the last few years were due to folks either seeing our newsletter here on the 4D website or at the local hobby shop.  We also saw the newsletter grow to not only provide information about our clinics, but also as a medium to showcase much of our member’s progress on layouts and modeling as well as interesting prototype information.  Al’s efforts set a very high standard and we were all privileged to have someone so dedicated to the job for so many years.  Volunteer efforts like this are what keeps our clubs and clinics going.

We wish Al good luck in his continuing volunteer efforts with OPSIG and always look forward to operating with him on his excellent N scale layout, the “Pilchuck Division of the BNSF.”

December 2013 Skagit Valley/Whidbey NMRA Clinic

Al Carter / Photos By Al Frasch

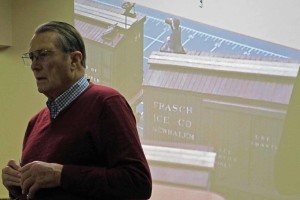
Clinic Chairperson Rich Blake welcomed all to our December clinic. He gave a brief rundown of upcoming model railroad related events in the Pacific Northwest, noting that the Fourth Division’s Pacific Science Center show will be held on MLK weekend, January 18-20 2014, and volunteers are always needed to help. Check the Grab Iron for more details.

Jack Tingstad reported that his annual open house over the Thanksgiving weekend was another resounding success – he estimates several hundred visitors came by to see his Cloud City And Western railroad and donated over 1000 pounds of food to the “Gifts From The Heart” food bank in Coupeville.

Al Carter gave a brief rundown on the upcoming PNR Convention to be held June 18-21 in Tacoma, WA and encouraged folks to attend. A great “warm up” for the NMRA National Convention to be held in Portland, OR in 2015.

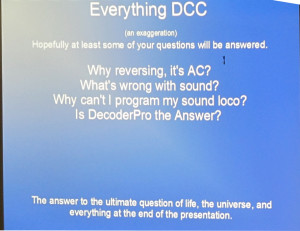
Ted Becker was the featured clinician for the evening, with a program titled “Everything DCC” – which was a general overview of the DCC method of operating model railroads. Ted had asked earlier for people to send him questions that he could answer to the whole group, but the response was, er, underwhelming, so instead he made up his own questions.

DCC Clinic Menue

DCC Clinic Menu

Among his “questions” was “What Is Wrong With Sound” (DCC sound decoders)? His answer, and this author is in agreement, is that sound decoders “out of the box” are generally too loud. When several sound equipped locos are running, they are filling the room with sound that becomes hard to distinguish. In Ted’s opinion, the decoders should be turned down so you hear the loco when it passes by you, but doesn’t overwhelm the room.

He also discussed the “keep alive” features that some DCC circuit boards are including these days (that keep the loco running when it encounters a brief dead spot, like a frog) – these keep alive features can create some programming issues.  ed mentioned some work-arounds.

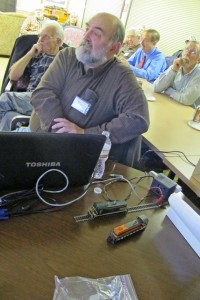
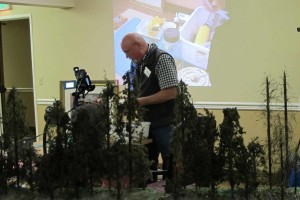
Ted Becker wowing the crowd with his DCC expertise

Ted Becker wowing the crowd with his DCC expertise

Ted also discussed the various ways to program a locomotive, and mentioned the new BLI Address Changer (but he hasn’t had time to review it yet), and the Sprog unit (from England). Ted then went into a brief overview of Decoder Pro, and brought it up on the computer and screen so we could all see how easy it is to use. Ted had brought a small test system with him and actually used Decoder Pro to make some changes to the loco.

Ted suggests for help using Decoder Pro, you have several options – you can peruse the JMRI pages on the web, type questions into a web search engine, download the full manual, or join a Yahoo Group on JMRI and/or DCC systems. Plenty of options are available.

As there was a little time left over, Ted gave a brief ad-libbed overview of JMRI’S Operations software and how it can be utilized to make operations orders and switch lists. For more info on the JMRI Operations Software, see: http://jmri.sourceforge.net/help/en/html/apps/PanelPro/PanelPro.shtml

The January 2014 Clinic starts the new year off with a presentation “Be A Rock Star – Make and Take Rocks” by Jim Tartas on using the Joel Bragdon Geodesic Foam/Resin method of making rocks. I’ve seen Joel Bragdon give demonstrations on this method before and it is certainly an intriguing way to produce some great looking rocks without all the mess of using plaster or hydrocal. Don’t miss this clinic!

November Skagit Valley & Whidbey NMRA Clinic

Tom Buckingham / Photos by Al Frasch

Rich Blake started the meeting to a new record in attendance—43. This month’s feature Clinic was by Al Carter. Al had just returned from a Seattle to Australia repositioning cruise with his wife Nona. His comment: “hot, humid and fabulous!”

Record Crowd

Al’s clinic was on building hydrocal structures. Al feels that there is a stigma about hydrocal structures that is not deserved. There are any number of sources for excellent hydrocal structures and in Al’s opinion the finished kit is oftentimes more realistic that it’s wood or plastic counterpart, especially stone and brickwork. It is easy to get good sharp details. Hydrocal is also easily kitbashed. On the negative side hydrocal is more easily breakable and does have significant weight—particularly if you are intending to use one or several in a module! (Plaster, like plaster of Paris, is much like hydrocal but is softer.)

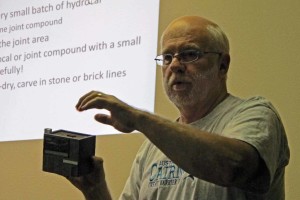
Al Carter on a roll

The tools one needs to work with hydrocal are 220 grit sandpaper and a flat surface to mount it on; flat files, sanding sticks and emery boards; a scribing tool and/or a dull hobby knife; bar clamps; weights; a small square, steel straight edges—both 6- and 12-inch lengths; yellow carpenter’s glue or epoxy; 1/4″ square stripwood for corner bracing, spray primer; and spackle.

When beginning construction dry fit the pieces first. It will most likely be necessary to remove “flashing”; use your flat files to make the edges straight and flat. Cut corner braces or gussets and test fit one more time before beginning the gluing process. Have your bar clamps ready, glue one corner together and add strip wood for strength. Next, add the other walls and strip wood. Finally use your bar clamps to hold it firmly together, making sure the structure is square.

Once the structure is complete you will need to fix the joints. Mix a small amount of hydrocal or use joint compound. Mist the joint carefully. Apply the mixture with  a small spatula. When the mixture is semi-dry, carve in the stone or brick lines at the corners.

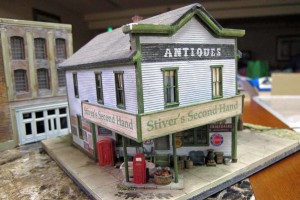
Stiver's Second Hand Store

Next, add the mortar. Several methods work—use a light grey paint, use slightly diluted joint compound or use your underlying primer color as the mortar color. Finally drybrush on the color of the bricks.

If by chance you break a piece, don’t pull your hair out (not an option I have). First check with the manufacturer. Many replace parts at no charge. If that is not an option use yellow glue sparingly and brace the back side thoroughly.

Paradise Apartments

There are different schools of thought on priming before painting. CC Crow and Downtown Deco recommend priming first, while others do not. Al showed two test pieces that he had done. On each he had primed half of the piece and left the other half unprimed. It was difficult to see any difference in the two. If you do prime, Al suggested using Wal-Mart’s “Color Place” primer. It is about $.96 per can.

There are several sources of hydrocal kits and many of the sources have online help and tutorials:

Downtown Deco http://www.downtowndeco.com/

C.C. Crow http://www.cccrow.com/

Guts, Gravel & Glory

Morse Productions http://morseproductionsproducts.blogspot.com/;

Thomas Yorke http://trevorcreek.tripod.com/

Cibolo Crossing; Motrak Models https://www.facebook.com/pages/Motrak-Models/134023453307135

Railroad Kits (Ed Fulasz) http://www.railroadkits.com/

South River Model Works http://www.southrivermodelworks.com/

Other sources include: Mike McNamara http://mainecentral.blogspot.com/2011/03/hydrocal-structure-kits.html

and Dioramas Plus http://www.dioramasplus.com/site/

A very informative clinic by Al and one that will encourage me to dig out some as yet unbuilt Ed Fulasz hydrocal kits!


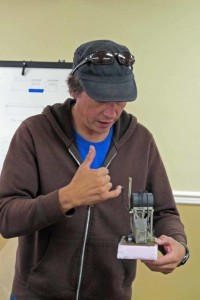
Finally, Bob Farley had a couple of  interesting items to share. First he showed us a Proto 87 turnout that he had constructed and automated. And then he showed us his HO scale locomotive that runs on an RC battery. He says he gets about 30-45 minutes out of each battery. The best part is there are no reverse loops or shorts. And it is all run by his wireless Digitrax system. He was even willing to run the train across the floor for us! Thanks, Bob.

October Skagit Valley & Whidbey NMRA Clinic

Tom Buckingham & Al Frasch / Photos by Al Frasch

Rich Blake kicked off the October Skagit Valley & Whidbey NMRA Clinic to more than 30 eager model railroaders by reminding everyone of the full slate of fall swap meets, expo’s  and clinics. Of note were the Pacific Northwest Railroad Prototype Modelers Meet “Rail By the Bay” on October 26th,  The Anacortes & Fidalgo Model Railroad Club’s 18th Annual Open House on November 2nd and 3rd,  The Boeing Employees Model Railroad Club Swap Meet on November 9th and finally the Burnaby, British Columbia  2013 Model Train Show & Meet November 9th & 10th.

The feature presentation was the much heralded Four Mini-Clinic Clinicfest. The first presenter was John White discussing “Dry Print Lettering for Rolling Stock and Buildings.” John had a nice handout of all the tools and materials required to do a professional-looking job. He started by the choices in fonts and colours (the spelling is out of respect to John). Though there are two good “railroady” font choices—Gothic and Roman, John urged us to choose only one or “inevitably a Gothic letter will end up in a line of Roman print.” Although the fonts are available in White, Black, Red, Yellow, Silver and Gold, John said he had had no luck with Gold with very high wastage. John WhitePerhaps the most valuable part of John’s comments were his tips that only experience can bring: Choose the name of your pike carefully—there are only two “V’s” per sheet; write down what you intend to decal—sometimes you have to spell backwards (try spelling Skagit backwards quickly without looking!); use a piece of blue or white masking tape to mark the edge of the lettering but be sure to cut off about ¼” so no “hairy” bits stick out on the original tape edge; don’t miss space between words; use a clean (preferably white) piece of paper towel to place on your workbench to prevent the decal sheet from picking up dirt form your workbench; and lastly check your work before burnishing the letters. John closed by discussing difficult locations and repairs.

The second presenter was Rich Thom with “Having Fun in a Cramped Space”  Rich talked about some problems encountered when he tried to cram too much operation—and too much track—in a small room: lots and lots of no. 4 turnouts; wye turnouts; tracks too close to layout edges; 4.5% grades, etc. Lack of planning also placed L-girders directly beneath a series of turnouts, so when he decided to use Tortoises to throw them rather than oversize ground throws, he had to make a number of simple brackets to extend the “reach” of the switch motors. They are simple and versatile and can be used in any situation where one needs to locate a switch motor some distance away from what it is moving. Rich wrote an article for the April 2013 Model Railroader on construction of the brackets (page 60).

Cliff Aaker

Our third mini-clinic was by Cliff Aaker on “Making Hemlock Trees.” Using bamboo skewers for tree trunks, Cliff first runs a bead of glue along the skewer where he wants the branches to be. Next he takes fibers that he has separated from a hank of manila rope and cut to approximate limb length and sprinkles them randomly on the  now sticky tree trunk. After that dries, he trims the limbs to a reasonable and appropriate length and dips the entire skewer in a dark walnut furniture stain. When the stain has dried he rotates the tree branches in glue and then sprinkles them with his favorite tree foliage. Cliff had samples at the various stages in the process with him and it took an unbelievably short time to produce a very realistic hemlock.

Rich Blake

Finally, what do the following items have in common: the foil from wine bottles, aluminum cut from pop cans, coffee stir sticks from your favorite barista, plastic bottles, dog toy stuffing, pencil shavings, used guitar strings, short lengths of solder, rhododendron cuttings, and rotted wood? We found out when Rich Blake showed us how he does “Scratchbuilding with Common Materials.” Rich told us how as a young modeler he had little financial resources to buy the “proper” materials so he used his imagination and commonly available materials to get the job done—always at a cheaper price and often better looking that the “real McCoy.” One example was to make door hinges complete with bolt heads using the foil from wine bottles and a dulled map pin. Another was using pencil shavings colored with acrylic paint to make clumps of flaking foliage. Finally he showed how he used an old dead Walkman to scavenge parts that can be used on models.

All-in-all a fun night in Oak Harbor.

Skagit Valley and Whidbey MRSR Trip Report

Rich Blake

35 members and guests of the SV&W Group attended the Mount Rainier Scenic Railroad’s annual “Rails to Ales” trip on 28 September 2013. This trip was planned and coordinated by the SV&W’s enthusiastic program coordinator Susan Gonzales who is also friends with the MRSR’s Chief Mechanical Officer, Stathi Pappas.

SV&W enjoying beer and brats

SV&W enjoying beer and brats

We rode by charter bus from Mt.Vernon to the MRSR shops in Mineral, Washington where we were greeted by Stathi and his crew. We were treated to a private shop tour with Stathi, where he explained many of the workings of the shop and the various projects that the MRSR is working on or completed. The MRSR shop is arguably the most qualified and best-equipped facility on the West Coast specializing in logging and short line steam engine repair and restoration. Under Stathi’s guidance, the shops and museum grounds have been extensively reconditioned to provide a professional presentation to visitors, while maintaining a top quality repair and restoration facility.

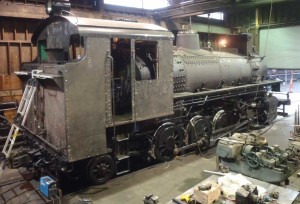
Hammond Lumber Co #17 undergoing restoration

Hammond Lumber Co #17 undergoing restoration

We saw MRSR’s own Hammond Lumber Co. #17 2-8-2T locomotive undergoing its full 15 year rebuild and observed some peculiar narrow gauge wheels being turned on one of the biggest lathes on the West Coast. The wheels are for the Southern Pacific #18 narrow gauge locomotive being restored by the Carson and Colorado shops in Independence, California. MRSR has been contracted by the C&C shops to provide this unique service.

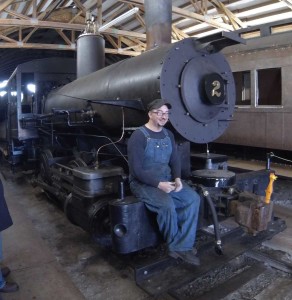
Stathi then showed us his “personal” loco, a small 45-ton Porter 0-4-0 tank loco that will be restored to operating condition. Stathi’s goal with this project is to take advantage of the Porter’s relatively small size which allows it to be trucked or hauled by rail to many steam-up events around the country, where it can operate for special occasions. We can call him a 1:1 scale model railroad enthusiast, for sure.

Polson Logging Co #70 current active excursion loco

Polson Logging Co #70 current active excursion loco

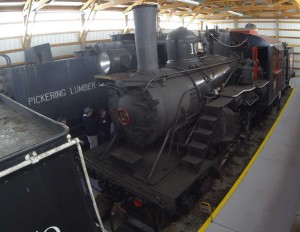
Our last portion of the shop tour took us into what I call the “Geared Loco Hall of Fame.” This building houses the only collection of the four major North American built geared locomotives in the world. Shay, Heisler, Climax and Willamette are all represented and in different stages of restoration, repair or operating condition. There was a lot of learning and questions answered for those not as familiar with these great logging beasts. It is truly a privilege to have a world treasure like this in our own state and maintained by the dedicated shop staff and volunteers at the MRSR. Detailed information on these locos can be found here. http://www.mrsr.com/historicalcollection.html

Hillcrest Lumber Climax #10 in the Geared Loco Hall of Fame

Hillcrest Lumber Climax #10 in the Geared Loco Hall of Fame

After our interesting shop tour, we headed to Elbe and the MRSR Depot, where we boarded a train headed by the beautifully restored Baldwin 2-8-2 #70, formerly of the Polson Logging Co. We were then served beers and other less interesting beverages as part of the Rails to Ales event. The weather tried to make itself known a couple of times, blowing trees down across the tracks. The MRSR train crew is more than familiar with this nuisance and quickly applied some chainsaw action to the downed trees and opened up the line in a matter of minutes. It was exciting to ride the train in such formidable weather with the wind howling, the river swelling and the loco barking out its protest to the conditions. A very Northwest railroading experience, to say the least.

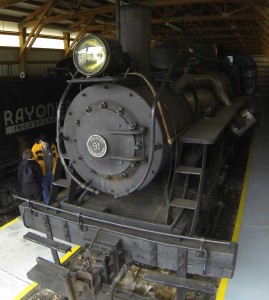
Heisler #91 is scheduled next for restoration

Heisler #91 is scheduled next for restoration

The loco brought us back through the torrential downpour across the mighty NisquallyRiver to the MRSR shops, where we then had a nice sit-down picnic under cover with, of course, more beers. After our fill of food and music, we headed back to Elbe onboard the train through more heavy rain and impending darkness. Not a photo run-by type-of-day, but one that made us appreciate the dedication of the MRSR volunteers in these trying conditions.

MRSR CMO Stathi Pappas describes his 0-4-0T Porter loco project

MRSR CMO Stathi Pappas describes his 0-4-0T Porter loco project

We boarded our bus and headed back home. A long day, but one well worth the journey. Everyone had a great time. Thanks again to Susan Gonzales for setting the trip up and the MRSR staff for their continued excellence in the railroad museum and excursion operations.

Videos

Poulson Logging 70 Hauling the Rails to Ales train

MRSR Shop Tour Gallery

Skagit/Whidbey Clinic, September, 2013

By Al Carter / Photos By Al Frasch
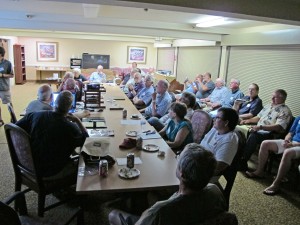
Clinic attendees eagerly listening to Rich Blake start the new clinic season

Clinic attendees eagerly listening to Rich Blake start the new clinic season

The first Skagit/Whidbey clinic of the 2013/14 season found a group of about 30 attendees ready to get back to model railroading, after the wonderful summer we all experienced.  I know I didn’t get much done in the train room over the summer, but I have been surveying my back yard with respect to installing a garden railroad.  Nice summers will do that to you, you know…

Clinic Chairman Rich Blake welcomed folks, and acknowledged the contributions of several folks who work behind the scenes with Rich to make this clinic so successful.

Announcements included a reminder of the upcoming, September 28 group field trip to the Mount Rainier Scenic Railway (contact Susan Gonzales if you are thinking of maybe going – there may be some seats available).

Rich introduced several new members:  Elizabeth Marshall of Oak Harbor (1:48 scale), and three HO modelers from Anacortes:  Dick Schussler, Frank Thompson, and Bob Easton, all of whom live at Chandler’s Square, and came down to the clinic with Bob Fulk, resident manager at the facility.

Al #2 (Al Carter) spoke briefly about the upcoming PNR Convention in June of 2014, to be hosted by the Fourth Division.  Al also mentioned the special “Marshalls Shipping” contest at the 2013 PNR Convention in Boise, that he, Ted Becker and Jack Tingstad attended.  Al and Ted both entered this contest, in which entrants started with a Marshall’s Shipping structure from Railroadkits.com and altered it to create a different business.  Al made his into an “out of business” small engine repair company, and Ted made a boat building company that had expanded its product (the boat), but not the doorway to the building, so the boat was built but could not be removed from the building.  Ted won the Most Humorous Award with his structure – Congratulations!

Al #1 (Al Frash) showed off some N scale mailboxes he had built through Shapeways.com, a company that produces 3D-printed products in various scales.  Go to their website and check it out – this is an up and coming technology that is here now and rapidly expanding.
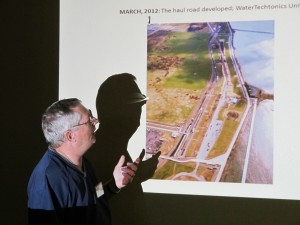
Bob Gilbert describing the beginning of the Tesoro Refinery Rail Expansion project

Bob Gilbert describing the beginning of the Tesoro Refinery Rail Expansion project

Our guest speaker/clinician for the evening was Bob Gilbert, Manager of Railroad Operations for the Tesoro Refinery in Anacortes.  Bob regaled the attendees with some background regarding moving the Bakken crude oil from North Dakota to Anacortes, then Bob showed a number of photos of the actual construction of the facility.

Typically, railroads prefer to use a balloon (or loop) track arrangement to bring in the trains for unloading, but due to the available “footprint” of land available at the Tesoro plant, this new facility was constructed as a long and narrow plant.

Once the environmental concerns had been addressed (and there were a lot), construction started.  This is more than just some flat tracks laid out on the ground.  There is a vast network of underground piping, and a huge rubber membrane, plus various concrete vaults and retaining walls in place to both move the crude oil, and to ensure protection for the ground if there were a leak.

The rail yard was built on top of all of this, and laid out as four separate unloading tracks.  The track is CWR (Continuous Welded Rail), 136 lb/3 ft, and there is over 29,000 feet of track in the rail yard, laid on concrete ties (John White was beaming at this news).   The only non-concrete ties on site were used under turnouts, which were pre-fabricated on site and slid into place (They looked like Atlas Code 100 to me).  The unloading “pad” is all concrete and measures 110’x1600’.  There are two more tracks alongside the unloading pad that are used to reassemble the 100 car trains for their return journey across the country.

About the trains:  BNSF runs 8 trains in continuous “loop” service between Anacortes and North Dakota, and each train is 100 cars long, with 4 locomotives, 2 on each end in a “push-pull” arrangement.  In a somewhat unusual arrangement, though, Savage Rail, Inc, an on-site contractor, takes over control of the unit train at the gate, and handles the actual switching – the train is broken into 4 segments, 25 cars each, for the afore-mentioned unloading tracks.  A train can be unloaded in about 12 hours.

More fun facts:  Each train has 2 “buffer cars”, one at each end, and each train is 1 ¼ mile long, and each car carries 680 barrels per car (so my math tells me that each train hauls 68,000 barrels of oil).  These tank cars were built new for this rail service, and are double hull and have double shelf couplers.

The company “UTLX” is contracted for on-site repairs, as any defective or damaged rail cars must be repaired before being allowed to leave the facility.  Bob regaled us with his humor and description of some of the challenges that were faced.  Truly a great clinic!

Next month’s topic is “Mini Clinics” that will feather a number of our members giving brief clinics on a variety of topics.  November’s clinic will be on building hydrocal structures by Al #2 (Al Carter).
A Visit To Dick Haines’ Layout

By Al Carter / Photos by Al Frasch and Al Carter

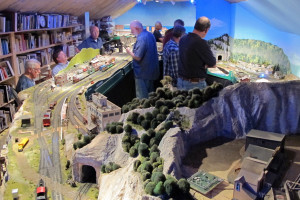
Jack Tingstad gazes approvingly at Dick Haines' latest improvements to his layout

Jack Tingstad gazes approvingly at Dick Haines’ latest improvements to his layout

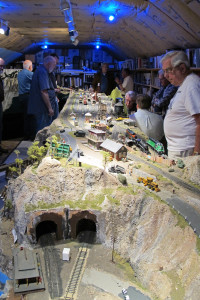
For the June 2013 Skagit/Whidbey Clinic, the meeting was held at the home of Dick Haines, just north of Oak Harbor. Twenty Eight folks showed up to see Dick’s wonderful layout and enjoy his hospitality, not to mention a lot of great socializing among attendees.

Dick’s layout is unique in a couple of ways. First, it is in his attic, but this isn’t your normal attic. When Dick had his house built, he had the attic insulated and constructed with no supporting beams or other obstructions, and it has a nice, tall ceiling too – no stooping over, as in most attics! But, as with most attics, access is somewhat limited, via a pull-down stairway/ladder.

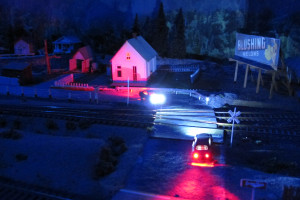
The second unique feature of Dick’s layout is his day-to-night lighting system. He has developed a method to transition from “daylight” to dusk to nighttime operations and he has really done a convincing job in this regard. “Nighttime” features include lots of building interior illumination, plus several vehicles with illuminated head and tail lights. And, of course, those headlights on locomotives are a must!

A view from the other end of Dick Haines layout

A view from the other end of Dick Haines layout

Dick had rigged up a small camera on a flat car that transmitted signals down to a television in his “crew lounge” area (the floor below the railroad), so those that were not actually upstairs could still see the action.  It worked very well.

After a lot of folks had departed, Steve Jaffray hit upon the idea of adding a small LED flashlight to the top of the camera/flat car, and a train was run around the layout in darkness, with the flashlight illuminating the way.  And the loco was being controlled by a DCC throttle from the second floor (the floor below the layout).  Of course, one person was needed in the layout room “just in case” and occasionally, a pair of fingers could be seen reaching down from the “sky” to throw a switch.

Vehicles with their headlights on at night on Dick Haines layout

Vehicles with their headlights on at night on Dick Haines layout

If you were unable to attend the meeting at Dick’s and see his lighting effects first hand, you can read about it in the May-June issue of the Narrow Gauge and Short Line Gazette.

The next meeting for the group will be the annual August journey to Coupeville to see John Marshall’s garden layout, as we have done for the past couple of years.  Watch for more details in a special, shortened edition of our newsletter.


Skagit/Whidbey Clinic – May 8, 2013

Backdrops – A Four Person Tag-Team Approach – By Tom Buckingham

Photos by Al Frasch and Rich Blake

Four clinicians (Al Carter, Nick Muff, Al Frasch, and Cliff Aaker) took turns with different parts of the presentation.  Al Carter began by briefly describing the three options one has: Plain sky, photo or photo mural and a painted backdrop.

For the plain sky Al provided some photo examples of the improvement  accomplished simply by picking your favorite blue sky color and painting your backdrop with that color. The difference was dramatic and very simple.

Al Frasch then showed the improvement that can be had by using three different shades of blue. He painted a board with the darkest shade on the top and the lightest on the bottom.  Then with a dry roller he simply blended the three colors where each joined its neighbor.  The result was a very nice gradual increase from the darkest blue on top to the lightest blue on the bottom with no apparent “line” separating them.  He said he paints about five to six feet at a time and can go about fifty feet or so before he has to get another dry roller.

Al Frasch demonstrating blending techniques

Al Frasch demonstrating blending techniques

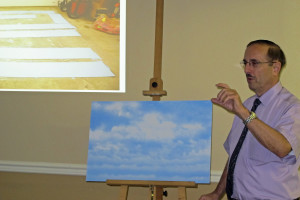
Nick Muff then talked about how he starts with a plain single color blue sky and then adds clouds.  As he researched the subject of adding clouds there seemed to be four popular methods: cloud stencils, hand painted clouds, misting with a spray paint to simulate clouds and using a sponge on a stick to in effect “blot” on the clouds.  His only comment about the latter method was that the end result looked like “sponges blotted on a blue sky” and were not what he was looking for.  Nick ended up using the cloud stencil method. He took pictures of clouds and projected them onlarge pieces of card stock and then outlined the clouds in the projected pictures. When he was done he cut them out and ended up with about a dozen or so different stencils.

Nick Muff showing a sample of his custom cloud stencils

Nick Muff showing a sample of his custom cloud stencils

He chose spray cans of Flat White Krylon because he liked the color and how fast the paint dried.  According to Nick the trick to getting realistic clouds is to hold the stencils about two inches away from your backdrop and spray mainly on the top edge of the stencil.  The result is a more defined top of the clouds and a “fuzzy” or less defined bottom.  As he gets to the bottom of the scene (that is the part representing what is the furthest away) he made the clouds smaller and in straighter lines as you would see if you were outdoors.

He passed on several secrets to realistic success—start with  a darker blue than you would probably otherwise use.  The blue has to be dark enough to see the white clouds. Start with a light mist and go heavier.  Once the cloud is on the backdrop it won’t get any less dense.  Flip your stencils end for end after a while to avoid “repeating” a cloud formation.  After all, clouds don’t look like carbon copies of each other.  Get a spray can “handle” so your finger doesn’t wear out.  And most importantly wear a respirator.  Nick had several photos of his process and a sample of his end result that was very realistic.

Al Carter then spoke about photo backdrops.  You may either buy them commercially (Backdrop Warehouse, and Scenic King) or make your own. To make your own, take some panoramic photos, and then using a photo program like Photoshop Elements remove any photo errors that may have crept in, like paralax error, etc.  The result can be printed commercially at Kinko’s or COSTCO,  for example.

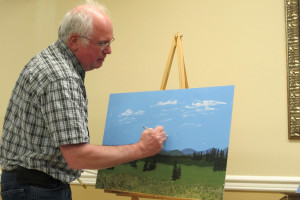
Finally, Al Carter and Cliff Aaker gave a live two ring circus show demonstrating how to paint trees by hand on your backdrop. Al dealt mostly with the far background trees using mostly very dark colors in the far background and then bringing them up to dark green and then lighter green as you come forward. He was mainly demonstrating the hills of trees that you see as you look off toward the mountains or hills. Cliff concentrated on the foreground trees. Using mostly a “fan brush” he demonstrated how quickly and easily one can paint realistic trees on your backdrop.

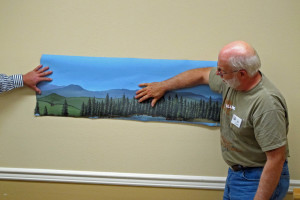
Al Carter showing a backdrop painted on the backside of sheet vinyl flooring

Al Carter showing a backdrop painted on the backside of sheet vinyl flooring

Cliff Aaker painting trees

Cliff Aaker painting trees

Both Al and Cliff had several tips for realism:  Have an example (a photo) nearby so that you don’t have to paint from memory.  Plan ahead—it is a lot easier to paint a back drop if you can stand at the wall than climbing over your layout to do it.  Make sure your “painted trees” are not larger than the actual scenery trees you have in the foreground.

Al wrapped up with some very amusing examples of the good, the bad and the ugly.

It was a very enjoyable clinic. There is nothing like seeing someone (in the case several someones) do something live. As Al Carter said: “If I can do it, so can you.”

Skagit/Whidbey Clinic Report for April

Al Carter / Photos by Al Frasch

Chairman Rich Blake started the meeting and welcomed 38 eager attendees to the April 2013 Clinic. Al Carter reported on the upcoming Fourth Division Spring Meet to be held on May 17-18 in Tukwila and on the June 26-30 Pacific Northwest Region meet to be held in Boise, Idaho. Susan Gonzales discussed several of the clinics scheduled for the 2013-2014 season, including a field trip to the Mount Rainier Scenic Railway, in late September.

One new attendee showed up, John Fuik of Anacortes, along with his wife Marjorie. For the Tool of the Month, Al Carter showed off MicroMark’s “Thin Beam” square, an invaluable tool for scribing sheet styrene and wood. John Mann displayed another MicroMark product – the “Crocodile Action Ear Polypus,” which is a nifty forceps-type tool that can fit into a 1/8” diameter hole.

Another member (sorry but I didn’t catch the name) reported on the fact that anyone with a Sno-Isl library card can subscribe to Model Railroader and also to Fine Scale Modeler, thus saving the yearly subscription costs. However, back issues are only available for the current year via the library. And apparently, anyone with a valid library card in the state of Washington can use this system. For further details, click here.

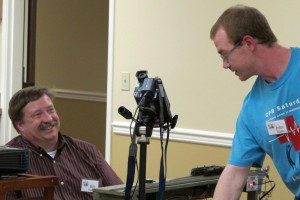
Bill Harper and John Mann sharing a moment of humor before the clinic started

Bill Harper and John Mann sharing a moment of humor before the clinic started

The “Main Event” of the evening was a clinic on installing sound decoders, by John Mann and Bill Harper. John started off by explaining that in our modeling world, size can be compressed to whatever size or scale we want, but sound is a different matter – think of muting the sound, rather than compressing it. There are lots of manufacturers of sound decoders available now and some sound a lot better than others. Prices generally reflect this, of course.  ohn demonstrated this difference by letting us hear Digitrax (lower end) and Tsunami (higher end) decoders.

John brought an incredible array of materials and supplies to augment his program, including a lot of hardware in addition to the actual decoders, including speaker enclosures, axle and drive wheel wipers, chuff sync devices, very fine and flexible wire, and mini-connectors. He pointed out that while most of the DCC manufacturers offer much of this equipment, one can also go to non-railroad supply houses such as Allied Electronics, Digikey, etc.

John and Bill described how adding a capacitor to the decoder circuit allows the sound to keep on uninterrupted, despite the locomotive running over dirty track or other disturbances in the signal reaching the decoder. We learned a lot about capacitors, including different types and ratings.

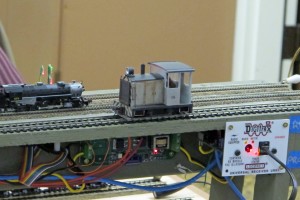
John Mann's DCC Test and Display Tracks

John Mann’s DCC Test and Display Tracks

Here’s a great tip, not only for sound decoder installation, but actually any modeling you do: take digital photographs of your work and your finished product for later reference.

John finished the evening with a great demonstration of several different sized speakers, both with and without speaker enclosures. It is truly amazing how a proper speaker enclosure enhances the sound. We learned a lot from John and Bill last night!

Skagit – Whidbey Clinic Report for March meeting

Al Carter

Clinic Chair Rich Blake called the meeting to order at a little past 7:00 am with 30 hearty souls in attendance. The group was treated to a pre-clinic “swap mart,” where people bring items to sell or trade or even give away. While the swap mart was held every few months or so in the past, it has become quite popular and is now a monthly part of the clinic.

Phil Gonzales brought along a nifty jig he made to make duplicate cuts in Campbell corrugated siding. He passed it around for all to see, but wouldn’t take orders to build any more. Darn!

The main event of the evening was delayed a bit while Rich and others tried to solve some technical difficulties with the computer, but the computer held out and wouldn’t cooperate, so we didn’t see the DVDs that were to be a part of the show.

Undaunted, our clinician, John White (and former clinic chairperson) pressed onward with his presentation entitled “Track Construction Methods In The Real World,” aided by his ever faithful Kodak slides and projector. John’s presentation told part of the story of the evolution of track/tie renewal from single insertions, to panelization, gantries and finally the need for a faster system for total track renewal, hence the P811.

John described the evolution of the use of concrete ties in North American railroading, including first aborted attempts in the 1960s.

Then, in the 1970s, the Canadian National, plunged forward with some extensive research and development into the use of concrete ties. This was also when use of the European P811 machine came into use, as a machine that could remove old wood ties, grade the ballast, and place new concrete ties all in one fell swoop. Quite a machine, judging by the great slides John displayed.

The P811 became the defacto machine used by the CN, UP, Amtrak and BNSF and is in use today, placing 400,000 or more ties per year for each railroad.  A couple of interesting facts:

  • A concrete tie used by the CN (8’ 3”) weighs about 610 lbs
  • Concrete ties for UP, BNSF, etc, built to AREA specs (8’ 6”) weigh closer to 750 lbs
  • Concrete ties for transit use can weigh less, according to design requirements
  • Concrete ties are depressed in the center as a function of their design, not necessarily to save weight
  • Concrete ties outlast the tie life of wood ties in similar track conditions

Quite a fascinating presentation by a fascinating individual. Thank you, John!

The April Clinic is scheduled to be “DCC Hands On Sound System Test Track” by Bill Harper and Jon Mann. All are welcome at the Summer Hill Retirement Center in Oak Harbor. The clinic starts at 7:00 pm, but come early to see what goodies show up for sale. Also, several folks get together for dinner at 5:00 pm at San Remo’s on Midway Blvd in Oak Harbor. For more info, email Al Carter or Rich Blake.

Sorry, no pictures this time – our official photographer was off running trains.