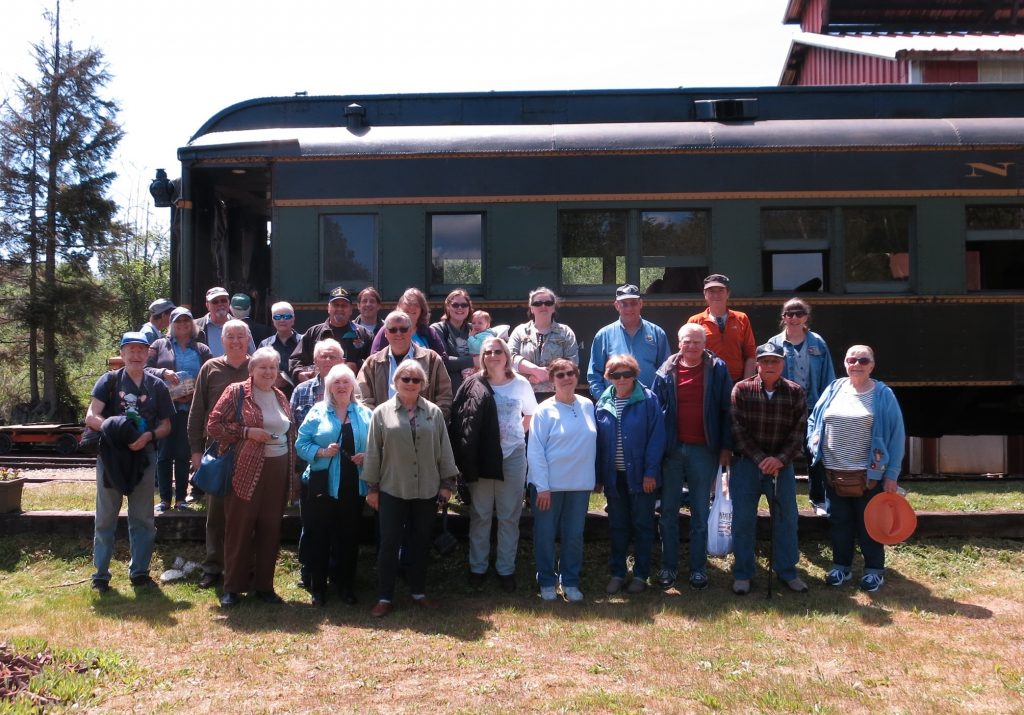
On 19 May 2019 thirty members and guests of the SV&W Clinic attended their second spring train excursion field trip on the Lake Whatcom Railway in Wickersham WA just east of Lake Whatcom and Bellingham.
Skagit Valley and Whidbey members and guests at the Lake Whatcom Railway.
Our trip was once again coordinated by our excellent Program Coordinator – Susan Gonzales who also somehow gave us a brilliant sunny spring day as well. A special note of appreciation also goes to Jan Clarke who coordinated food orders and provided picnic box lunches for our train riders.
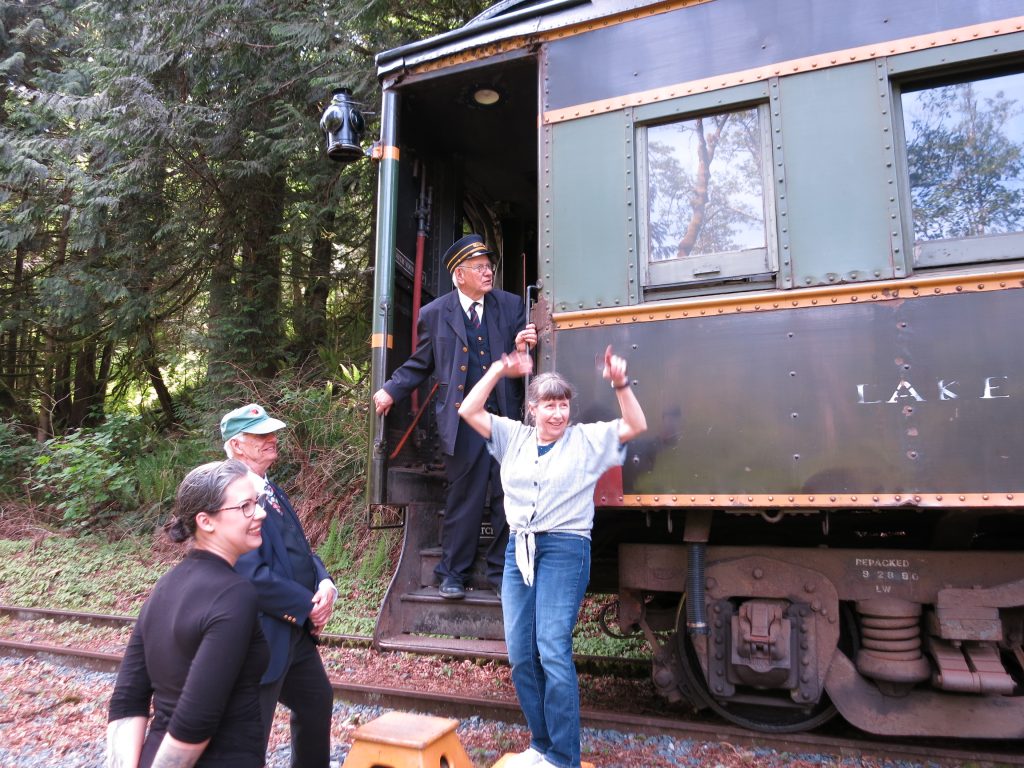
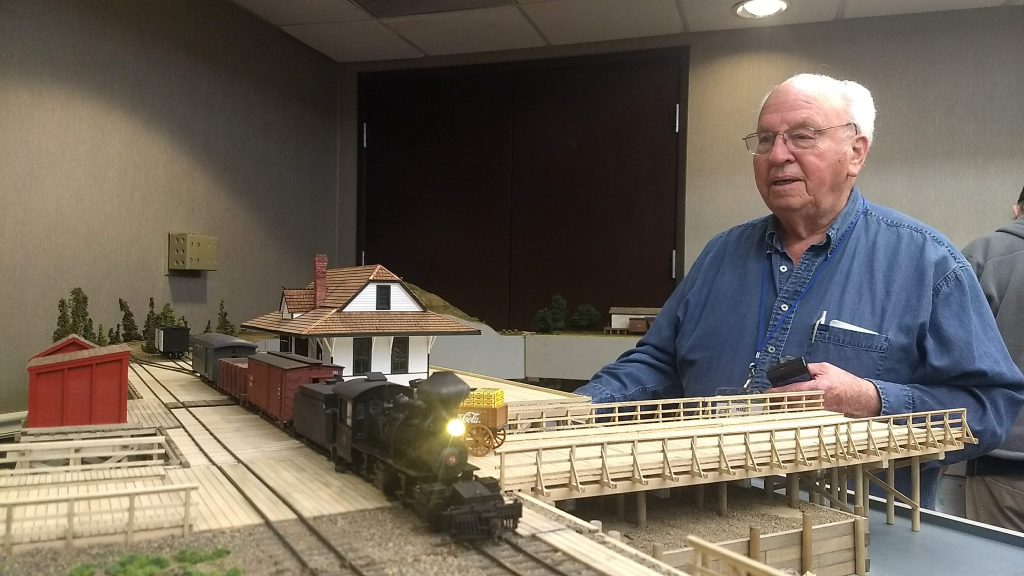
Lake Whatcom Railway owner/superintendant Frank Culp looks on from the footboard of a vintage NP passenger car while SV&W Program Coordinator Susan Gonzales enthusiastically gets an “all aboard” call going.
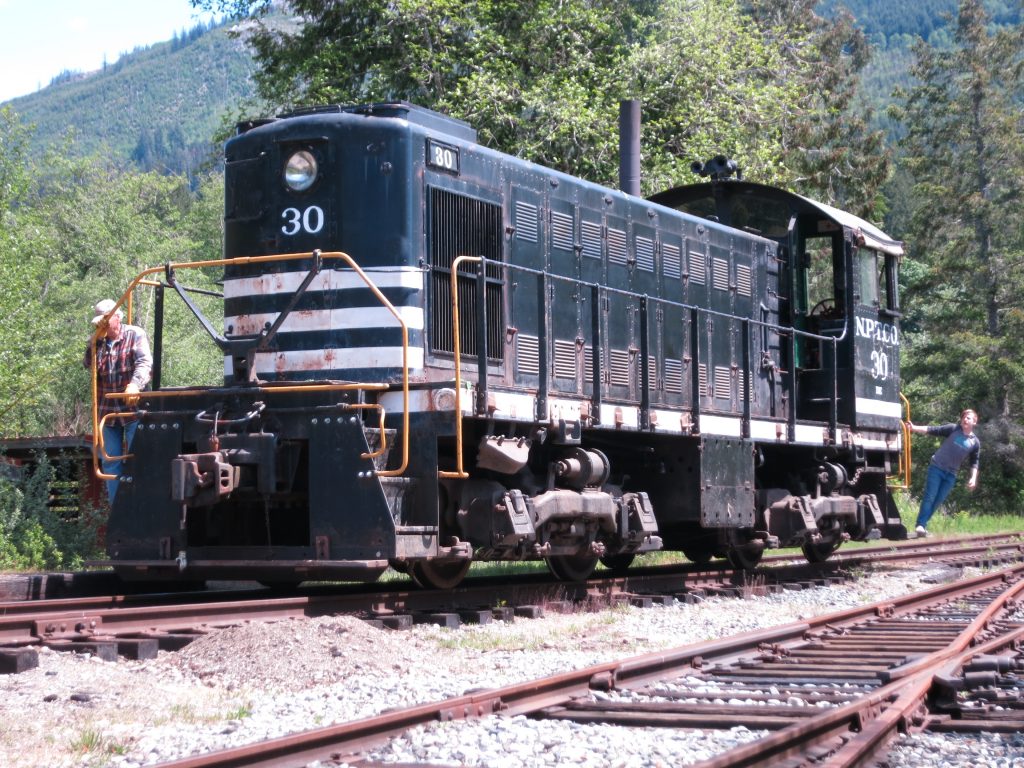
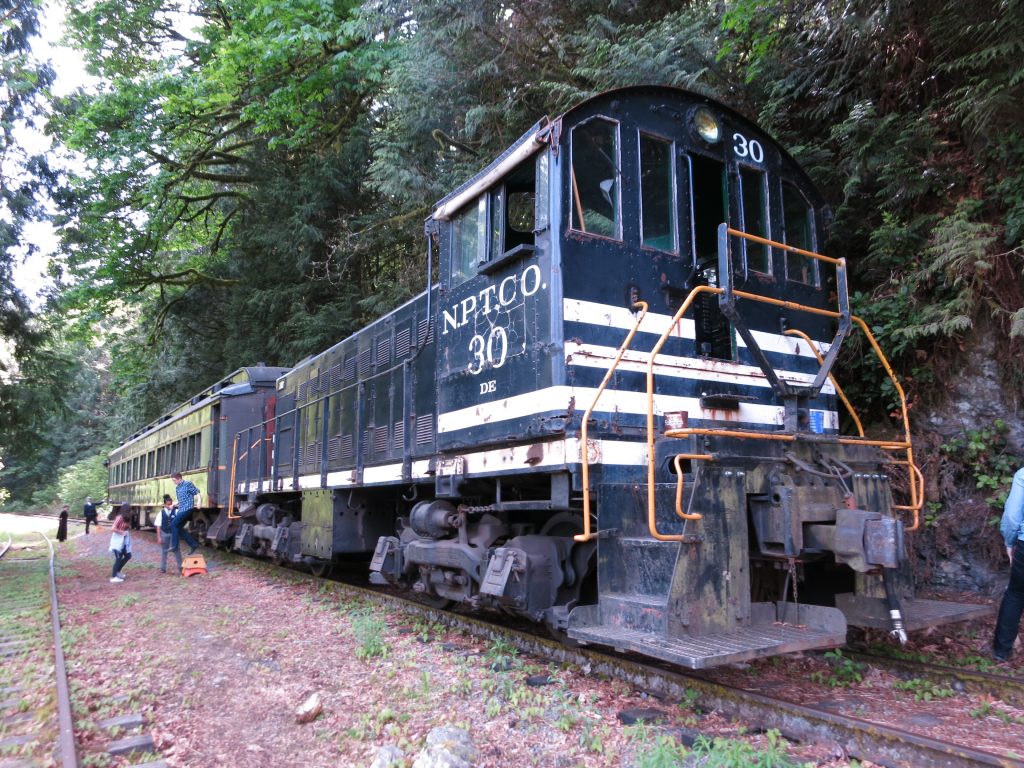
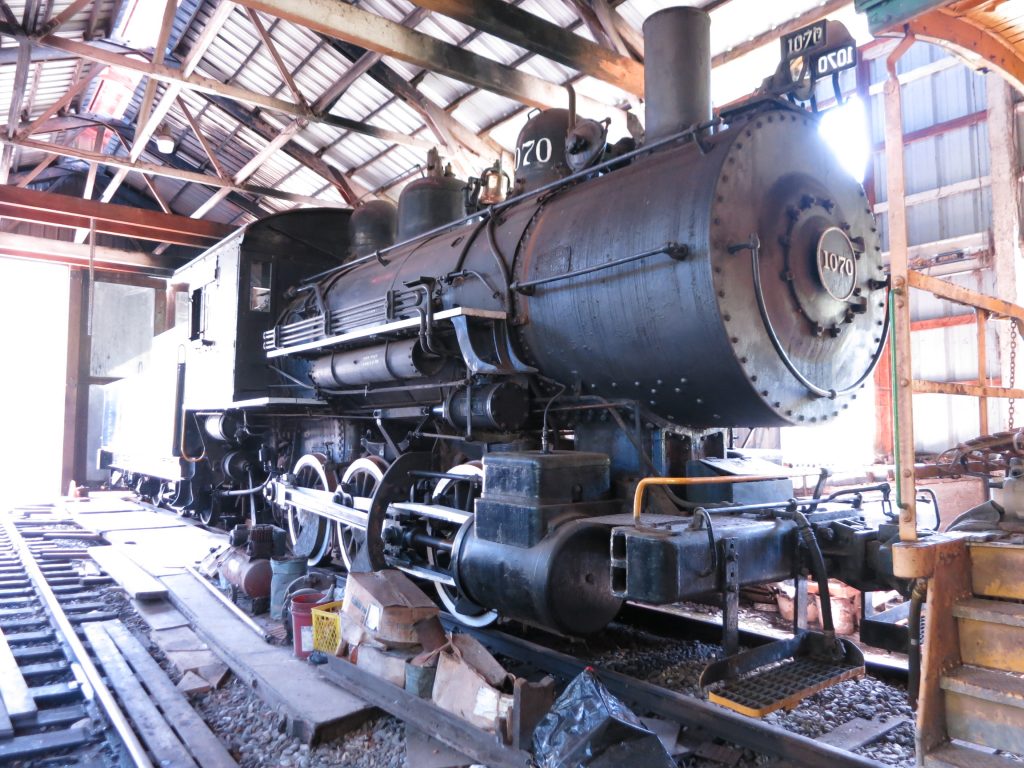
Our trip started in the tiny village of Wickersham which was once a station stop for the Northern Pacific on it’s way to Sumas. The BNSF branch still runs through this area today. The railroad grounds contain a wye and a large engine shop/car shed. We rode behind a vintage Alco S1 diesel which was originally assigned to the Northern Pacific Terminal Company as No 30 in Portland OR.
Vintage Alco S-1 which once served on the Northern Pacific Terminal Co. in Portland OR. working the yard at Wickersham.
After boarding we headed out on what was once a branch line along the south shore of Lake Whatcom on the Bellingham Bay and Eastern Railroad Company line that connected Bellingham to the NP Mainline at Wickersham. Our ride took us to the shores of Mirror Lake for a picnic stop and some fun on a pump car for the kids (and adult kids).
Picnic stop near Mirror Lake.
Once back at Wickersham, some of us explored the NP No 1070 Class L-9 0-6-0 steam locomotive in the shop and watched the crew turn the Alco on the wye to put the passenger coach away. It was a great day out in the sun and everyone had a good time. Check the Lake Whatcom Railway’s website for their event schedule, it is worth the trip.
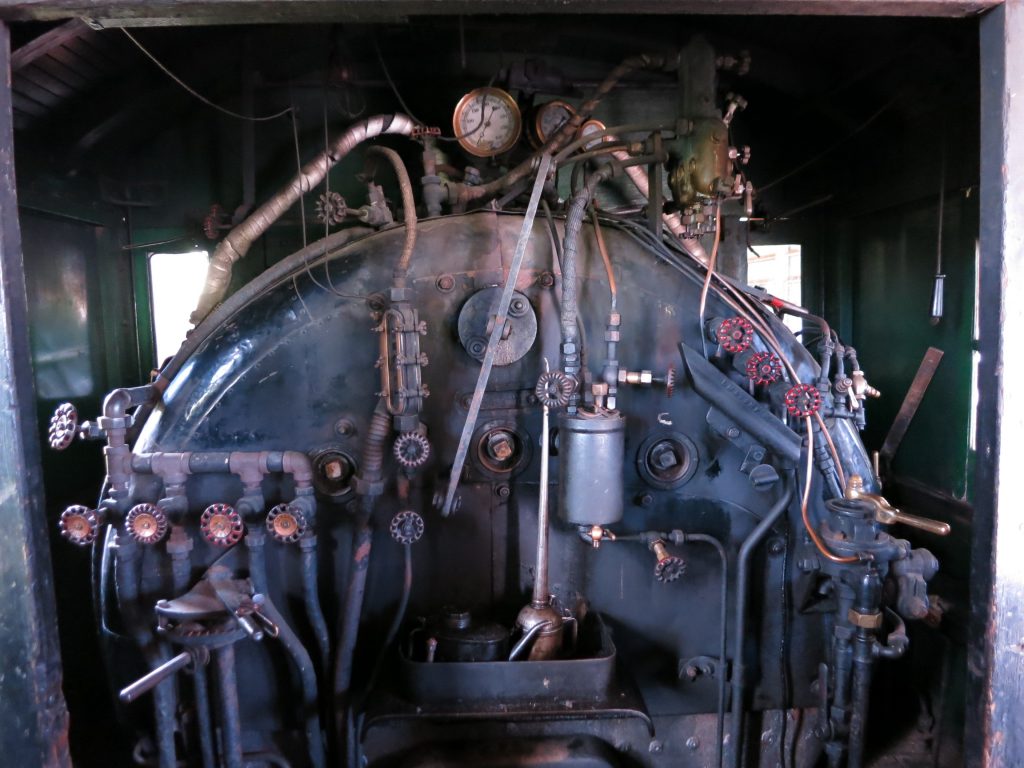
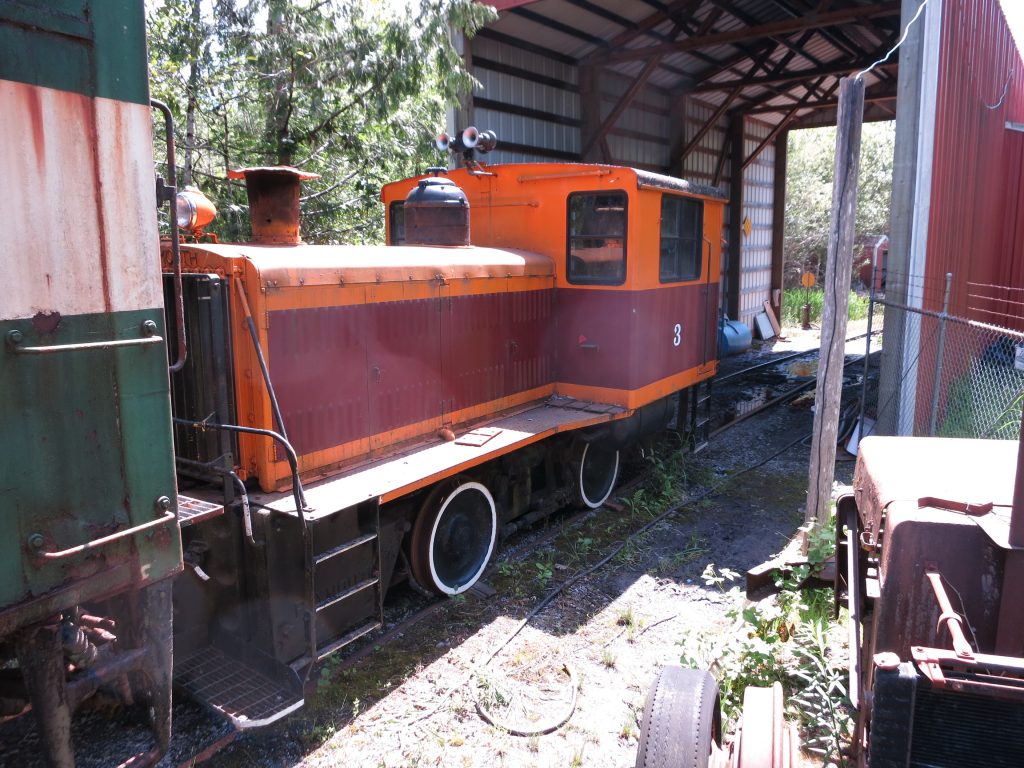
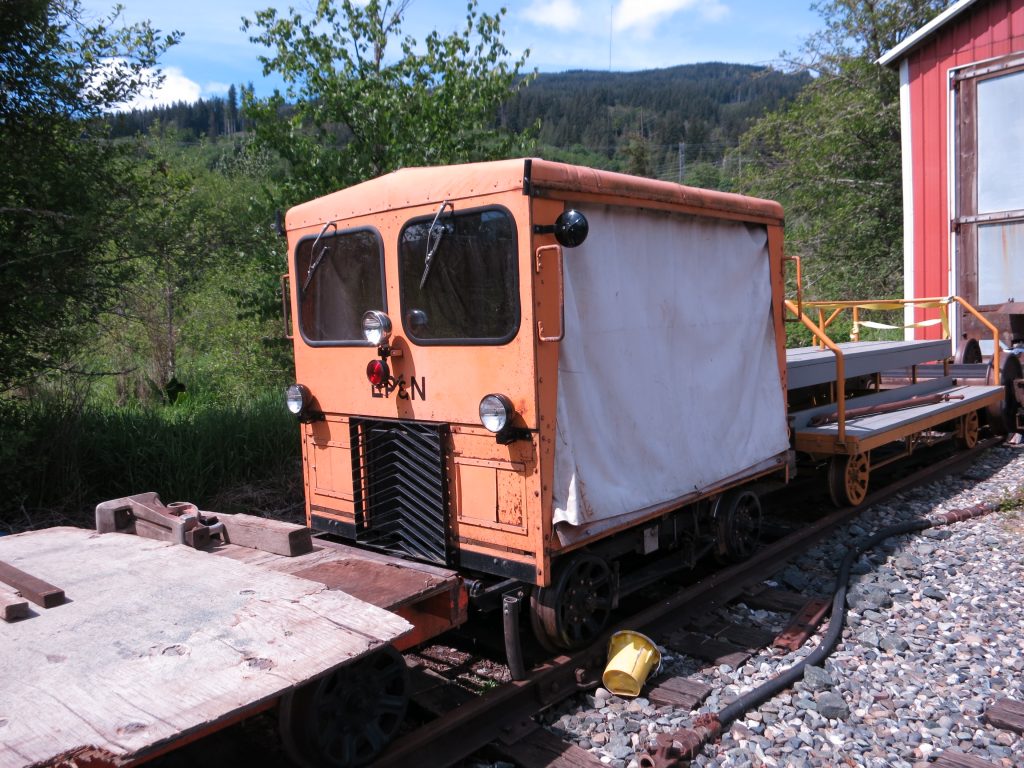
Northern Pacific 0-6-0 Class L-9 No. 1070 in the Wickersham shop awaiting restoration. The locomotive is in very good condition and will likely be seen under steam again.Backhead details on the NP No. 1070.Mount Vernon Terminal No 3 a Plymouth Diesel sits near the engine shed.Ex Longview Portland and Northern speeder which is used for track maintenance.
There has been a lot of interest in trains the last few weeks with the celebrations of the completion of the Transcontinental Railway 150 years ago and the return of UP Big Boy 4014 to active service. So, has anybody asked you recently about your interest in trains?
Let them know that your Fourth Division (4D) is very active in promoting such interest in real trains as well as modelling them. This involves more than talk. We have developed resources and organization to be effective.
I think it important to restate what we in the 4D/PNR/NMRA are all about. The purposes of the Fourth Division (4D) are to:
Educate persons engaged in model railroading in methods of building and operating model railroad equipment and prototype practices.
Develop the technical skills of persons engaged in the art and craft of model railroading.
Encourage the collection and preservation of historical data and to promote education about railway history through model railroading.
Facilitate communication among all model railroaders, both members and non-members.
The 4D Board of Directors has determined that the best way
to reach its audience, especially nonmembers and potential model railroaders,
is through modular model railroad participation at train shows and other public
activities. To achieve that public representation, the Fourth Division has created
this Modular Model Railroad Sponsorship Program. This program provides
financial assistance and administrative assistance to modular model railroad
groups to help them achieve the Fourth Division’s organizational purpose.
We want to be sure we stay focused on these goals. Your Board recently revised and expanded several policies in the Executive Handbook.
Appendix A – Modular Model Railroad Sponsorship Program
This section clarifies and condenses existing policy into one location.
There are two types of Sponsored Modular Model Railroads:“4D Modular Groups” created by 4D and “Supported Clubs,” which are Clubs with
100% NMRA membership who have asked the Division for support and which meet the
Division’s criteria. Both types are eligible for financial support,
administrative support, and publicity for their activities.
Requirements for
Sponsorship: The following conditions must be met for a Group or Club to be
considered for inclusion in the Modular Model Railroad Sponsorship Program: i)
It is based within the geographic boundaries of Fourth Division. ii) It
achieves and maintains 100% NMRA Membership. iii) Any 4D member in good
standing may apply for membership in it. iv) It demonstrates continued effort
to achieve the Fourth Division and NMRA organizational purposes. v) It actively
participates in and supports 4D and NMRA activities, in addition to its own
activities. vi) It actively participates in general management of 4D with
respect to support, funding and activities. vii) It has, or will create,
operating documents governing its conduct, including referring to, and abiding
by, the NMRA guidelines for anti-harassment and anti-discrimination, and will
submit a copy to the 4D Board to validate that it agrees with 4D purposes. viii)
It designates an individual to be the contact point with the 4D Treasurer for
reimbursement. ix) 4D Modular Groups do not charge dues or fees for
participation by NMRA members. Supported Clubs may charge. b. The 4D Expects
such clubs to; i) Support the Fourth Division and the NMRA organizational
purpose by: (1) Serving as active and effective NMRA and 4D ambassadors to
layout visitors, promoting the hobby, and educating the public about model
railroading, etc. (2) Encouraging existing NMRA members to attend local clinics
and volunteer as clinicians.
Appendix B – Donations and Disposition of 4D Owned Property.
This is a new document to help members know how to deal with donations of equipment and models from families who want these items to be useful to the hobby.
Appendix C – Mileage Reimbursement Guidelines
(formerly the Appendix to the Mileage Reimbursement Form). The 4D actively supports participation by members at local clinics and clubs and presentation to the public at trains shows. Because the Division is spread over such a large geographic area, some travel expenses are reimbursable. So, there are specific policies in place to financially support those who travel long distances to present clinics and for those who pull the trailers for modular groups to train shows. These expenses are authorized in our budget negotiated and approved each fall. This process is currently underway.
Members are encouraged to click here,download, and read the Executive Handbook published in the Members Onlysection on our website for the complete provisions.
Last call for ballots. Send those ballots in. Even though the three candidates, Al Lowe, Robin Peel and Anton Faulk, are unopposed, it is important that we give them a vote of confidence and thanks for stepping up to serve us on the Board of Directors.
Your Board is responsible to see that our area clinic facilities are made available and the clinics staffed. We also recruit presenters for programs and special events such as our shows at MOHAI and the Pacific Science Center.
Speaking of MOHAI and the Pacific Science Center shows, there is a meeting May 4 at The Yankee Grill in Renton at 10:00 to discuss and plan these two shows held this fall and winter. Al Lowe, Ed Ives, Mike Slease, Alan Murray and David Yadock with be there with me. We will be focusing on adding small demonstrations and displays in addition to the usual modular layouts.
If you have a small demonstration module to demonstrate some modeling skill, let us know, or, better yet, joins us on the 4th. Give me a call at 206 200 2211.
Again I am writing you about membership issues. I want to focus on “memberships of expedience” (my term).
There are people who get on with the NMRA because an event is nearby; whether a division, regional or national event. Within a year we are seeing them drop off and by year two or three they are gone. If you are not sure of this happening please consult your monthly rosters from Ed Liesse to confirm this occurrence.
The decision some years ago that all people wanting to attend a NMRA event must be a member was a good one. I must confess that at first I was a bit skeptical but overall the numbers have proven me wrong.
About that same time the national board created the Rail Pass process. It was intended to be a gateway process to get on board. Further, a person who might have been out of our organization for two or more years may again ride in on a Rail Pass. What appears to be happening is a person gets on for a regional event, promptly falls off and then reappears five or six years later when a regional gathering comes to that division again.
With that uptick in memberships in a division that might be hosting a PNR convention, we need to take another look at how we tend to these members. I am suggesting that we treat these people like a first time membership that I directed you to in my last e-mail to you. The problem is that often we know these people relatively well so we falsely think that they need no further attention. They are often people who exist on the fringe of the hobby, have long been a part of the hobby, and are often well known to many. We need to connect with them as if they had never been a part of us previously. When they take a membership they take on a new relationship with us and now, again, require our attention.
To be fair to the existing membership, new members also bear a responsibility to the local divisions, regions and the national organization. They are hanging their hat on our hook. They may be getting on with us rather begrudgingly as they must be a member to attend a particular function, but they are a member none the less. We may even have been a part of a conversation with a person who might have, in the past, spoken disparagingly of the organization but they are again a member now. All former negatives must be set aside.
We must assist them knowing where hobby related information is located on our national pages plus when and where local events are happening. Yes they bear a responsibility to show up but we must engage them when they do, both in conversation and requests for service to the hobby, most frequently in the local division. New members have energy when they arrive that we need to seek out and offer outlet for them.
It takes work on our part to make single term members into continuous renewal members. If your division had any successes along these lines, please let me know so that I can pass them along. A division does not exist in a vacuum unless we let it happen. Help us make the PNR better.
I have accumulated a huge amount of Marx O27 Trains, Track, Crossings and Turnouts.
I’m 90 yrs old and didn’t really remember how much I had accumulated since Santa brought me a Marx Canadian Pacific set with remote turnouts and remote uncoupling. Sigh.
I have 30 or MORE Marx remote turnouts, an impressive Marx Army Set, and M 100000 Streamliners. I need to download, but require someone or some group to buy the ENTIRE mess.
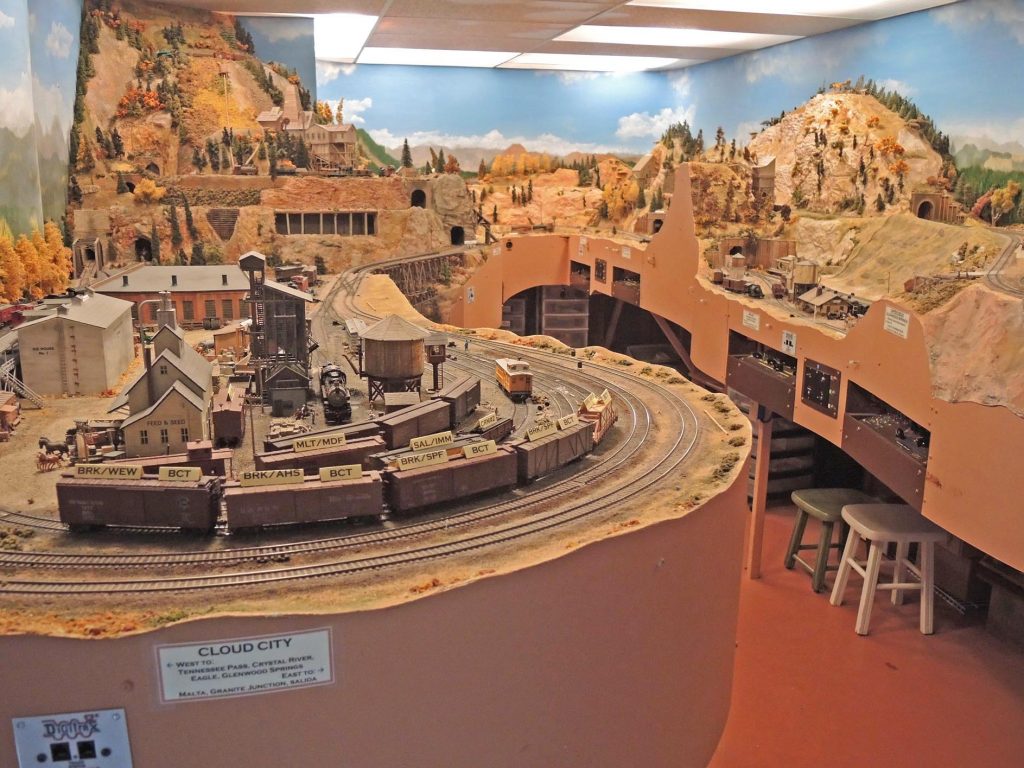
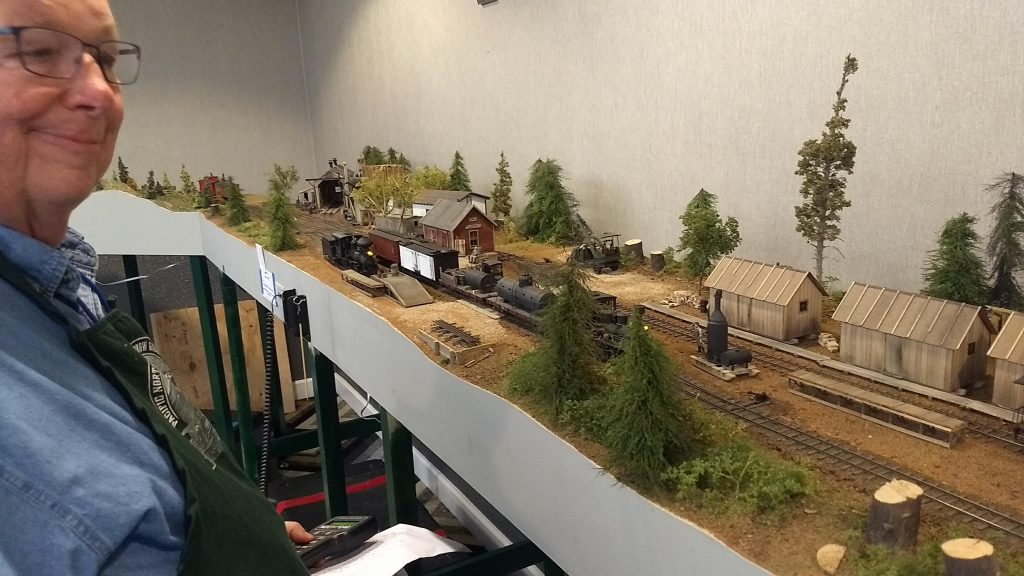
Cliff Aaker, filling in for Clinic Chair Rich Blake on business travel, introduced tonight’s two clinicians who presented two highly interesting talks about track planning for operations. Both presenters are NMRA MMR’s with decades of experience between them. Their layouts are very different not only in the era modeled, but also in their builders’ “druthers” (as layout design guru John Armstrong put it). One shared feature, though, is that both railroads center on Colorado—not surprising considering the fascinating prototypes that this mountainous state offered.Jack Tingstad, MMR was up first with his talk titled “Making an Old Track Plan Work.” Jack’s HO-scale Cloud City and Western RR, begun about 20 years ago, has now been hosting operating sessions for 12 years,
Fig 1 – Jack Tingstad’s Cloud City & Western
with crew sizes varying
between 6 and 8. The main section (Fig
1) is in a ground-floor room 12’ by 21’ in Jack’s home in Coupeville. Jack’s layout was adapted from a John
Armstrong plan (thus the “old track plan” descriptor) but whereas Armstrong’s
plan featured a “big city” setting, Jack wanted his set in the Colorado
mountains in the steam era and revised it accordingly. His “druthers” included:
“Massive”
scenery—extending to the room ceiling and to just feet above the floor in
places
Maximize
switching opportunities
No
duck-unders
“Visually
separated” town scenes to the extent possible
24”
radius minimum mainline radius with easements
Minimum
#6 mainline turnouts
Micro
Engineering track in Codes 83/70/55 for mainlines/passing tracks/spurs
Jack’s resulting track plan is shown in Fig 2.
Fig 2 – Track Plan for Jack Tingstad’s Cloud City & Western
The plan is “loop to loop”
with the eastern and western loops at Glenwood Springs (upper level) and Salida
(lower level) shown at the upper right-hand corner of the track plan. The two levels are connected by a 24”-radius,
two-turn helix at the lower center of the plan.
The layout’s major yard is at Cloud City (Leadville), midway between
Glenwood Springs and Salida, lower right in Fig 2. All of the towns are named for actual places
in Colorado but their relationships to each other on the layout do not adhere
to their actual prototype locations.
Whereas large staging
yards, either concealed on lower levels, visible, or in separate rooms, are
currently in vogue, Jack built what might be called distributed staging all
around the layout, all hidden from view, most below scenery. See Fig 2.
He can stage up to 15 trains prior to starting an operating
session. A few years ago Jack acquired
“trackage rights” to a room adjacent to his original layout space, in which he
added a new yard, East and West Breckinridge, with tracks leading through the
wall from Granite Junction and Cloud City.
This room also functions as crew lounge.
The addition greatly expanded operations and adds two crew slots to work
the busy yard.
Jack’s “old track plan” certainly
works well as this reporter–a regular crew member–can confirm, and he
considers it a success. However, there
are always lessons learned and Jack shared a few:
Make
sure to provide access to all hidden track; Jack has no fewer than 20 lift-outs,
of which 4 or 5 are used frequently, others rarely
Although
they save much space, avoid 3-way turnouts as their complexity can cause loco
hesitation and other issues
Ditto
double-slip switches; Jack has one in his town of Malta, as part of a switching
puzzle in a small space, but crews can have trouble with it
Ensure
spurs and sidings where cars are to be spotted are dead-flat—otherwise clothes
pins or other braking devices are needed to prevent roll-aways
Use
of compound ladders in yards on modest-sized layouts can save space; Jack used
them in his Breckinridge addition
Mark
Malmkar, MMR, was up
next. His layout is about the same age
as Jack’s but has traveled many more miles!
Begun in Nebraska in 1990, Mark’s layout—built in sections–was moved to
two more houses in that state, with revisions to fit the spaces available. Following some years of storage, the layout
has been moved yet again to its new home in Oak Harbor where it is now being
re-assembled, with plans to considerably expand it as well.
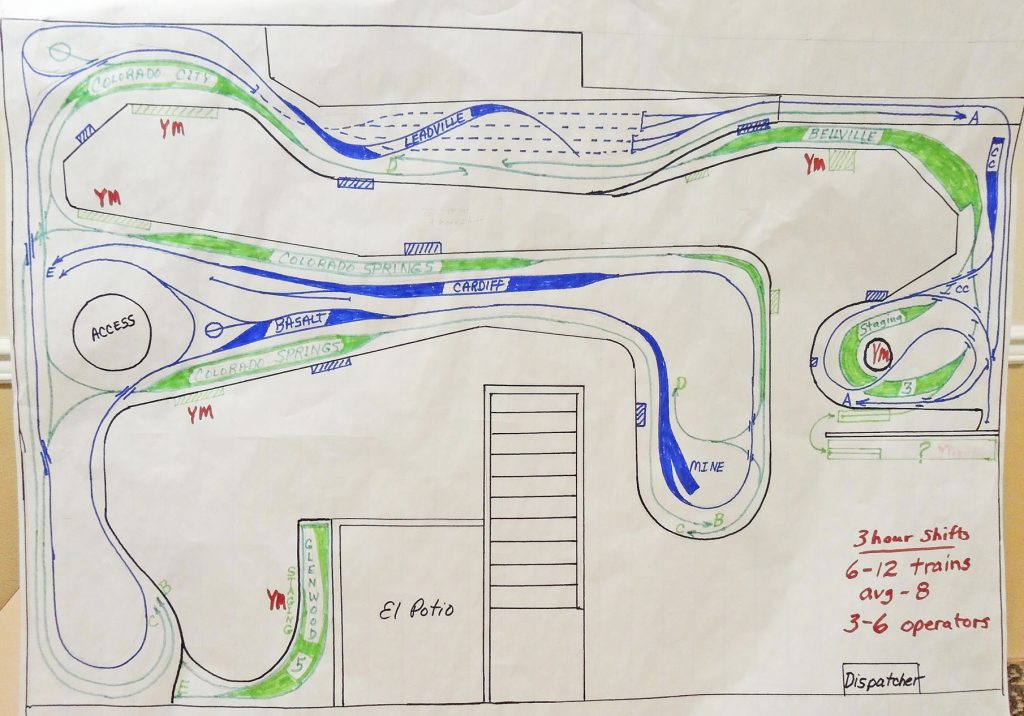
Fig 3 – Mark Malmkar’s HO-Scale Rocky Mountain Central
Mark’s current plan for his HO-scale layout
in its new location is shown in Fig 3.
The space is 40’ in its long dimension.
His freelanced railroad is called the Rocky Mountain Central. It’s
a two-level pike (lower level is shown in green and upper in blue) with a helix
interconnecting the two. Despite being
similarly located in Colorado, Mark has far different “druthers” for his layout
compared to Jack’s:
Transition
era, 1955, with some steam but mostly diesel
Town
plans replicating prototype as much as possible
Kansas
City and Chicago staging yards originating and terminating trains; most traffic
comes from Chicago
Rock
Island, CB&Q, and AT&SF trains cross Rocky Mountain Central’s trackage
Passenger
train emphasis, especially dome cars (Mark’s favorites)
Mark’s layout features
24-inch minimum radius curves and Code 100 track throughout for improved
operation. Referring to Fig 3, the
sections at the top and at the right of the drawing are mostly re-assembled and
in place; the central peninsula and Glenwood Springs at the lower left (now
Mark’s office space) are planned for later construction. Mark anticipates 3-hour operating sessions
with 6- to 12-trains running, with an average of 8, and 3 to 6 crew on the
mainline. Crews could grow to 12 to 14,
but aisle congestion, especially where switching districts are close together
and on both levels, might make that too optimistic. Mark’s first op sessions will tell!
Great ideas—from modelers
with years of experience—for our own layouts.
The April 2019 Eastside Get Together Clinic will meet on April 18,
2019.
The Clinic will
meet at the:
Redmond Community Center at Marymoor Village 6505 176TH AVE NE, Rm. 202 REDMOND WA 98052-4930
Doors open at 7:00 PM and meeting
starts promptly at 7:15 PM
We will be mentioning noteworthy, upcoming
model railroad and railfan events in the area.
We will also have our Model of
the Month and Rail Photo of the Month contest. Don’t pass up this opportunity to show off
your modeling and photography skills!
Bring your latest scratchbuilts, kit bashes or plain cool looking models
to compete with your fellow modelers for the coveted Model of the Month
award. Also, be sure and bring photos
from your latest railfan trip! Remember,
if it’s on rail and you have a photo of it, you’re good to go!!
Bob Rorabaugh will also have the “Buy ‘n
Sell” table available during the evening.
So if you’ve got anything model railroad related you’d like to find a
new home for, contact Bob and he’ll help you do that.
This
month’s Clinic Topic will be: “Building
and Detailing Specific Scenes”. John Paschal will be here to present
an encore of his clinic that he presented at the recent Sn3 Symposium in
Bellevue. If you weren’t able to see it
there, here’s another opportunity for you to do so. John is an outstanding modeler that I’m sure
we can all learn from as far as adding detail to particular areas of our
layouts and how to add that extra eye-catching bit of detail.
We will have door prizes, refreshments and snacks available as
always.
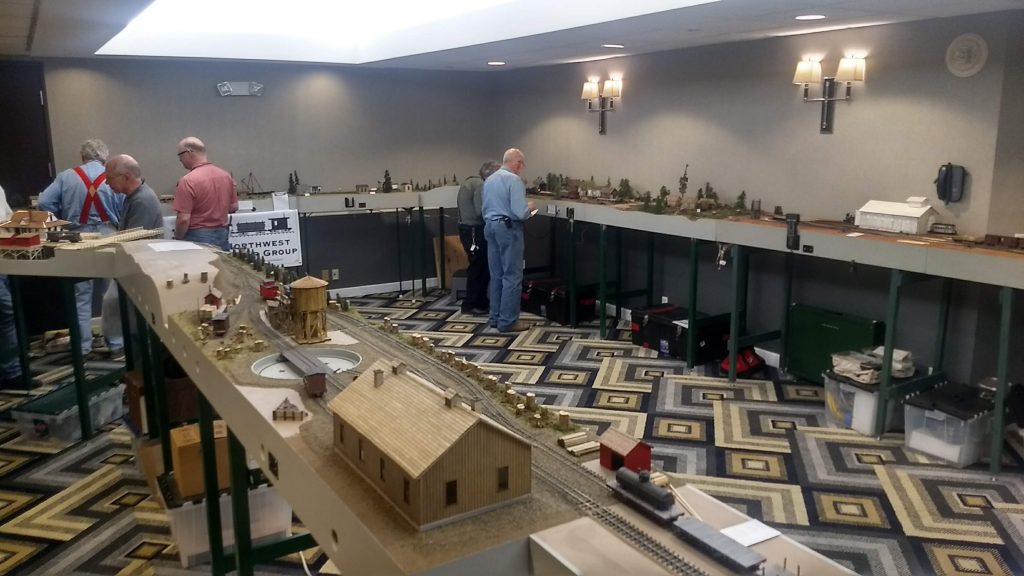
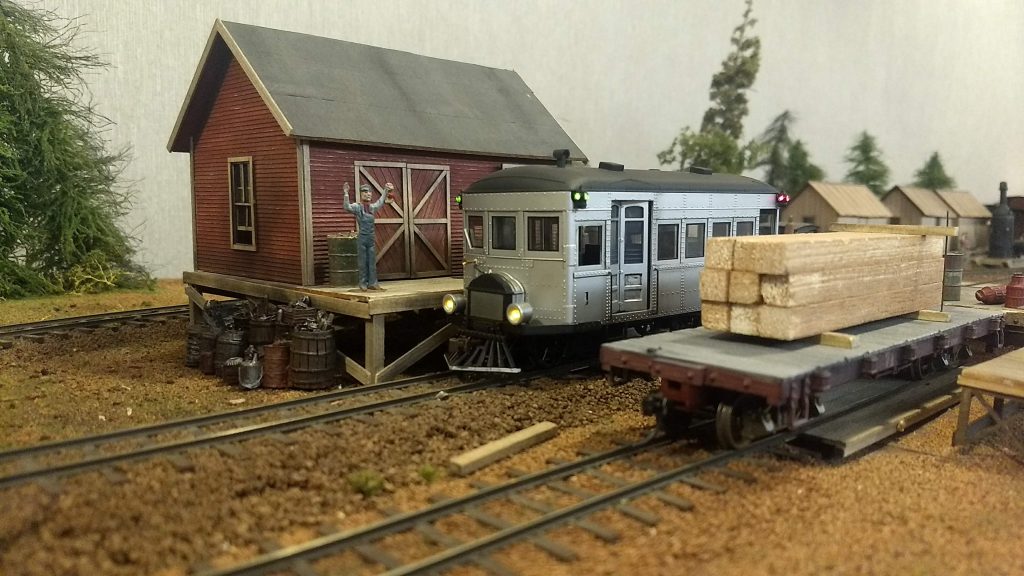
Overview of the PNW On30 Modular Group setup at the Sheraton Hotel in Bellevue WA.
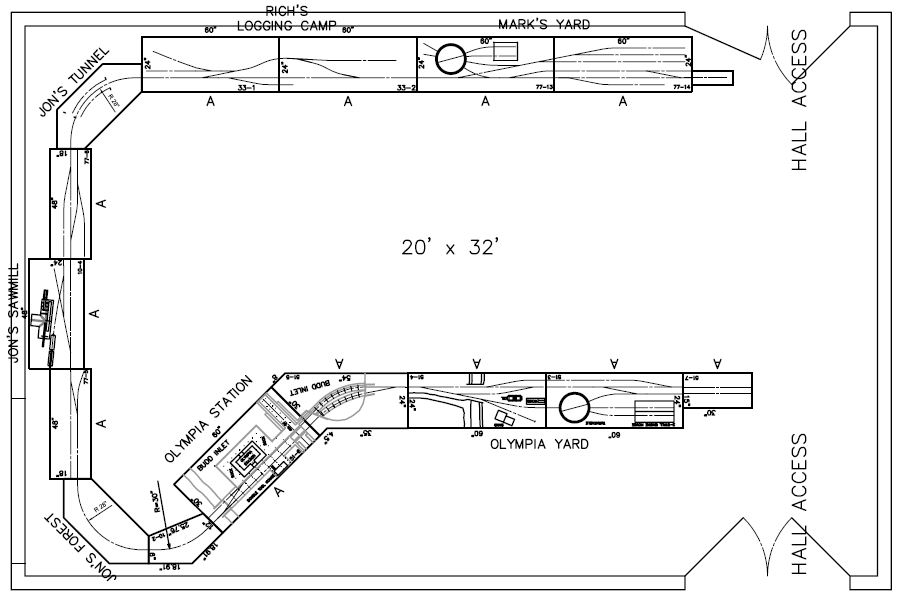
A nice change of pace however was afforded to our group with an invitation to the 34th Annual Sn3 Symposium at the Sheraton venue in Bellevue WA April 4-6 2019 from 4D Superintendent Russ Segner and Sn3 Symposium coordinators Robin Peel and Dale Kreutzer. This is a niche event that is similar to the National Narrow Gauge Convention but mainly focused on “S” or 1/64th scale. Although the space was smaller than our usual huge open train show venues, PNWOn30 Superintendent and CAD expert Alan Murray managed to design a layout to fit in the space that allowed for a nice point to point configuration providing a lot of operating opportunities.
PNW On30 layout configuration for the Sn3 Symposium.
Alan along with PNWOn30 members Jerry Barnes, Jon Bentz, Rich Blake and Mark Clemmens set up the layout on Thursday April 4th in a well lit private space in the hotel. Even though we are 1/48th scale or O scale, the layout was a welcome attraction for the Sn3 Symposium participants and generated a lot of interesting discussion on modeling, construction of modules and DCC system control (we use NCE).
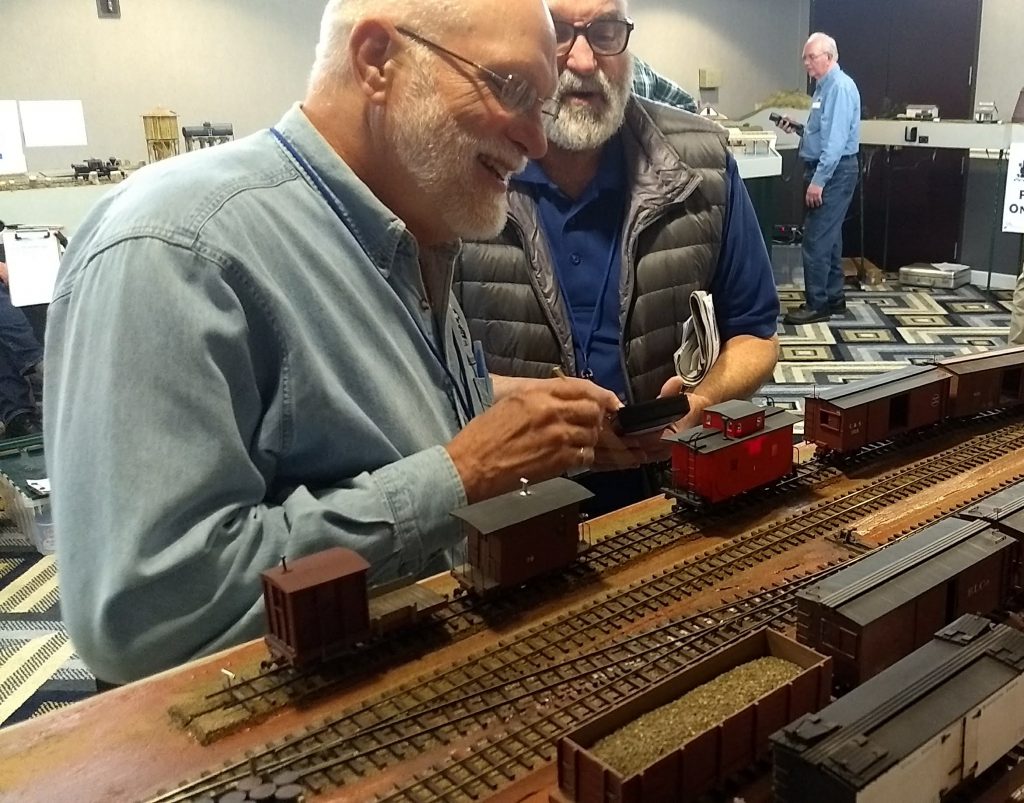
Chick Sweeny and John Dodds building up a train on Mark Clemmen’s yard modules.
Something new for the symposium and our modular group, was that we opened up the layout to guest operators on a fixed time schedule throughout the open viewing periods of the show. Normally we just operate with our own modular group members at shows but this time we opened up the layout as a bonus operating opportunity and ended up with twelve guest operators on the crew call list over the course of three days in five different sessions. Rich Blake ran the layout as Dispatcher/Trainmaster while the rest of the PNW On30 crew assumed yard and crew assistance duties for our guest operators.
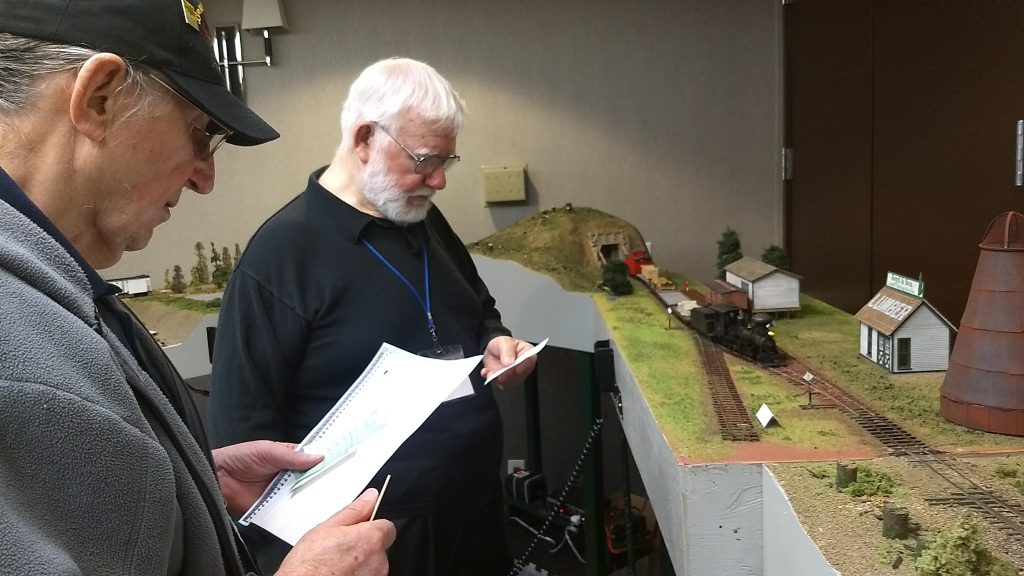
Jerry Barnes and Byron Osborn reviewing their orders and switchlist at the busy Sawmill Siding area. Bob Stafford switching the house track at Olympia Station.
We had several “old hats” as well as a few “noobs” to operations who learned a lot about this very intensely engaging aspect of model railroading. Our operating schema utilizes Time Table and Train Order rules typical of the early 1900s. We also use Java Model Railroad Interface (aka “JMRI”) Operations Pro to manage car inventory and generate switchlists for yards and industries. The operating style is laid back and slow moving but every train has a purpose and work to do. A typical job for a conductor/engineer two man crew would take about an hour to complete which was perfect for the time slots we had for guests.
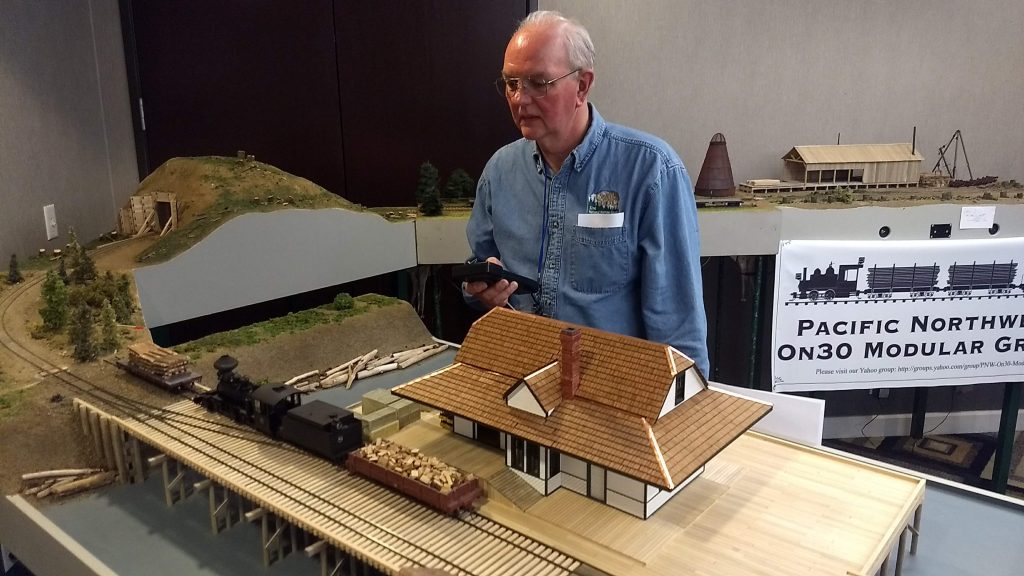
Ron Auletti running the morning westbound mixed at Alan Murray’s Olympia Station.Ed Roach enjoying his time working the Bay Lumber Company Camp 4 module.
Overall it was a great event and our group would especially like to thank all the enthusiastic operators who brought the layout to life as well as the coordinators of the Sn3 Symposium who provided the great space and support. If you would like to see our layout or are interested in operations, stay tuned here on the Grab Iron for show announcements or contact us via the Module Programs section of the 4D website or the PNW On30 website.
A few more shots from the event:
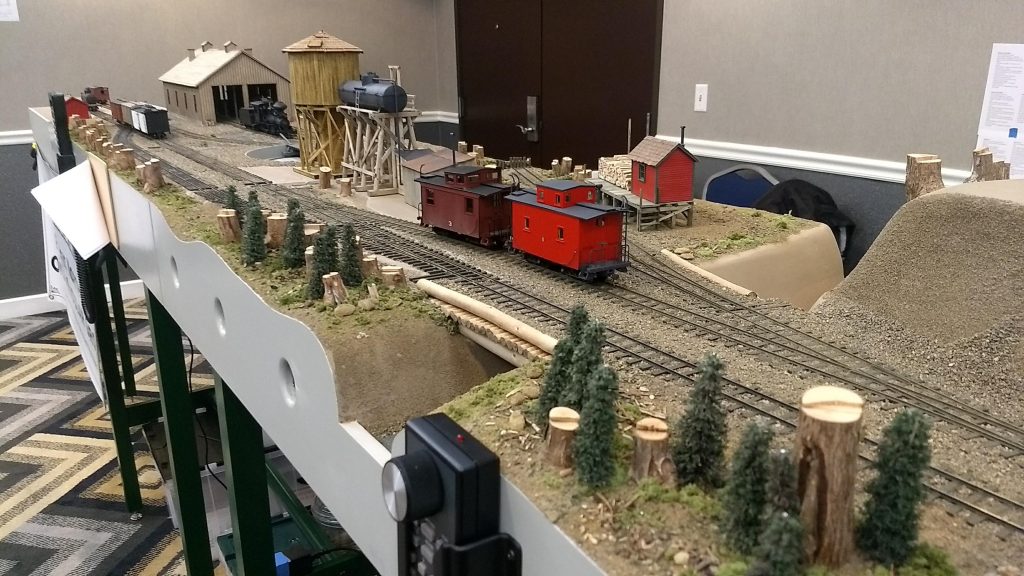
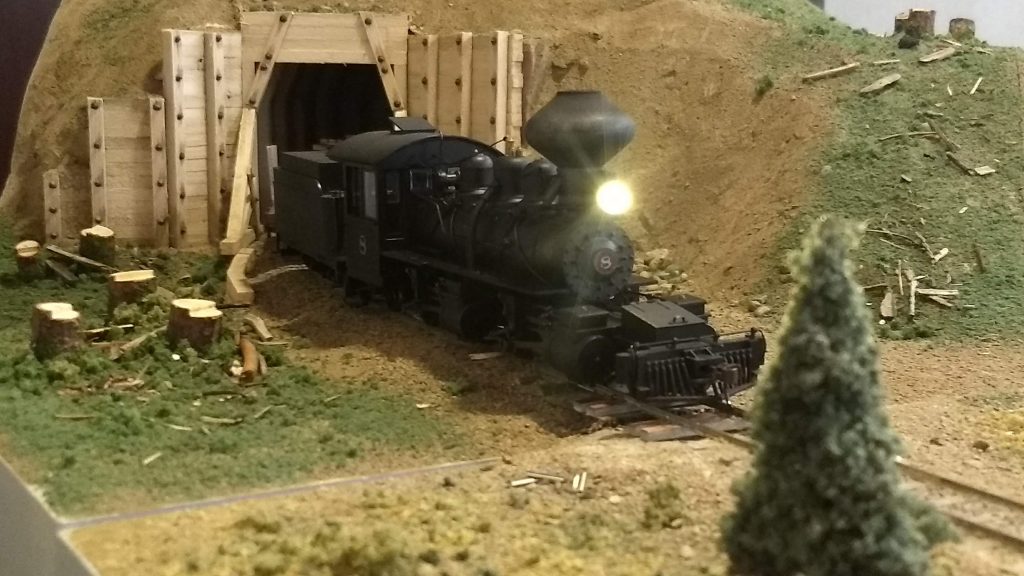
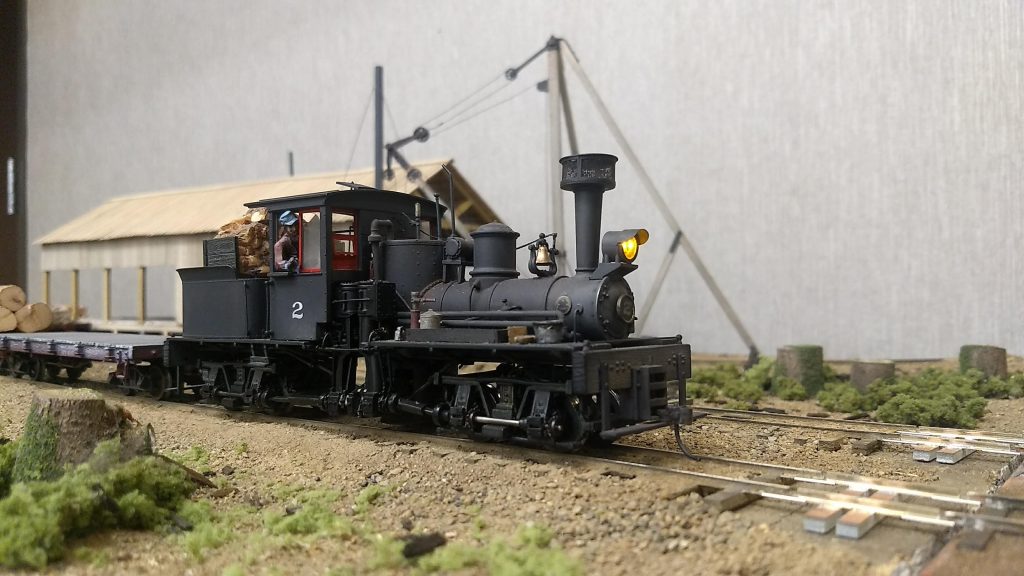
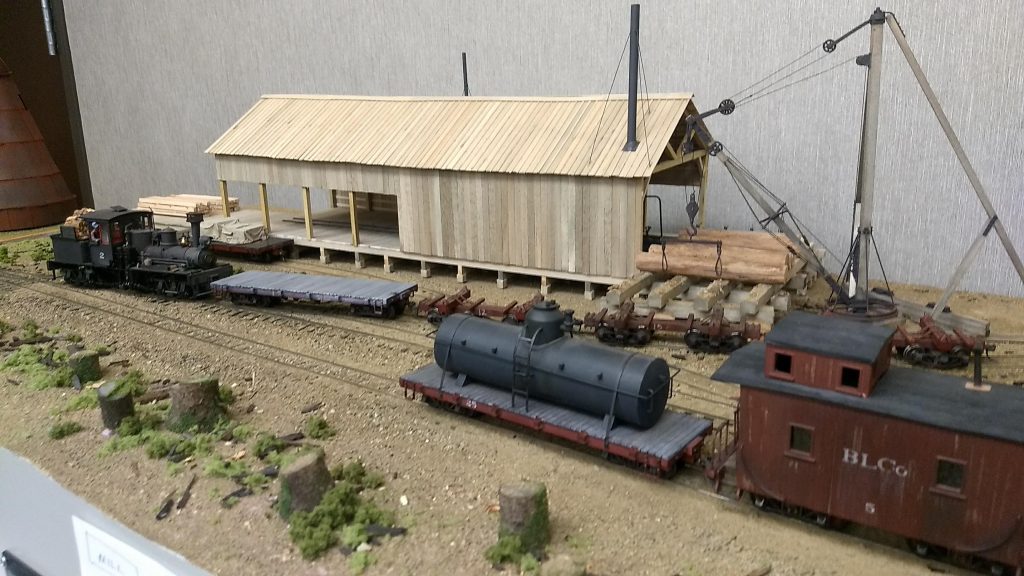
Motor No. 1 of the Nemah Valley Narrow Gauge making a stop at Camp 4. (Module and models Rich Blake)View of Alan Murray’s Olympia Yard section with locomotive servicing and turning facilities.The No. 8 2-4-4-2 of the Nemah Valley Narrow Gauge emerging from Jon Bentz’ Tunnel module.Bay Lumber Company No. 2 15 ton “Tee” boiler shay. (Model by Rich Blake) Bay Lumber No. 2 shay working Jon Bentz’ sawmill module.
Registration is now open for the annual 4D Spring Meet, to be held this June 22nd in Tacoma. We have many Master Model Railroaders signed up to educate, entertain, and amuse you — 11 clinics in all, including a Make & Take Clinic.
Quick! Head over to http://www.4dspringmeet.com/ and register today. If you pay in advance with PayPal, you’ll get a free lunch. (Of course, you can procrastinate, register the day of the Meet, pay the same amount, and get no lunch — it’s your choice!)
So click here and register today. You can thank me in Tacoma!