Article and Photos by Rich Thom
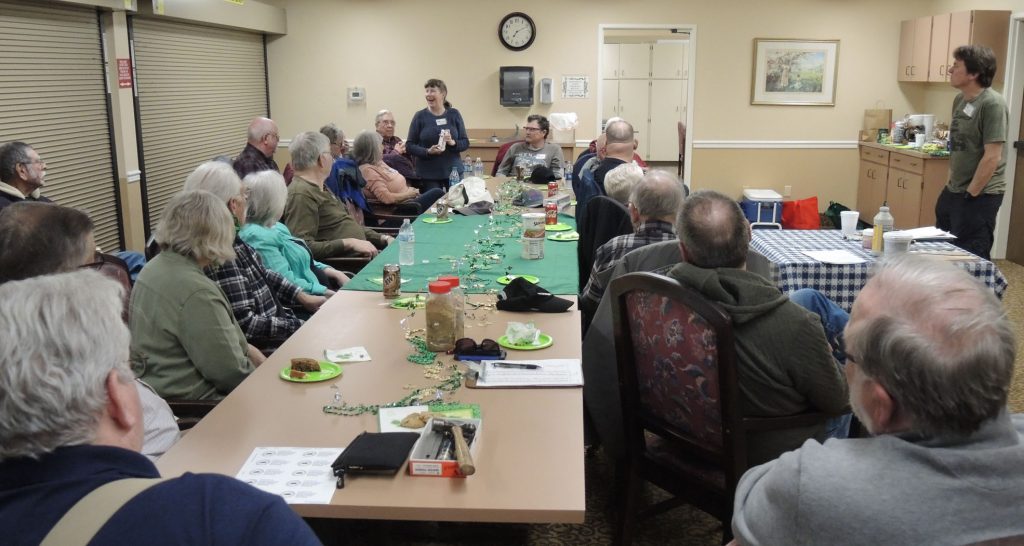
It wasn’t necessary for Clinic Chair Rich Blake to fire up enthusiasm. A St. Patrick’s Day mood was already in the air (Fig 1) at our March meeting, with green tablecloth, plates, hats and delectable cake (with green icing) laid out, all carried in by some of our keen members. Susan Gonzales (pictured, at end of table) announced our upcoming Lake Whatcom Railway outing (May 18th) as well as her work on recruiting. Susan created a small flyer for members to post in their towns to potentially attract new (younger?) members. Thanks, Susan; although our attendance is strong, we would be pleased to welcome more! Rich reminded all of the upcoming annual joint clinic with the Mt. Vernon NMRA Clinic on March 23rd, which will feature multiple clinics, swap tables, our annual model contest, NMRA achievement award judging, and more. Info is on the Grab Iron.
Alan Murray kicked off the evening by demonstrating a clever and simple way to add needed weight to Bachmann On30 flat cars. These are well-detailed, popularly-priced models but too light; Alan and his On30 modular group (https://www.pnwon30.org) endeavor to weight their cars to S-scale standards since no standards specific to On30 exist.
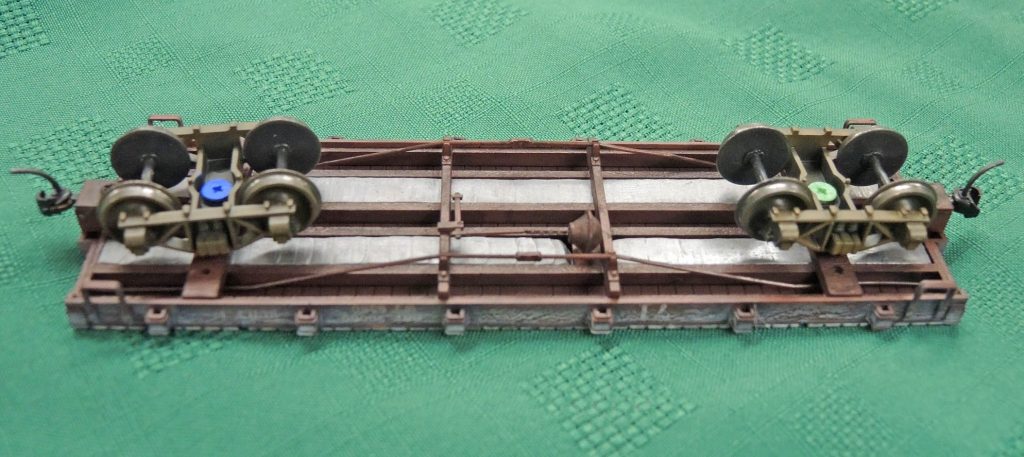
Fig 2 shows the underside of a weighted flat car using Alan’s method; two strips of lead are visible imbedded between longitudinal frame members. To fashion these, Alan starts with strips of ¼” diameter lead fishing weight; it’s available in rolls in the fishing department at Sebo’s Hardware stores or similar outlets. It turns out to be just the right diameter that—when hammered into the frame as shown—fills the spaces between the frame members perfectly. (Trucks are obviously removed beforehand.) Following initial shaping with an ordinary hammer, the job is finished off with a steel block and gentler hammering.
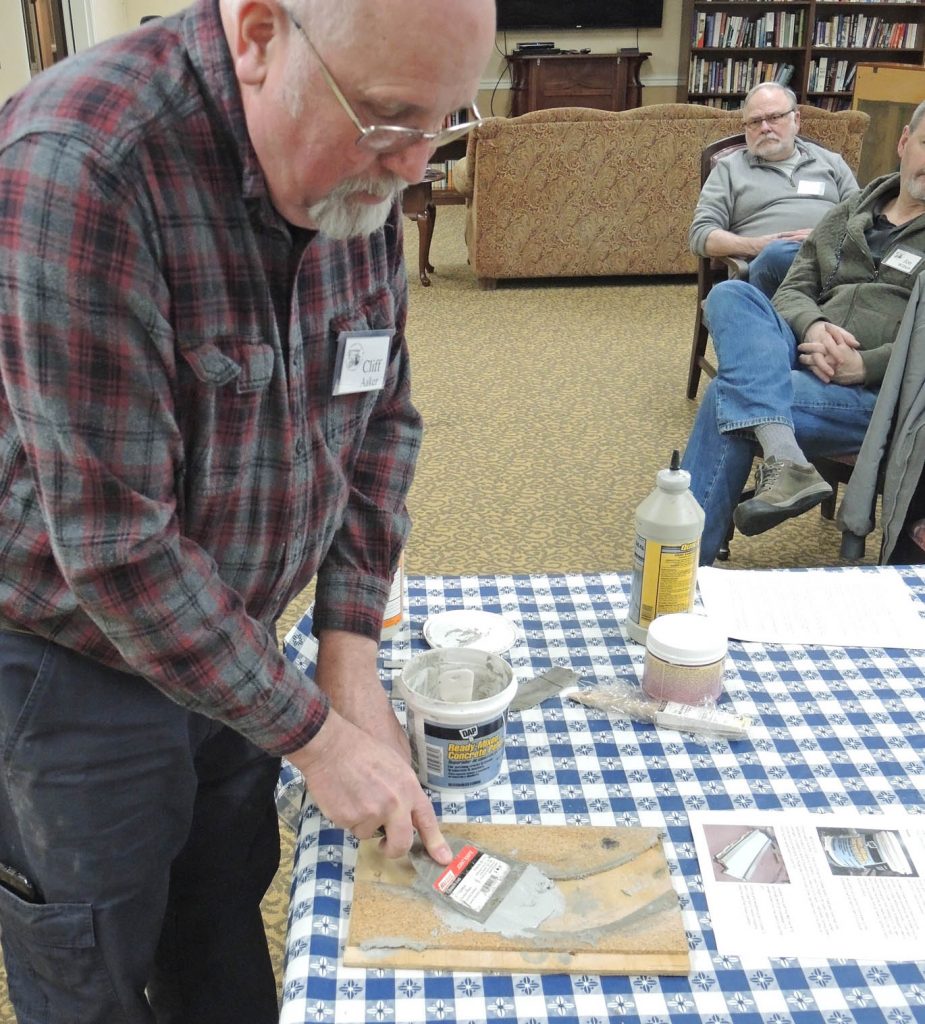
Cliff Aaker was up next for the main clinic of the evening, fashioning Roads from Concrete Patch and Rocks (and other things) from Concrete Crack Seal. The selection of the right materials is the key here, and Cliff tried several, so his trial and error will save you a lot of time. He was led down the right track by a video by Ken Paterson on making roads, which you can view at https://www.youtube.com/watch?v=ZEhBYa9P-EA&t=1358s.
First, roads. Of many similar products, use only Ready-Mixed Concrete Patch by DAP. Other latex-based products may work, but acrylic-based will not. Cliff applies this product up to 1/8th” thick per layer and allows 24 hours to harden. It applies somewhat like drywall mud but you have to keep wetting your trowel (use wet water i.e. with a couple of drops of detergent) often to keep the compound from sticking to it. Also, keep the trowel as nearly parallel to the surface as possible and go slowly. See Figure 3. In this example Cliff is using a simple form of plywood and cork roadbed.
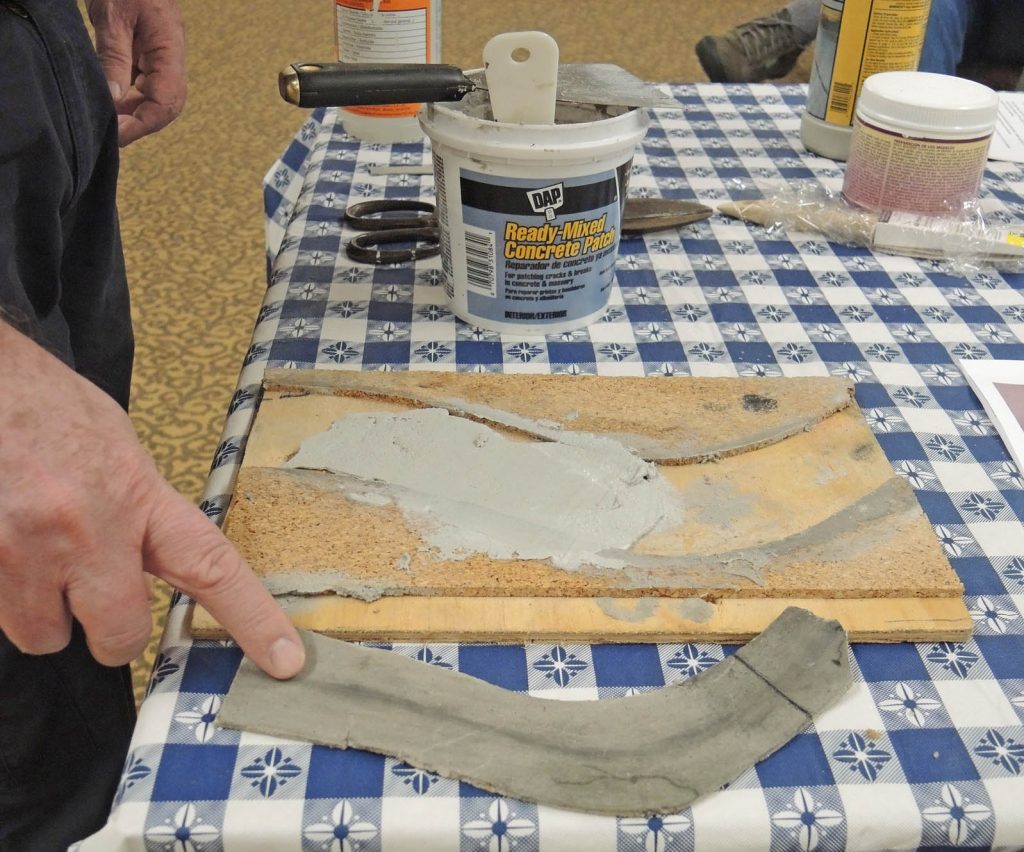
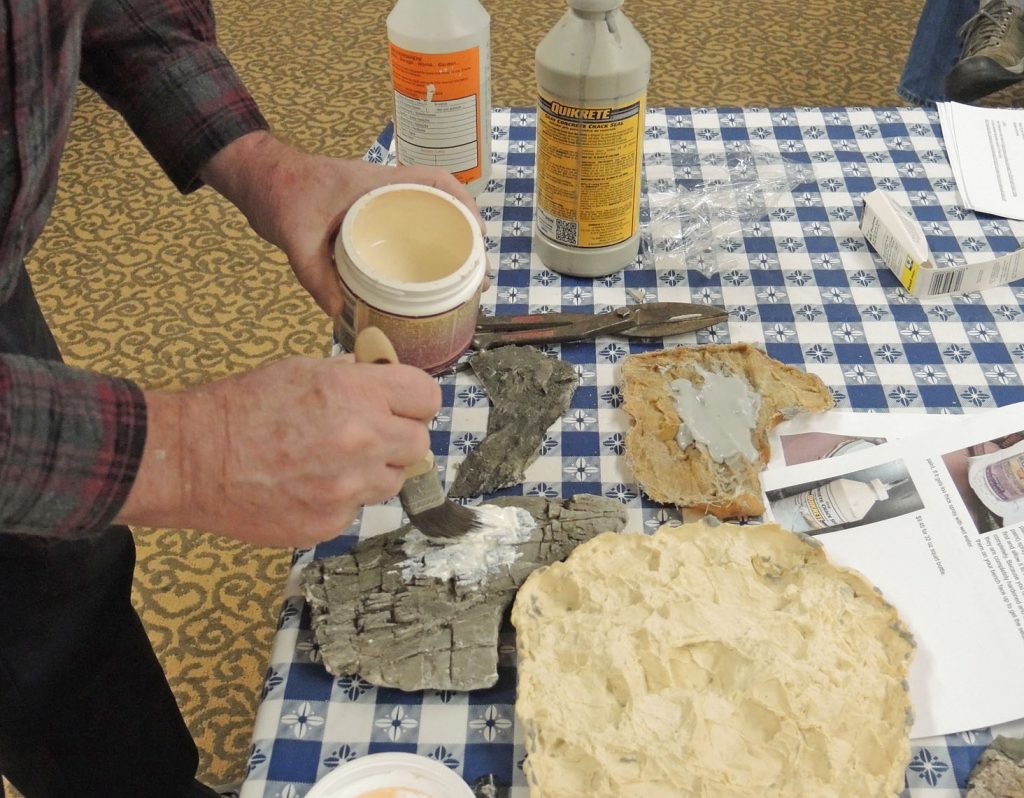
The concrete patch will shrink and crack on the first application. Applying a second coat is usually sufficient. After it dries, Cliff then sands first with #60 grit sandpaper followed by #120 and #400. Coloring and weathering are a matter of taste. One of the features of the patch is—well—it looks like concrete, so not too much effort is needed, as would be for, say, plaster or Sculptamold. Cliff uses India ink and Pan Pastel powders to age the pavement, and to add centerlines, joints and cracks. Potholes can be carved in later with a knife if desired. Fig 4 shows a section of finished road at the bottom, made from the same form. Another feature of the cured latex is that it is flexible, so you can easily create vertical curves in your roads.
Moving on to rocks, a different concrete patch is used: Concrete Crack Seal by Quickcrete. In essence Cliff uses this material to make latex rock castings, using latex molds, in a similar way that plaster rock castings are made using these same molds. The end products are similar to—but far cheaper than–the so-called “rubber rocks” commercially available. The Crack Seal is much thinner than the patch material described earlier as it’s made to flow into cracks. That also means it flows into and conforms to tiny details of latex molds. In Fig 5, Cliff begins filling a mold with the crack seal material.
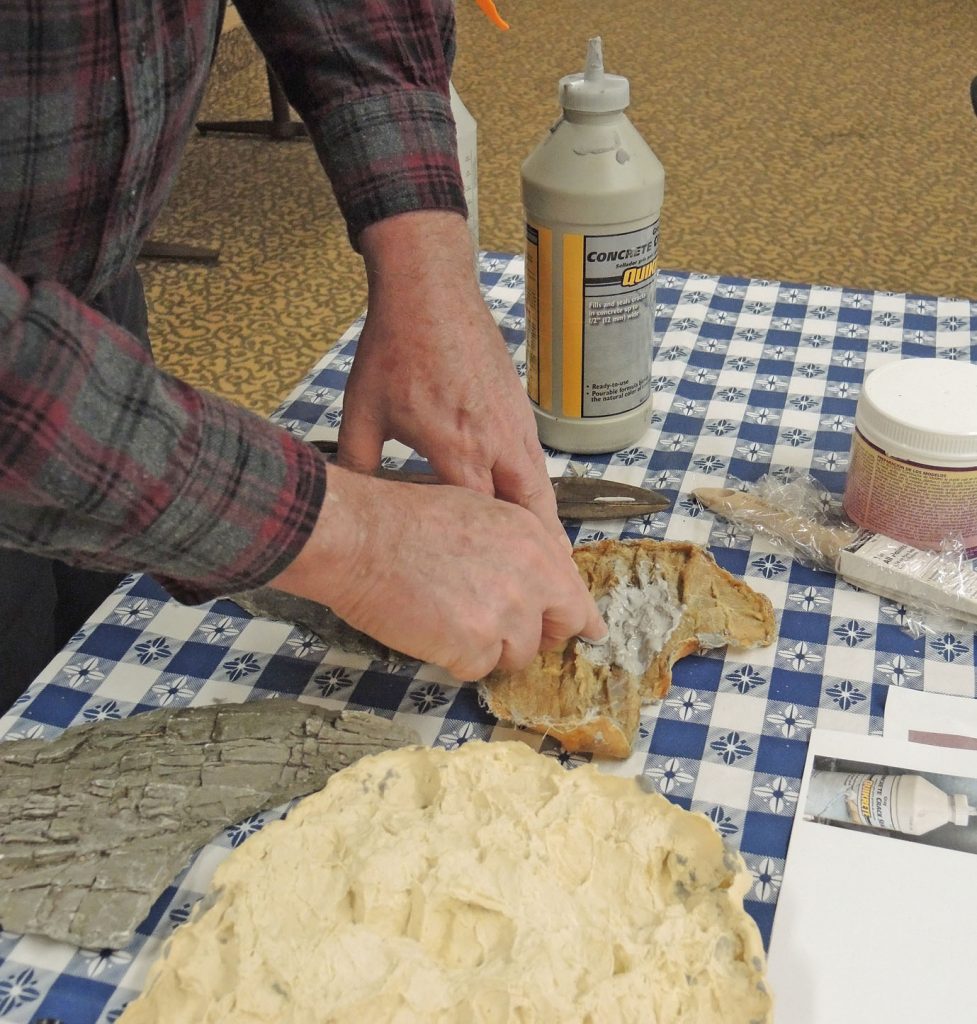
Perhaps surprisingly the Quickcrete material, despite being latex-based, doesn’t seem to stick to some latex molds, even without any mold release agent being used. Cliff has successfully used both home-made molds (such as the one he is filling in Fig 5) and Bragdon molds (bottom, Fig 5). However some have had trouble trying this material with Woodland Scenics molds, so experimenting with small pieces is recommended. If you run into an incompatibility, the crack seal material dissolves in alcohol before it cures.
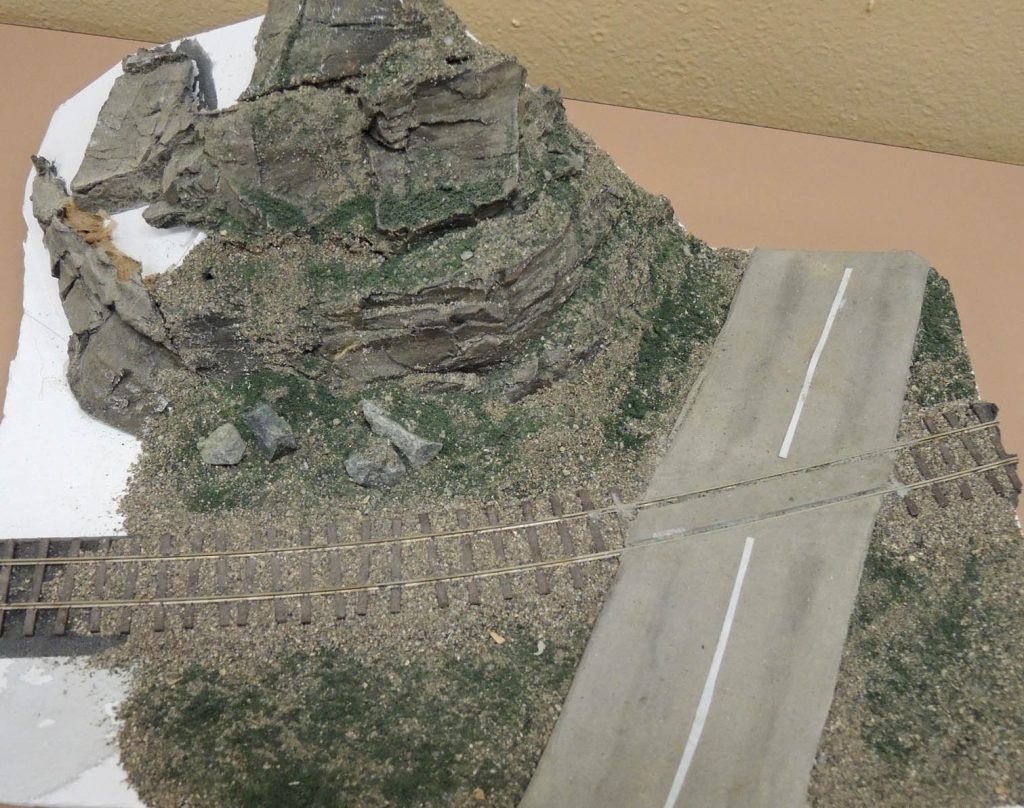
Fig 6 shows a small display piece with both a concrete patch road and some rock outcroppings made with concrete crack seal as above. The crack seal rock pieces can be trimmed with tin snips to fit neatly onto hillsides or into cuts and are glued into place with hot glue (high heat type). Crack seal doesn’t stain the way plaster does: you must paint it. Cliff uses acrylic craft paints diluted 1 part paint to 4 water applied with a squirt bottle. He does black first and allows it to settle into the cracks and dry completely.
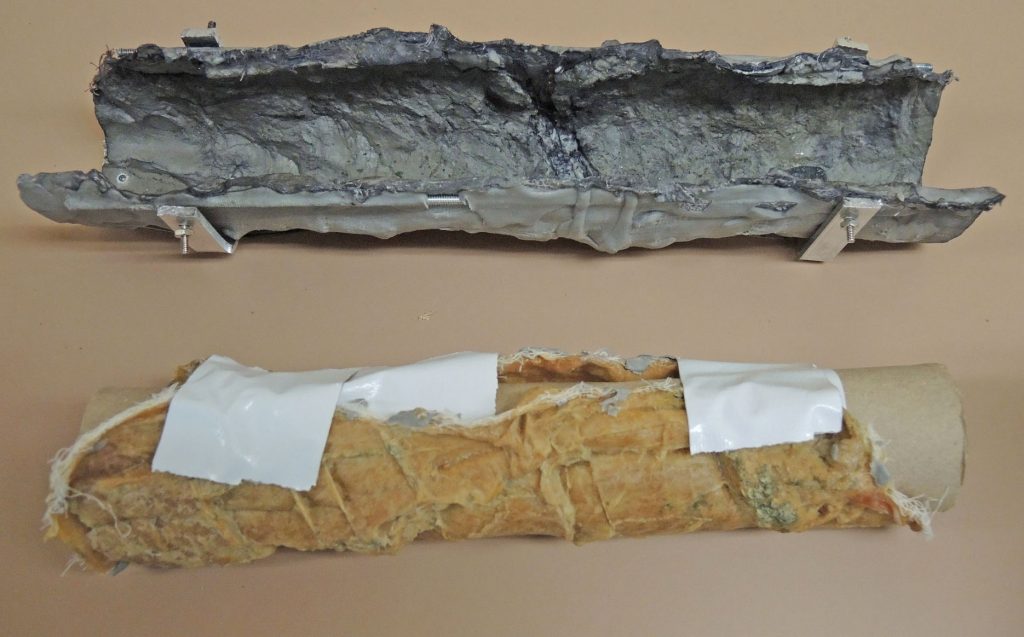
Cliff discovered other uses for the Quickcrete material. One example is shown in Fig 7: a tunnel lining for one of Cliff’s On30 modules. The module contains a small length of On18 ore track with ore cars shuttling back and forth using an automated reversing circuit. Train Show attendees would peer into the tunnel, Cliff said, and remark that it had no walls or ceiling. Easily fixed by using the crack seal to create a lining. The “mold” for the lining is at the bottom in Fig 7 and the lining produced at the top.
Speaking of molds, Cliff makes his own (Fig 8). He uses Castin’Craft Mold Builder liquid latex rubber sold at Michael’s and similar craft stores.
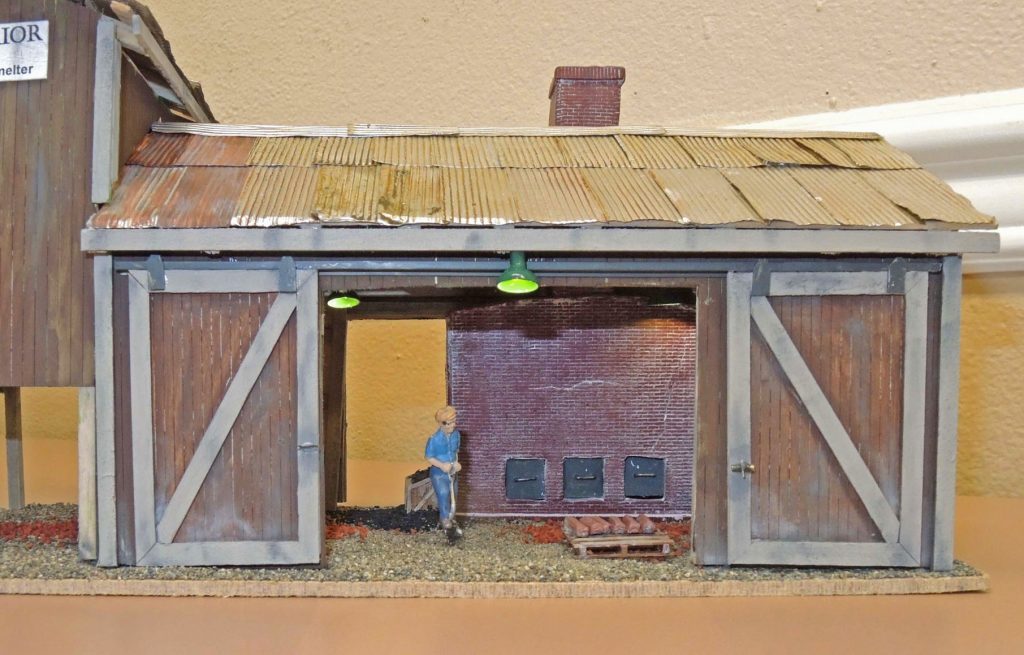
Cliff has also used Quickcrete Concrete Crack Seal for creation of structural details. In Fig 9, a portion of a larger O-scale model of a copper smelter, Cliff used it to produce the furnace and chimney: beautifully done. The material accepts common acrylic craft paint—Cliff used Black Cherry to create the brick tones here. He earned a well-deserved NMRA Achievement Award for his copper smelter.
Rich Thom
No Comments Yet