Article and Photos by Rich Thom
Clinic Chair Rich Blake welcomed 26 to the first SV&W NMRA Clinic of the season. This clinic was devoted to scratchbuilding; so without further ado, let’s get to it.

Area modelers were invited to bring in their scratchbuilding efforts, both completed and in progress, and most are on the table next to Cliff Aaker (Fig 1), who led off the evening with his presentation “Methods and Tools for Scratchbuilding Scale Models.” Cliff discussed his general approach, in which he either copies a commercial model—to improve upon it by adding details and “personality” for his own railroad—or more typically working from prototype photos. From photos he works out roof pitch and other dimensions using window, door and other features–for example, a standard door height of 6’10”. Often he builds a paper or art board mockup for a project if it’s complicated or must fit a precise space; his first such was building a road bridge for the Anacortes & Fidalgo Model Railroad Club, whose members are long-time clinic contributors.
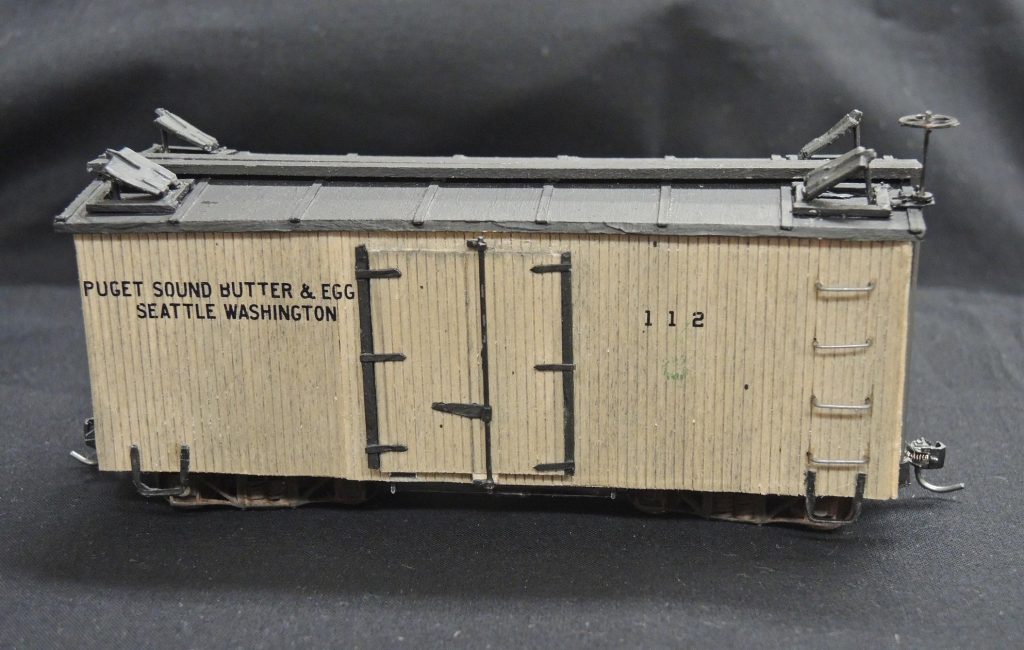
Like most everyone, Cliff uses a mix of purchased and scratch detail parts. For his On30 reefer in Fig 2, brake wheels, roof hatches, turnbuckles—and of course couplers–are commercial parts. Other details, door hardware, latches, stirrups, and grab irons are scratch. Cliff passed around his grab iron bending and drilling jigs; the stirrups are fashioned from bent staples.
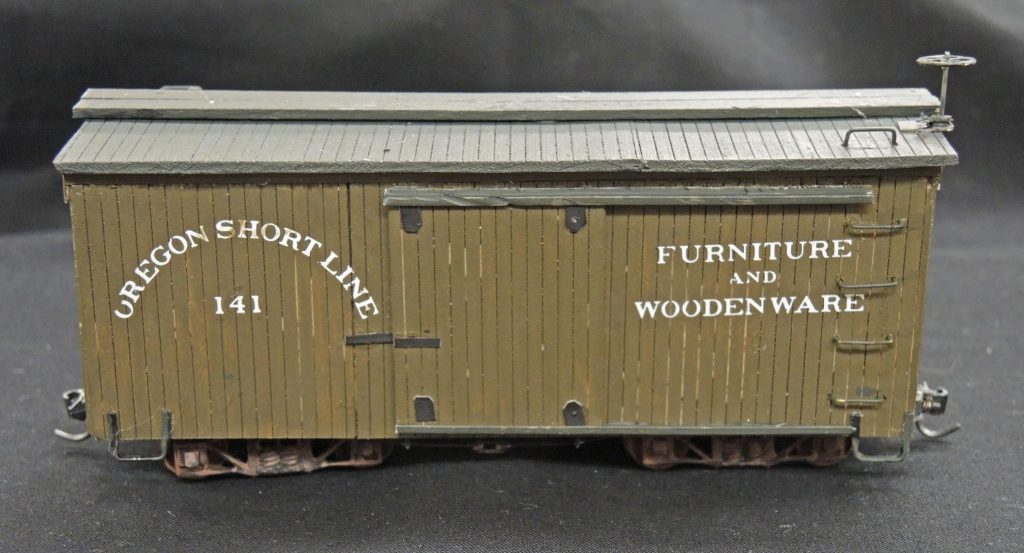
Cliff’s box cars (Fig 3 shows one example) are built over a solid wood core, or plug. This automatically keeps all car sides and ends square and provides the needed weight. All car sheathing is Kappler Lumber scribed wood. Roofs are either wood planks or ribbed metal. Metal ribs are simulated with paper strips cut with a rotary cutter. The styrene door channels were glued to the carbody with “old” thick styrene glue, which Cliff found to adhere well to wood.
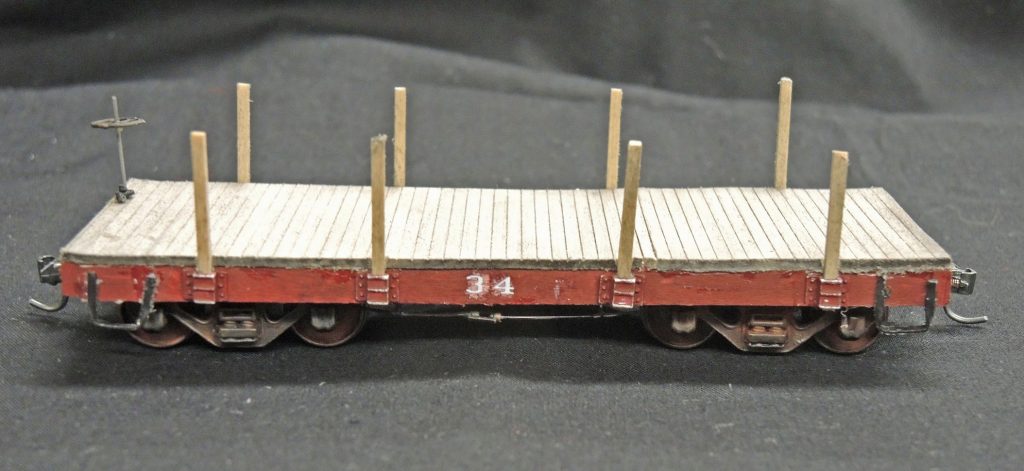
Flatcars (Fig 4) are difficult to weight properly without unsightly lead weights glued to the underbody, or weighted loads. Cliff solves this by using 1/16” lead sheet sandwiched under the decking. The stake pockets are commercial parts, the stirrups scratch.
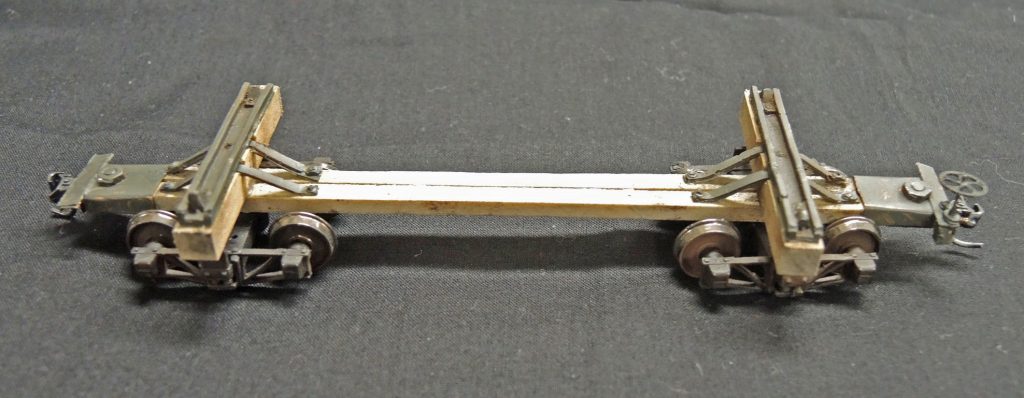
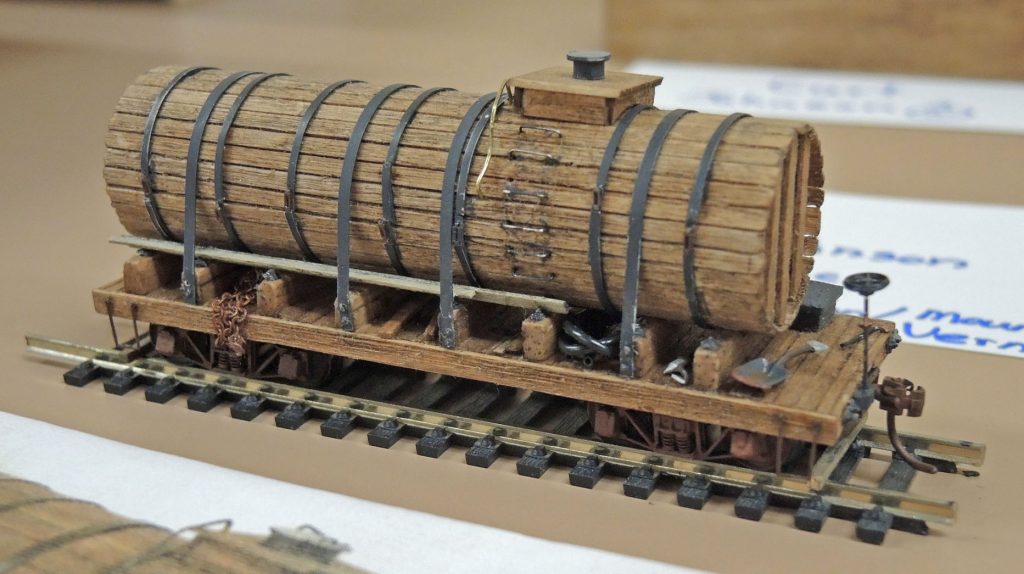
The metal parts on the skeleton log car in Fig 5 were fabricated using concrete patch and latex rubber molds. (Cliff described multiple uses of two types of concrete patch at our March 2019 clinic.) The trucks on this car, available from Precision Vintage Classics (www.pvc-sn3.com), use 3D-printed sideframes. The cars in Figures 2 and 3 also use PVC trucks.
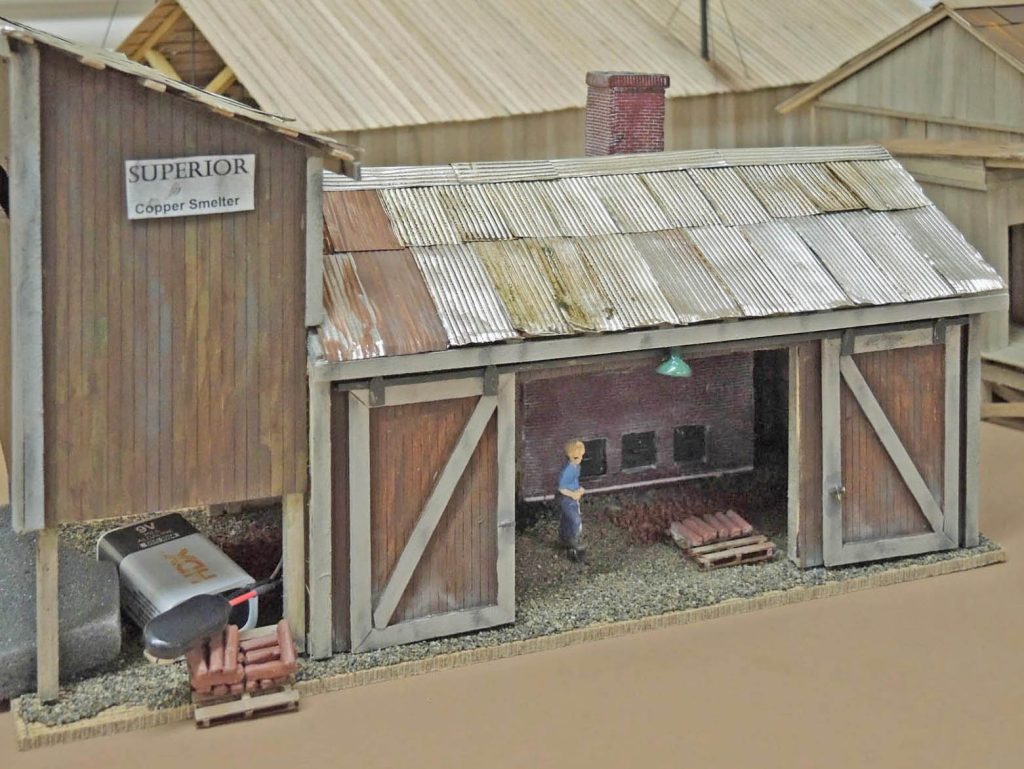
Cliff brought two of his scratchbuilt O-scale buildings to discuss some of the construction methods used. The copper smelter (partial view in Fig 6) was based on drawings of a smelter in Bodie, CA published in Narrow Gauge & Short Line Gazette. Quickcrete Concrete Crack Seal was used to make the furnace and chimney. The roofing is ordinary household aluminum foil cut with a rotary cutter and scissors, then shaped with a tool from Brunel Hobbies, their “Corrugated Iron Maker” (www.brunelhobbies.com.au). Cliff uses all three readily available thicknesses of aluminum foil in his models.
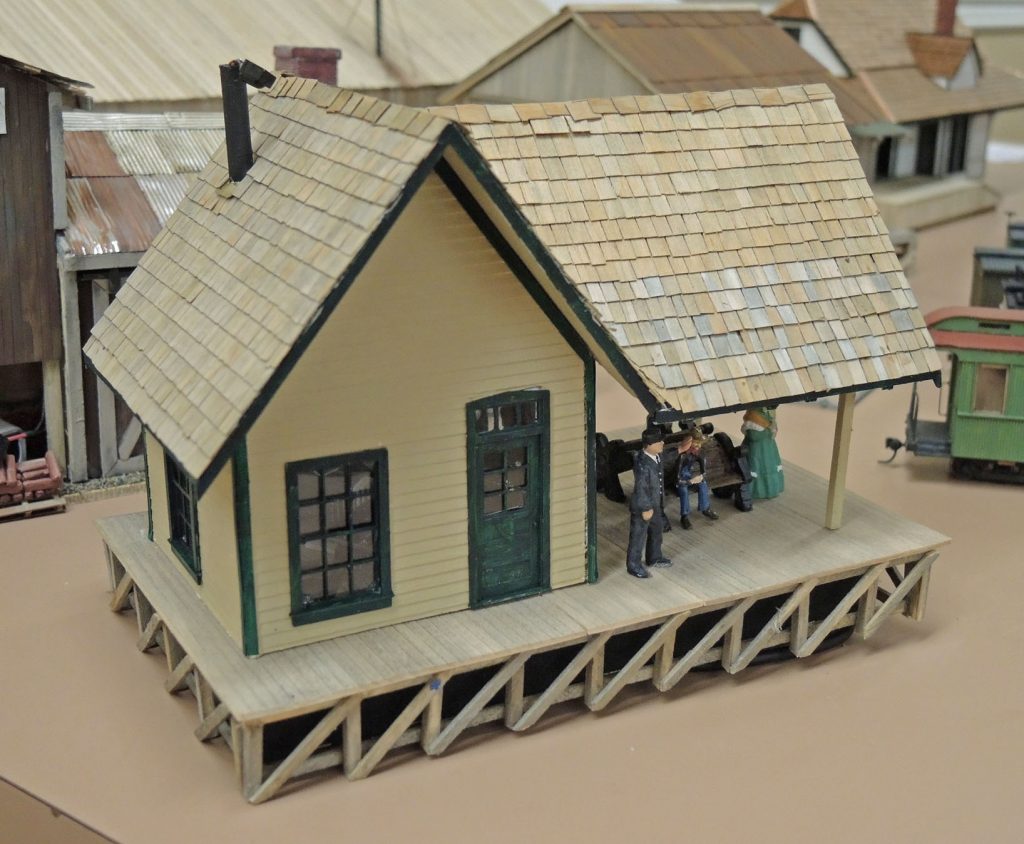
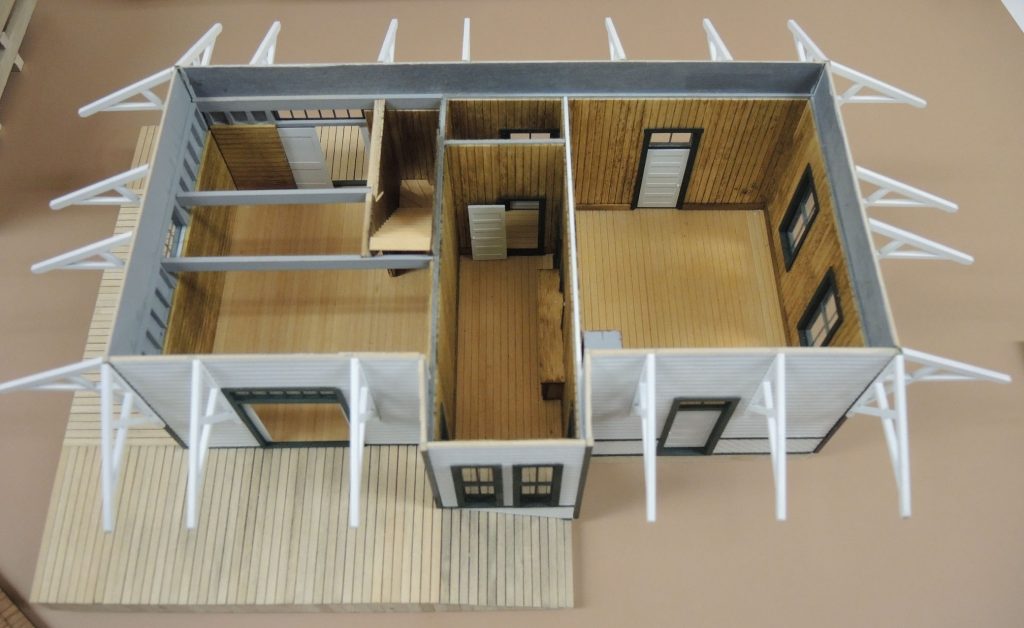
The freelanced depot (Fig 7) was designed with a deliberately high-peaked roof, 12/12 pitch, to provide maximum elevation for an IR sensor which, in conjunction with a servo, battery and Arduino, operates a train order signal (not shown) using a TV remote. During assembly, walls were kept square using a fixture constructed of Lego pieces. The beautifully-executed roof is built with individual Western Red Cedar roofing shakes. Thin wood sheets of cedar were cut into strips with a rotary cutter, chopped, and applied one-by-one with double-sided tape. Fine work, Cliff, and a great clinic!

Other scratchbuilders in the group had the opportunity to describe their show-and-tell items. Alan Murray brought two of his fine O-scale structures, including the oil tank in Fig 8. Alan has discussed his techniques in several of our previous clinics, which include sawing all of his scale boards from sheet—no purchased (expensive) stripwood for him! Note the N-B-W castings, essential for any model to qualify for an NMRA Achievement Program award.
Alan showed slides detailing the history of the train station in Olympia, and his remarkable reproduction of it in O-Scale. The single photo of it here (Fig 9) can’t possibly do it justice. It sits not on land, but a pier, and the pier (not shown) is just as well-crafted as the station. Alan has featured his Olympia station module construction in previous clinics.
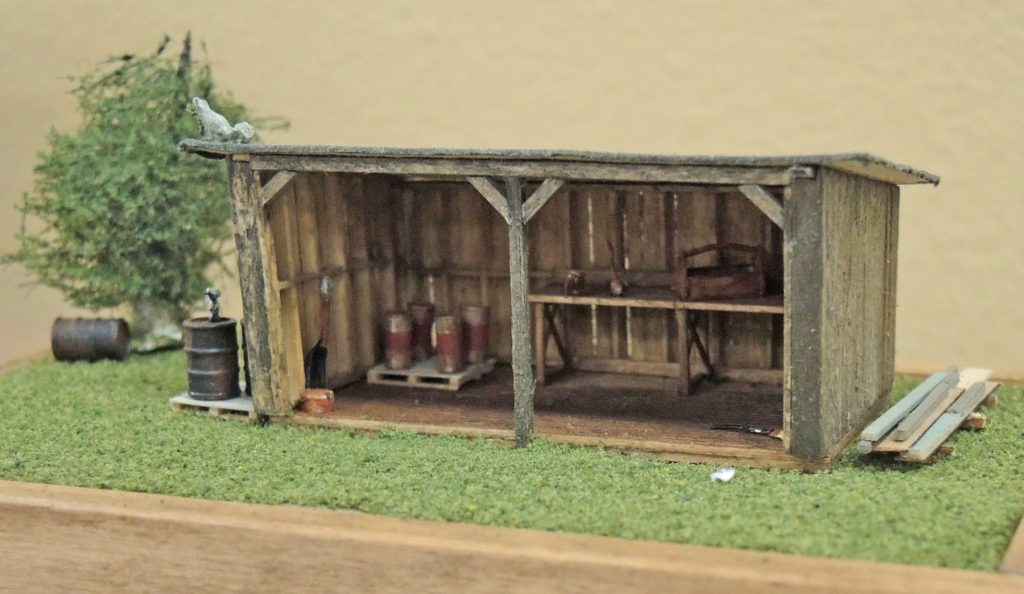
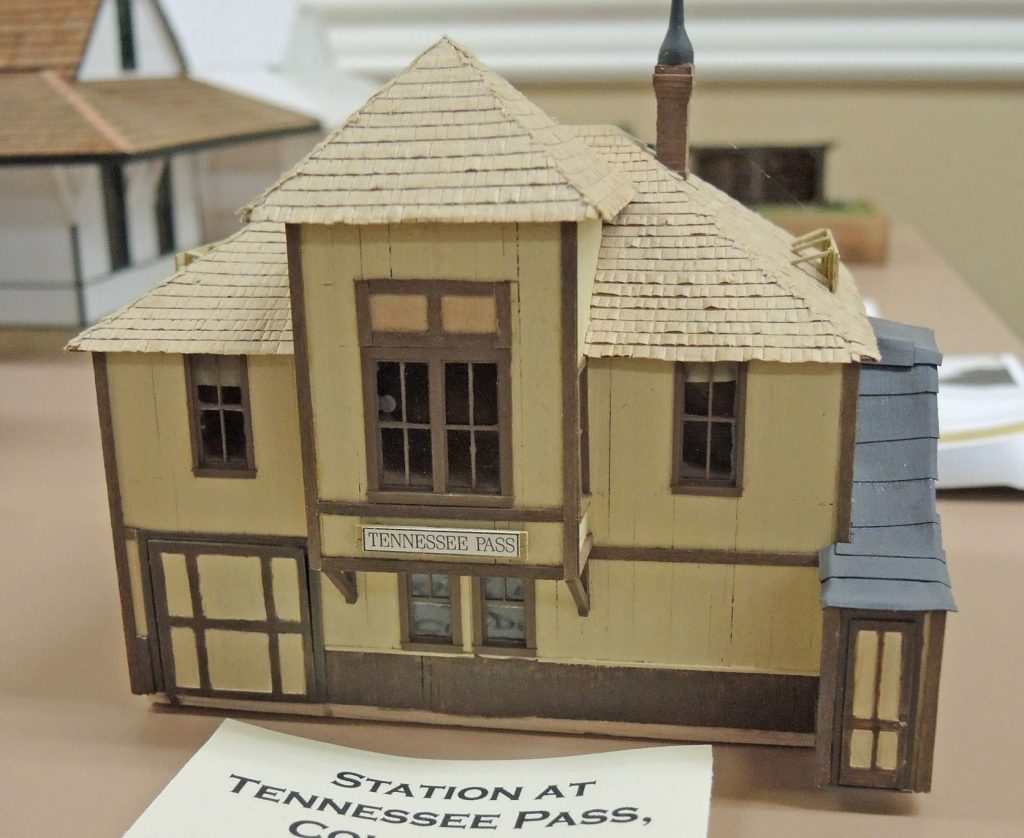
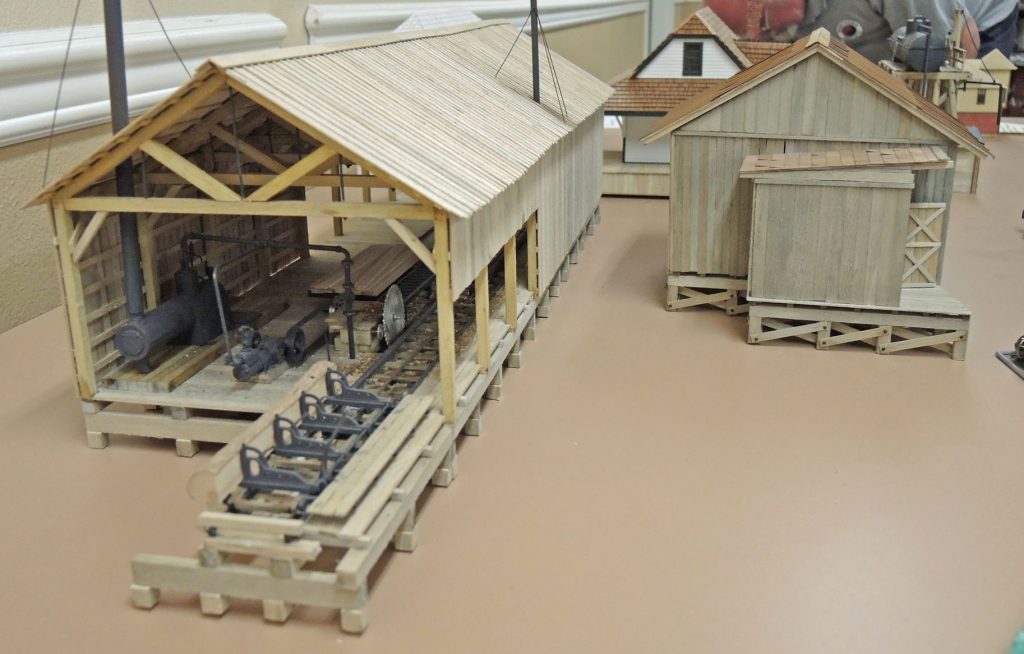
Iver Johnson showed off his water tank for a logging line, Fig 10. Curt Johnson got the idea for his scratch shed, Fig 11, from a Walther’s Catalog. Jack Tingstad built the replica of the Tennessee Pass Station, Fig 12, from plans he was able to obtain after he was unsuccessful in finding one of the original kits which had gone out of production. Jon Bentz brought two of his O-scale structures, both freelance, a sawmill and a work-in-progress freight house (Fig 13).
Thanks to all for bringing in some fine models and describing some of their techniques.
###
This is an outstanding report. I can see that everyone who participated enjoyed the clinic. I enjoyed reading about it and wish I could have been there. Excellent work folks.
This reminds me of Butch Cassidy and the Sundance Kid while being pursued by the Pinkerton agents: “Who ARE these guys?!” Wow these are some great models. Make that: these are a LOT of great models. Thank you for sharing and inspiring.
same
I love that you contributors (above) are “doers” of the words, and not “hearers” only. As Paul Scoles said to us years ago, “You’ll never know what you can do… until you do do. Do something!” For those who are hesitant, build scale wood pallets or an outhouse, if not for your layout, someone else’s. Thanks for sharing. Hope to see you in Lynden next weekend!