Article and Photos by Rich Thom
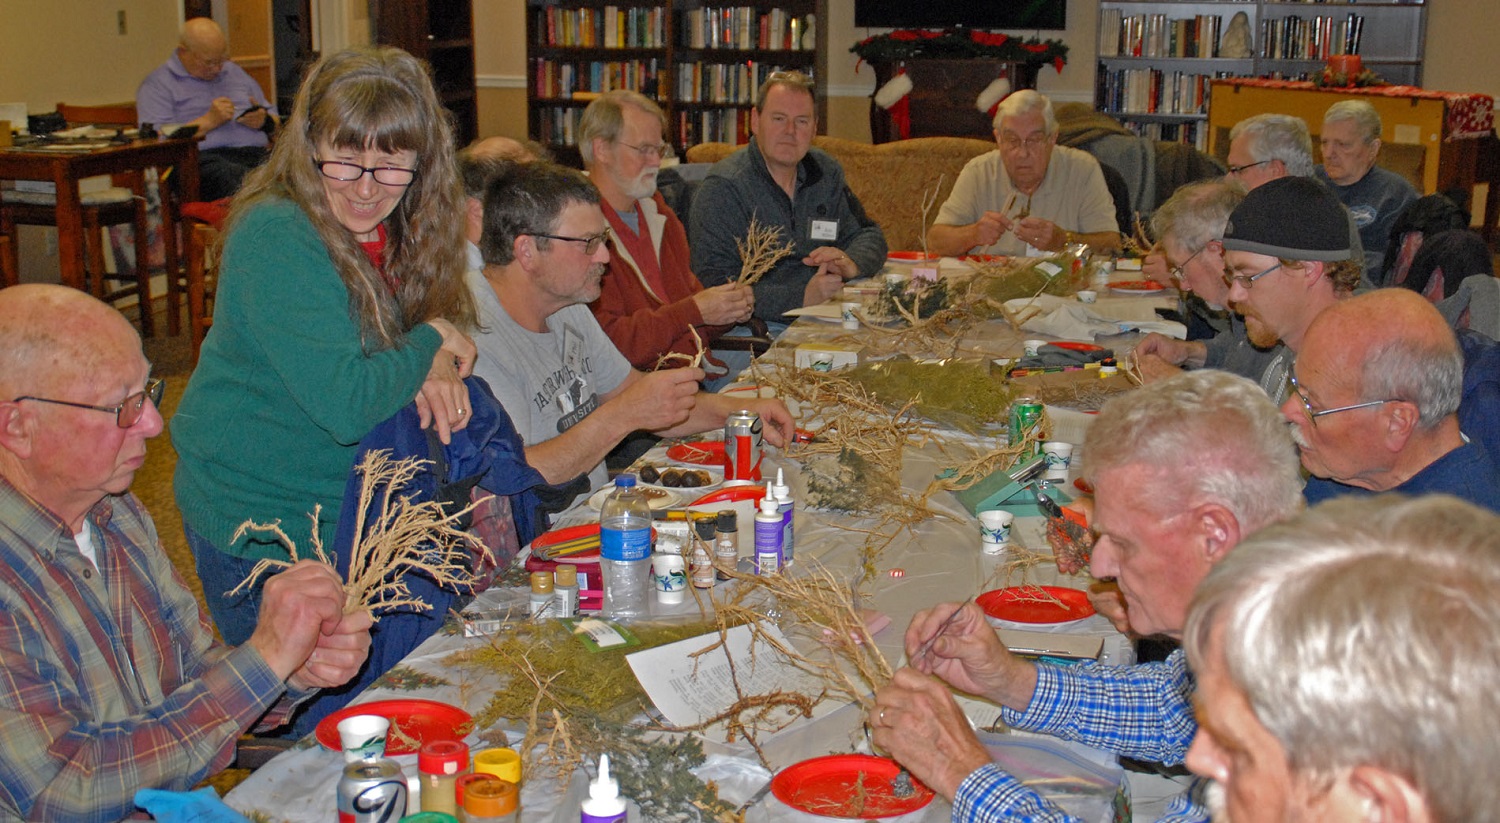
December’s clinic featured an always-popular “Make-and-Take,” with Susan Gonzales leading the group through her process of making windblown trees. Susan’s technique is based on an article, “Windswept Trees from Natural Materials,” in the April 2013 issue of Model Railroader, but she shortened the process and used her own choices of materials, stains, etc.
To inspire everyone for the evening’s tree-making, Susan brought a completed tree:
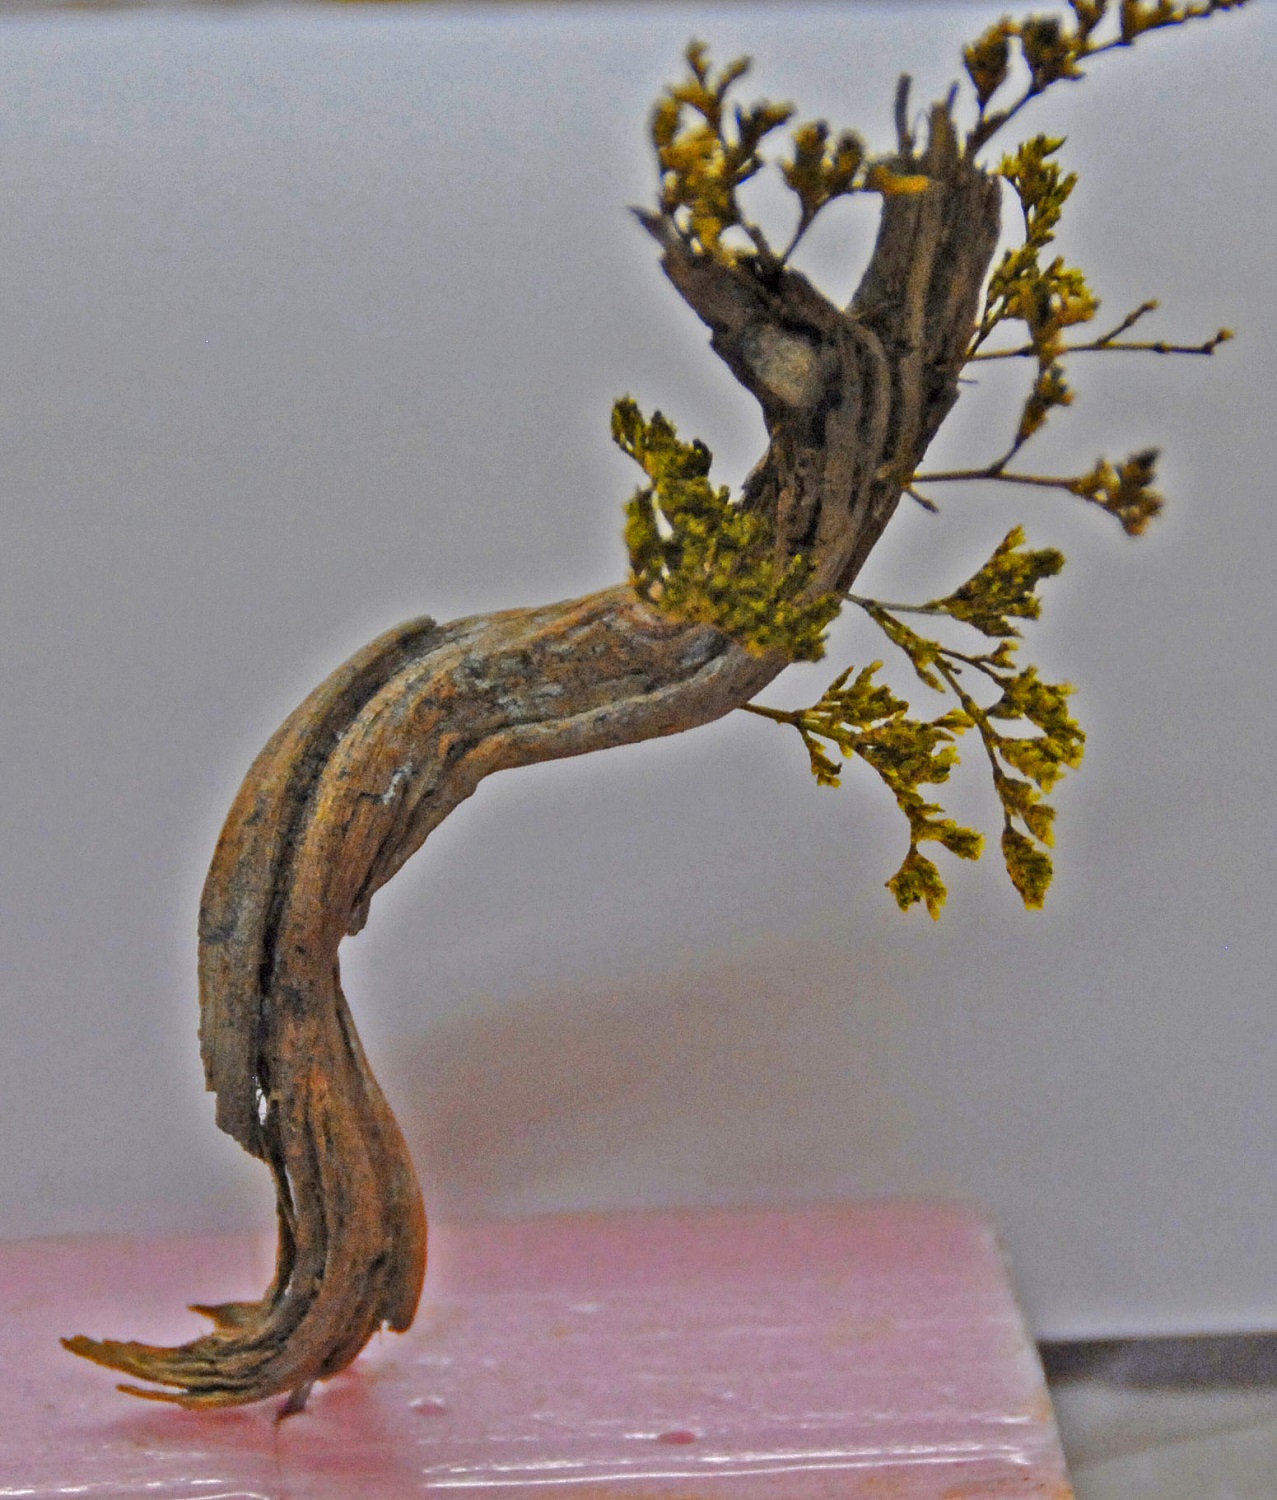
In this example, sagebrush collected in eastern Washington was used for the trunk, and caspia for the branches. Other twigs you can find in the woods can also be used, but sagebrush produces especially fine windblown trees. The trunk has been stained and also weathered with gray washes. Having examined Susan’s tree, everyone had a chance to try their hand at creating an equally-gnarled tree. Susan brought a large supply of sagebrush and caspia to the clinic — more than five times enough in fact for everyone!
Susan Leads Tree Clinic
The first step in the process Susan did before the meeting (after gathering a quantity of sagebrush): bleaching the wood. She uses four 5-gallon buckets. The first is filled with a strong solution of bleach, and the other three with rinse water. The twigs are soaked in the bleach solution for one hour, then moved to bucket #2. The wood is swished around in the bucket and soaked for 20 to 30 minutes. This is repeated again in bucket #3, and then #4. The rinse water is changed frequently. Rinsing continues until all bleach odor is gone. The twigs are dried on a tarp or plastic sheeting, preferably outside. A sunny day is even better (good luck with that in western Washington!).
The next step is to “mine” the brush, searching for gnarled and / or curved or otherwise interesting-looking segments for the trunk of your tree. Cut, then pinch off excess branches to get the look you want. The size will obviously depend on your scale and whether it is to be a foreground or background tree. If it’s sagebrush, pick off any thorns. Clean off loose pieces with a wire brush. For a polished, wind-worn look, use 220-grit sandpaper on the trunk.
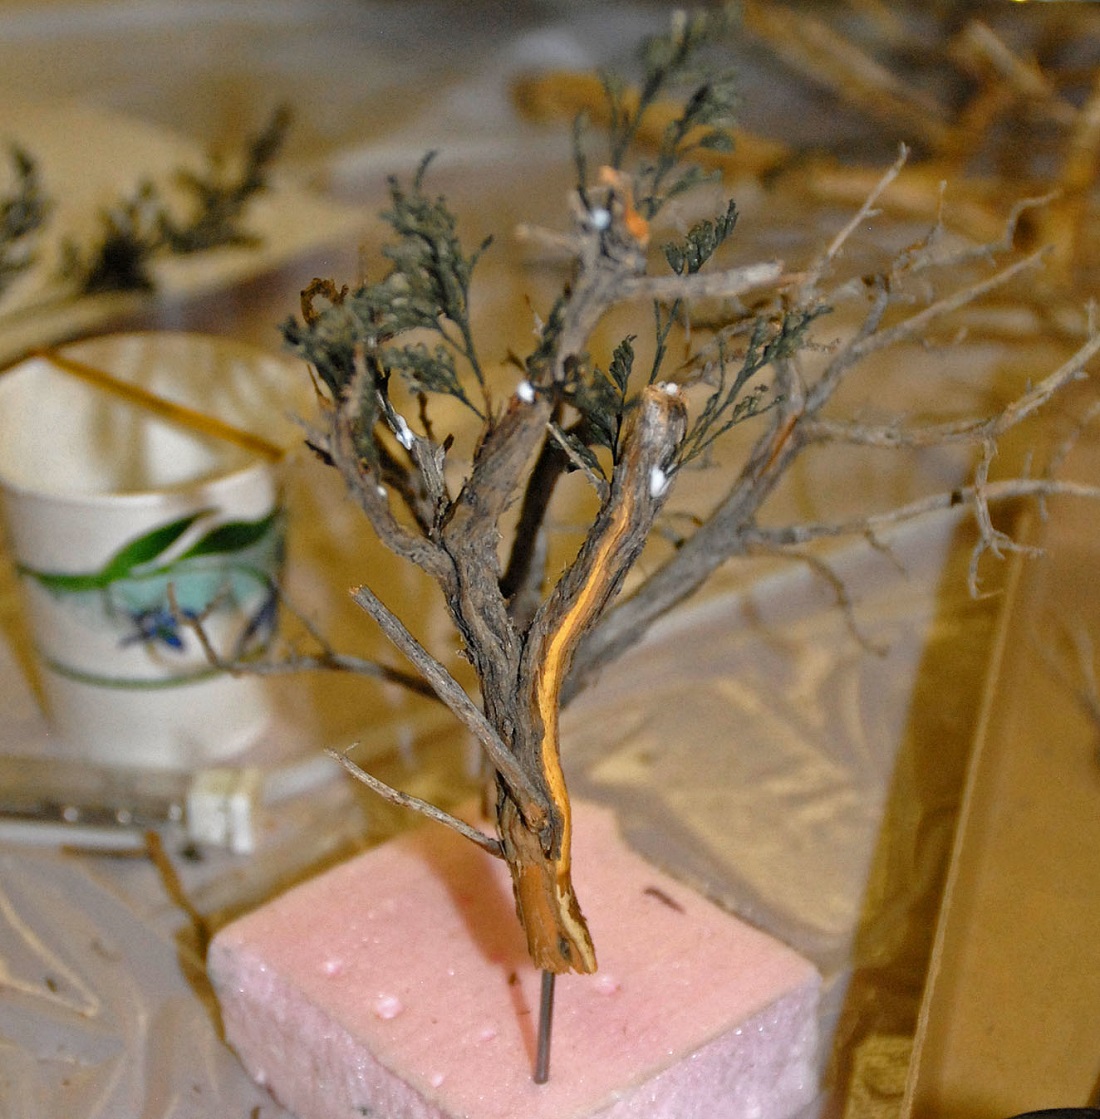
Color the trunk (optional) with a brown stain, gray washes, or both. Susan uses Folk Art brand maple and cherry stains (hard to find) but your favorites will work, too. She uses Folk Art dove gray and steel gray acrylics for the washes.
The next step is to drill or punch holes in the trunk for the caspia branches. After forming the holes, Susan uses a trick of putting T-pins in them to keep them open (and visible!) until you are ready to glue in the caspia. She uses Aleene’s fast grab or tacky white glue. One of our tree-builders discovered that you shouldn’t squeeze the glue bottle too hard.
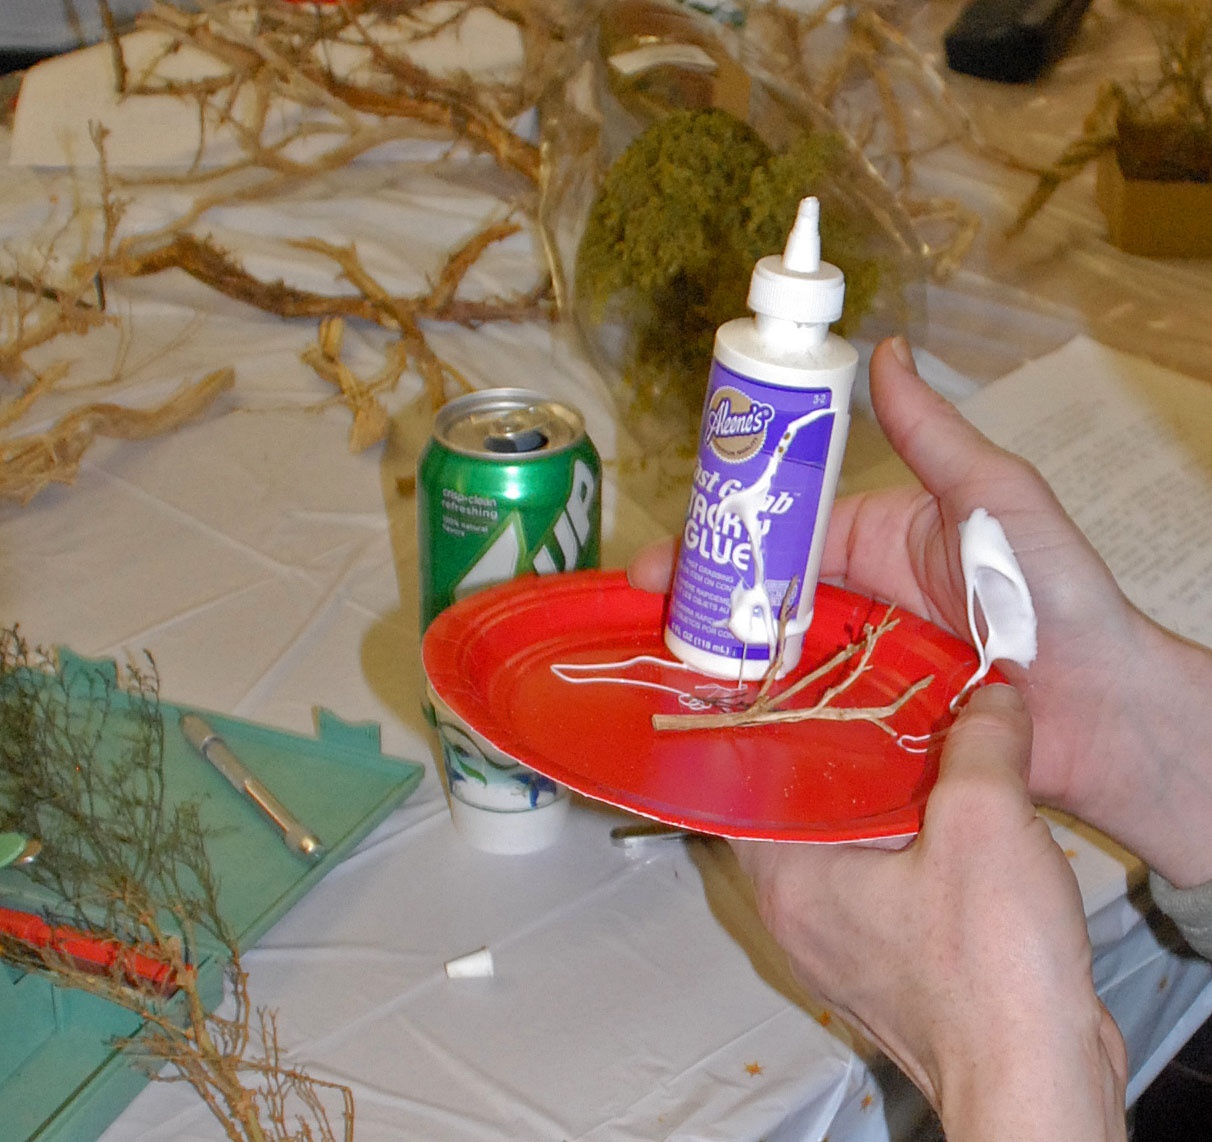
Results of Squeezing the Bottle Too Hard
Ground foam may be added to the branches, also optional. As a final step, drill hole and glue in a planting pin at the bottom of the trunk
Everyone took home a windblown tree, such as these resulting from the evening’s labors:

John Mann’s Tree
Tom Hawkins’ Tree
Thanks Susan for a fine clinic and inspiring us all to enhance our layouts with these unique trees.
No Comments Yet