Article & Photos By David Yadock
Dry Gulch & Western, Update 6
One of my favorite locations is the steep, narrow gulch that is next to Alpine on the layout. This is my attempt to copy the famous French Gulch scene that was on the Gorre & Daphetid. A swift moving river with several cascading waterfalls provides plenty of visual interest to this gulch. Just like John Allen’s layout all four levels of the mainline traverse this area. This creates an excellent photographic location, but also created a very difficult scene to complete. Like with other areas of my layout there are lots of things going on in a very small amount of space. Six bridges, 4 tunnel portals, and a major water feature all had to be carefully planned and executed.
Photo 28 is probably very familiar since it was used in my last update but gives a very good view of the gulch in its infancy. It also shows how I attached some of my rock castings. I usually “glue” them in place with simple expanding foam, I then cover the exposed foam with joint compound. Once the joint compound is dry, I then paint it with earth colors. Later on, I blend the colors with other paints and ground cover. I used to use primarily lacquer-based paints but have switched to more water-based paints. Yes, there are 6 bridges at this location. One is on the left, 4 are in the center of the photo, and the last is a small wooden trestle just past the oil rig.

Photo 29 is taken from the Dry Gulch access hatch. This view normally can’t be seen from any aisles. The photo shows just how close the various towns are on the layout. At the top right is Alpine, just to the right of the oil rig in the center of the photo is Potter Flats, and down at the bottom left is the town of Raade Springs. The raised elevation of land that Raade Springs sits on completely hides Potter Flats from the front of the layout. Using these types of scenery dividers helps with making the towns seem further apart from each other. You can also see the completed rock castings and how they have been blended into the rest of the scenery.
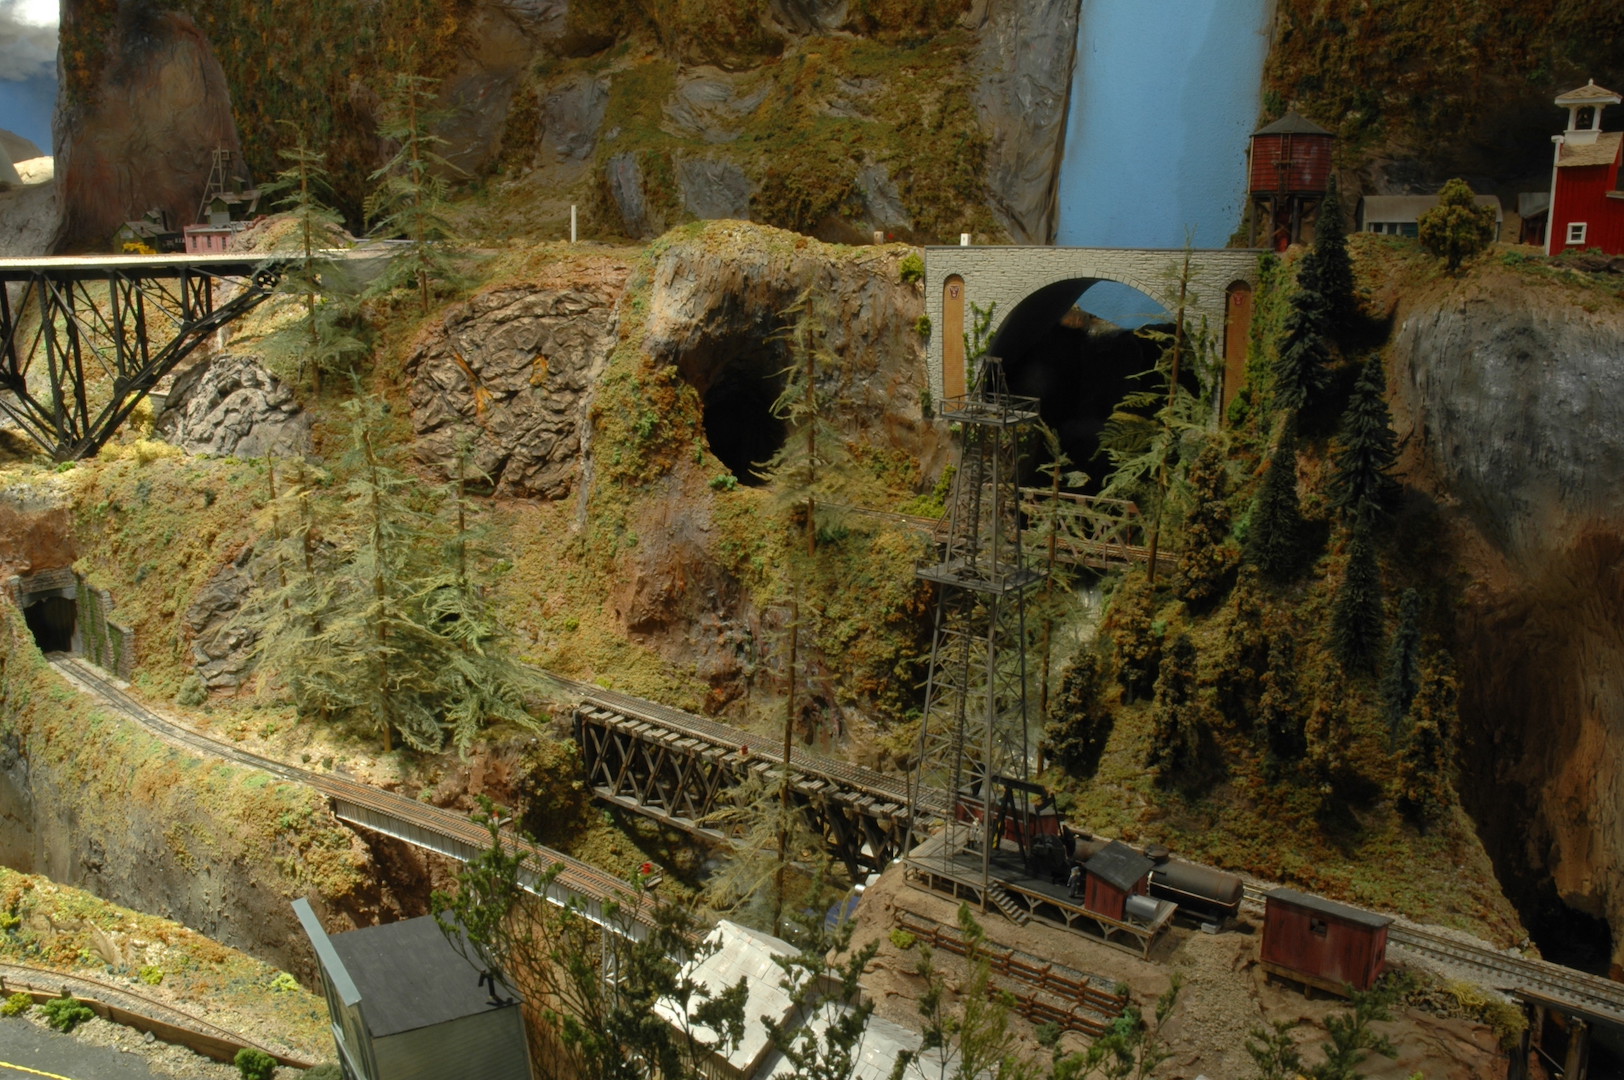
Photo 30 gives you a close-up view of the bridges and the Conoco oil operation at Potter Flats. It also shows how little space Potter Flats occupies! Lots of tall timber trees surround the gulch giving it a wilderness atmosphere. I made those trees following Jack Work’s method of using tapered wooden dowels. Dyed asparagus fern “branches” are then glued into tiny holes drilled into the dowel.

Photo 31 is an “action shot” of a freight train crossing the steel trestle while Shay #9 pulls an empty log train over the wooden bridge. The wooden bridge is scratchbuilt and carries my dual gauge line.
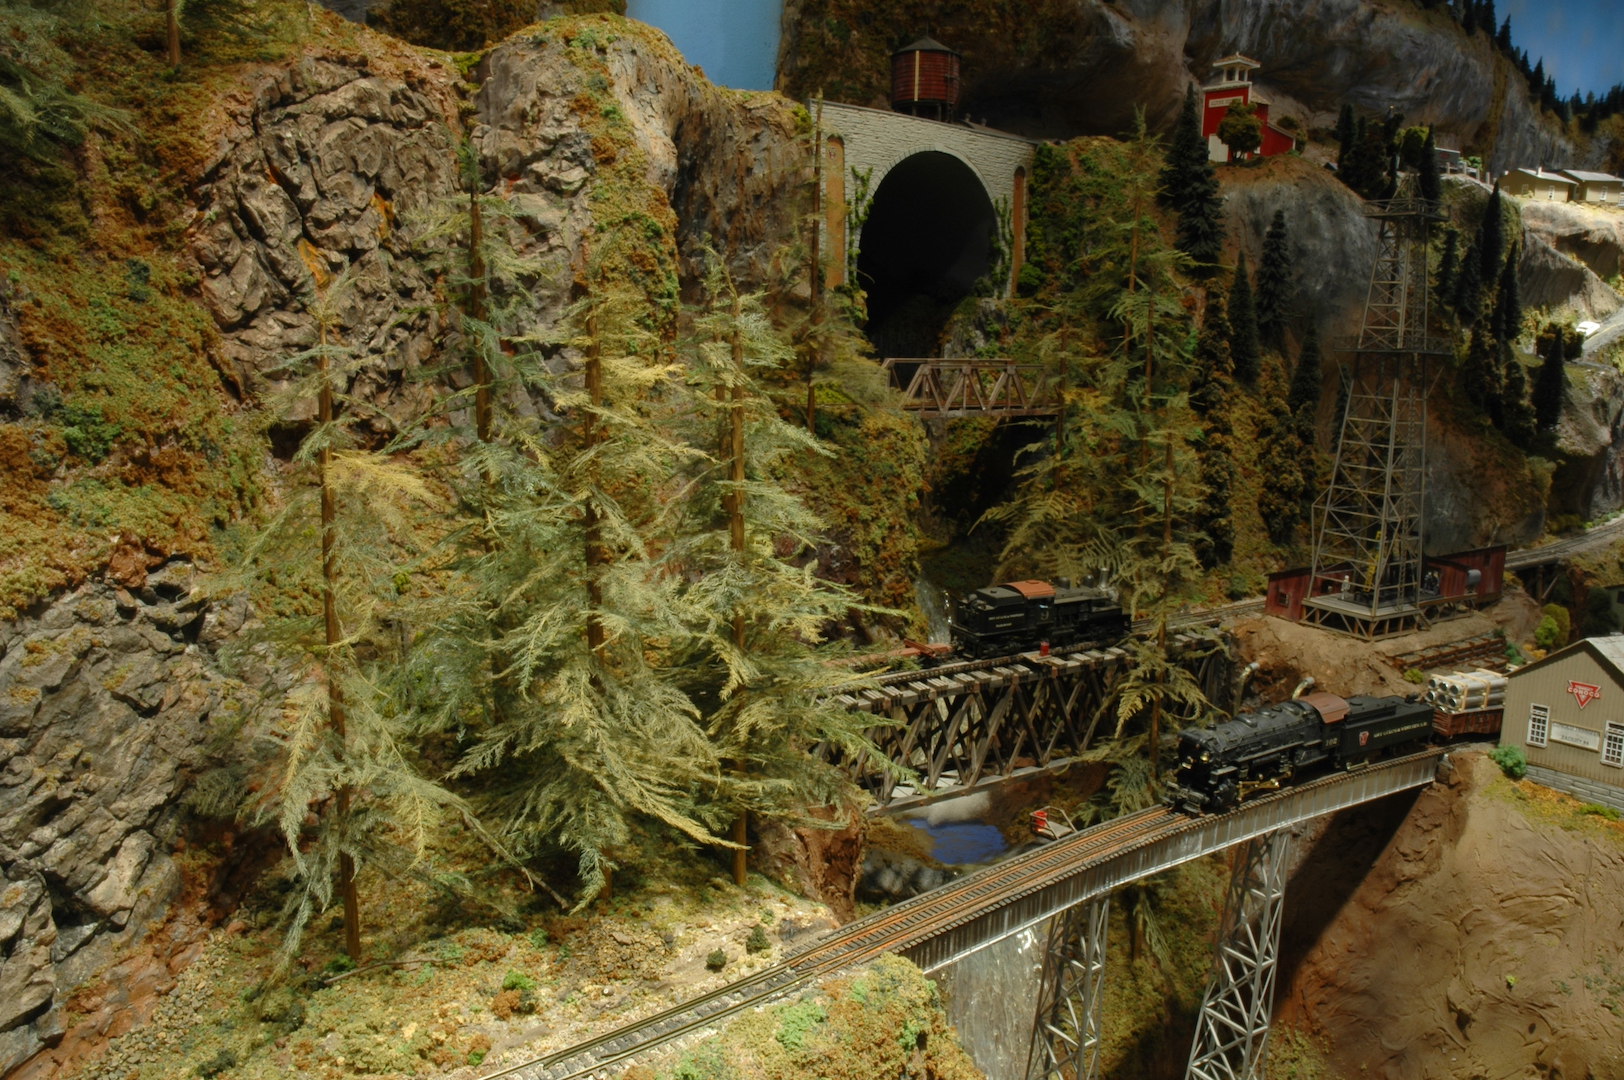
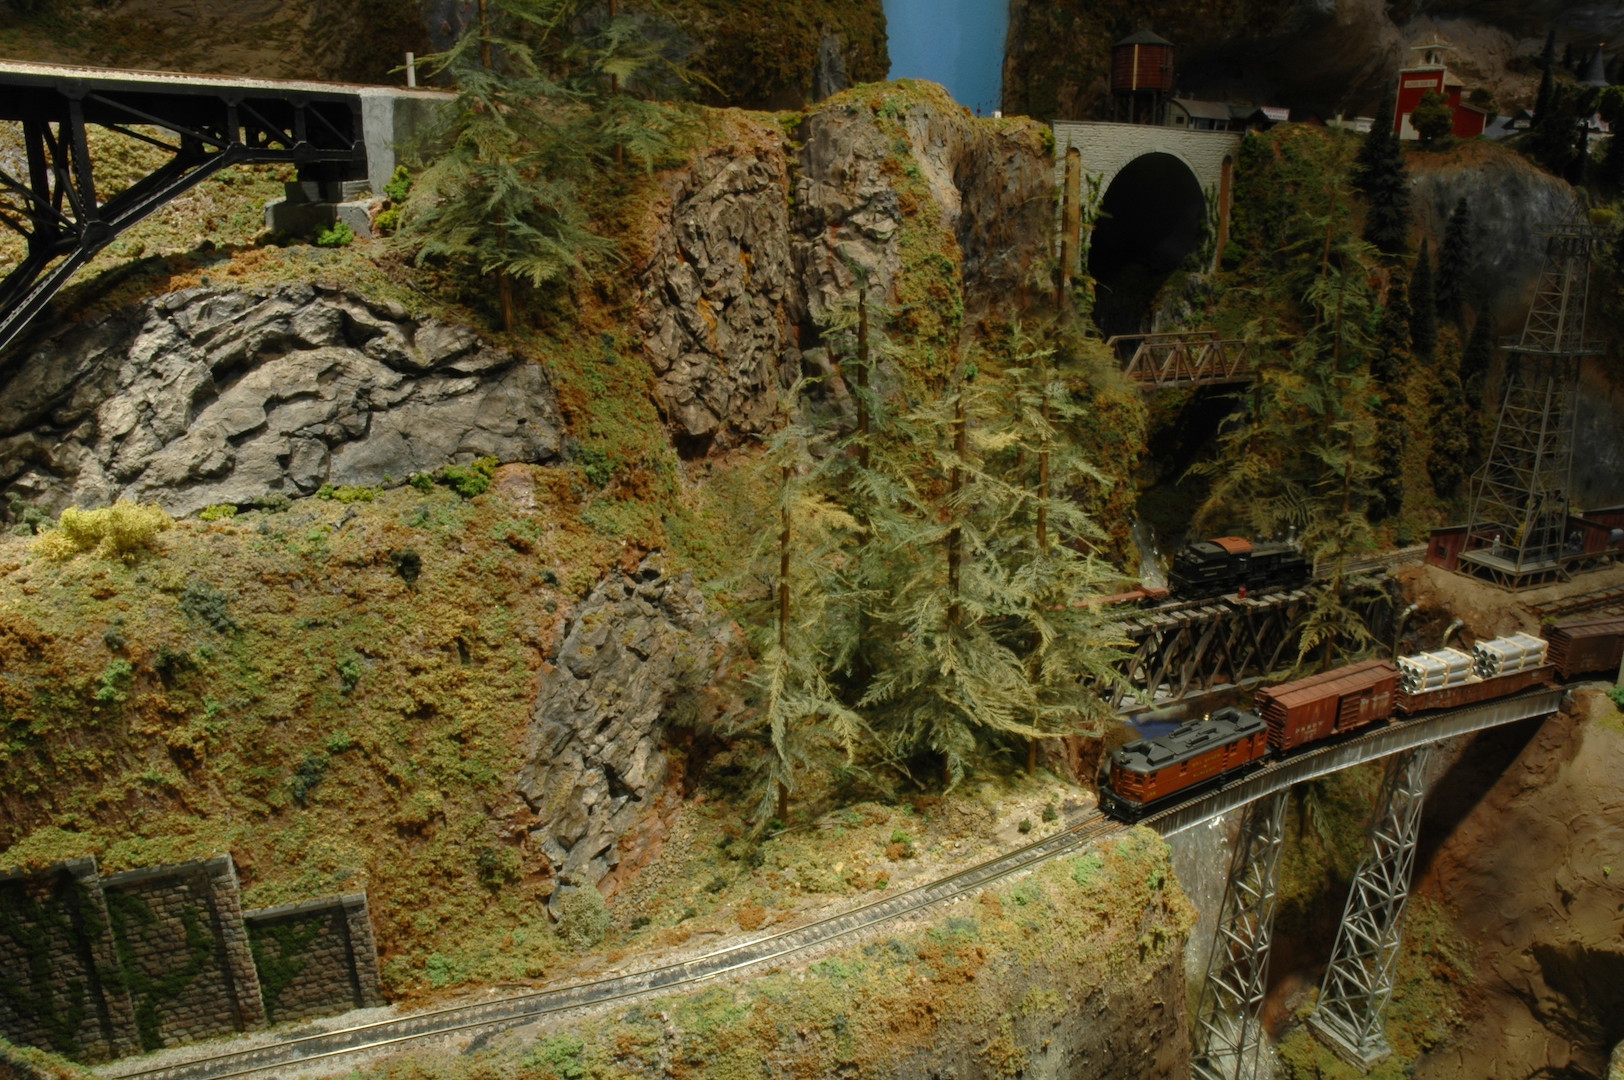
Photo 32 gives you an idea of the vertical separation of the tracks on the mainline. Those little locomotives have some steep mountain terrain to climb! This follows John Allen’s idea of using the same scenery on some of the sections of his layout for the mainline tracks. Stacked multi-deck shelf layouts with divided scenery limits a photographer’s ability to produce dramatic photos. John Allen’s method allows for continuous scenery between the levels to create photos with depth.
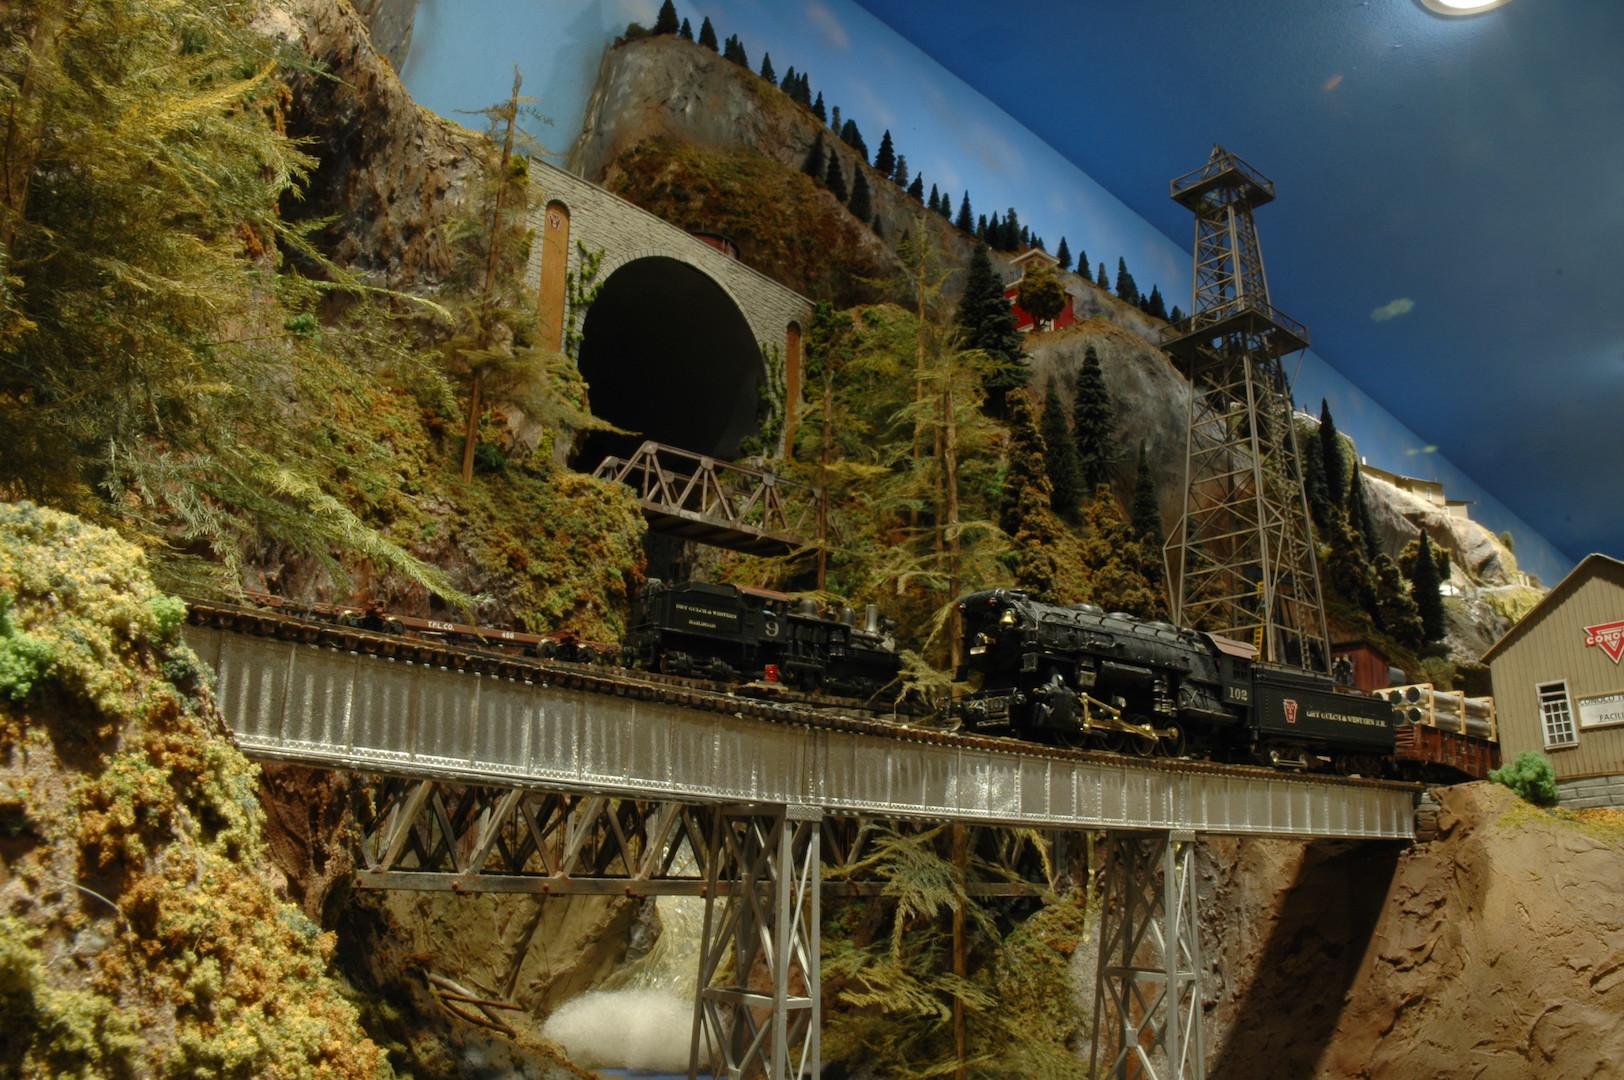
Photo 33 has the Dry Gulch & Westerns lone diesel in the photo. I guess the engineer in Shay #9 decided to take a break since the locomotive hasn’t moved since the last photo! When compared to photo 28, this photo gives you a good example of how the addition of rock castings, trees, and ground cover can change a scene. Note how this photo really doesn’t need a backdrop, the layout, due to its depth, becomes the backdrop for this photo.
Next time we will take a second look at Potter Flats and the use of the mainline as part of the branch line. I will also show you the completed scenery in that area. There have been several subtle changes made in that location, so it warrants a second look.
David
Thanks so much for sharing your journey it building this. I love both the height and depth.