May 2014 Skagit Valley/Whidbey Clinic

Tom Buckingham / Photos by Al Frasch

Clinic Chairperson Rich Blake called the May 2014 meeting to order with 39 members in attendance. 

Rich announced that there would be no meeting in June. He was scheduled to run the clinic but has become unable to due to recent commitments. The group talked about the idea of canceling the June meetings altogether as it consistently has the lightest attendance. After some discussion it was agreed not to hold meetings in June.

Once again Rich appealed to the audience for someone to step up and take over the job as snack coordinator. Rich also shared the preliminary clinic topics for next season (September 2014 – May 2015). One important date on the horizon is the annual picnic at John Marshall’s home on August 9th . Rich also mentioned that the 2015 NMRA convention will be held in Portland August 23-29th. It’s not too early to make plans to attend.

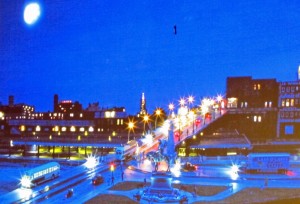
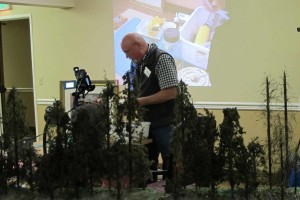
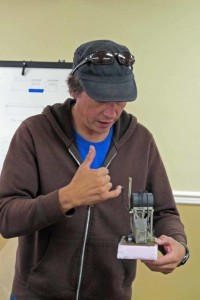
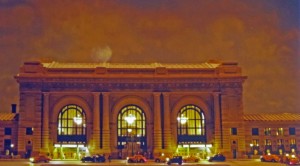
Our clinic was run by Dr. Nick Muff showing us how he adds working headlights and taillights to his fleet of HO vehicles. Nick shared an interesting pictorial history of his various layouts from the time he was 10 and how lit vehicles ever got into his layout plans in the first place. He insists he never planned to light vehicles. However, by the time he got ready to do the scenery on his current layout, he decided to start on the right end of his layout and fine tune his skills as he got to the Kansas City Union Station. In the process he reached his first road. In the background was a small town and he added a couple of lights to buildings  in the village. The next logical step was to add lights to a couple of vehicles on the road and the rest, as they say, is history.
Moon-over-KCThe first step is to select the vehicles. You must consider the purpose of the road—general thoroughfare or industrial with primarily trucks; time of year—convertibles don’t work well in the winter; your era—but don’t have all cars from the same year. Once those decisions are made select the actual vehicles. The more detailed cars should go toward the front and the less detailed, less expensive cars towards the back.

Good sources for cars are Greg’s Garage in Saginaw, Michigan, Woodland Scenics, Jordan kits, MiniMetals and others.

When assembling the vehicles, some will be ready-to-run while others will require a good bit of work. When using cast resin vehicles he first paints the window areas with Micro Mark “Mask-It” liquid masking film. Next goes a coat of primer before the paint. Then the details go on. Nick feels figures are one of the most overlooked details in vehicles—especially convertibles (Al Carter would agree.). He had a wonderful photo of a convertible with four occupants just for Al who was unfortunately out tooting his horn at another event in Oak Harbor.. All of his vehicles have license plates—another excellent detail. Some vehicles get white wall tires. He prefers using commercial stickers instead of hand painting them.

Some of his vehicles have open doors and trunks. His preferred method to accomplish that is to make repeated scribes around the door or trunk with a scalpel with a #11 blade until the job is finished.

His taxis all have the “available” sign on the top. Some are lit. To accomplish that he positions a tiny LED below the sign and holds it in place with Canopy Cement. Canopy Cement, dries clear, holds well, but remains slightly “gummy” which allows you to reposition the light later if necessary.

Now  the vehicles are ready for the lighting. Drilling the holes takes patience, but is not difficult (metal being the exception). Once the holes for the wires have been drilled, Nick uses a slightly larger drill to hollow out some recess for the actual LED. Nick uses Golden White and Red surface mount LED’s from Richmond Electronics. The LEDs can be ordered with or without the leads attached. He strongly recommends getting them with the leads attached. Once the headlight LED’s are in position he puts a small drop of Canopy Glue, which acts somewhat like a lens, consequently it is hard to actually tell that the lights are square and not round. Canopy Glue is also used to hold the tail lights in place.

For Taxi’s he uses the Golden White LED glued under the roof top sign, the light that “leaks” through looks perfect as an interior dome light. However if you wanted the dome light “off” he uses a small dab of Pactra Racing Finish TESRS 50”Outlaw Black”. It is quite thick and very black and will cover the leak with one coat.

As to the LED’s themselves he had several pieces of advice, the most important being to test the LED’s before installing them and be sure to use the appropriate dropping resistor when connecting an LED to power, otherwise your LED is gone. As he is fond of saying “once you let the smoke out they don’t work any more”.

When Nick is done with all the above steps he weathers the cars. His favorite medium is Bragdon Weathering Chalks. Bragdon Chalks are mixed with a powdered adhesive that is activated by the heat generated by brushing it on. Another weathering technique he favors is a light wash of dilute black paint over the grill areas. It make the detail stand out and makes it look more realistic.

Night-view

It was a wonderful clinic filled with many great ideas on vehicles. Thank you Nick!

For those of you who missed the clinic, Dr. Muff has authored a booklet titled “Lighting Vehicles Using LEDs” offered through BHI Publications. Their website is : http://www.bhipubs.com/


Remember, no meeting in June.
November Skagit Valley & Whidbey NMRA Clinic

Tom Buckingham / Photos by Al Frasch

Rich Blake started the meeting to a new record in attendance—43. This month’s feature Clinic was by Al Carter. Al had just returned from a Seattle to Australia repositioning cruise with his wife Nona. His comment: “hot, humid and fabulous!”

Record Crowd

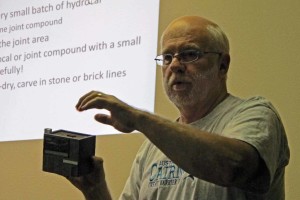
Al’s clinic was on building hydrocal structures. Al feels that there is a stigma about hydrocal structures that is not deserved. There are any number of sources for excellent hydrocal structures and in Al’s opinion the finished kit is oftentimes more realistic that it’s wood or plastic counterpart, especially stone and brickwork. It is easy to get good sharp details. Hydrocal is also easily kitbashed. On the negative side hydrocal is more easily breakable and does have significant weight—particularly if you are intending to use one or several in a module! (Plaster, like plaster of Paris, is much like hydrocal but is softer.)

Al Carter on a roll

The tools one needs to work with hydrocal are 220 grit sandpaper and a flat surface to mount it on; flat files, sanding sticks and emery boards; a scribing tool and/or a dull hobby knife; bar clamps; weights; a small square, steel straight edges—both 6- and 12-inch lengths; yellow carpenter’s glue or epoxy; 1/4″ square stripwood for corner bracing, spray primer; and spackle.

When beginning construction dry fit the pieces first. It will most likely be necessary to remove “flashing”; use your flat files to make the edges straight and flat. Cut corner braces or gussets and test fit one more time before beginning the gluing process. Have your bar clamps ready, glue one corner together and add strip wood for strength. Next, add the other walls and strip wood. Finally use your bar clamps to hold it firmly together, making sure the structure is square.

Once the structure is complete you will need to fix the joints. Mix a small amount of hydrocal or use joint compound. Mist the joint carefully. Apply the mixture with  a small spatula. When the mixture is semi-dry, carve in the stone or brick lines at the corners.

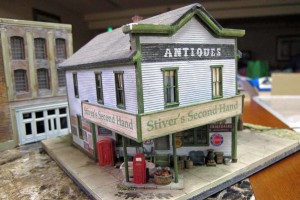
Stiver's Second Hand Store

Next, add the mortar. Several methods work—use a light grey paint, use slightly diluted joint compound or use your underlying primer color as the mortar color. Finally drybrush on the color of the bricks.

If by chance you break a piece, don’t pull your hair out (not an option I have). First check with the manufacturer. Many replace parts at no charge. If that is not an option use yellow glue sparingly and brace the back side thoroughly.

Paradise Apartments

There are different schools of thought on priming before painting. CC Crow and Downtown Deco recommend priming first, while others do not. Al showed two test pieces that he had done. On each he had primed half of the piece and left the other half unprimed. It was difficult to see any difference in the two. If you do prime, Al suggested using Wal-Mart’s “Color Place” primer. It is about $.96 per can.

There are several sources of hydrocal kits and many of the sources have online help and tutorials:

Downtown Deco http://www.downtowndeco.com/

C.C. Crow http://www.cccrow.com/

Guts, Gravel & Glory

Morse Productions http://morseproductionsproducts.blogspot.com/;

Thomas Yorke http://trevorcreek.tripod.com/

Cibolo Crossing; Motrak Models https://www.facebook.com/pages/Motrak-Models/134023453307135

Railroad Kits (Ed Fulasz) http://www.railroadkits.com/

South River Model Works http://www.southrivermodelworks.com/

Other sources include: Mike McNamara http://mainecentral.blogspot.com/2011/03/hydrocal-structure-kits.html

and Dioramas Plus http://www.dioramasplus.com/site/

A very informative clinic by Al and one that will encourage me to dig out some as yet unbuilt Ed Fulasz hydrocal kits!


Finally, Bob Farley had a couple of  interesting items to share. First he showed us a Proto 87 turnout that he had constructed and automated. And then he showed us his HO scale locomotive that runs on an RC battery. He says he gets about 30-45 minutes out of each battery. The best part is there are no reverse loops or shorts. And it is all run by his wireless Digitrax system. He was even willing to run the train across the floor for us! Thanks, Bob.

October Skagit Valley & Whidbey NMRA Clinic

Tom Buckingham & Al Frasch / Photos by Al Frasch

Rich Blake kicked off the October Skagit Valley & Whidbey NMRA Clinic to more than 30 eager model railroaders by reminding everyone of the full slate of fall swap meets, expo’s  and clinics. Of note were the Pacific Northwest Railroad Prototype Modelers Meet “Rail By the Bay” on October 26th,  The Anacortes & Fidalgo Model Railroad Club’s 18th Annual Open House on November 2nd and 3rd,  The Boeing Employees Model Railroad Club Swap Meet on November 9th and finally the Burnaby, British Columbia  2013 Model Train Show & Meet November 9th & 10th.

The feature presentation was the much heralded Four Mini-Clinic Clinicfest. The first presenter was John White discussing “Dry Print Lettering for Rolling Stock and Buildings.” John had a nice handout of all the tools and materials required to do a professional-looking job. He started by the choices in fonts and colours (the spelling is out of respect to John). Though there are two good “railroady” font choices—Gothic and Roman, John urged us to choose only one or “inevitably a Gothic letter will end up in a line of Roman print.” Although the fonts are available in White, Black, Red, Yellow, Silver and Gold, John said he had had no luck with Gold with very high wastage. John WhitePerhaps the most valuable part of John’s comments were his tips that only experience can bring: Choose the name of your pike carefully—there are only two “V’s” per sheet; write down what you intend to decal—sometimes you have to spell backwards (try spelling Skagit backwards quickly without looking!); use a piece of blue or white masking tape to mark the edge of the lettering but be sure to cut off about ¼” so no “hairy” bits stick out on the original tape edge; don’t miss space between words; use a clean (preferably white) piece of paper towel to place on your workbench to prevent the decal sheet from picking up dirt form your workbench; and lastly check your work before burnishing the letters. John closed by discussing difficult locations and repairs.

The second presenter was Rich Thom with “Having Fun in a Cramped Space”  Rich talked about some problems encountered when he tried to cram too much operation—and too much track—in a small room: lots and lots of no. 4 turnouts; wye turnouts; tracks too close to layout edges; 4.5% grades, etc. Lack of planning also placed L-girders directly beneath a series of turnouts, so when he decided to use Tortoises to throw them rather than oversize ground throws, he had to make a number of simple brackets to extend the “reach” of the switch motors. They are simple and versatile and can be used in any situation where one needs to locate a switch motor some distance away from what it is moving. Rich wrote an article for the April 2013 Model Railroader on construction of the brackets (page 60).

Cliff Aaker

Our third mini-clinic was by Cliff Aaker on “Making Hemlock Trees.” Using bamboo skewers for tree trunks, Cliff first runs a bead of glue along the skewer where he wants the branches to be. Next he takes fibers that he has separated from a hank of manila rope and cut to approximate limb length and sprinkles them randomly on the  now sticky tree trunk. After that dries, he trims the limbs to a reasonable and appropriate length and dips the entire skewer in a dark walnut furniture stain. When the stain has dried he rotates the tree branches in glue and then sprinkles them with his favorite tree foliage. Cliff had samples at the various stages in the process with him and it took an unbelievably short time to produce a very realistic hemlock.

Rich Blake

Finally, what do the following items have in common: the foil from wine bottles, aluminum cut from pop cans, coffee stir sticks from your favorite barista, plastic bottles, dog toy stuffing, pencil shavings, used guitar strings, short lengths of solder, rhododendron cuttings, and rotted wood? We found out when Rich Blake showed us how he does “Scratchbuilding with Common Materials.” Rich told us how as a young modeler he had little financial resources to buy the “proper” materials so he used his imagination and commonly available materials to get the job done—always at a cheaper price and often better looking that the “real McCoy.” One example was to make door hinges complete with bolt heads using the foil from wine bottles and a dulled map pin. Another was using pencil shavings colored with acrylic paint to make clumps of flaking foliage. Finally he showed how he used an old dead Walkman to scavenge parts that can be used on models.

All-in-all a fun night in Oak Harbor.