Article by Rich Thom, Photos by Al Frasch
Skagit Valley and Whidbey NMRA Clinic Chair Rich Blake welcomed 24 modelers to the March 9th meeting at the Summerhill facility in Oak Harbor. Rich made an interesting observation about attendance. Since the “new” Mt. Vernon NMRA Clinic was launched last fall the typical attendance numbers of the SV&W and Mt. Vernon clinics together have totaled more than the SV&W group typically drew when it served both geographic areas. That suggests the “splitting up” of our original group was a grand idea – more folks are discovering the value and camaraderie offered by these clinics and the NMRA. Our clinic has seen a steady addition of new people, model railroaders who might have thought they were isolated in our corner of the Puget Sound, delighted to find a large and active group of like-minded souls.
Susan Gonzales is putting together next season’s program and pointed out that she had only received one suggestion for clinics (and even fewer volunteers) and repeated her call for clinic topics and, especially, clinicians. The popular “mini-clinics” evening will be repeated in October – 10 to 15 minute spots to describe simpler, single topics — but volunteers are needed. Interest was expressed in another contest. Two suggestions from the floor for possible contest themes included (1) car interiors and (2) kit-bashing variations on one simple building kit. A contest will occur only if someone steps up to be Contest Shepherd!
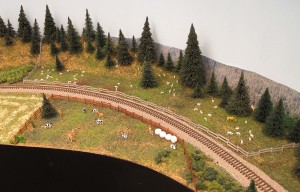
The March presentation was “Fences are Structures, Too“, presented by Al Frasch. Al is well known in the region for his N-scale, operations-focused Pilchuck Division of the BNSF and his great newsletters (sent to our clinic members as well as available on the 4D web site newsletters page), which have done much to increase our membership and “reach” across the 4th Division. Al’s layout (100% scenicked – how many can brag that?) is enhanced by over 50 fences, of which only two are illustrated in Fig 1. Here sturdy wood fences protect cows and sheep from certain death by frequent BNSF trains.
Fences on a layout, of course, serve the same functions that they do in the prototype; they are abundant in “real life” so they should be also on your layout. Al pointed out some additional advantages of fences in the model world:
- Fences create (or suggest) different scenes, each with perhaps its own story
- The more scenes, the more likely viewers will stop and look more closely at your modeling
- Fences, like tunnels and track hidden by trees, will make your layout appear larger than it really is
- In housing areas, several fences add to the feeling of density
- Fences are good “one evening” scratch-building projects
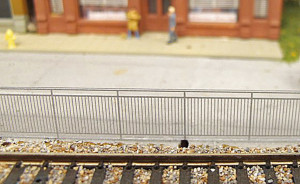
Commercial, ready-to-install fences are available from many sources. Although Al prefers to scratch-build his fences he has used some ready-to-install products on his layout, such as the one in Figure 2. This one is by Tomytec, and is printed on clear plastic; care must be taken to locate this particular product in an area where lighting does not reveal the plastic base.
Al researched sources of commercially-available fences, which include:
- Bar Mills InstaFence (N/HO/S/O scales)
- BLMA — N and HO picket, wrought iron, and chain link
- Monroe Models
- RS Laser Kits — several in HO
- Gold Medal Models — photoetched chain link in N
- Tichy Train Group — a large variety in HO
- Kibri
- JL Innovative Design — picket fencing
- Busch — chain link, chain fence, pipe fence
Another intriguing commercial resource is printable fencing — online images that you can download, print in high-res and glue to styrene, foamboard, wood or even a backdrop for an instant fence! These are mostly “solid” fences such as brick, concrete, wood plank and so-on, but they look great. Try www.textures.com (formerly CGTextures) and search keyword “fence” to bring up no fewer than 365 fence textures.
But Al prefers scratch-building fences; it’s not only more creative, but you can shape them to suit terrain, and build them with “defects” too, which adds to realism. Some materials you can use:
- Scale lumber
- “Craft” wood — sticks or dowels available in craft store woodcraft departments (far cheaper!)
- Styrene, both smooth surface and textured, e.g. brick
- Handmade or commercial trees and shrubs
- Thread or wire (try 30 AWG stranded) for fence wire
- Window screen (use the non-metallic variety)
- Wire mesh
- Tulle (Bridal Veil)
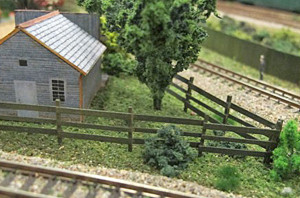
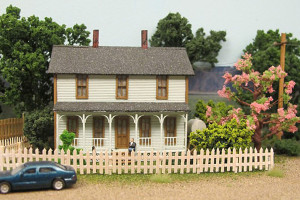
Two examples of Al’s wood fences are shown in Figs 3 and 4. Packages of “Craft” wood available at Michael’s and similar stores save money compared to “scale” lumber, and for fences dimensional fidelity is not all that critical — close is good enough. Cut posts, rails, boards and pickets with a NWSL “Chopper” to save time. Admittedly trimming the tapered tops of the pickets in Fig 4 was tedious!
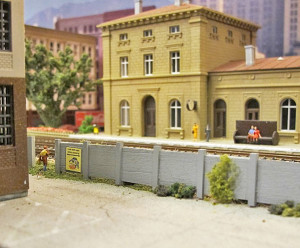
Concrete fences (Fig 5) are simple to build, and add credibility in urban areas where they are more likely to be used, such as in New Westminster on Al’s BNSF Pilchuck Division. This is an easy one-hour project using cardstock, wood or styrene, and Floquil or other concrete paint.
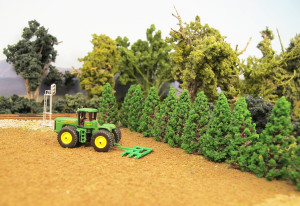
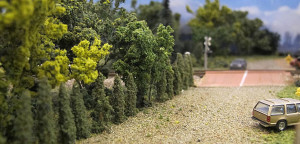
Tree fences are simple (Fig 6) and are a good use for that box of ready-to-install trees in the back of your closet — trees which look far too uniform and perfect for use on your hillsides. They would have obviously been planted together, and possibly even trimmed over the years, and the uniformity appears perfectly natural.
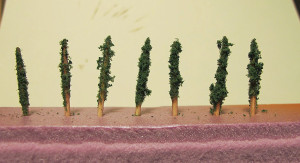
Al has also crafted his own tree fences — modeling rows of arborvitae (thuja) a species commonly used for hedgerows and fences. In his scale, round toothpicks make ideal trunks. The toothpicks are stained and cut in half, then dipped in glue and foam foliage. Fig 7 shows the trees after the first foliage application. After two or three more foliage applications, and possibly some trimming with scissors, they are ready to plant (Fig 8). An easy fence!
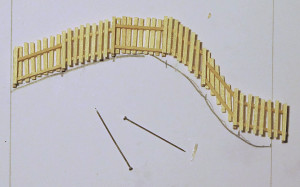
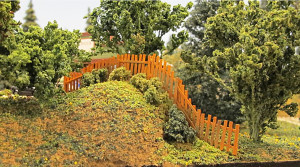
Al moved next to two more slightly more complicated projects, but ones still achievable in a single evening. The first was building a wooden fence for a hillside — somewhat trickier than a level fence. Al picked a candidate slope on his railroad, then used a profile gauge to transfer the precise contour of the slope to card stock (pencil line, Fig 9). The posts, rails and fence boards were then built up using standard methods and CA glue; note Al chose to model a “shared” fence where half the fence boards face each side. The straight pins (heads clipped off) were glued to each end of the fence with CA to enable “planting” the fence into the terrain when completed. Fig 10 shows the result after staining and pinning the fence onto the layout — an eye-catching, scratch-built detail. Any errors in building the fence to the precise contour of the slope can be hidden with shrubbery.
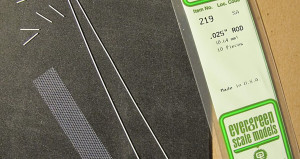
Al finished his clinic with another evening project — building a chain-link fence using tulle. Al picked up this idea from an on-line magazine (see www.model-railroad-hobbyist.com/node/17658). Tulle (also known as bridal veil) is available at low cost at any fabric store; the particular brand Al used was “Celebrate It” but others are equivalent. Along with styrene strips (Fig 11) that’s all you need.
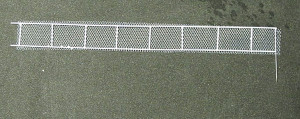
After building a simple post-and-rail frame with the styrene (Fig 12) the tulle was glued to the frame; plastic cement was found to work, with the nylon tulle settling into it nicely. Pins were added (heads again clipped off) for planting the fence. The tulle can be tricky to cut: use a fabric rotary wheel and cutting board.
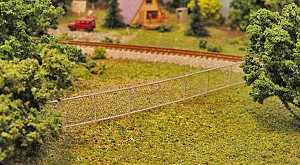
The completed tulle chain link fence (Fig 13) looks convincing when installed on Al’s layout. Fences can be a fine enhancement to anyone’s layout, in any scale. Al’s fences in N-scale are especially impressive!

Nice!