Article and Photos by Rich Thom
In brief opening remarks, Clinic Chair Rich Blake reviewed the calendar for upcoming clinics and other PNR events, highlighting the PNR’s regional convention, Selkirk Express 2016, to be held June 15-19 in scenic Salmon Arm, BC. Rich also mentioned that the Mt. Vernon Clinic has switched its meeting nights to the second Thursday of every month, and encouraged continued cross-attendance. Jack Tingstad reminded everyone of next month’s contest, in which flatcars with loads will be displayed and judged (categories and rules have been discussed previously), adding that cash prizes (!) (from the attendee kitty) will be awarded, as well as the usual certificates and, naturally, accolades. A show of hands promised a good number of entries.
Susan Gonzales launched right into the evening’s make-n-take, Modeling Rock Details for Structures. It’s a simple idea to create details such as chimneys, fireplaces and fire pits, root cellars, fences, even entire houses—and easily achieved, with a steady hand. A very steady hand! To get an idea of what you can build, search “river rock chimney,” for example, to find prototype photos.
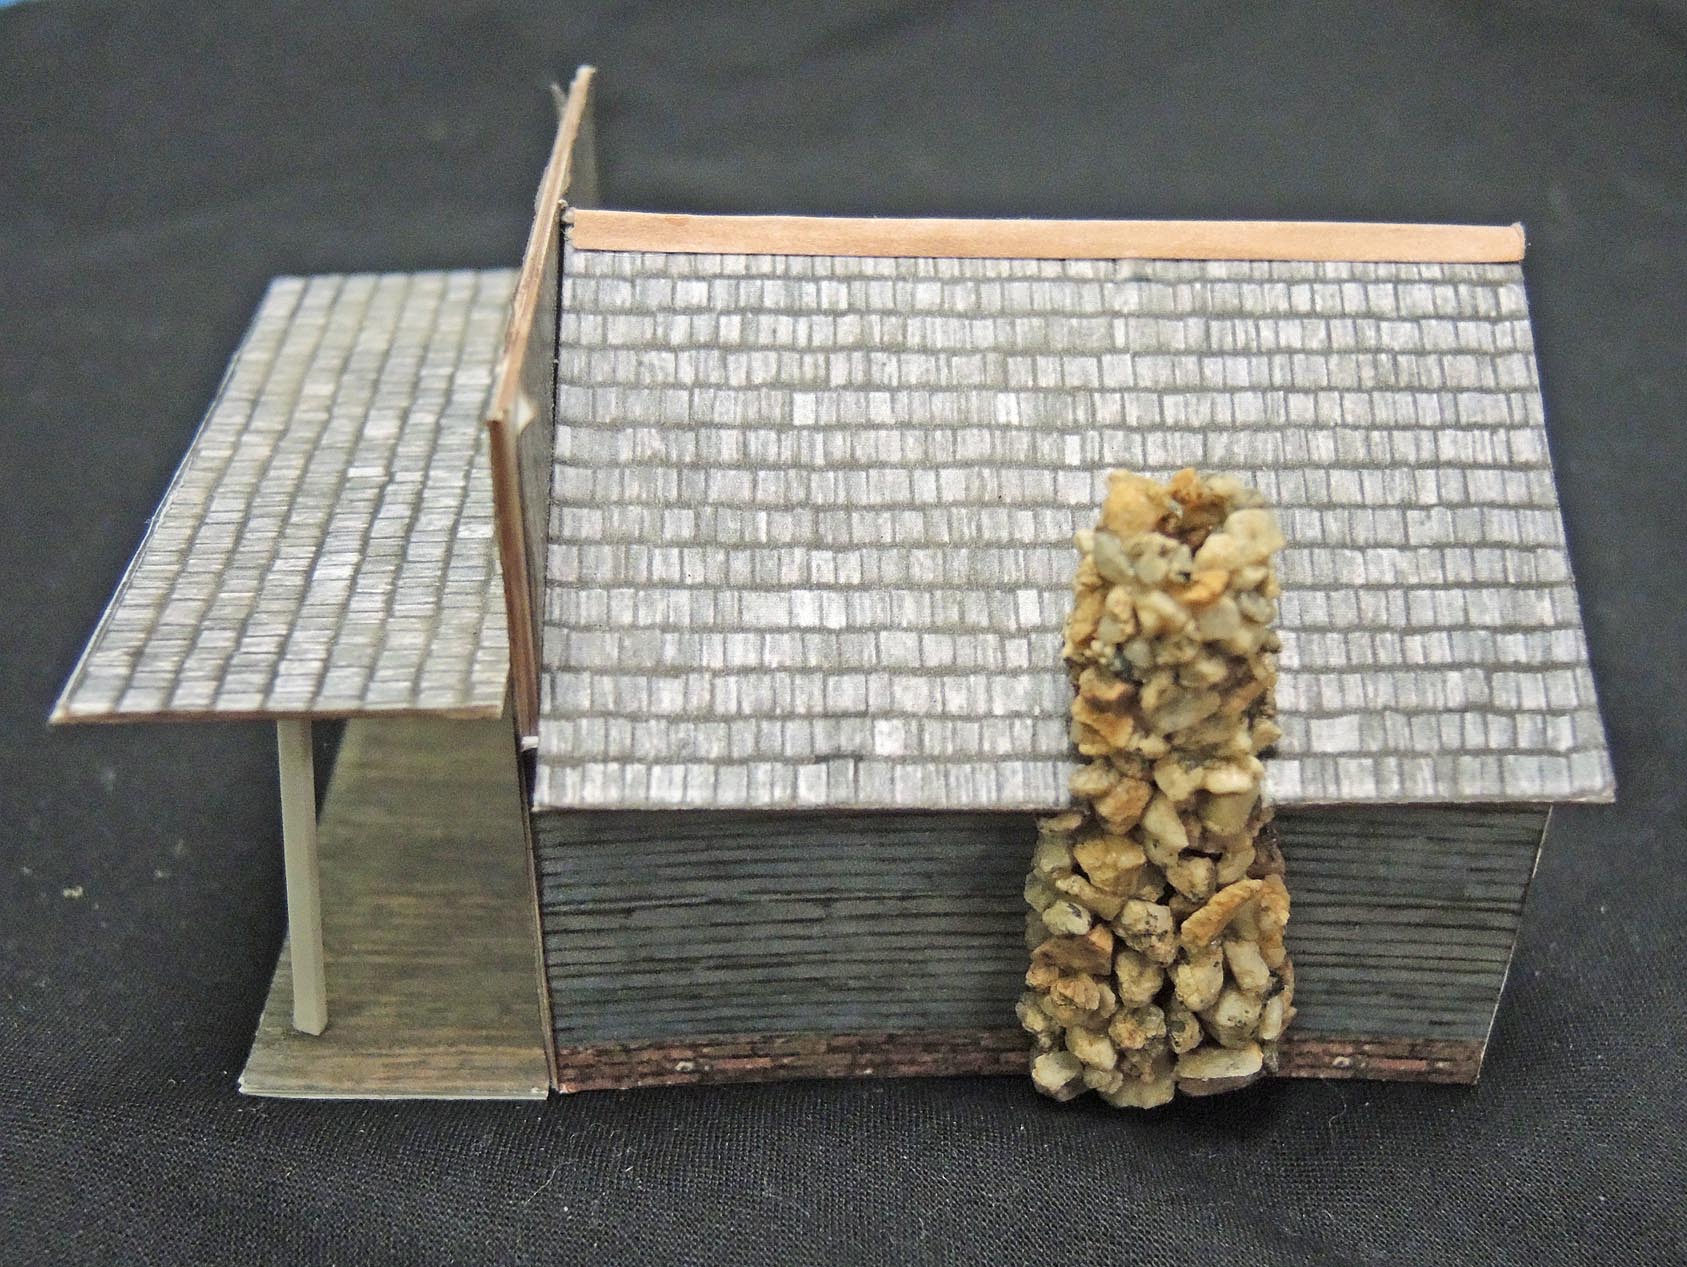
Fig 1 – Susan’s Rock Chimney, HO scale
To get everyone inspired, Susan brought an HO-scale building to which she added a chimney (Fig 1). (This cardboard building resulted from another make-n-take project at our clinic a few seasons ago, conducted by Roger Ferris.)
Duly inspired, everyone set about building something, encouraged by Susan (Fig 2). Your Grab Iron clinic reporter has not seen this group as intent — or, fortunately, as quiet — as he did tonight.
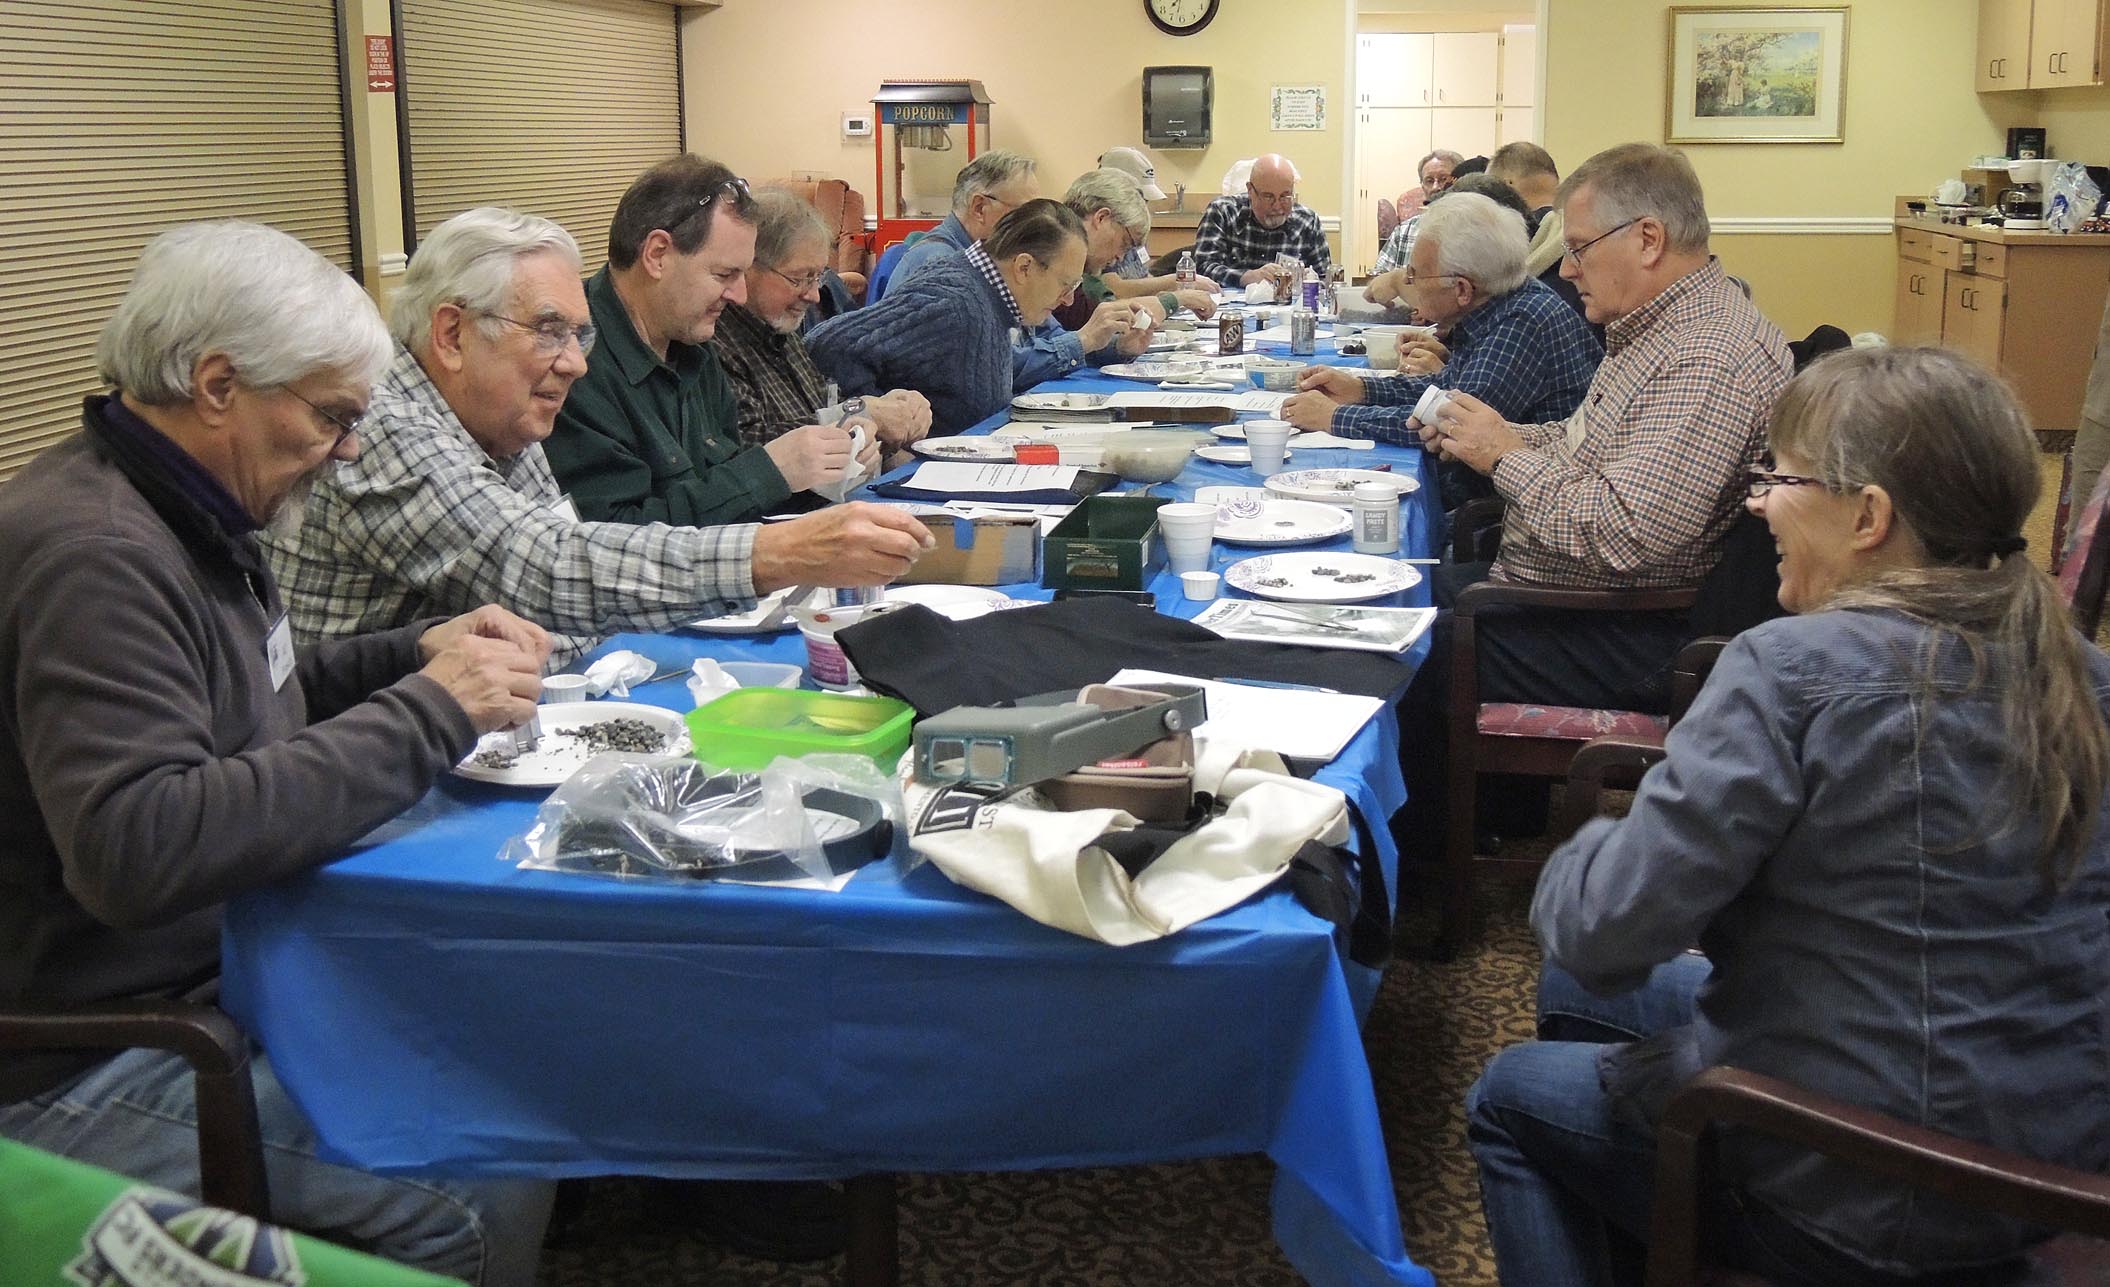
Fig 2 – Susan Keeps the Group Busy, Working on Their Own Rock Details
The process is simple: (1) find, wash, and sort your rocks. Susan and husband Phil brought a selection that they collected in the Sierras, Snoqualmie Pass, and on the local beach. Almost anything will work, but if you’re a stickler collect rocks from the area you are modeling, so color and composition are prototypical. (2) If you’re concerned about microorganisms lurking on your layout, bake the stones on an old cookie sheet for 20 minutes at 250 degrees.
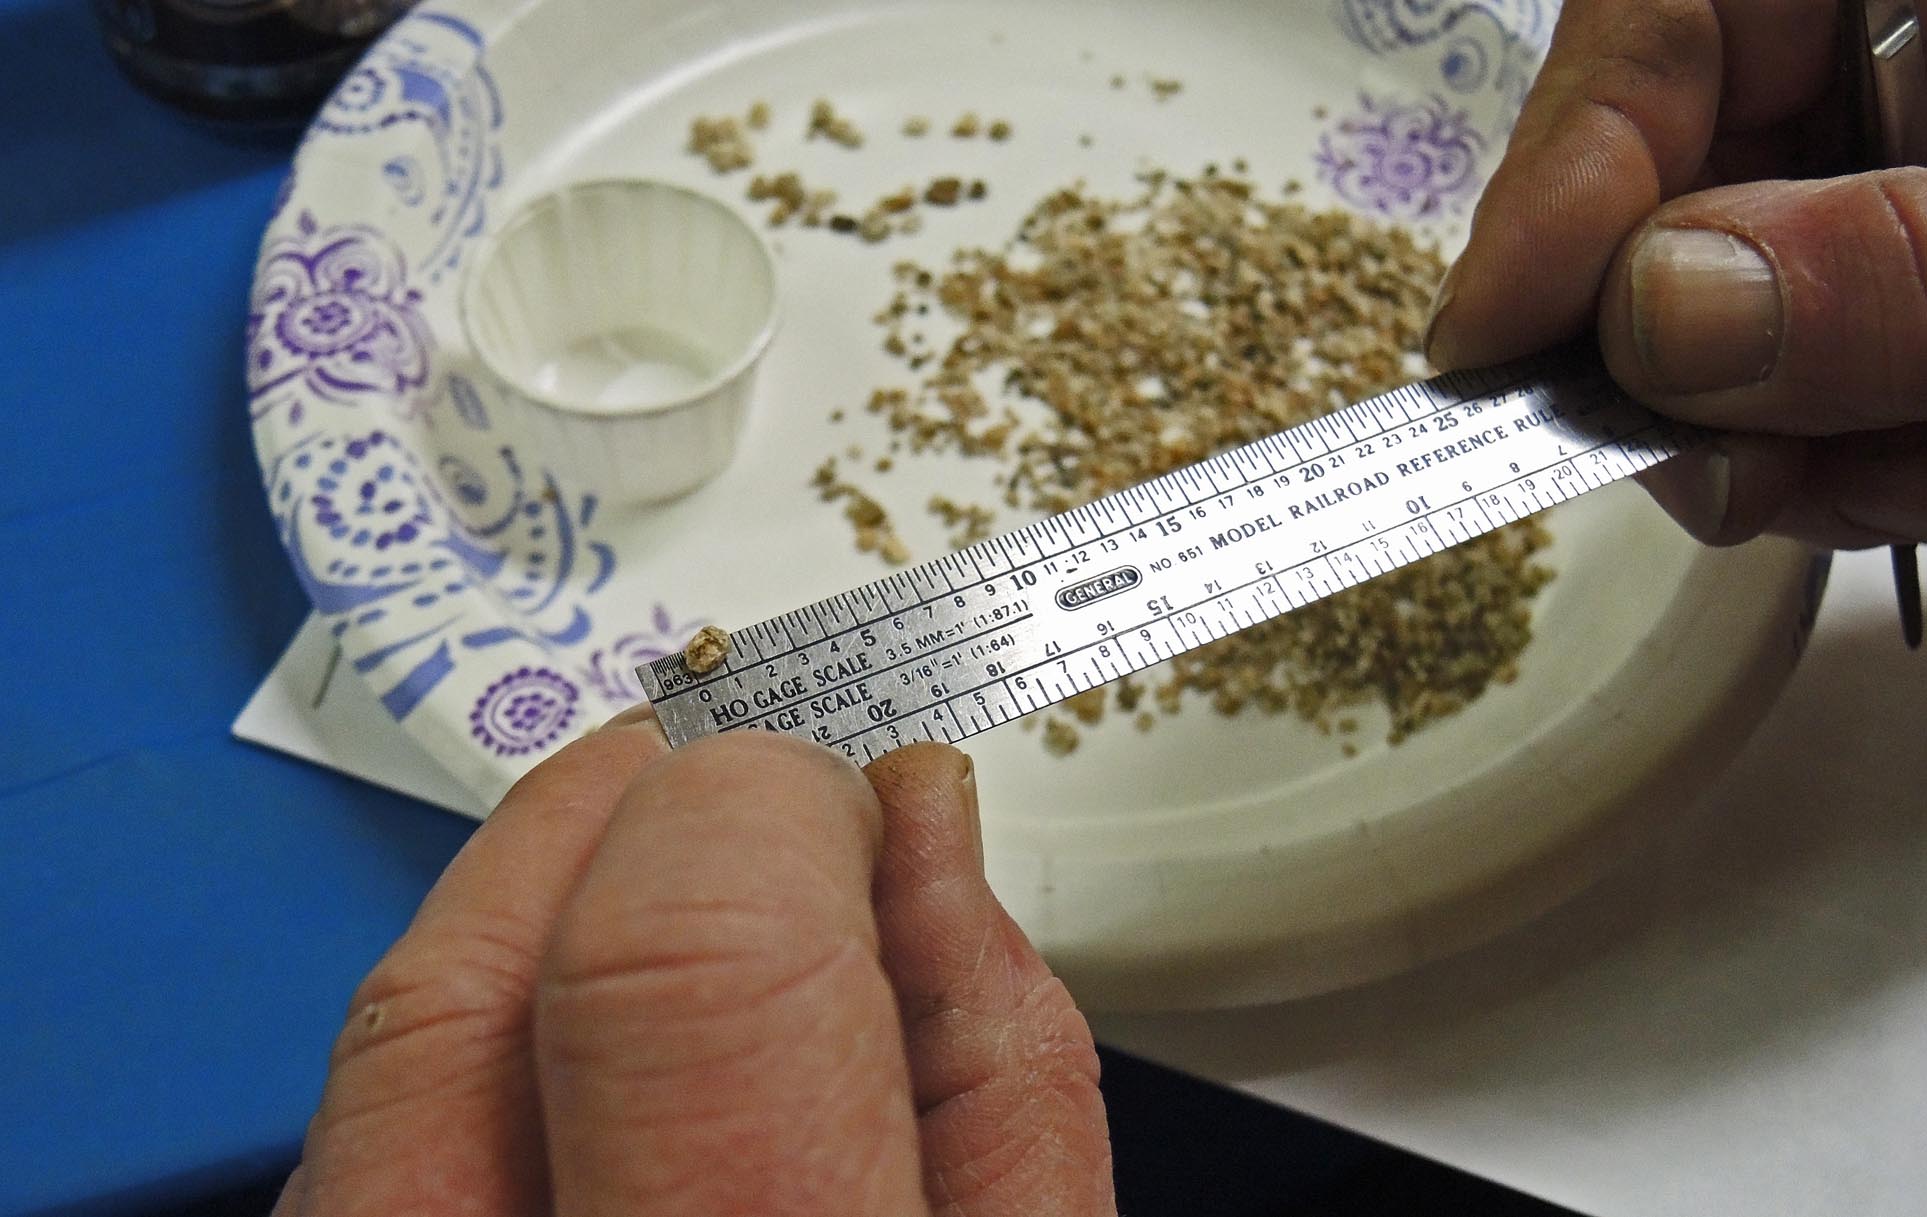
Fig 3 – Selecting Rocks for Your Scale
Step (3) is to check for appropriate sizes for your scale using a scale ruler (Fig 3). Be careful here. Selecting rocks that are too large for your scale — although it makes the project go faster — will result in an unrealistic-looking model, especially noticeable in foreground structures and photographs. A good rule of thumb is to pick only stones that a workman could heft by himself.
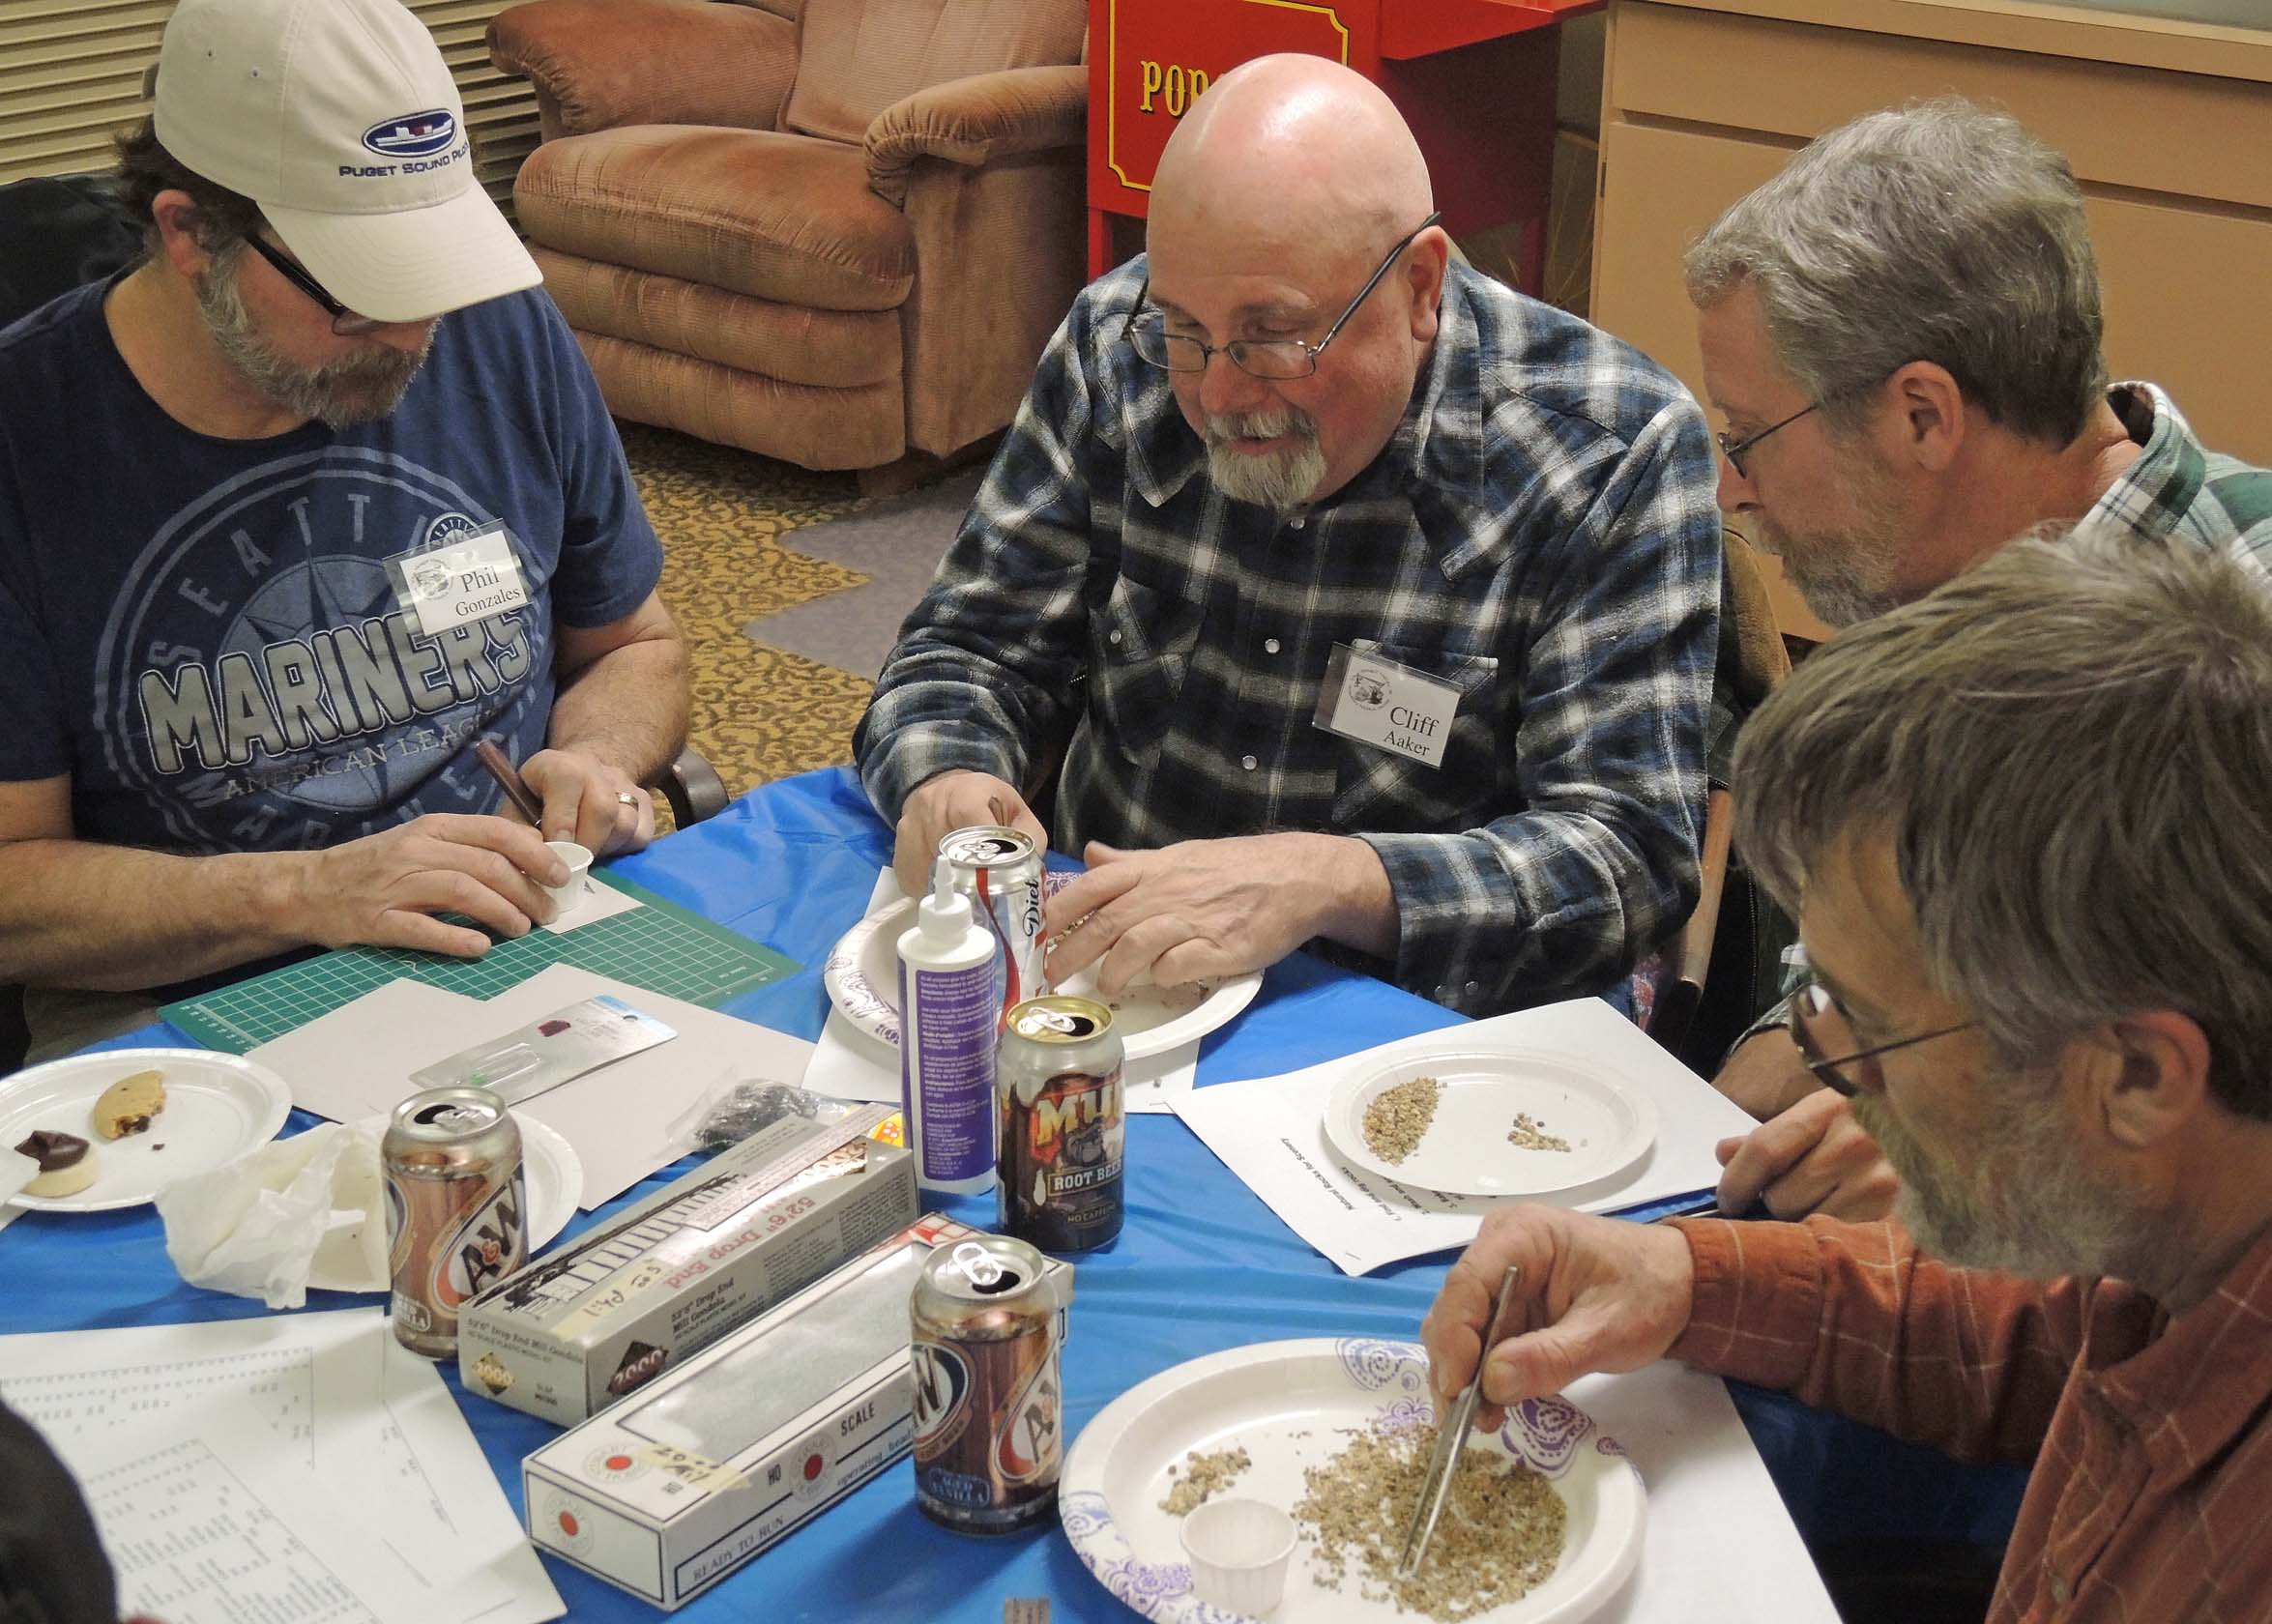
Fig 4 – Gluing Step
Step (4) is to glue the rocks together (Fig 4). Susan recommends Aleene’s Fast Grab Tacky Glue (purple label) and that’s what the group used tonight. From left to right in Fig 4, Phil Gonzales, Cliff Aaker, Doug Greenfield and Steve Jaffray work on their masterpieces.
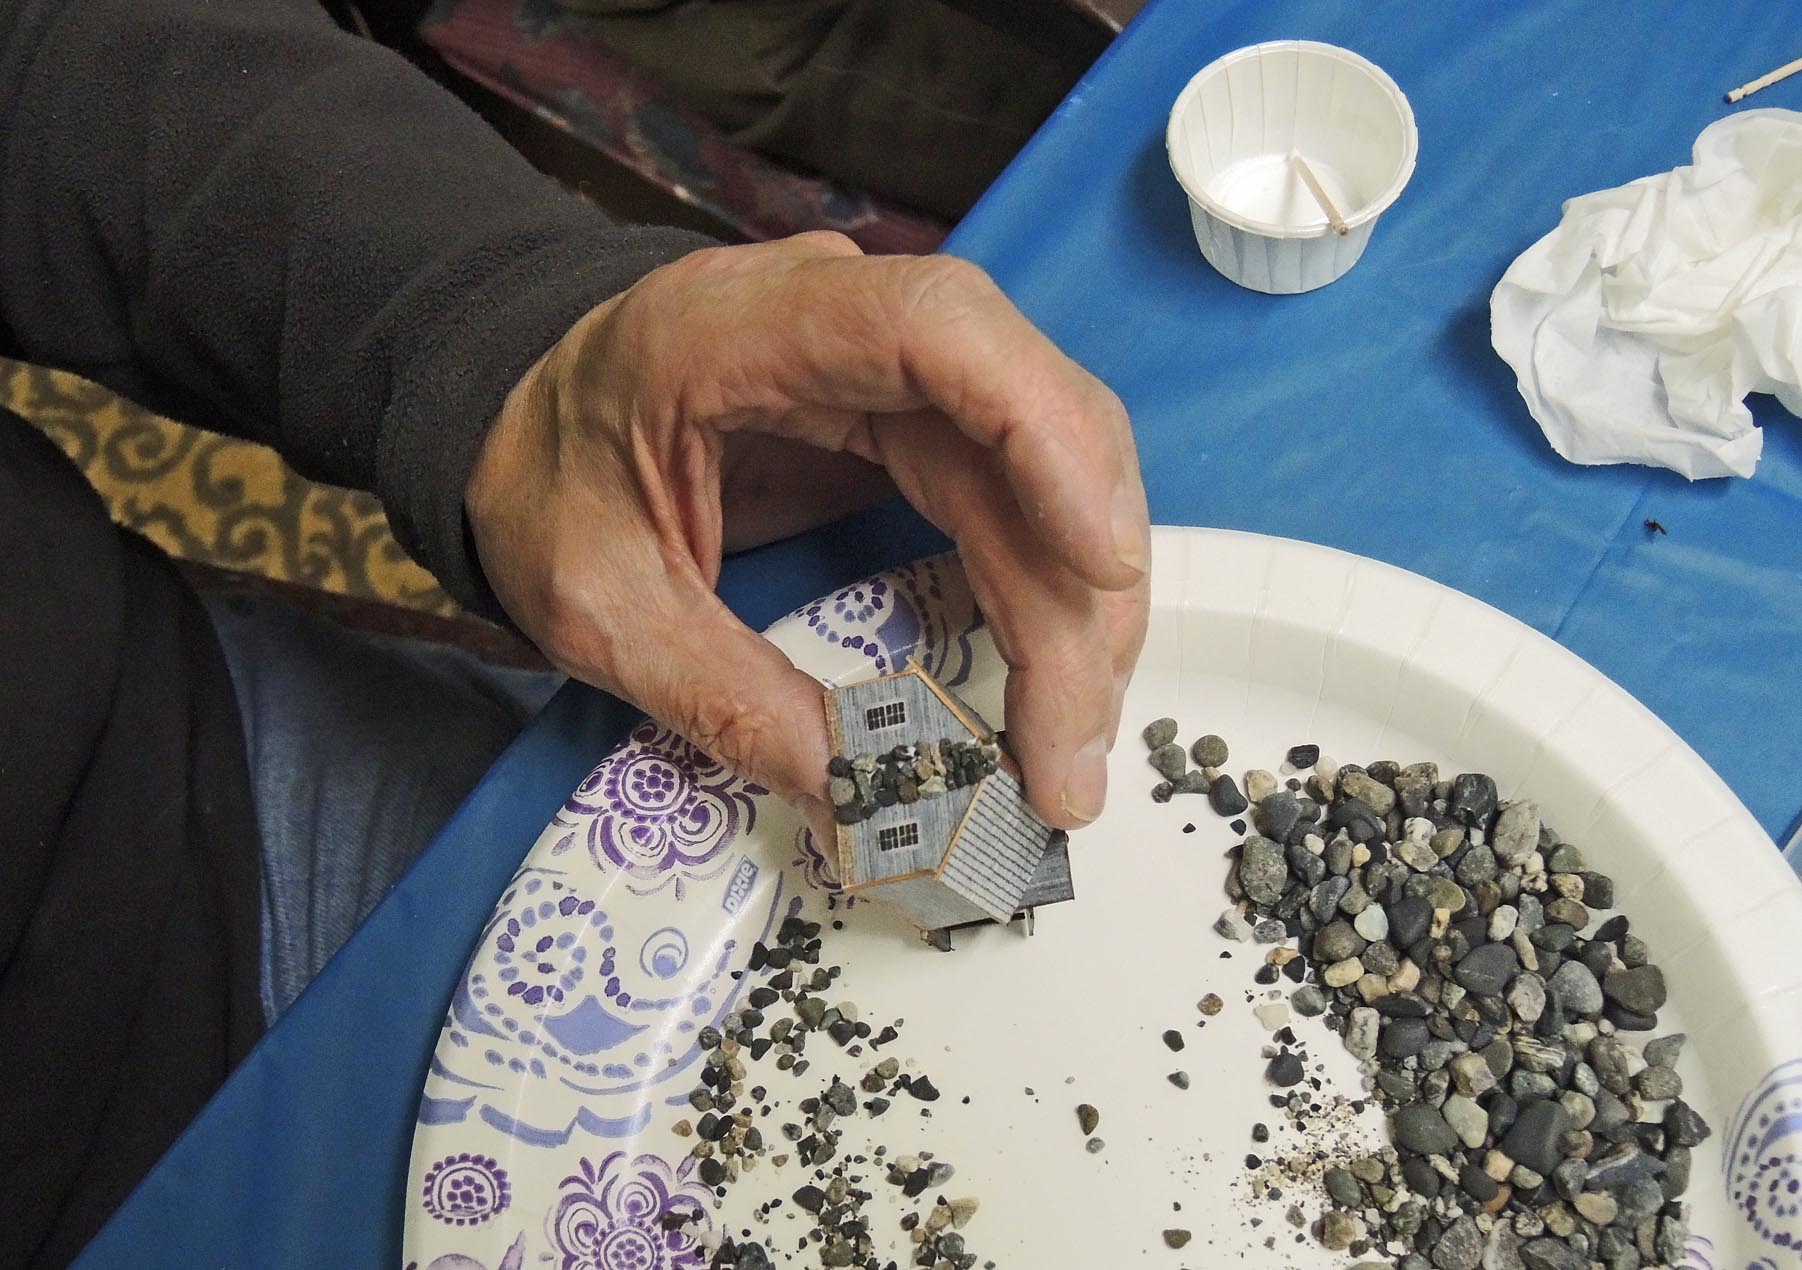
Fig 5 – Al Frasch’s N-Scale Chimney
In Fig 5, Al Frasch is nearly finished with his chimney — more of a challenge in N (“Normal”) scale!
After letting the whole structure dry, an optional step (5) is to apply mortar. Susan uses (Fig 6) Vallejo brand (Acrylicos Vallejo) Sandy Paste 26.215 (left in Fig 6) or Grey Pumice 26.213 (right). Both are available from Micro-Mark.
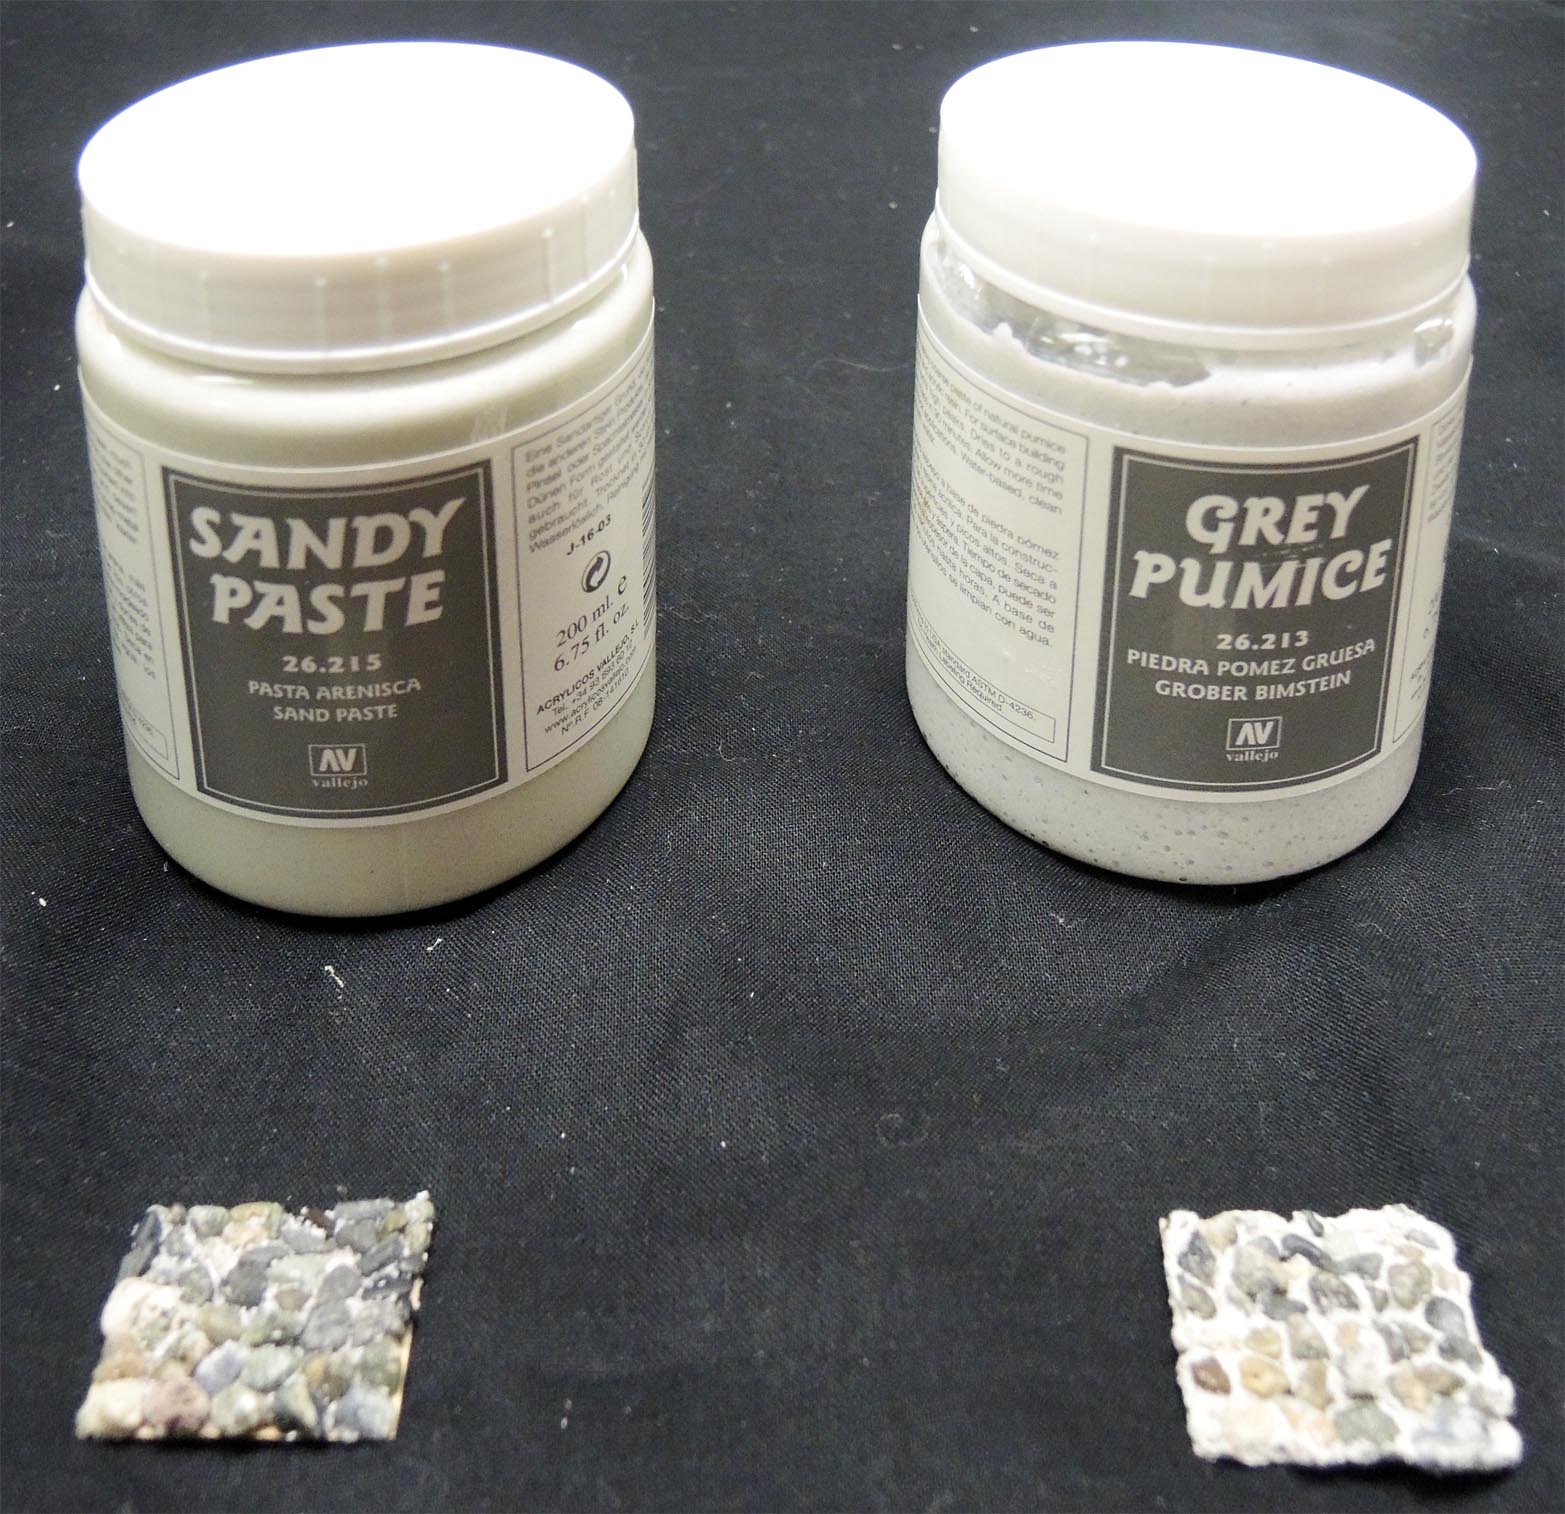
Fig 6 – Adding Mortar is an Optional Step
Thanks for these reports. You guys always seem to be doing something interesting, and it’s fun to read about your activities. Great photos, too.
Good article, Thom. I especially enjoyed the photographs inline. Keep up the good work!