Article & Photos By David Yadock
Dry Gulch & Western, Update 4
It has been a while since the last update on the Dry Gulch & Western. I’m sure you have been wondering what new things have been happening on the layout. I decided to continue this series with the completion of the Wapwallopen area. We last left off with the track completed but scenery needed to be added. Finally, the scenery and structures are in! As previously mentioned, I created this new town to add interest and some switching to my branch line leading out of Dry Gulch. So, let’s take a look at the new scenery.
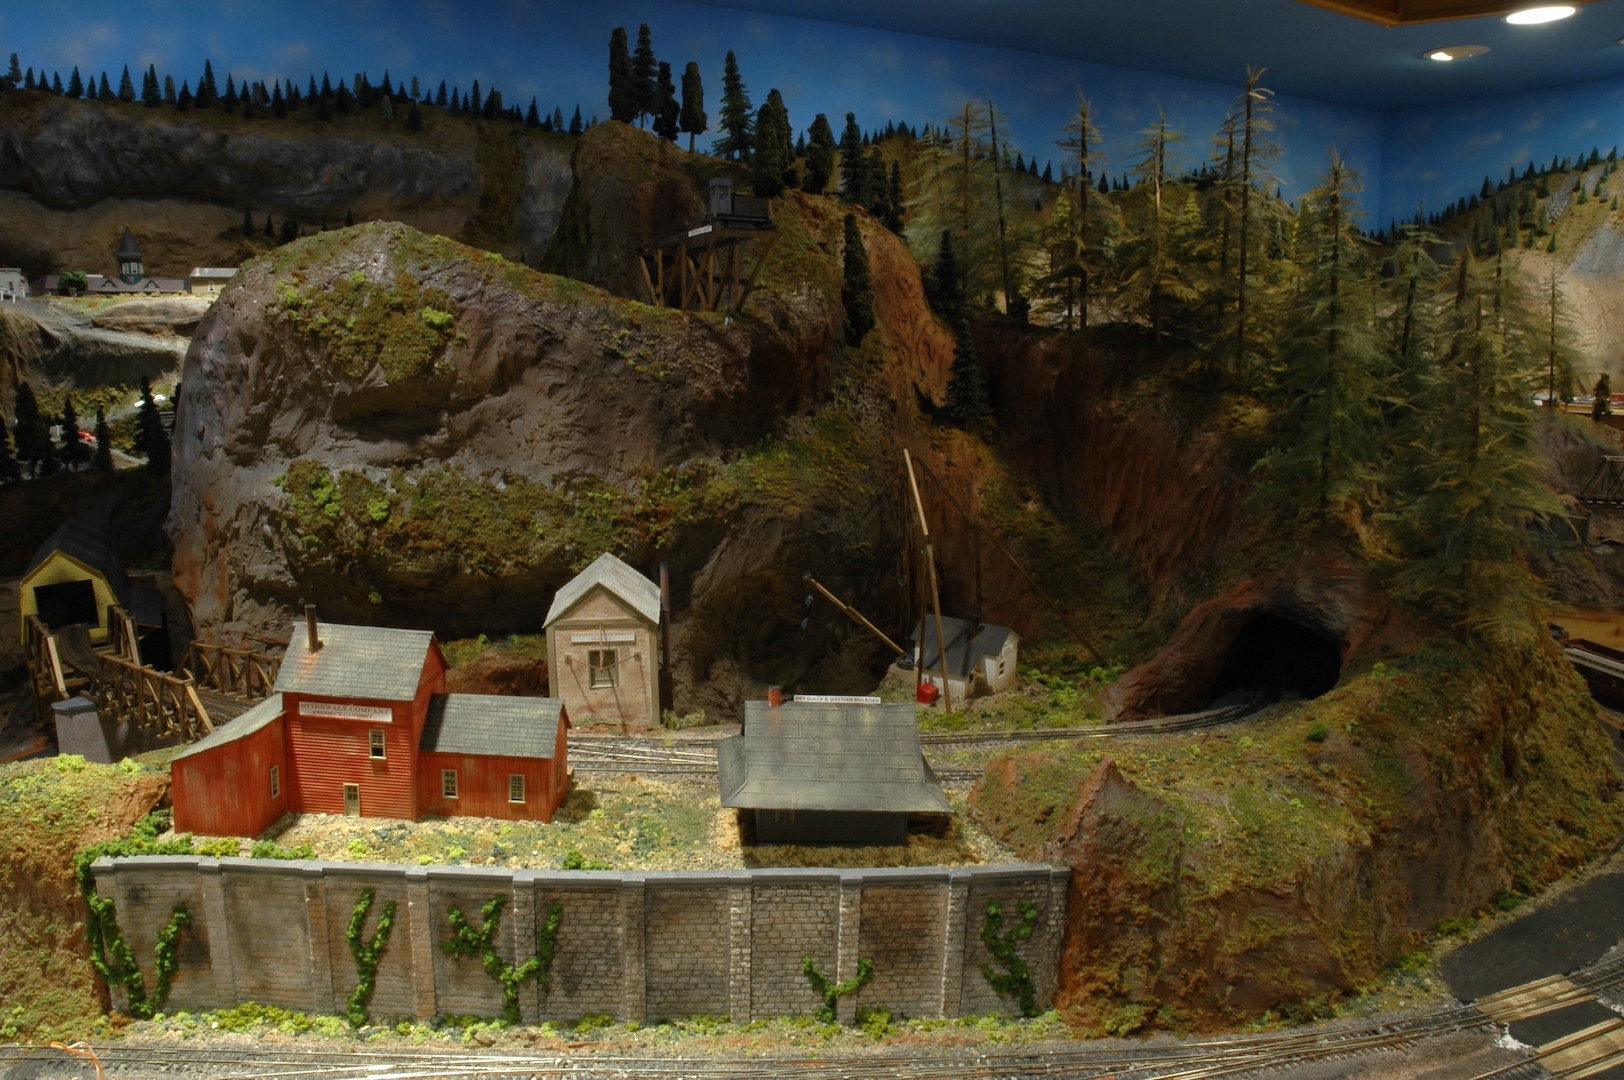
Photo 17 gives the overview of the area. The vine laden stone wall acts as a scenery dividing point between the two towns of Dry Gulch and Wapwallopen. From the extreme left to right you can see the yellow painted coal pocket structure and the straining beam bridges that allow access to the coal pocket. They also support one of the two turnouts for the run around track. The red structure is a small cannery that will provide some revenue freight traffic. The brick structure across the tracks is a deceptive building since it is 3 stories tall and has access to a siding from the branch line as well as another siding from the town of Dry Gulch. The switching crew at Dry Gulch will need to pay attention to where cars are placed next to this building! The small Wapwallopen station with is large expanse of roof is a kit I purchased from Ed Liesse. Ed knows I like Pennsylvania Railroad items, and this is a fine model of a PRR whistle-stop station. Last, is the stiff leg derrick that loads granite slabs onto specially built flat cars. The slabs are lowered from a trolley crane from the granite quarry at the top of the mountain. The entire process is done on the siding from Dry Gulch.
Photos 18 and 19 show both wooden cranes for the granite operation. The stiff-leg derrick was constructed from a Sheepscot kit that I purchased from JJ Johnston. It features functioning spotlights on the spindly legs as well as interior lighting in the small building. The trolley crane in Photo 19 was completely built from scratch and fitted to the area. JJ, I now know why you didn’t build the Sheepscot kit! Instructions? Who needs detailed instructions?

Photo 18 
Photo 19

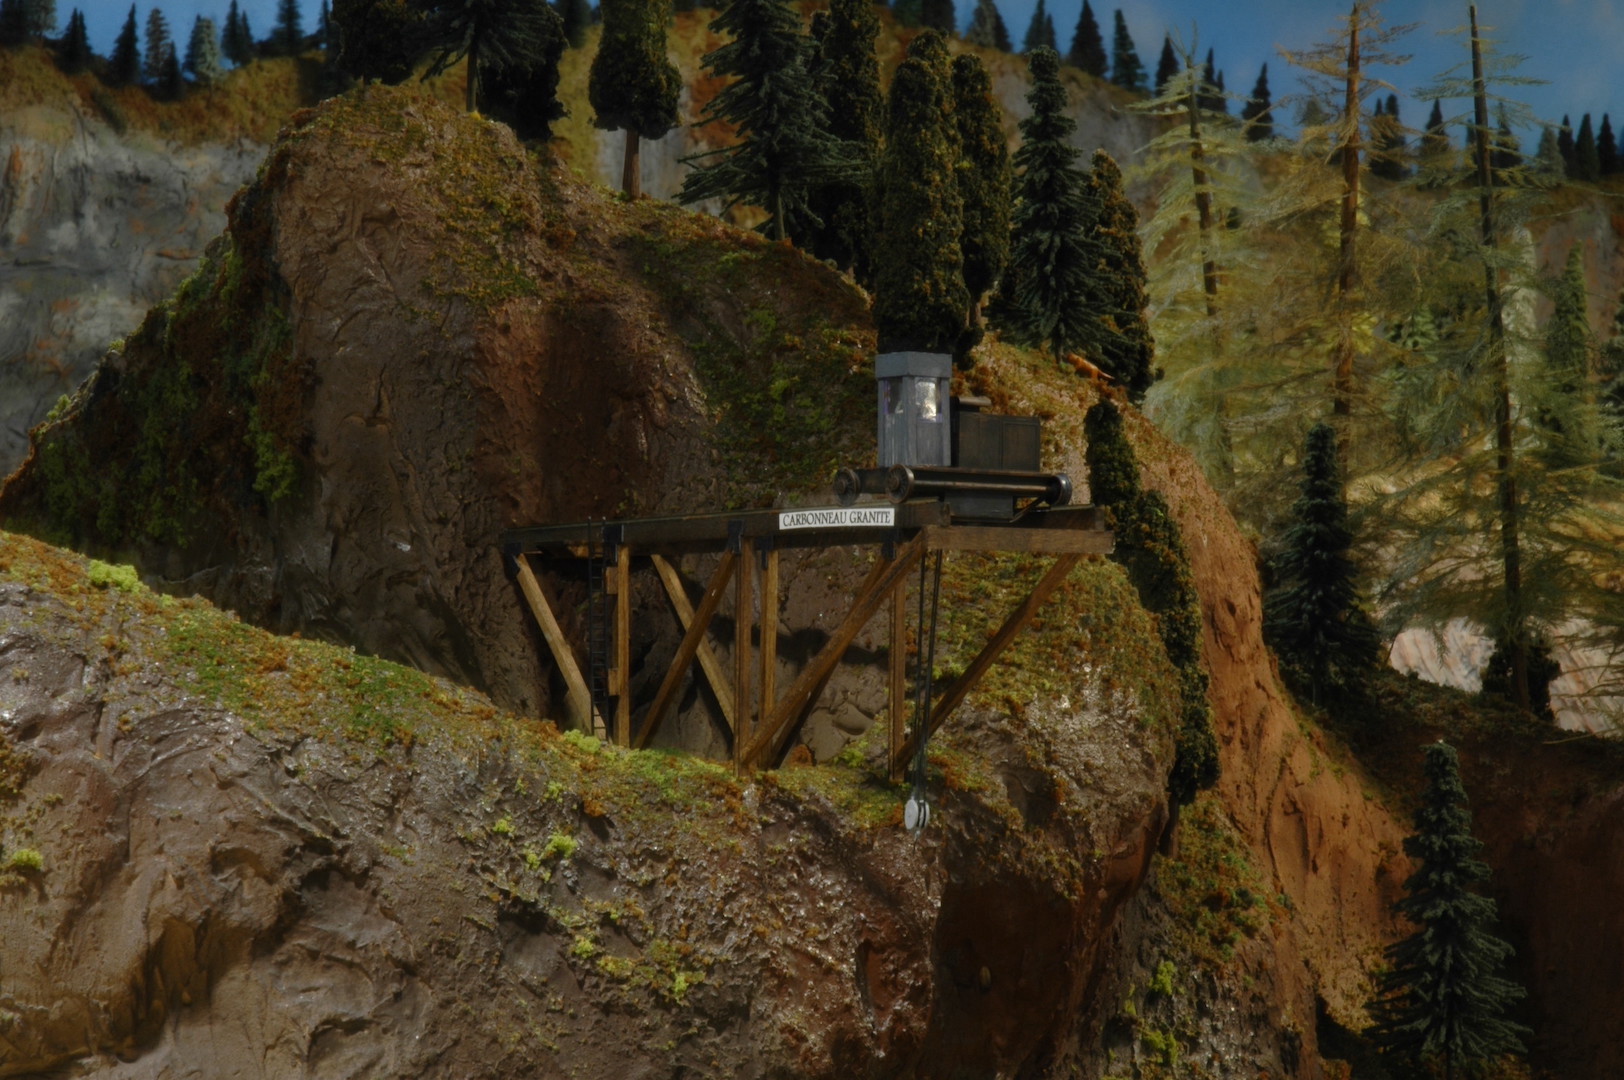
Photo 20 shows a backside view of Wapwallopen and the straining beam bridges. This shot was taken from the access hole located in Dry Gulch. The two tracks leading under the straining beam bridge on the right provide the siding for the granite operation as well as the brick structure. The single-track siding under the second straining beam bridge allows for rail access to a fuel facility and its associated storage tanks.
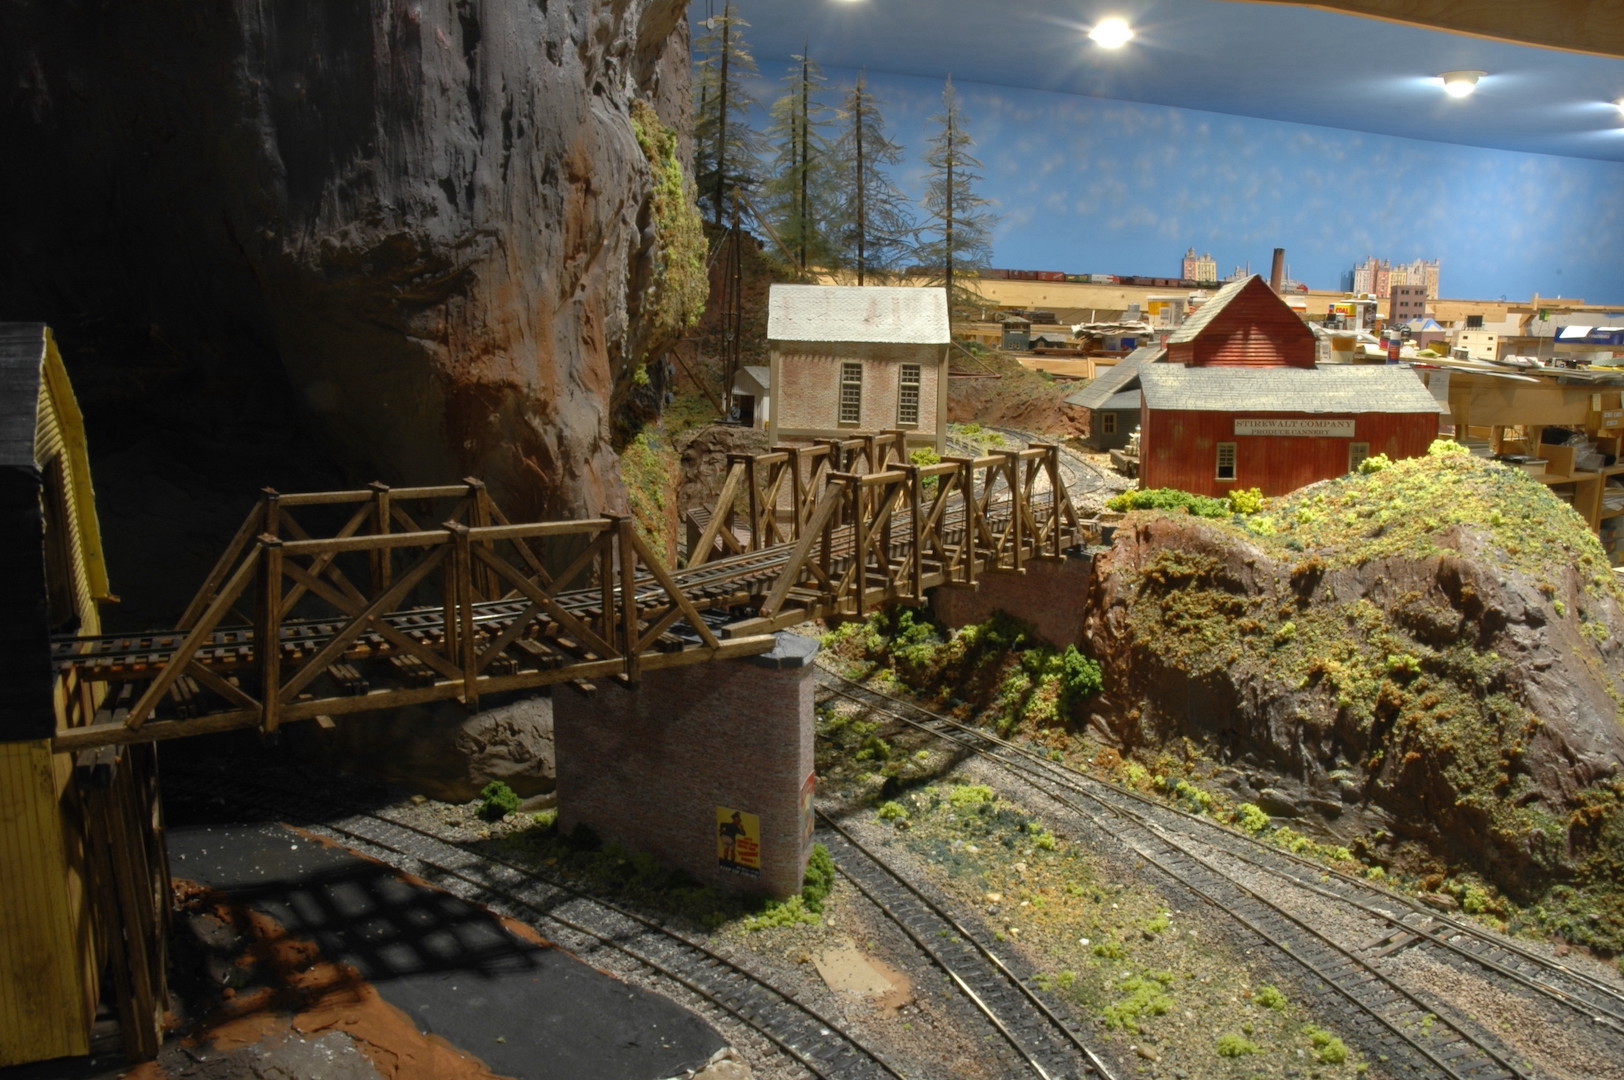
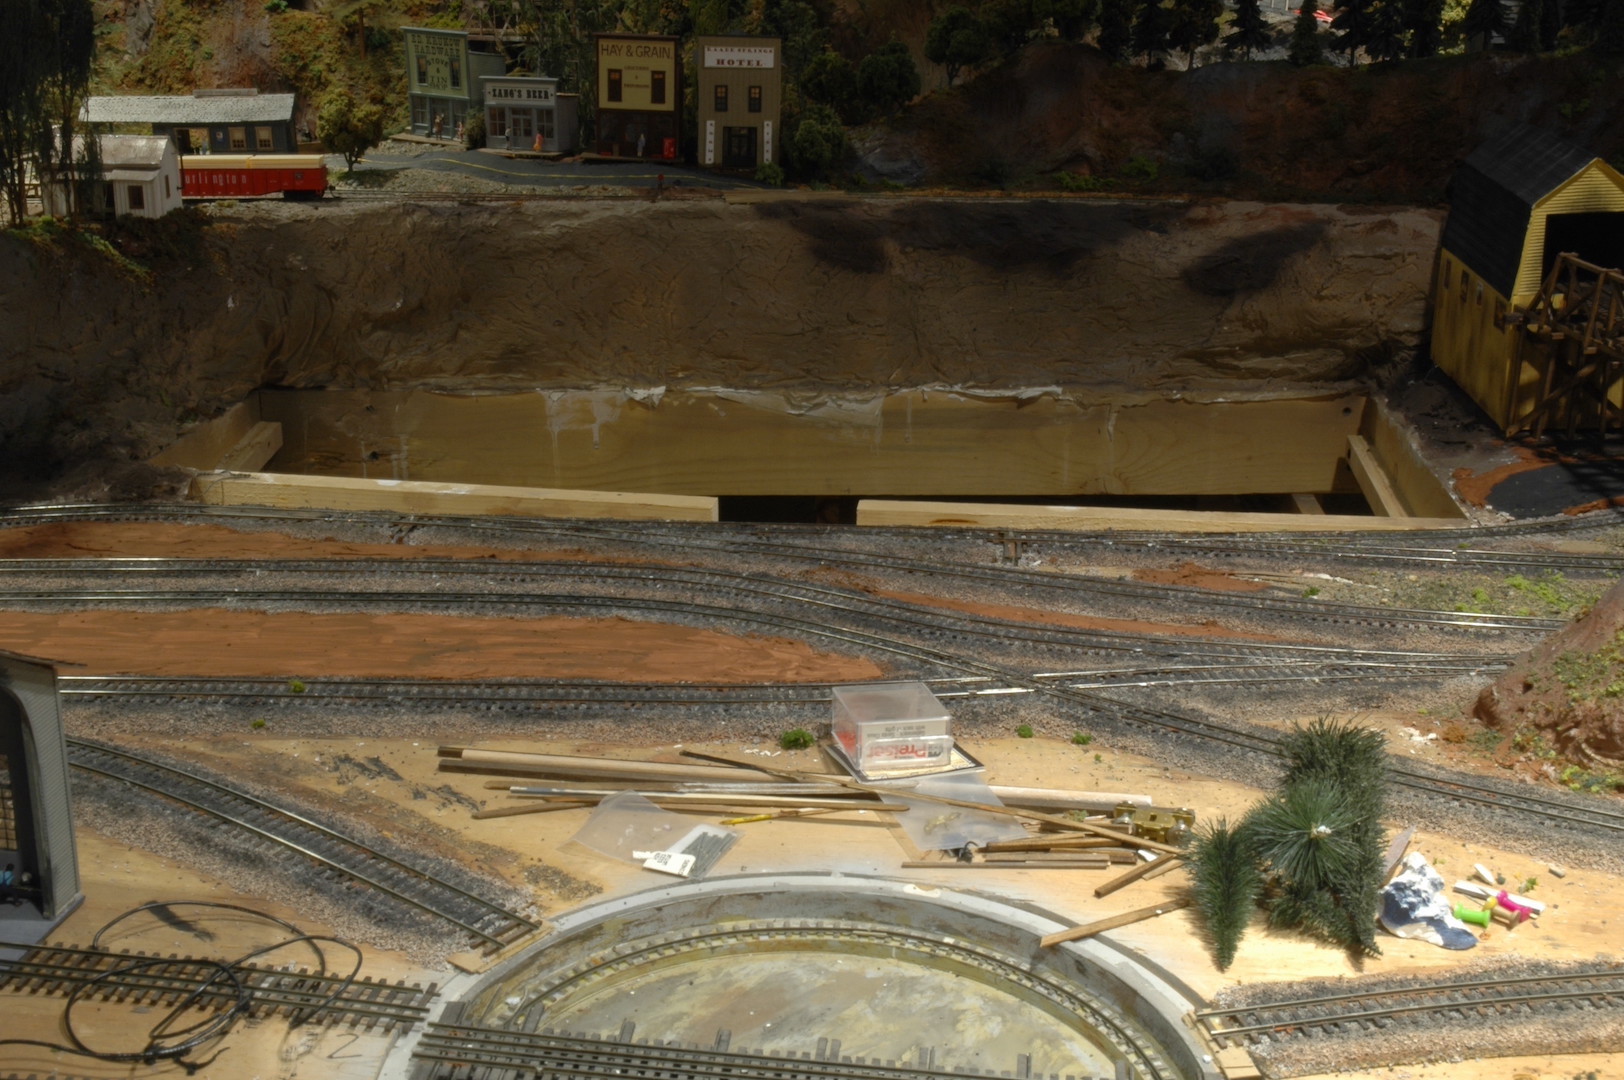
Photo 21 shows the access hole that the previous photo was taken. The cover for this access hole is currently under construction off of the layout. It will feature several structures and scenery. It will be a sliding lift-up type of access hatch with the ability to lock in the upright position allowing me to do track maintenance. Directly behind the hatch area is the completed town of Raade Springs. This town has rail service provided by the branch line out of Dry Gulch. In the foreground is the Dry Gulch turntable and to the extreme left is the corner of the Dry Gulch engine house.
That completes this update on the Dry Gulch & Western Railroad. Over the next few updates, we will take a peek at the towns of Alpine, Potter Flats, and Raade Springs. All of these areas were completed over the past year along with the adjoining scenery.
David
Dave, thanks much for your update. I think you’re doing an amazing job and your beautiful layout reflects your hard work.
THX: Don
David – thanks for posting. Looking good.
A lot of skill + a lot of space = GREAT LAYOUT DAVE!
TINA
Looks great!
Dave, With all that you have done with your great layout, perhaps it’s time you wrote it up for Great Model Railroads 202X. You certainly deserve the distinction that comes from being in such a publication. When I was in the 2003 issue it was quite uplifting. I think everyone that has seen your work would agree with me.