Article by Rich Thom, Photos by Rich Thom & Presenters as Noted
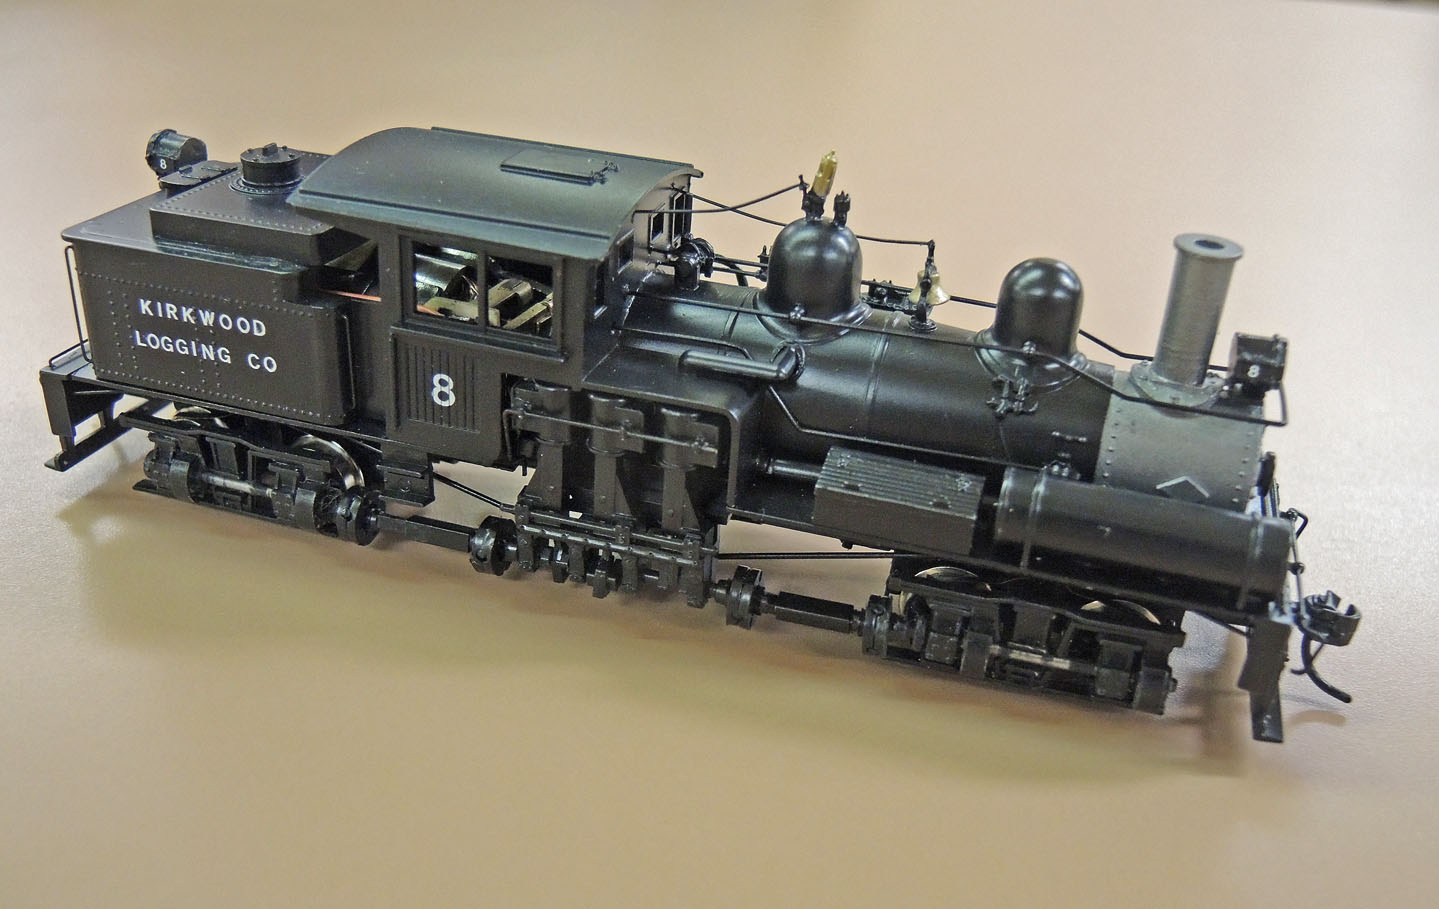
Fig 1 – Dave Clarke’s Shay
The Skagit Valley & Whidbey NMRA Clinic’s October meeting featured mini-clinics, a format which has been popular before and proved itself so again. The clinicians kept the group in the meeting room for a whole hour beyond the usual lights out — so it must have been interesting!
Dave Clarke, a master at taking old locomotives, mostly brass, and turning them into beautiful, smooth-running new power, brought in his latest transformation, a Roundhouse Products 3-truck Shay (Fig 1). Dave installed a 3/4 amp NCE decoder, replaced many plastic parts with castings, swapped out the original bull and axle gears for Northwest Shortline ones, and painted the loco. Nice work Dave.
Trees, Trees, Trees
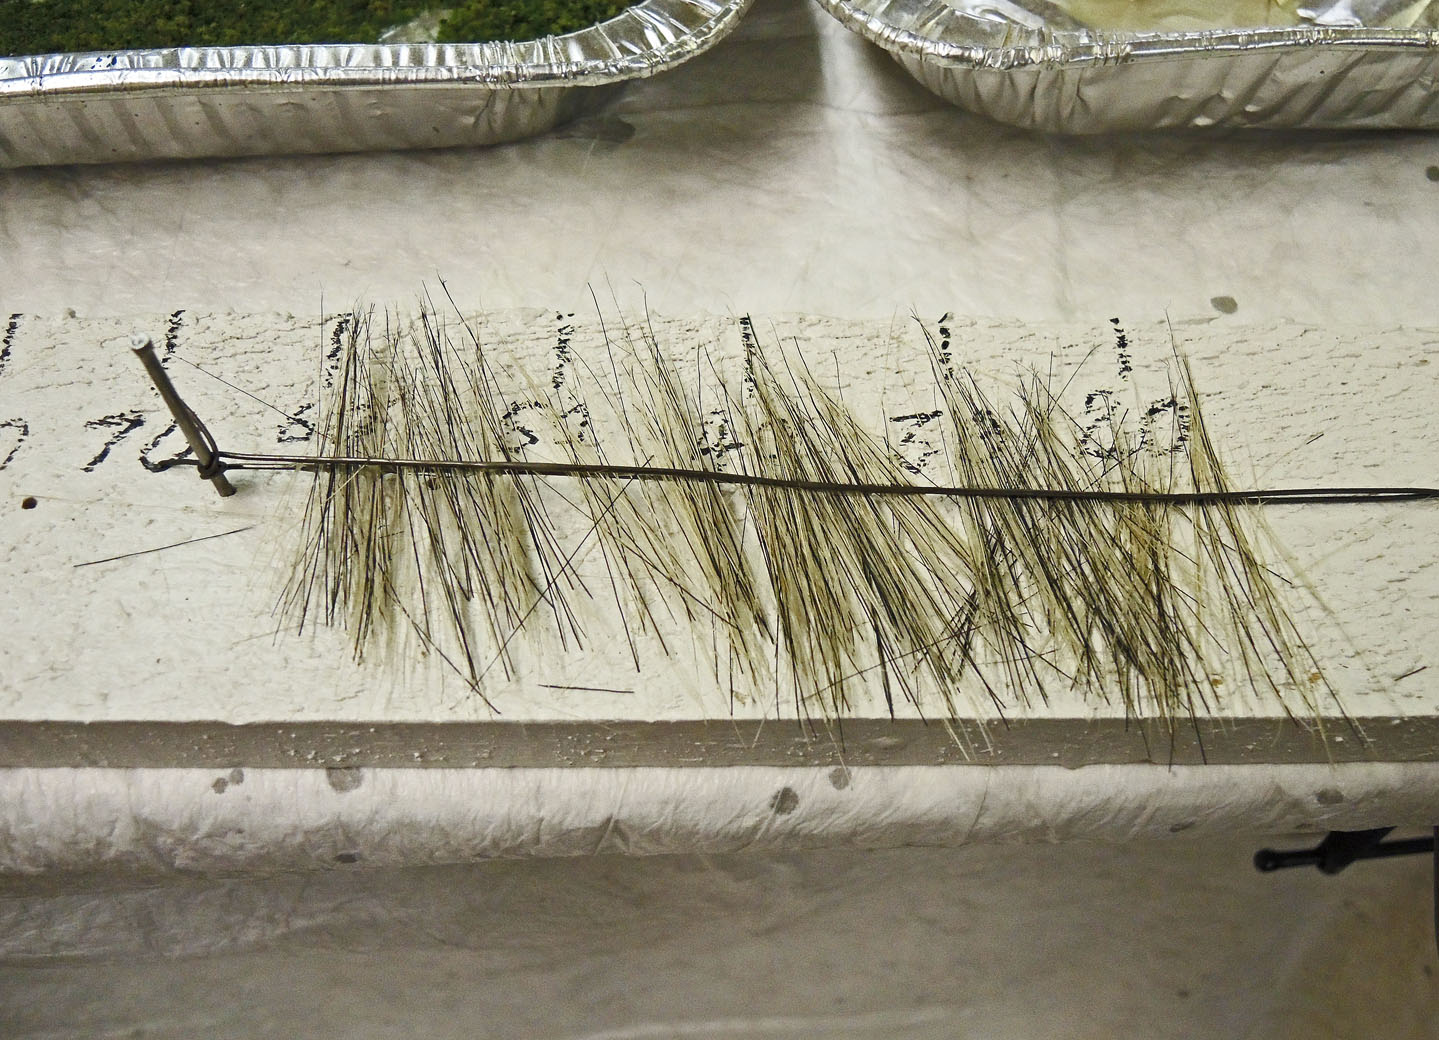
Fig 2 – Fibers and Pair of Wires Ready for Glue Application
Tom Hawkins was first up on the tree tag team to demonstrate making a “bottlebrush” tree, using materials and a tool marketed by MicroMark. The kit includes wire, a supply of approximately 3” long fibers, and a tool — a “Safety-Wire Twister” (so said the box).
The process begins by laying out the fibers and a pair of wires as shown in Fig 2. Glue is then applied; Tom uses Aleene’s Fast Grab Tacky Glue. The twisting tool is used to twist the wire pair (Figs 3 and 4).
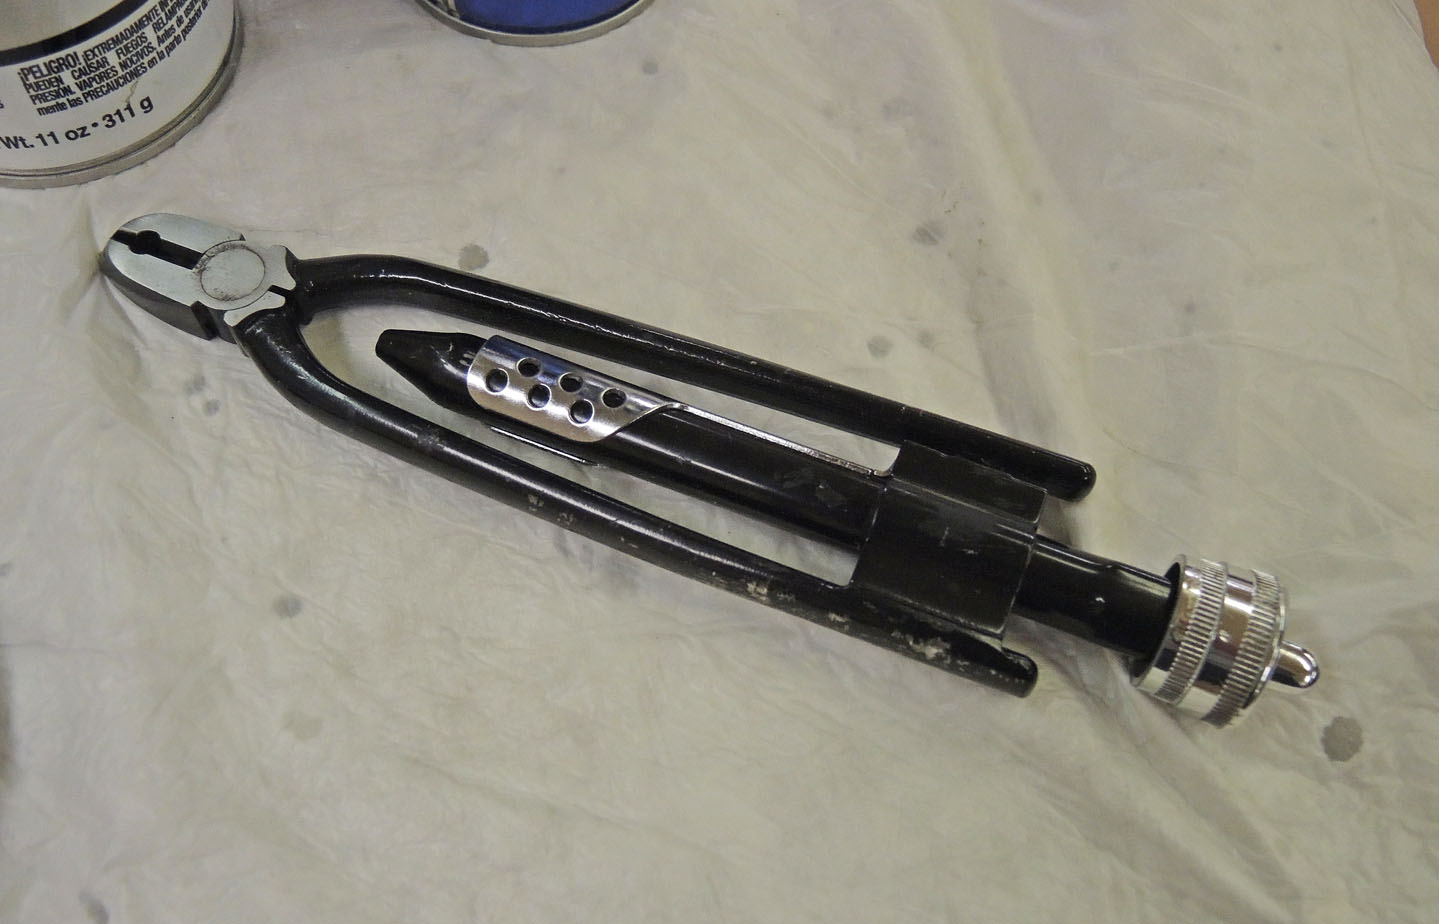
Fig 3 – Wire-Twisting Tool
The fibers are then trimmed to the desired tree shape, and foliage applied to the fibers (Figs 5 and 6). The tree is sprayed with hair spray (artist’s fixative also works) and then foliage is sprinkled on; several applications of foliage may be needed to get the look you want.
Bottlebrush trees make convincing background trees, especially when used in clusters. Rope fibers and annealed wire (try 19 gauge) are available at any hardware store, and the wire-twisting tool can be found on Amazon for about $12.
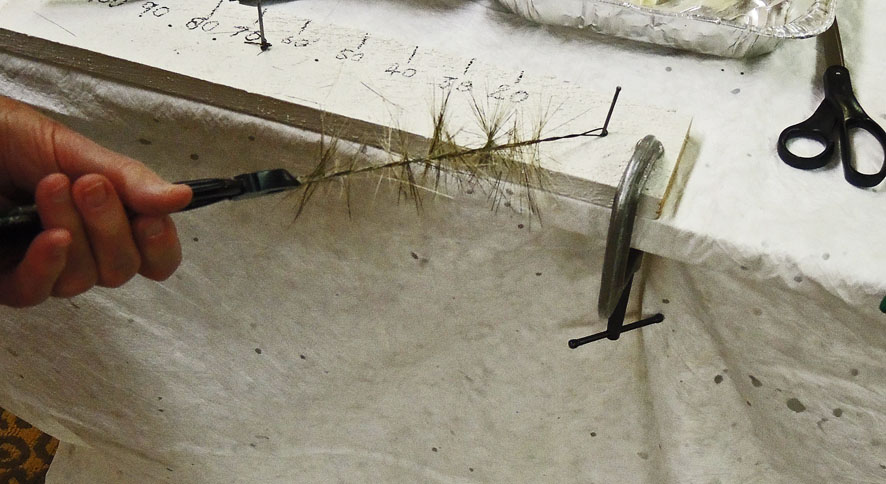
Fig 4 – Twisting the Wires
Cliff Aaker, in collusion with Susan Gonzales, was up next to demonstrate making trees. His goal is to model hemlocks, again using rope fiber branches, but using trunks of wood rather than twisted wire, for a step up in realism compared to bottlebrush trees. In Fig 8, Cliff applies Aleene’s Tacky Glue to a trunk before applying rope fibers, separated from common rope (photo) available anywhere. After letting the glue dry the entire tree is dipped in stain. Here are the detailed steps provided by Susan:
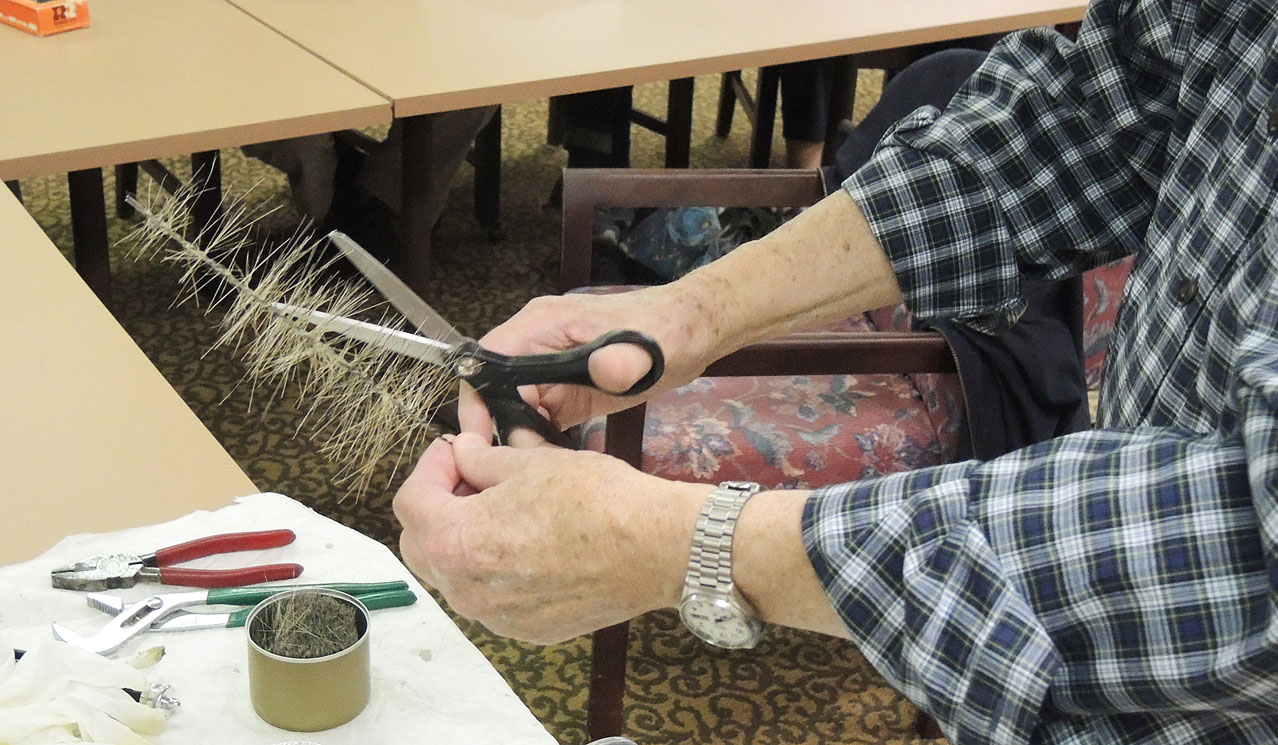
Fig 5 – Trimming the Fibers
Materials:
- Bamboo skewers, found at grocery stores or 1/8” dia. wood dowels at craft stores
- Manila rope, 3/8” or larger, at Home Depot or similar
- Aleene’s tacky glue
- Furniture stain — we prefer dark walnut
- Coarse turf from Woodland Scenics or others — we prefer dark greens but you should use several different shades for trees clumped together
- Empty water bottle cut in half
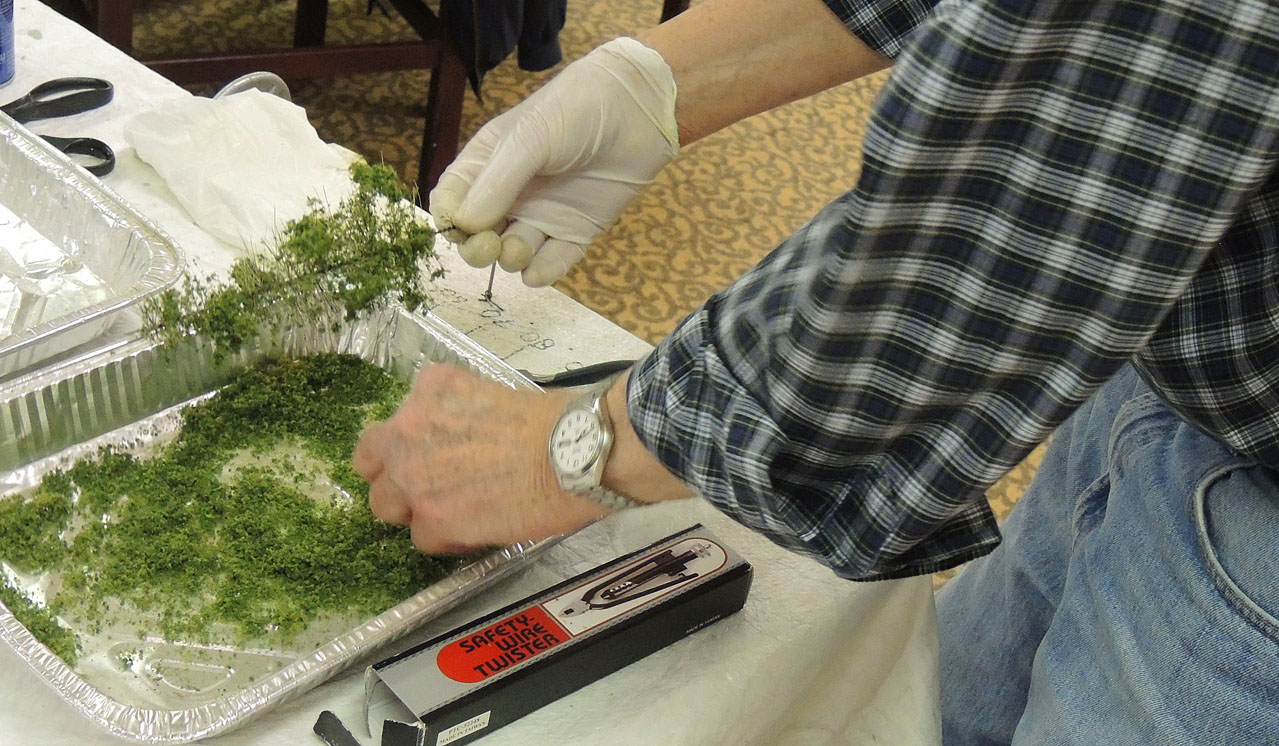
Fig 6 – Applying Foliage
Steps to make your small trees:
- Cut the skewers and dowels into a random mix of lengths and sharpen both ends
- Cut the rope into 1.5 – 2” lengths
- Shred the rope down to individual fibers
- Apply 3 or 4 vertical stripes of Aleene’s glue along the tree trunk; the combination of glue and wood will give the trunk needed texture
- Apply the rope fibers to the glue, aligning the center of the fibers to the trunk; try to use very few fibers at a time but put more on than you think you will want, working your way around the trunk in a circle; make sure the top gets plenty
- After the glue dries dunk the entire tree into the stain
- After the stain dries (several hours) you can optionally spray with dullcoat
- Trim the tree to the desired shape; don’t be afraid to trim too much off, especially near the top
- Take the bottle halves and put some Aleene’s in the bottom of one, and coarse turf into the other
- Roll the tree in the Aleene’s; be fairly aggressive with this step since the glue hasn’t much to cling to
- Roll the tree in the coarse turf
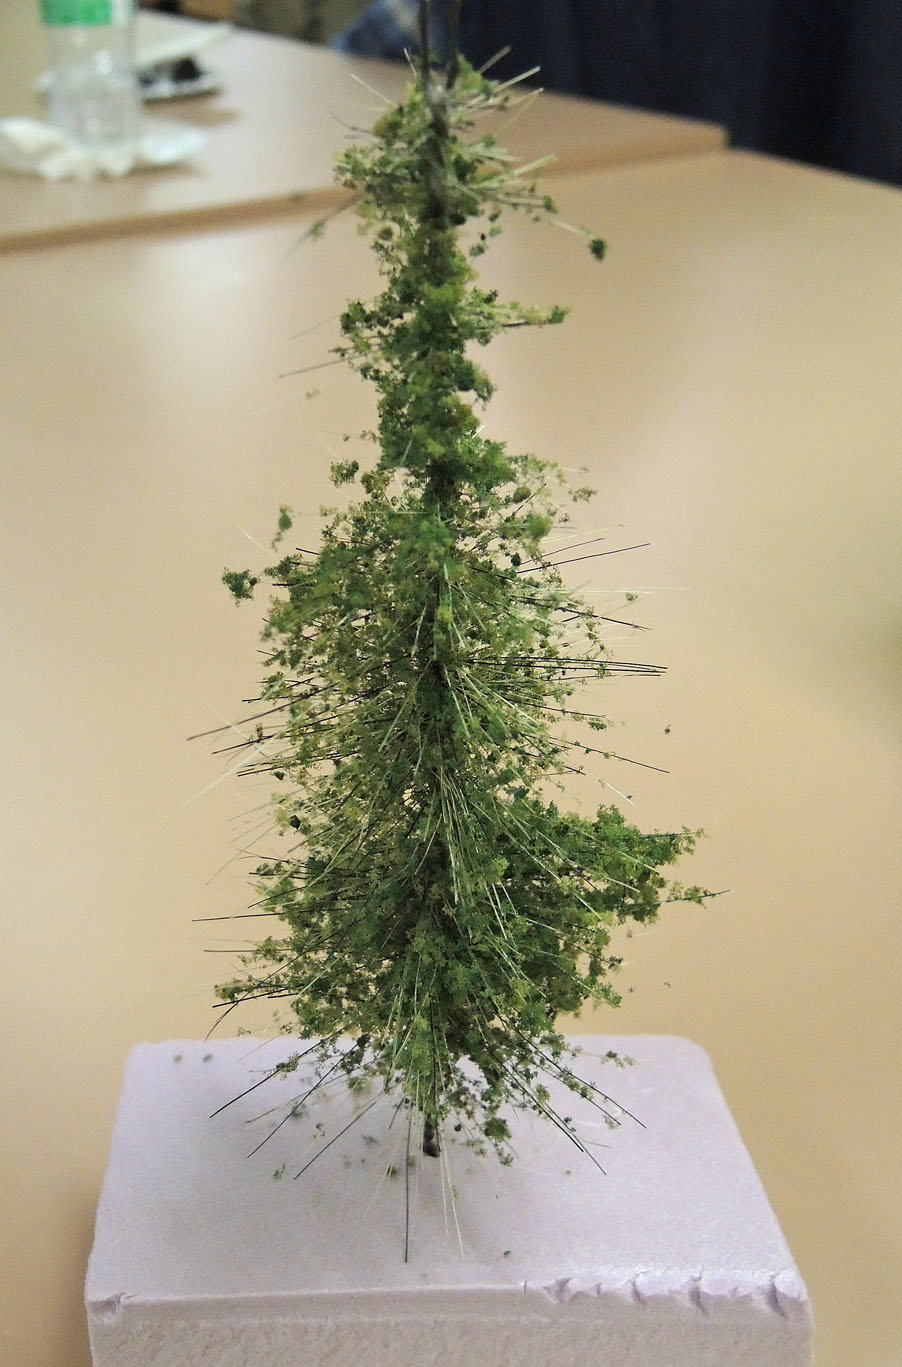
Fig 7 – Tom Hawkins’ Completed Bottlebrush Tree
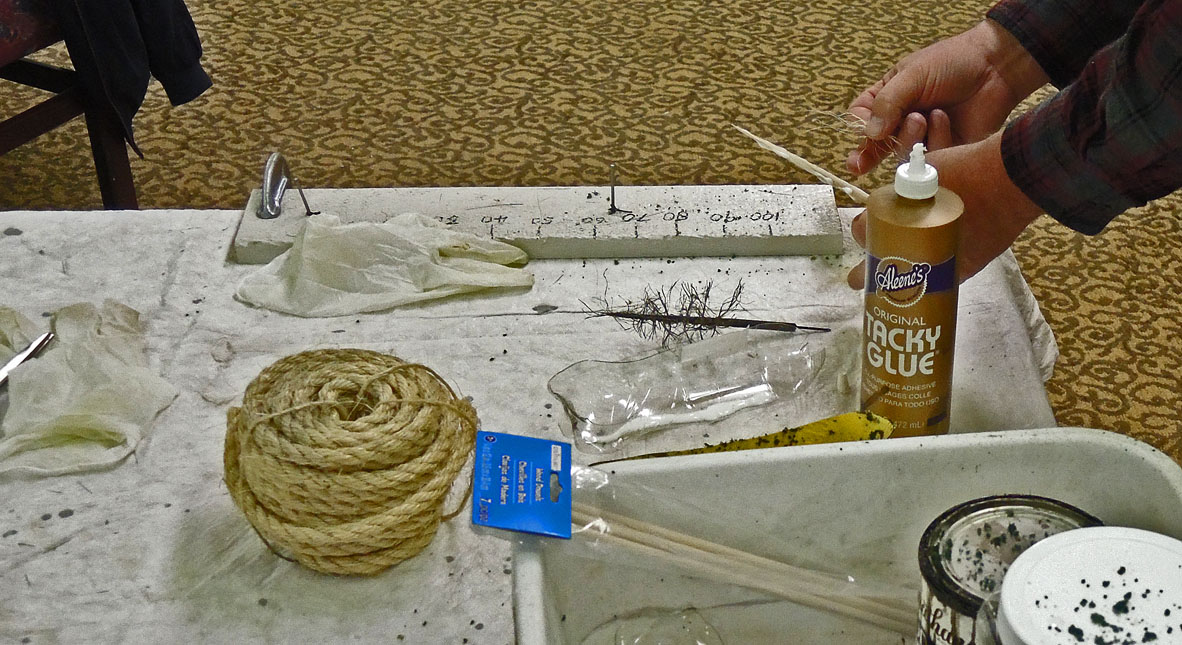
Fig 8 – Cliff Aaker Demonstrates Making Rope Fiber Hemlocks
Susan also brought in some examples of another method she uses for coniferous trees, in this case replicating red pines and bristlecone pines. These are foreground models justifying the time to make them, about one hour per tree, says Susan. Trucks are hand-whittled, and the branches are individual twigs of caspia (Fig 10).
Throw out the Plaster – Use Rubber Rocks Instead
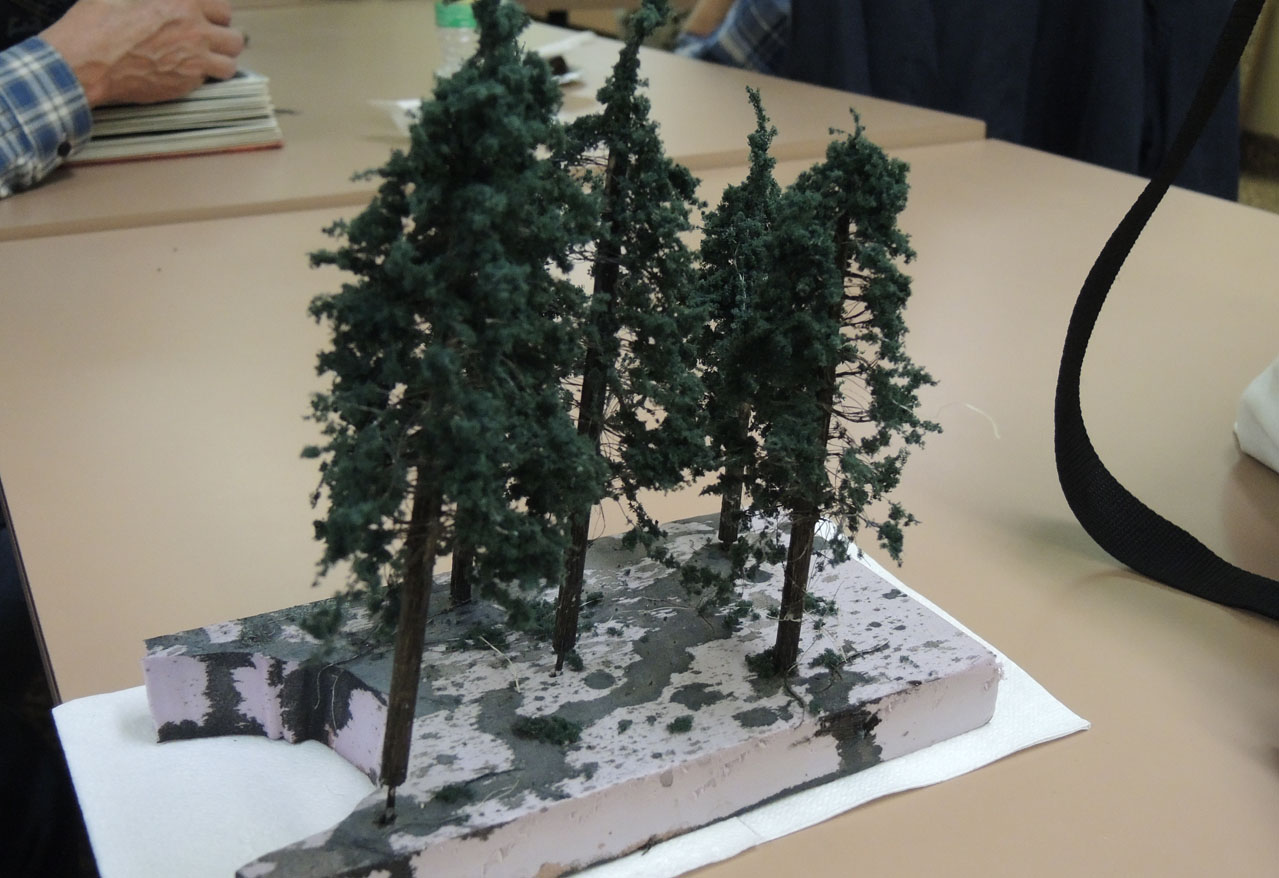
Fig 9 – Trees Created Using the Above Method
Most modelers use the traditional method of creating rock outcroppings by using molds to cast them in hydrocal or other plaster formulations, and beautiful results can be obtained. Another method — rubber rocks – intrigues Rich Thom.
Rubber rock advantages:
- Light weight — if you have large scenicked liftouts for example (which Rich does)
- Flexible, e.g. can curve to follow sharp curves in cuts
- Less mess — no plaster, molds
- Faster — attach to hardshell in minutes
- Trim with household scissors to fit scene
- Reworkable, especially in coloring steps
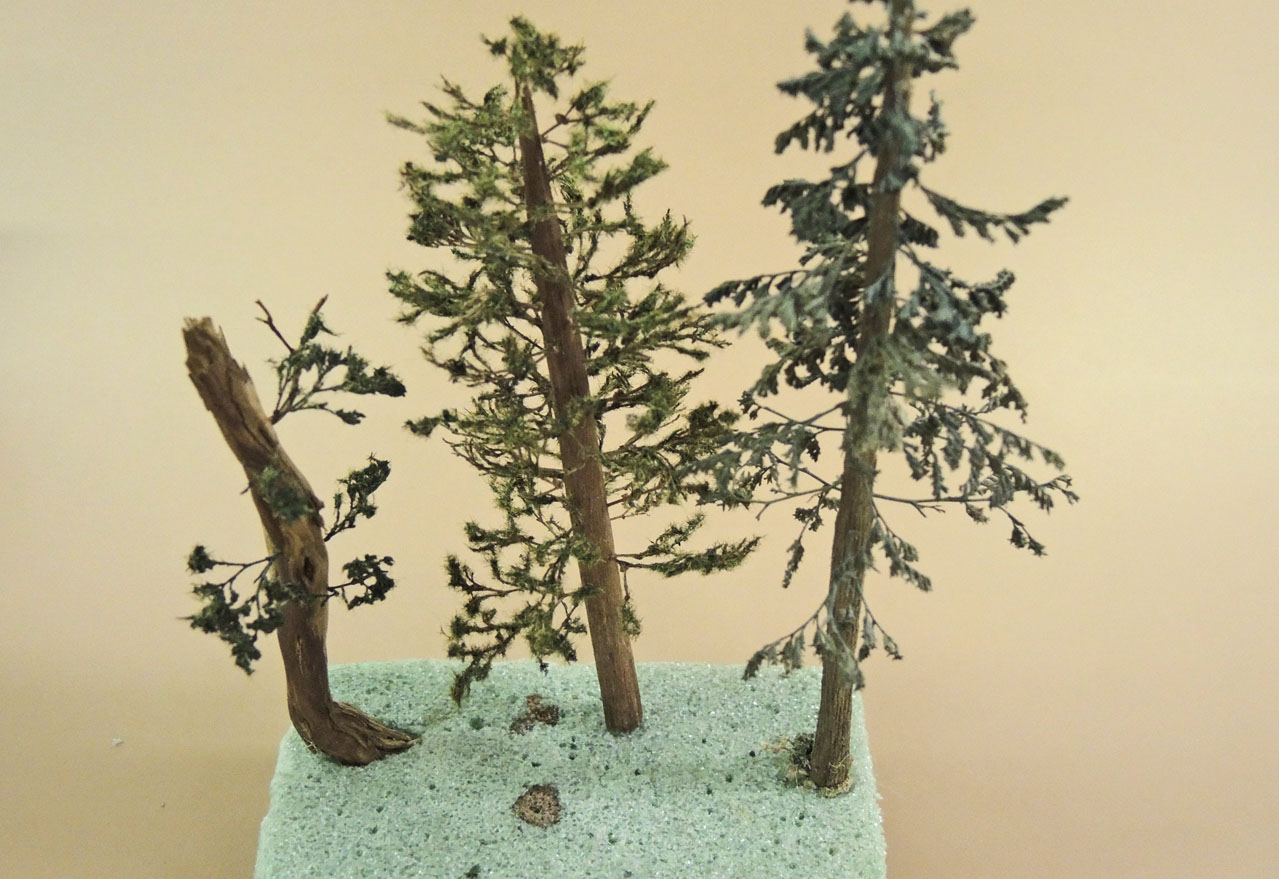
Fig 10 – Susan Gonzales’ Pines
A rubber rock is essentially a reproduction of a rock outcropping ready to glue to layout hardshell — it’s not a mold. They are made using a process similar to that used to make Halloween masks. Rich obtains his from Cripplebush Valley Models (www.cripplebush.net). Cripplebush sells rubber rocks in a wide variety of rock types including granite, basalt, limestone, sandstone and many others, so one can match rocks to the geology of the region modeled. Their disadvantages are that they are a little more difficult to color (in Rich’s opinion) than plaster castings, and relatively expensive, roughly $25 per square foot. That sounds pricey but compare that to what you spend for a single locomotive, for example. For modest layouts (like Rich’s at under 200 square feet), scenicked modules, or select mountain and canyon areas of very large layouts, rubber rocks are a good alternative to consider.
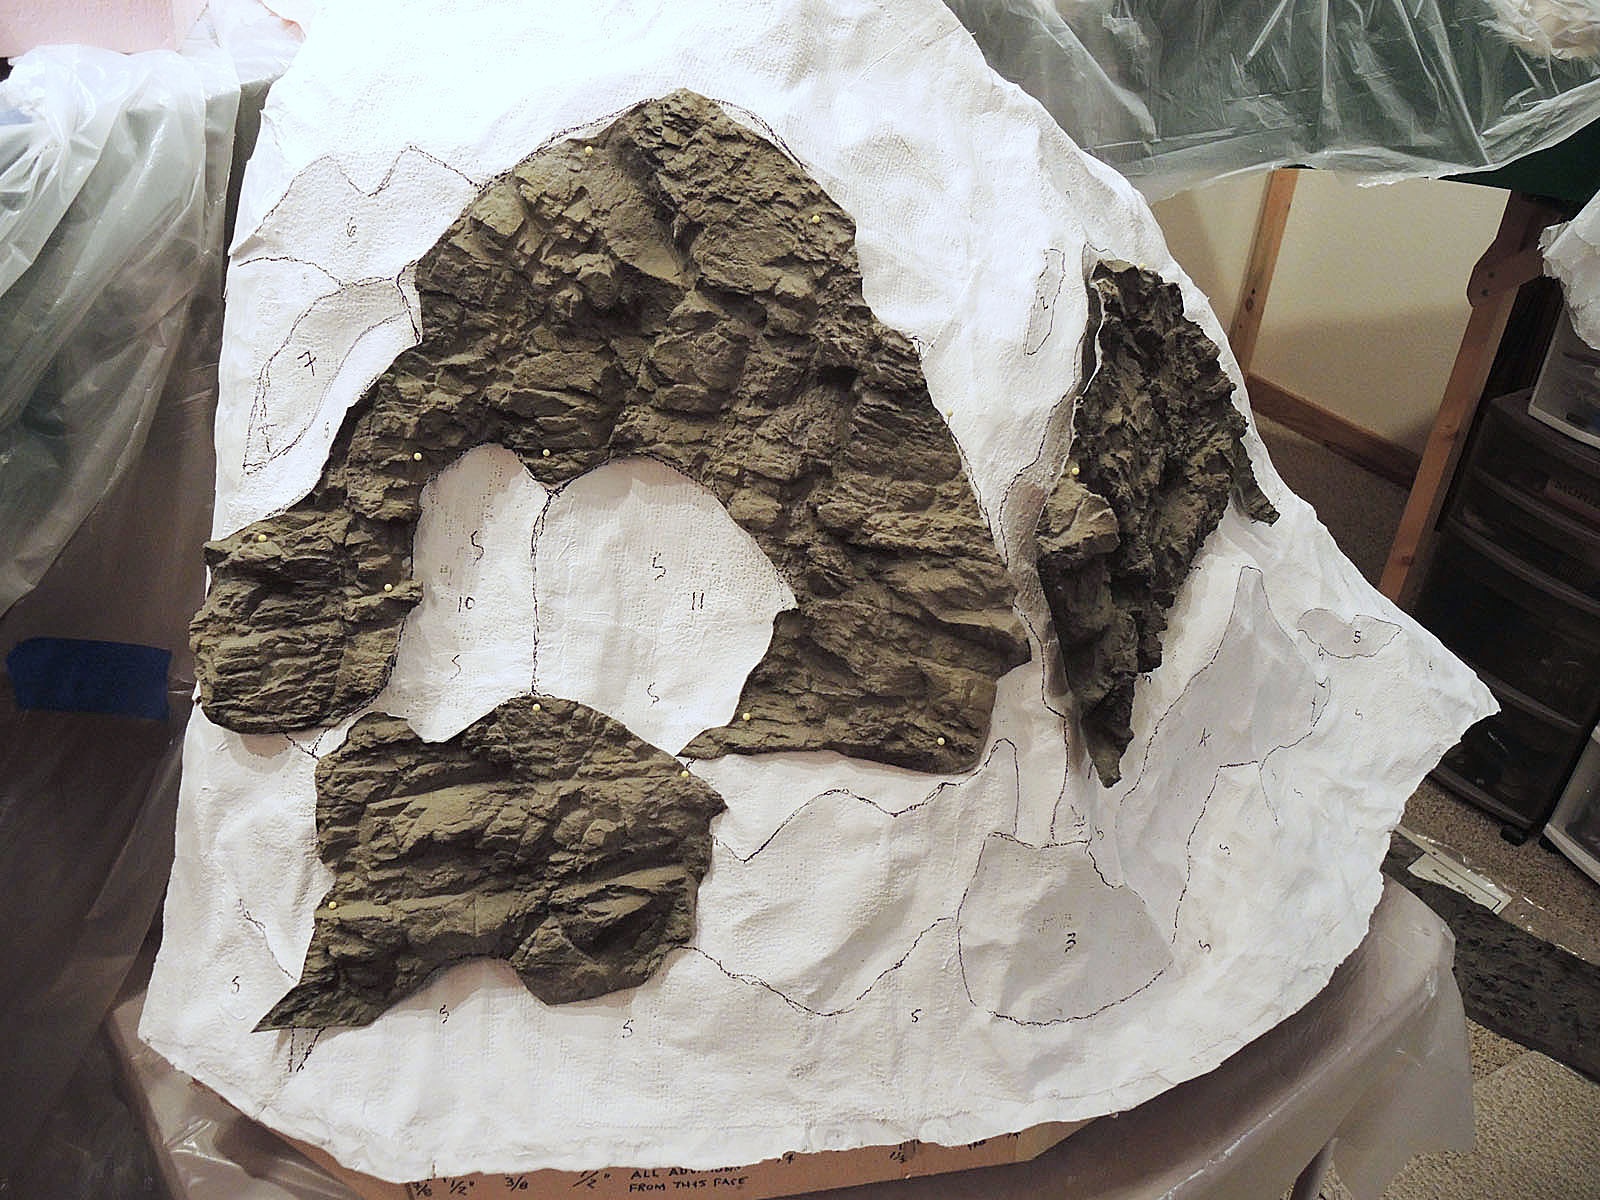
Fig 11 – Rubber Rocks Pinned to Hardshell Before Gluing
Attaching and coloring rubber rocks (Rich’s Method):
- Mark out desired outcrop locations on hardshell with a Sharpie or equivalent
- Pin on tracing paper and trace the outcrop outlines on the paper
- Cut out the tracing paper patterns and transfer outlines to rubber rocks
- Cut out outcrops with household scissors (save leftover pieces for isolated rocks!)
- Glue rubber rock outcrops to hardshell with hot glue (alternatives include caulk)
- Apply second ground layer of your choice to hardshell (Rich uses Sculptamold)
- Brush-apply thinned (1:1) white acrylic gesso to everything — both rocks and ground layer
- Brush-apply basic rock color to the rubber rocks — Rich uses an acrylic battleship gray
- Brush-apply rock shadows — Rich uses either an India ink wash or near-black acrylic mix
- Dry-brush rock highlights — just the basic rock color lightened up with some white
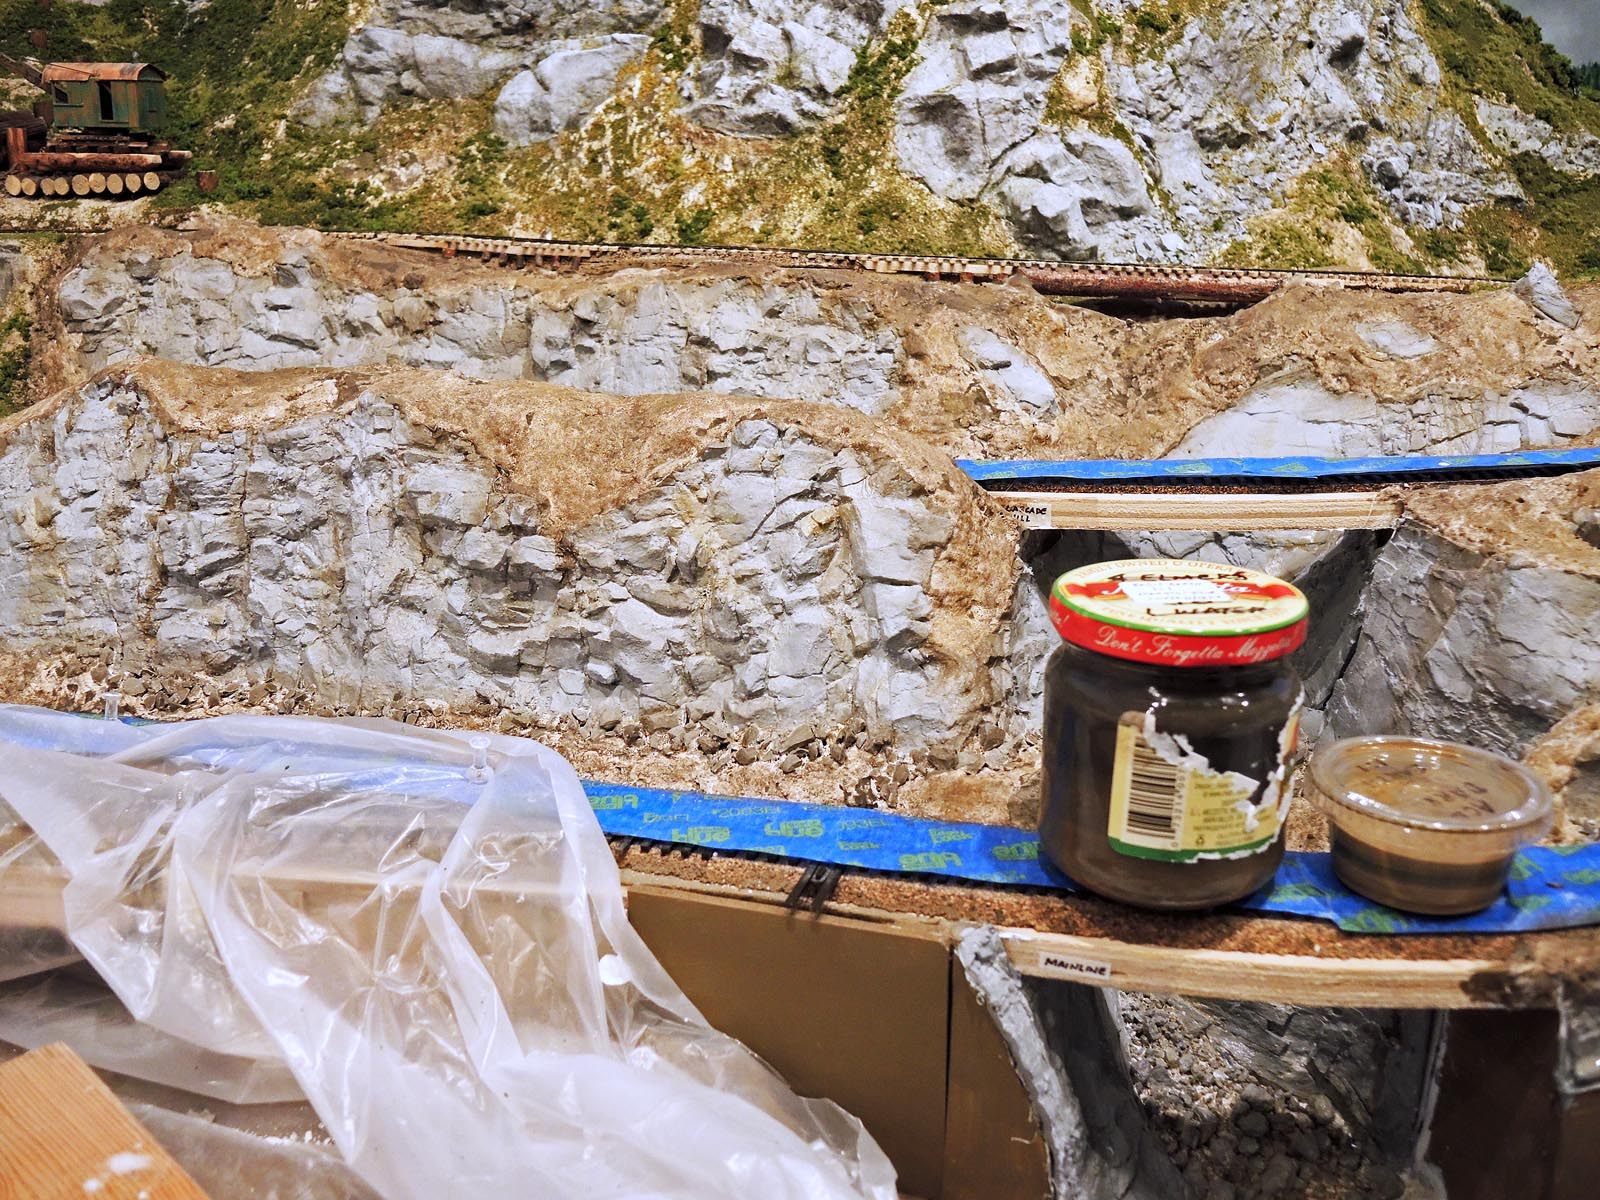
Fig 12 – Basic Rock Color on Rubber Rocks, Earth Tones Applied
It all sounds easy when written like this, but there are sandtraps. In the attachment steps, hot glue “strings” (as everyone knows) and you will spend some time brushing and vacuuming away the strings from your rubber rock mountainsides. You can use caulk instead but then you need to hold the outcrop in place until the caulk sets. Some of the rubber rocks, particularly the granite reproductions, have high relief and are stiff as an egg carton, and don’t flex the way you would like them to (or at all). Rich found he has to mechanically cinch them in (using wire punched through the rubber rock and hardshell and then twisting it) in some places where the hot glue just doesn’t have enough strength to hold them in place.

Fig 13 – View of Rubber Rock’s on Rich Thom’s Layout
Coloring the rubber rocks is rather different from staining cast plaster rocks with washes. The rubber is not porous, and even after priming with the white acrylic gesso, which produces a matte surface with some “tooth,” the process is closer to painting than staining. I use acrylics thinned about 1:1 with water — runny but not a “wash.” It takes some practice to get it right: practice on test pieces off the layout. One advantage is that if you are not happy with an outcropping, you can “start over” at the gesso step and try again. With a plaster casting, if you overstain and it’s too dark. you’re essentially stuck with it.
Maine Two-Footers
Moving a few thousand miles east, Alan Murray presented a still photo and video montage of the 36th National Narrow Gauge Convention in Augusta, Maine. Over the course of the convention, Alan visited many layouts in the area as well as museums and, well, just rural Maine in all its beauty and quaintness.
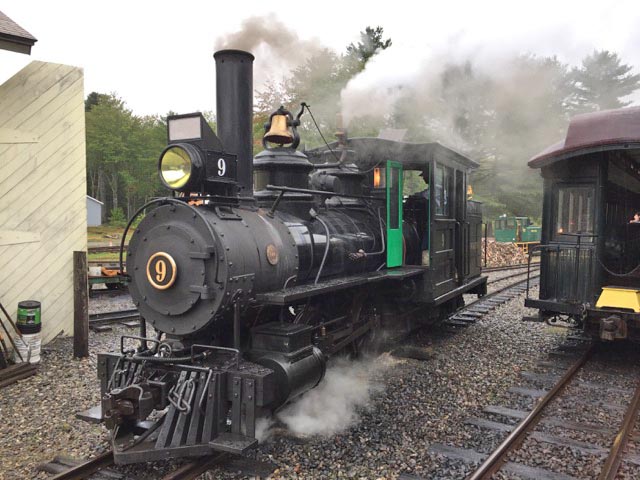
Fig 14 – Locomotive #9, the Only 2-Ft Gauge Survivor (Photo: A. Murray)
Locomotive #9 (Fig 14) is the only surviving locomotive from three different Maine two-foot gauge railroads, the Sandy River and Rangeley Lakes, the Kennebec Central, and the Wiscasset, Waterville and Farmington. Additionally it is the oldest of the surviving Maine two-foot locos (built 1891) and only one of possibly two locos surviving from its builder, the Portland Co. of Portland, Maine.
At Boothbay Railway Village, a locomotive (Fig 16) manufactured in the 1930’s by AG Vulcan Stettin, a German builder of warships and locomotives, runs for visitors. Water is carried below the boiler in tanks between the frames, i.e. this is a well tank.
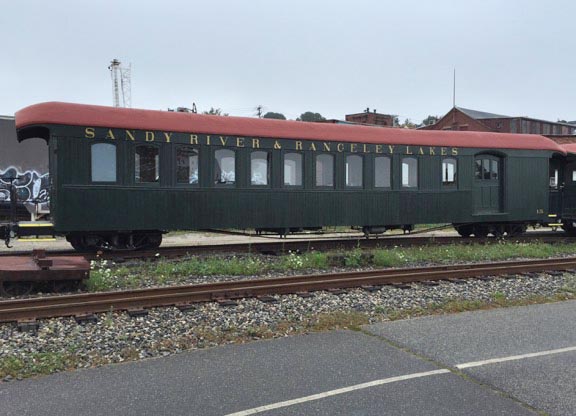
Fig 15 – Passenger Car at Maine Railroad Museum (Photo: A. Murray)
Finally, Alan included some photos that underscored that America excelled in the maritime, as well as the railroading, world. Turns out a Maine shipyard launched, in 1909, the largest wooden sailing vessel built in this country, the six-mast (an 0-12-0?) schooner named Wyoming (model, Fig 17). It’s length over spars was no less than 445 feet, height of masts from the keel 177 feet (17 stories), and gross weight 3,730 tons. Wow.
Thanks to all clinicians for their informative and interesting presentations.
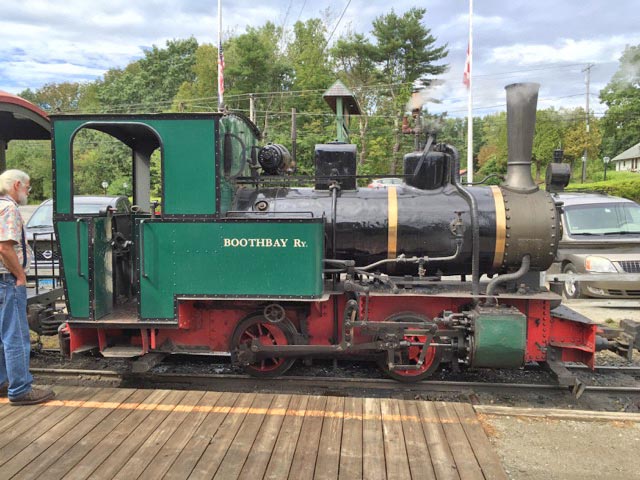
Fig 16 – German Loco at Boothbay Railway Village (Photo: A. Murray)
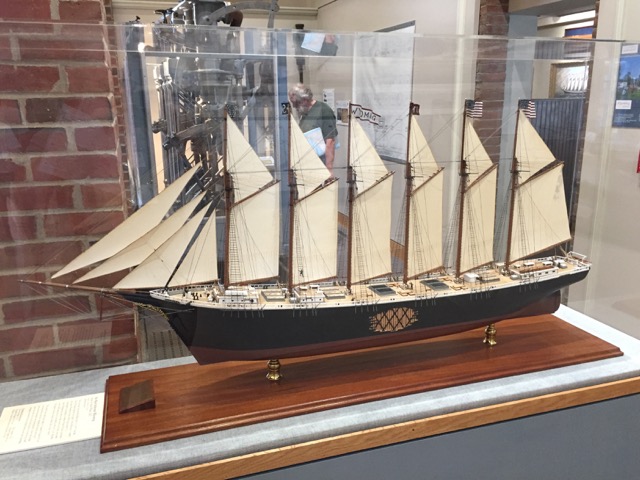
Fig 17 – Model of Schooner Wyoming (Photo: A. Murray)
No Comments Yet