Article and Photos by Rich Thom
January Meeting – Working with Stripwood
Clinic Chair Rich Blake welcomed 28 modelers to the first meeting of the new year, including three from our “sister” Mt. Vernon clinic group, and guests BK and Nancy Blackketter. Rich along with Program Chair Susan Gonzales reviewed some of the plans for the remainder of the season: in March, a program about the Ilwaco Railway and Navigation Company, a 3-foot gauge line that ran for over forty years from the bar of the Columbia River up the Long Beach Peninsula; April, a joint meeting with the Mt. Vernon clinic at their venue; and in May, a tentative field trip to the Lake Whatcom Railway in Wickersham.
The evening’s topic was Working with Stripwood, and several brought in models either finished or “in progress” and described some of the methods used. We’ll show a sampling; your reporter apologizes for not getting photos of them all.
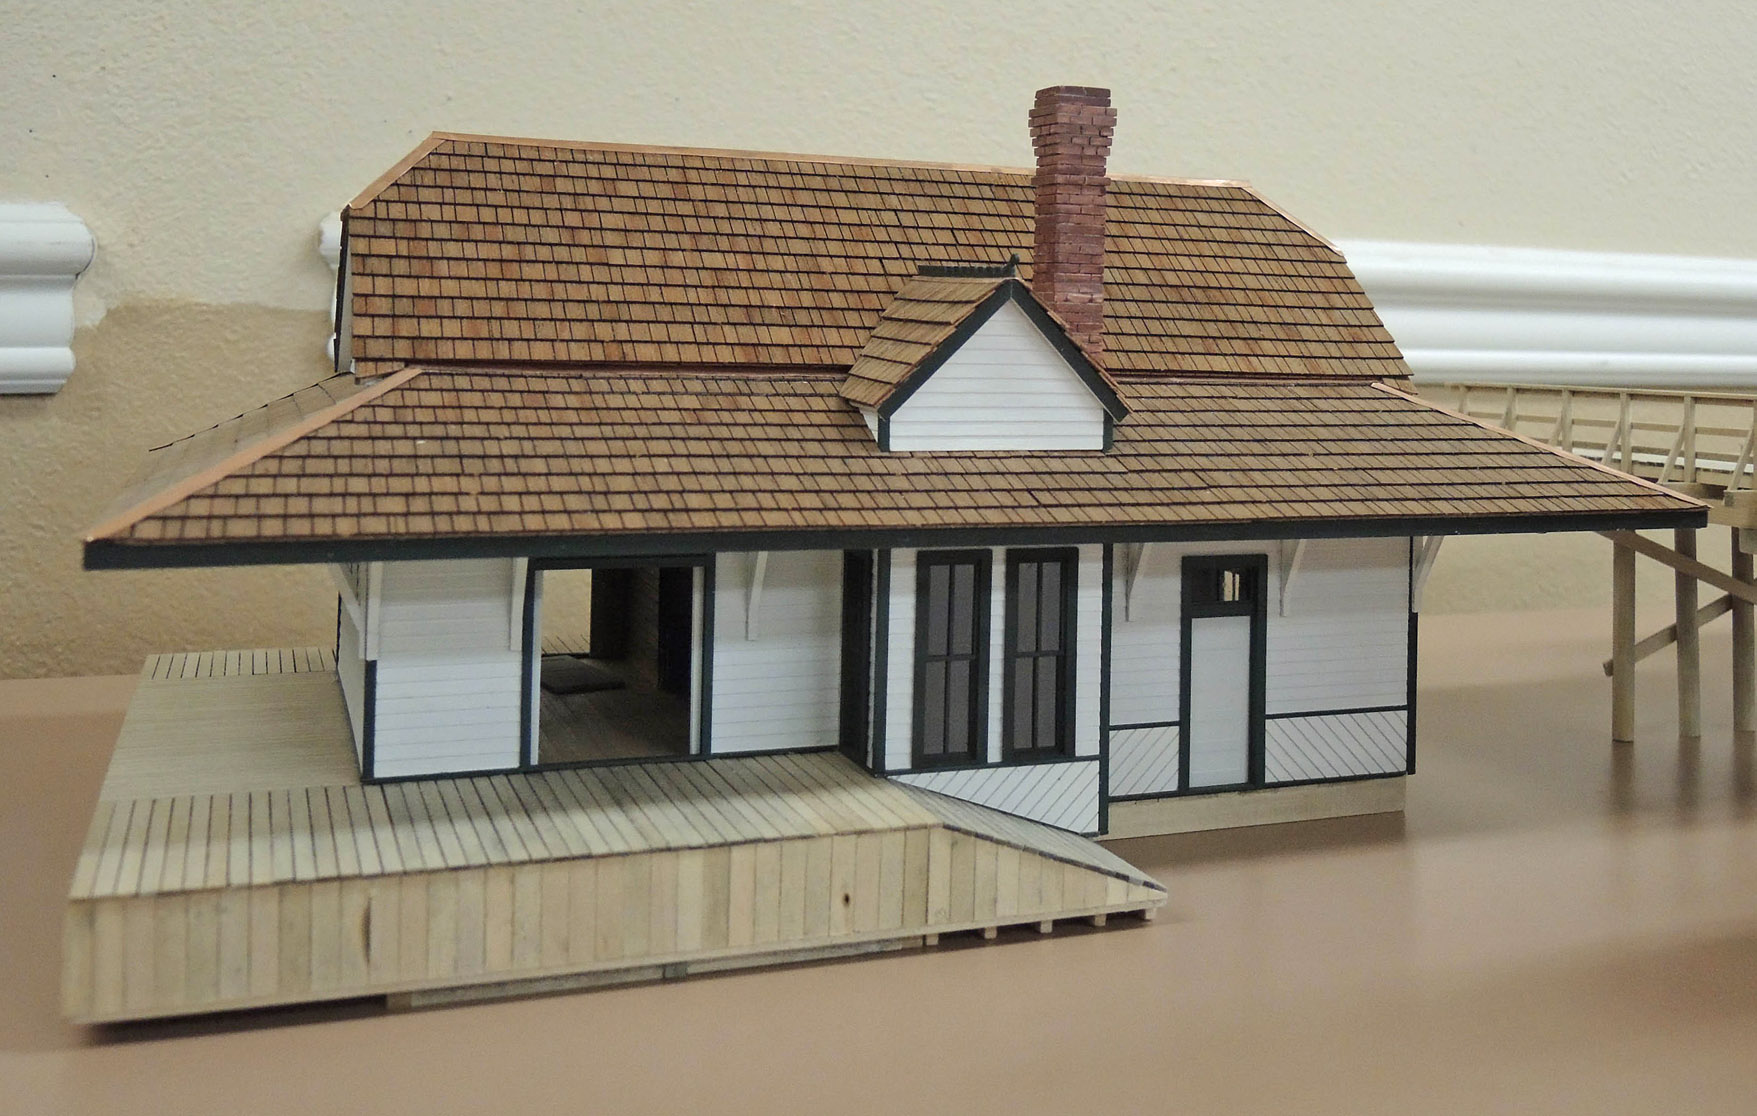
Fig 1 – Alan Murray’s Olympia Station
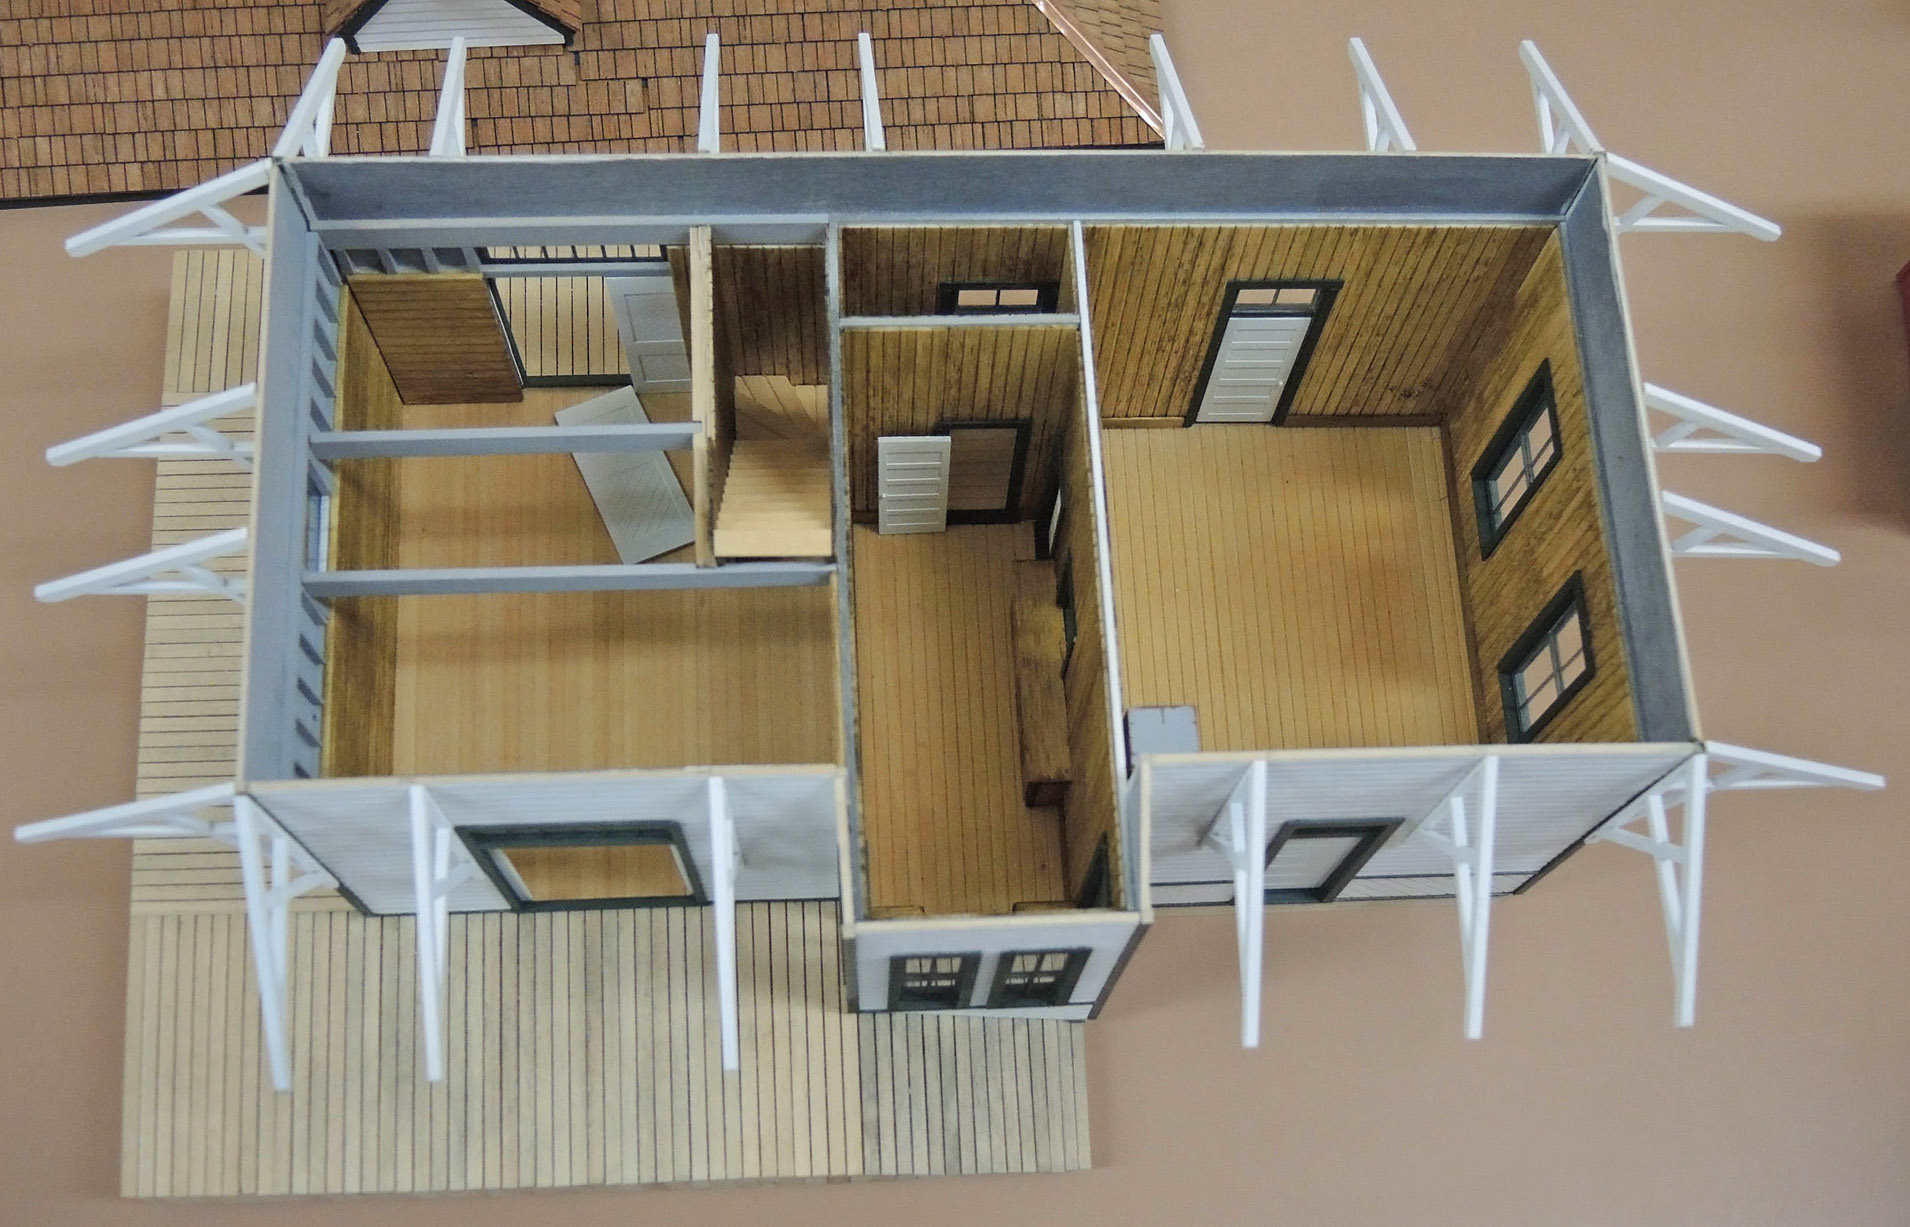
Fig 2 – Olympia Station Interior
Alan Murray kicked off with a powerpoint presentation illustrating some of the techniques he used to create his O-scale Olympia dock and station complex and other structures, which will be used on some of his On30 modules. Alan showed photos of the large dock and brought in several of the buildings (Figs 1 through 4). These are beautifully built as shown by the photos.
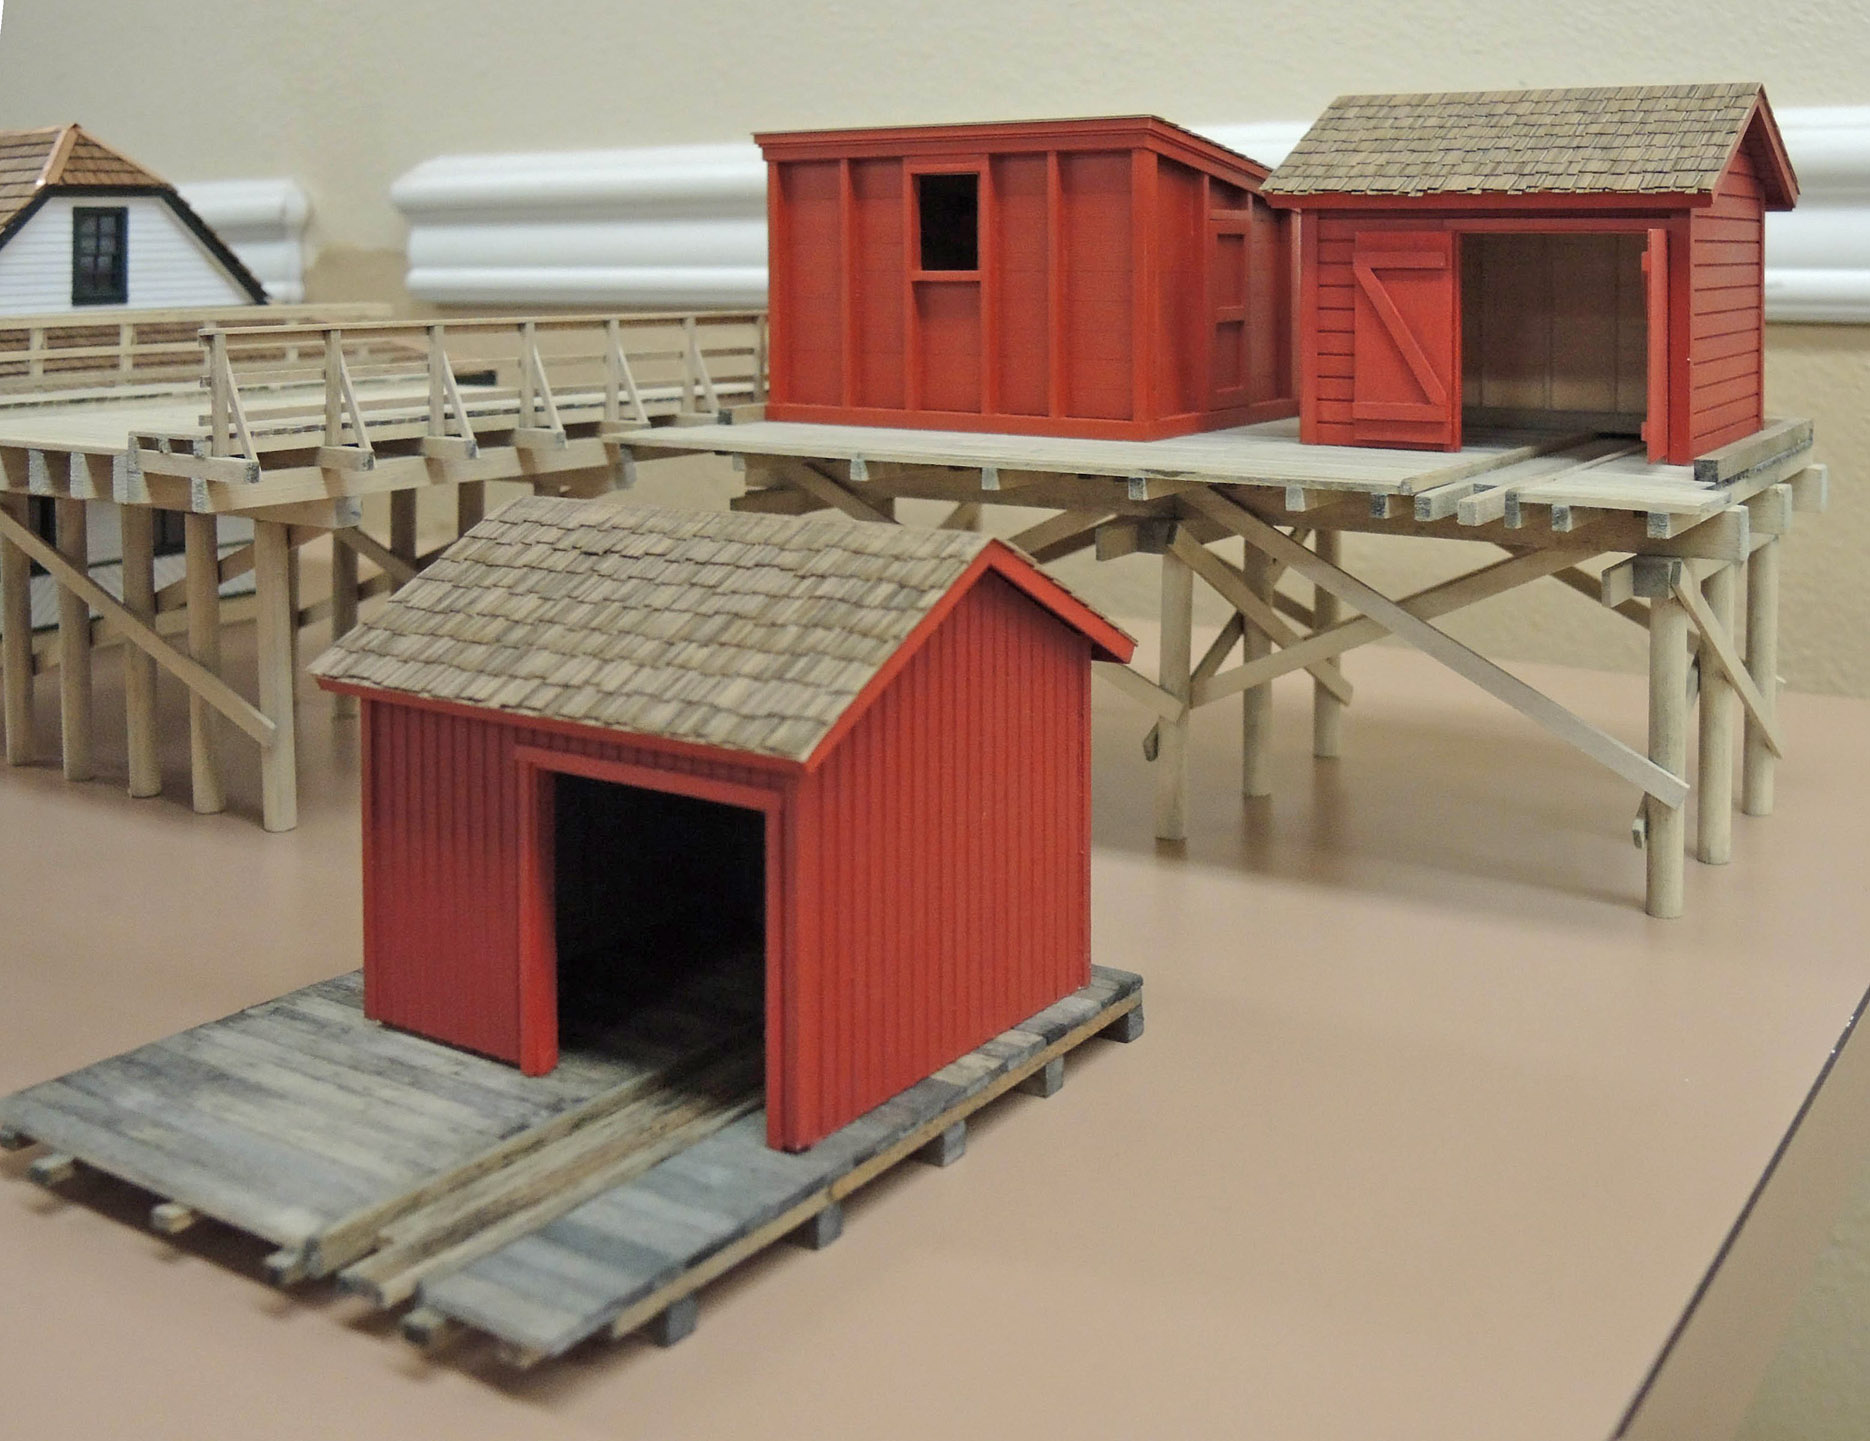
Fig 3 – Sheds for Olympia Dock
The buildings in Fig 3 are, on the section of dock, a coal shed for stations (left), and a tool house for speeders and tools (right); another tool house with different wood siding is below. All were built to Northern Pacific Standard Plans, which can be found on the Northern Pacific Railway Historical Association website (www.nprha.org/Lists/Structures/Structures2.aspx).
Alan’s essential tools for his wood structure work are an 18” band saw, a 12” portable planer, and a 10” cabinet saw. For all dimensions 1/8” (6” in O-scale) or greater, rather than purchasing commercial stripwood, he uses the band saw and planer to mill his own lumber. He obtains large pieces of basswood at Martin Lumber in Everett, but any lumber store that specializes in hardwoods may stock it. The cabinet saw, with a 96-tooth, 10” carbide blade, is used for cutoff work.
Alan uses Gator-Board for strong and flat bases for many of his structures. He uses exclusively, for all wood-to-wood bonds, Aleene’s Tacky Glue (golden-brown bottle) applied with an application syringe to avoid visible glue lines. He finds Aleene’s glue extremely strong and easy to use (it’s also non-toxic unlike some other wood model glues). Alan also uses many custom jigs, and showed some examples. (John White later in the evening also showed some of his custom jigs for trestle bents and retaining walls.) For staining wood, Alan uses a pre-stain sealer followed by Builders-in-Scale stains (www.builders-in-scale.com).
Another structure which Alan brought in to display is the fuel oil tank in Fig 4. This used bents of ¼” dowel and is complete with NBW details. Alan didn’t want too large a tank, and found just what he wanted at a train show, an S-scale tank car which did the trick.
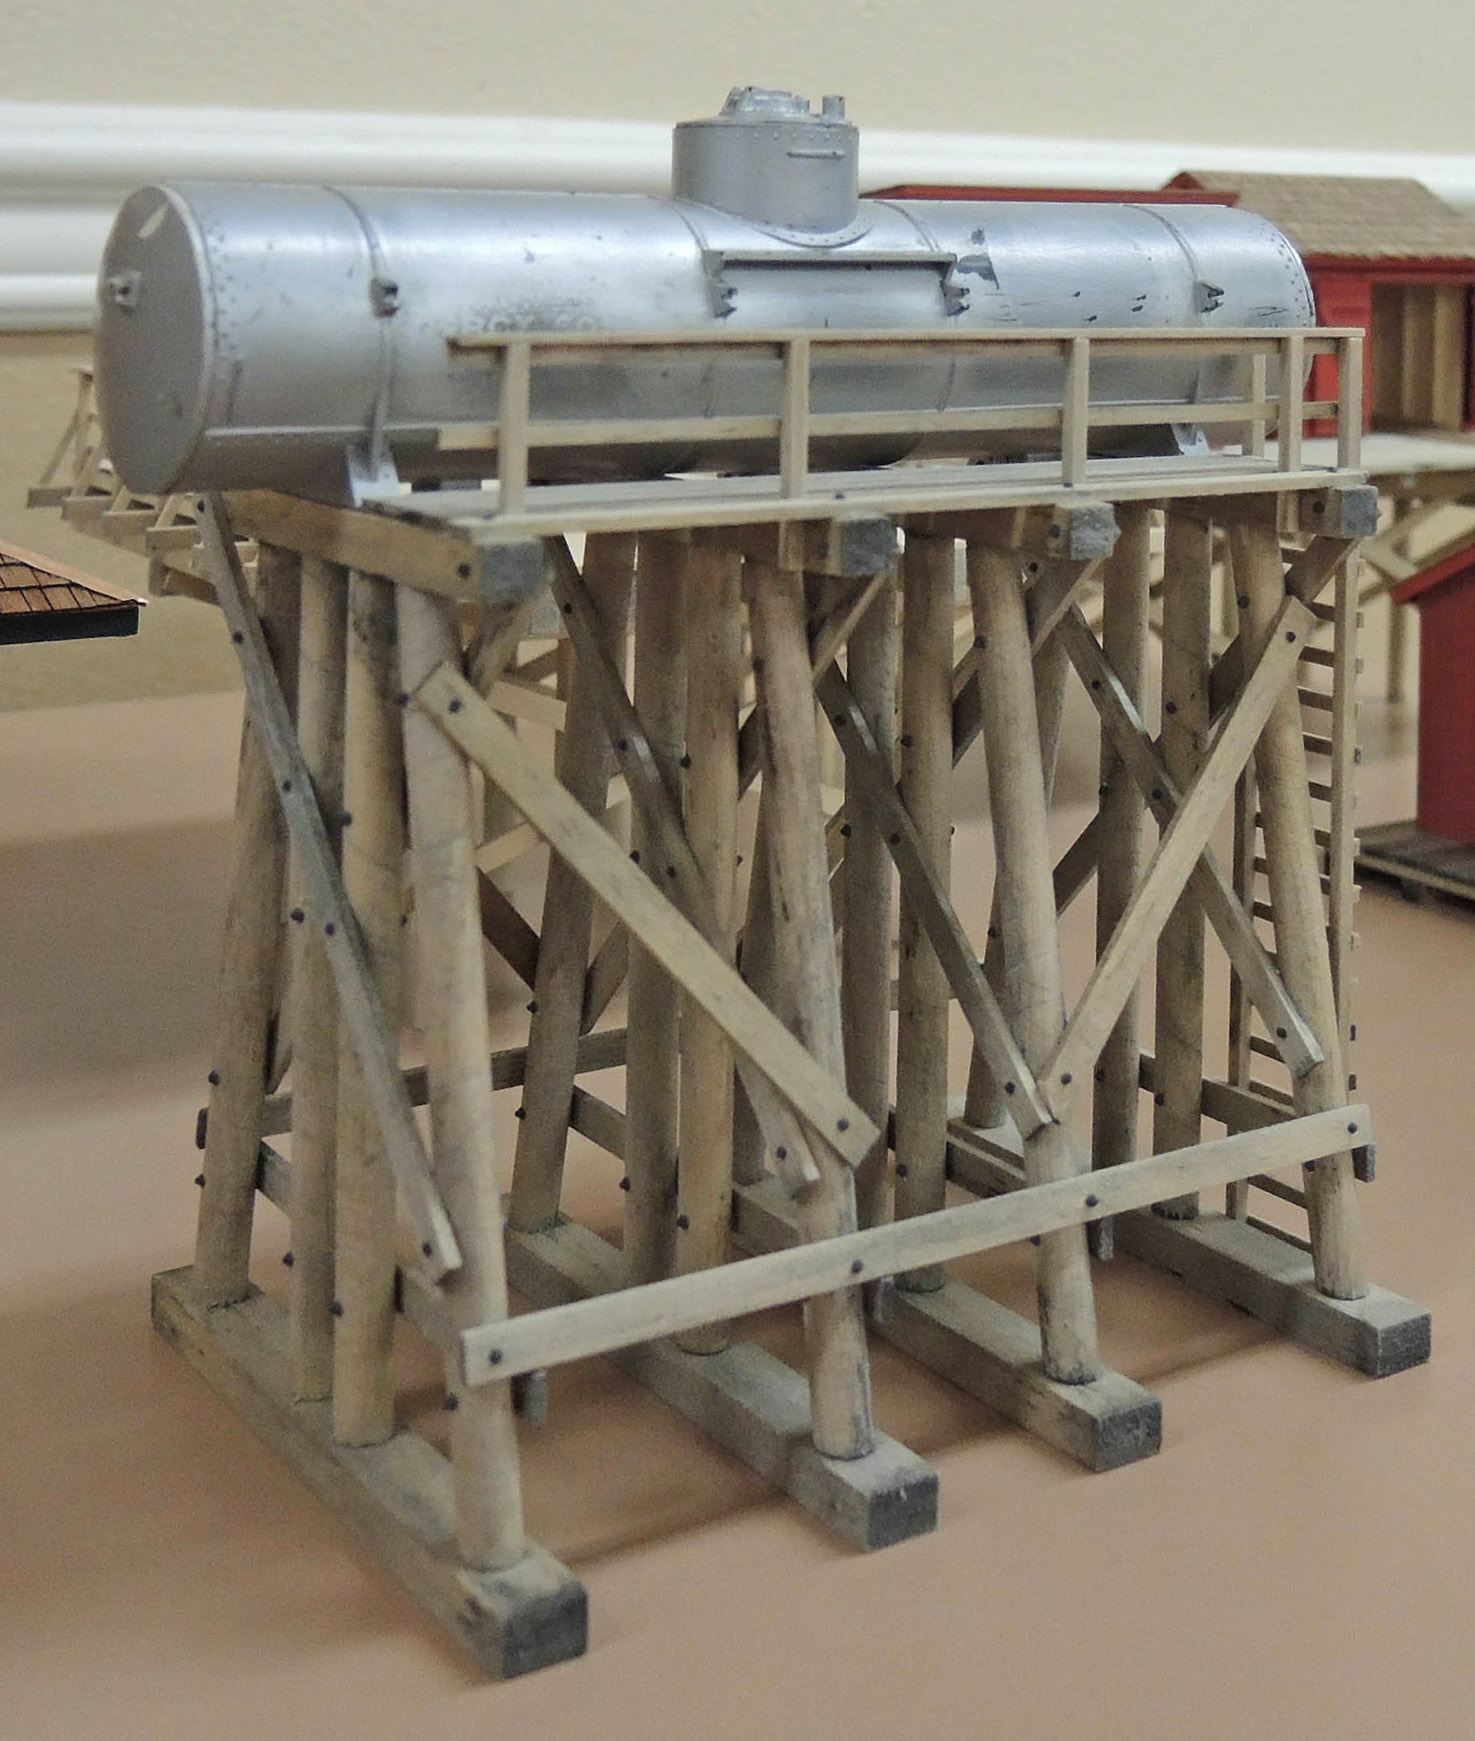
Fig 4 – Alan’s Fuel Oil Tank
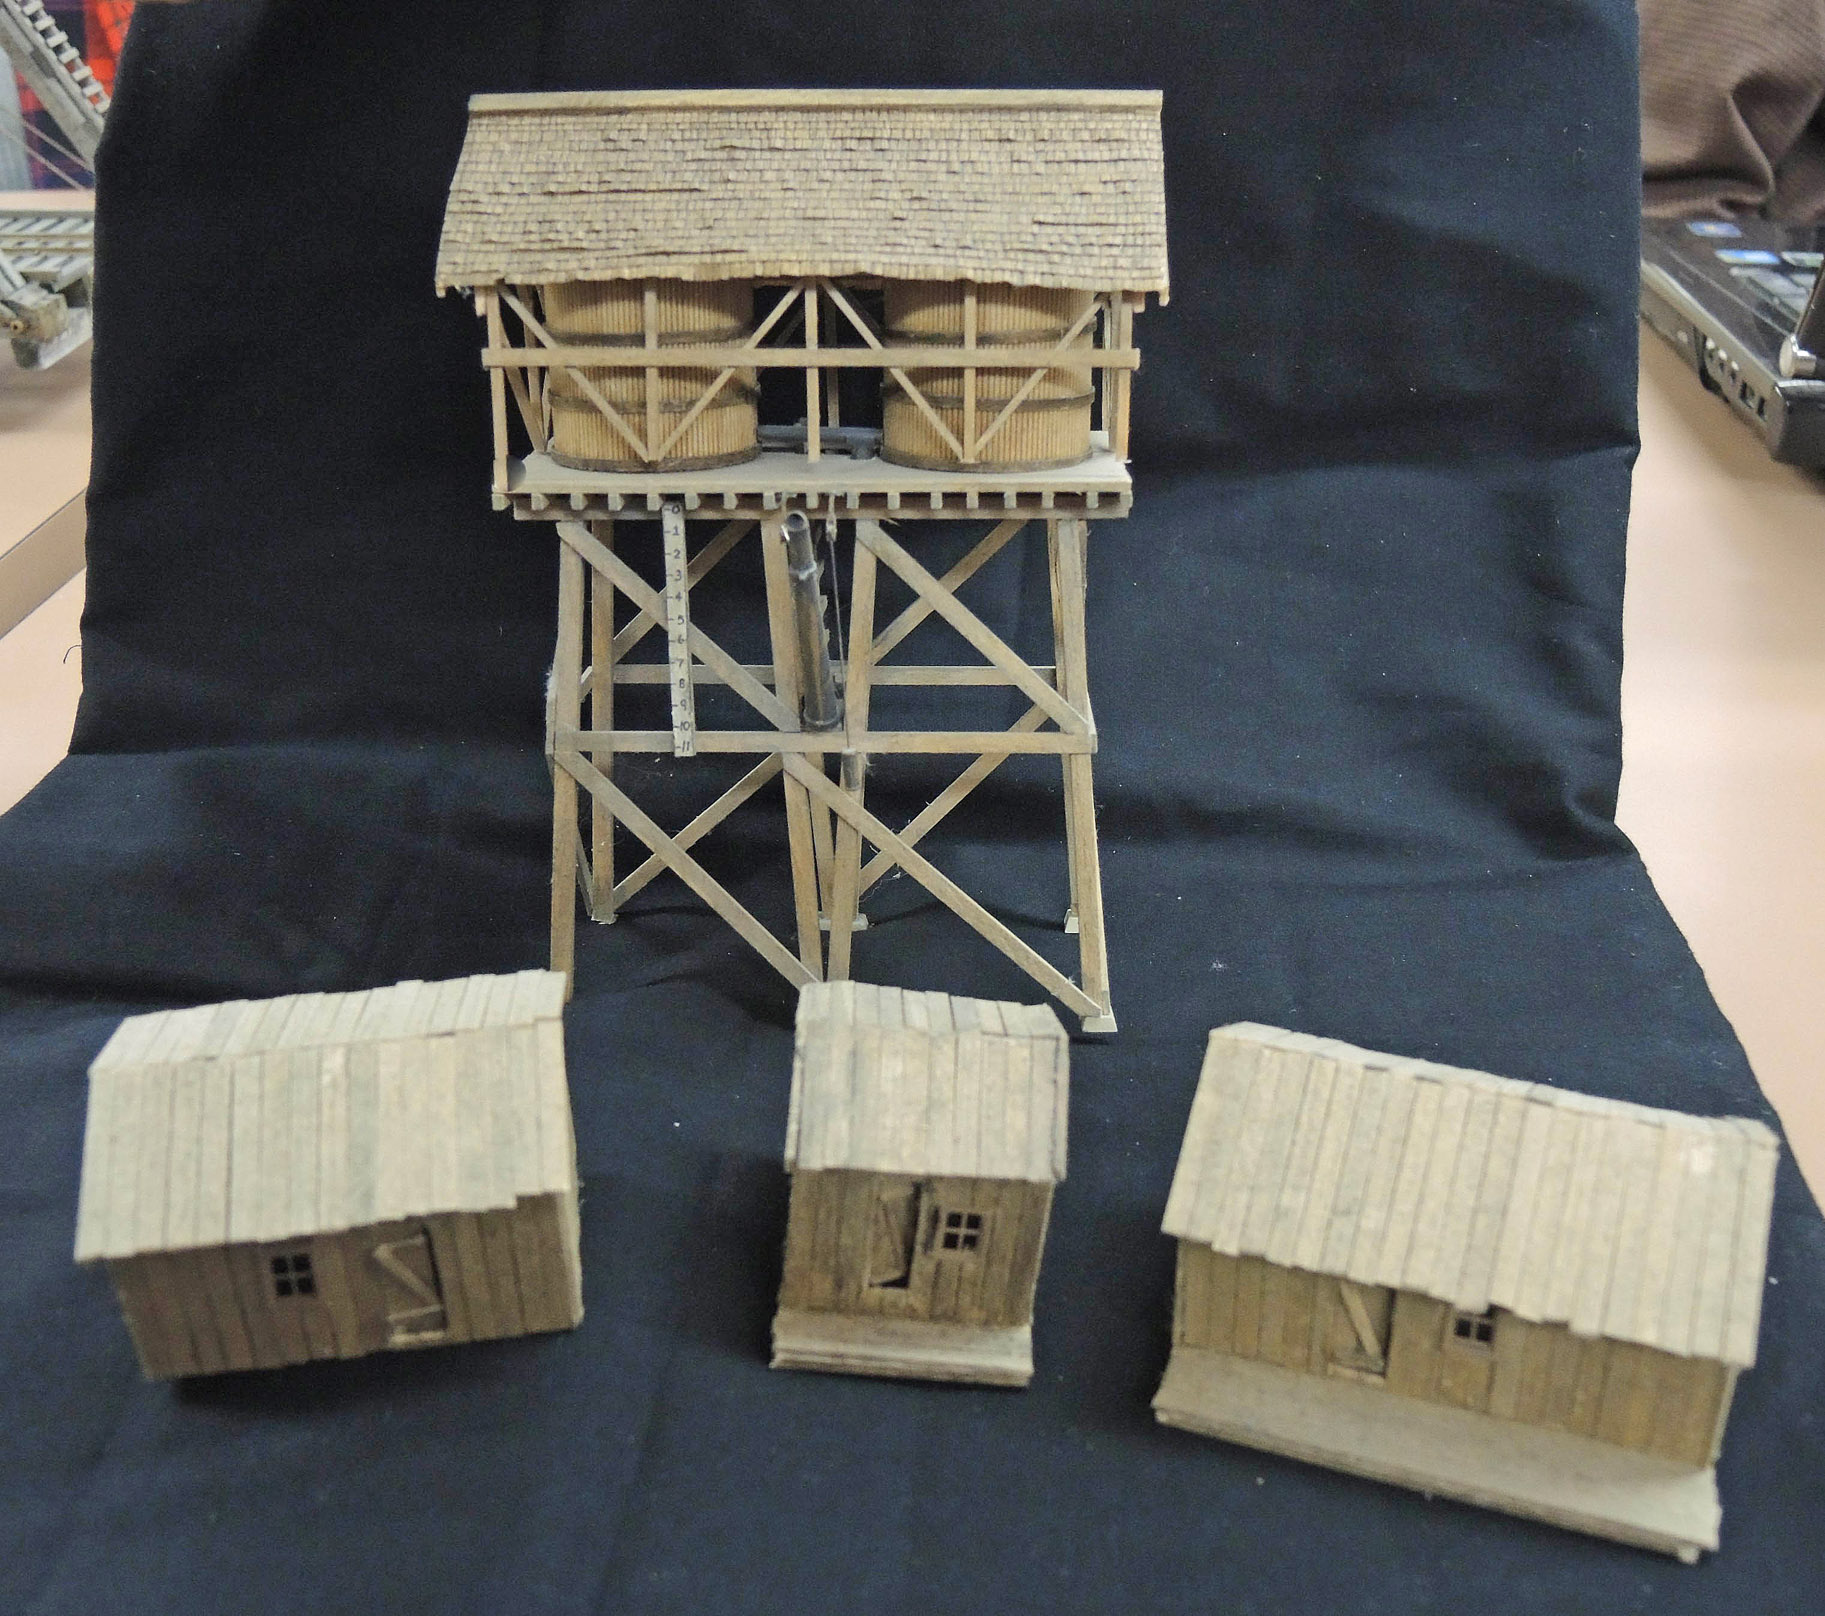
Fig 5 Structures by Phil and Susan Gonzales
Fig 5 shows HO-scale structures brought in by Phil and Susan Gonzales. Phil built the double covered water tank, a Muir Models kit which models the twin water tank which stood at the town of Bagby on the Yosemite Valley Railroad. It’s “straight out of the box” except Phil used Campbell shingles for the roof. The fine model was stained with Floquil pine stain, and weathered with a thin wash of grey craft acrylic paint. Susan described with good humor her “initiation” to building with stripwood, when, opening her first craftsman kit, discovered just a box of sticks. It was a JV Models kit called the Boyd Logging Camp. She built the three camp buildings shown, but never finished the rest!
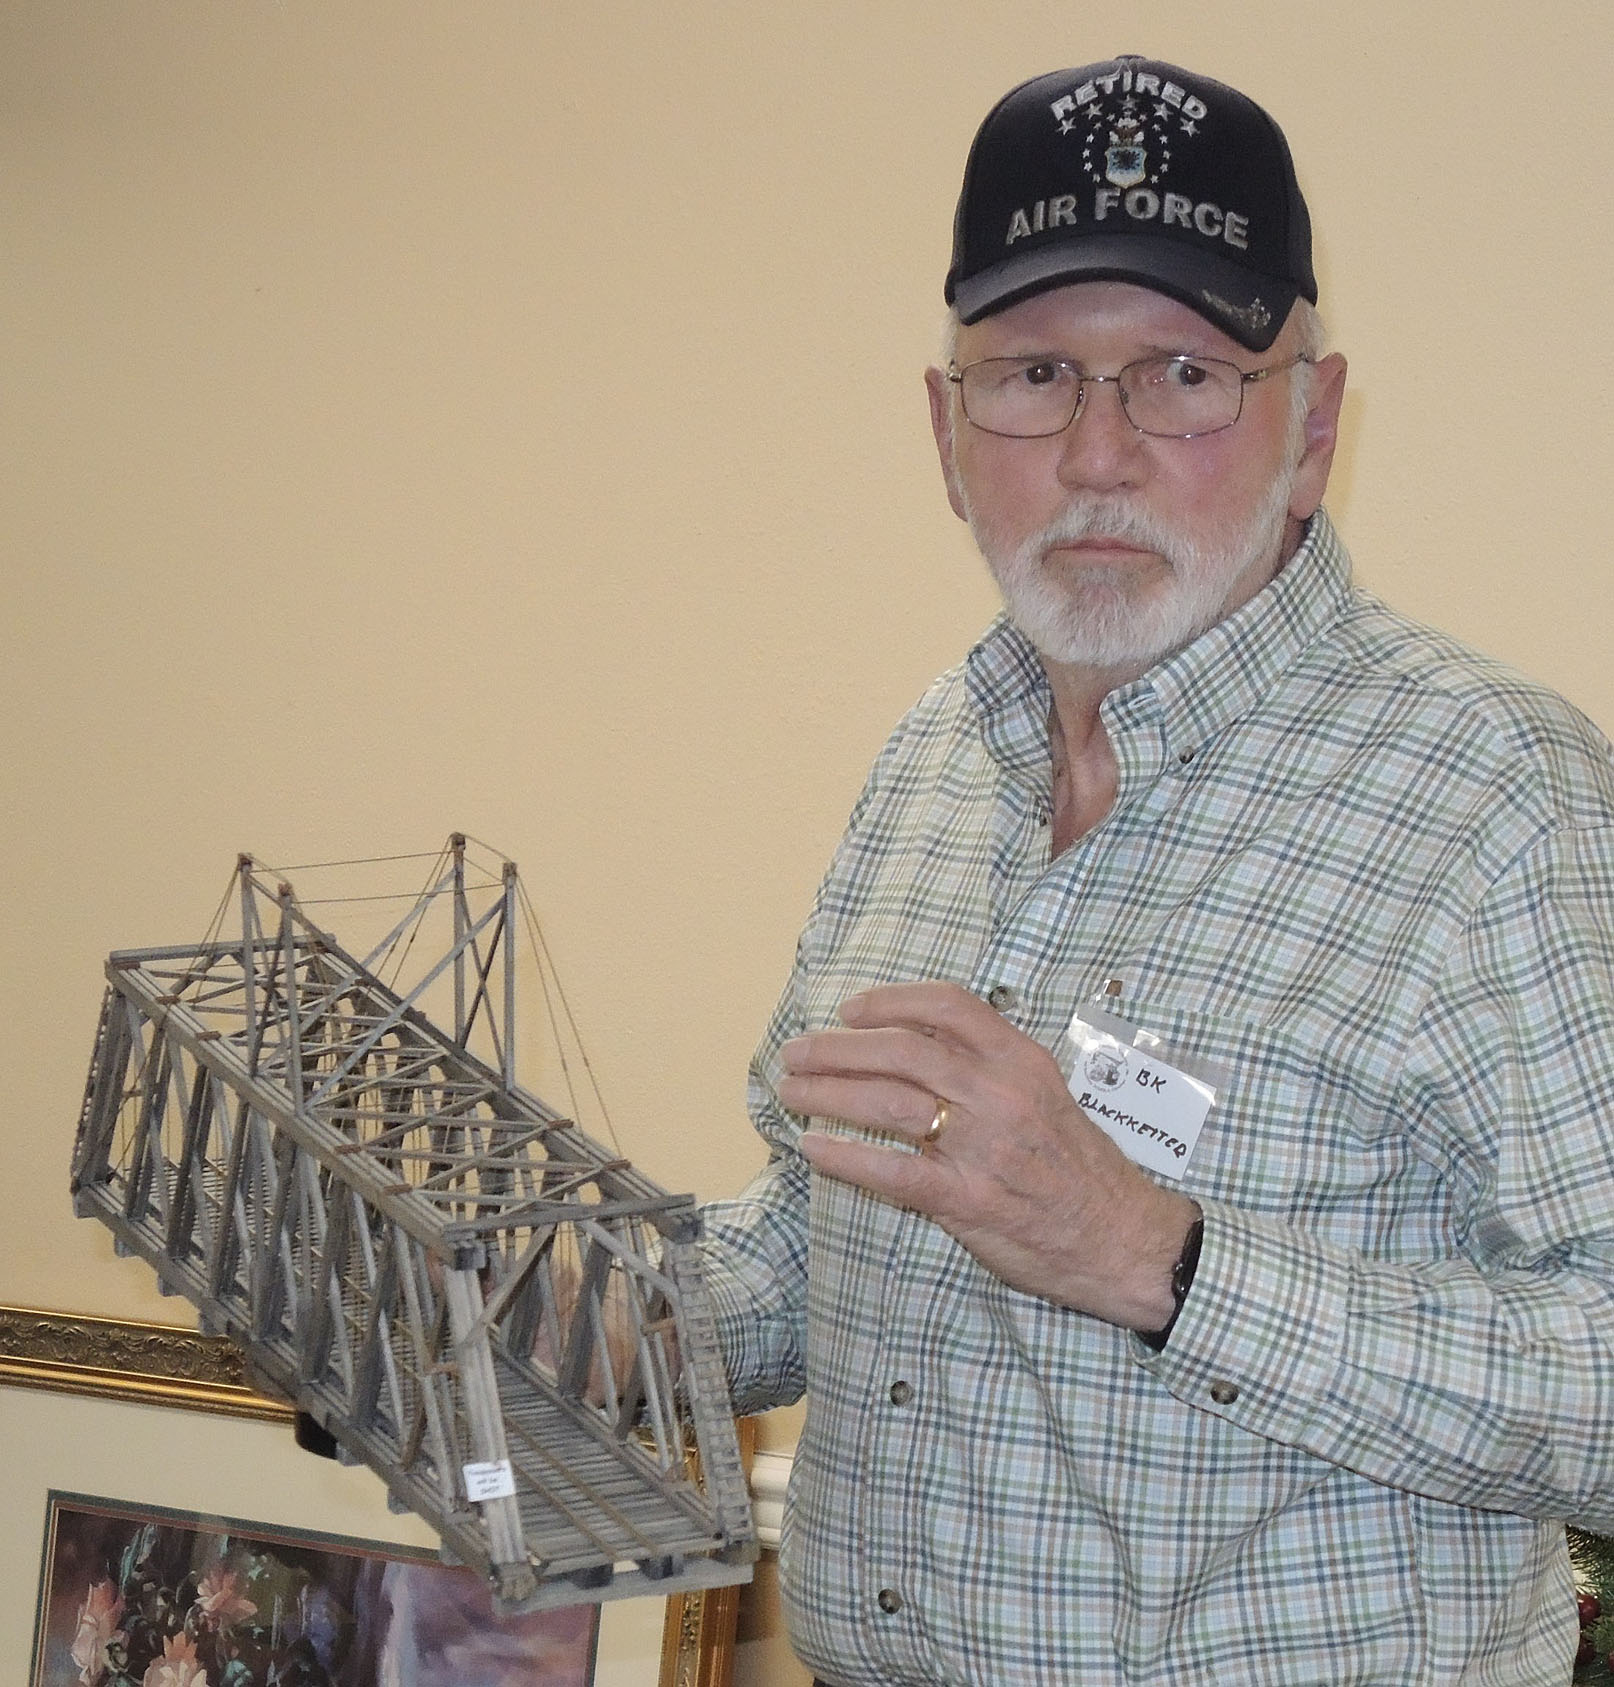
Fig 6 – BK Blackketter Describes His Lift Bridge
BK and Nancy Blackketter made the not inconsiderable journey from Bellingham—and we’re glad they did!—to update the group on BK’s approximately 20’ x 20’ On30 layout, which models the White Pass & Yukon RR from Skagway to White Horse. BK brought with him his scratchbuilt lift bridge model (Figs 6 and 7).
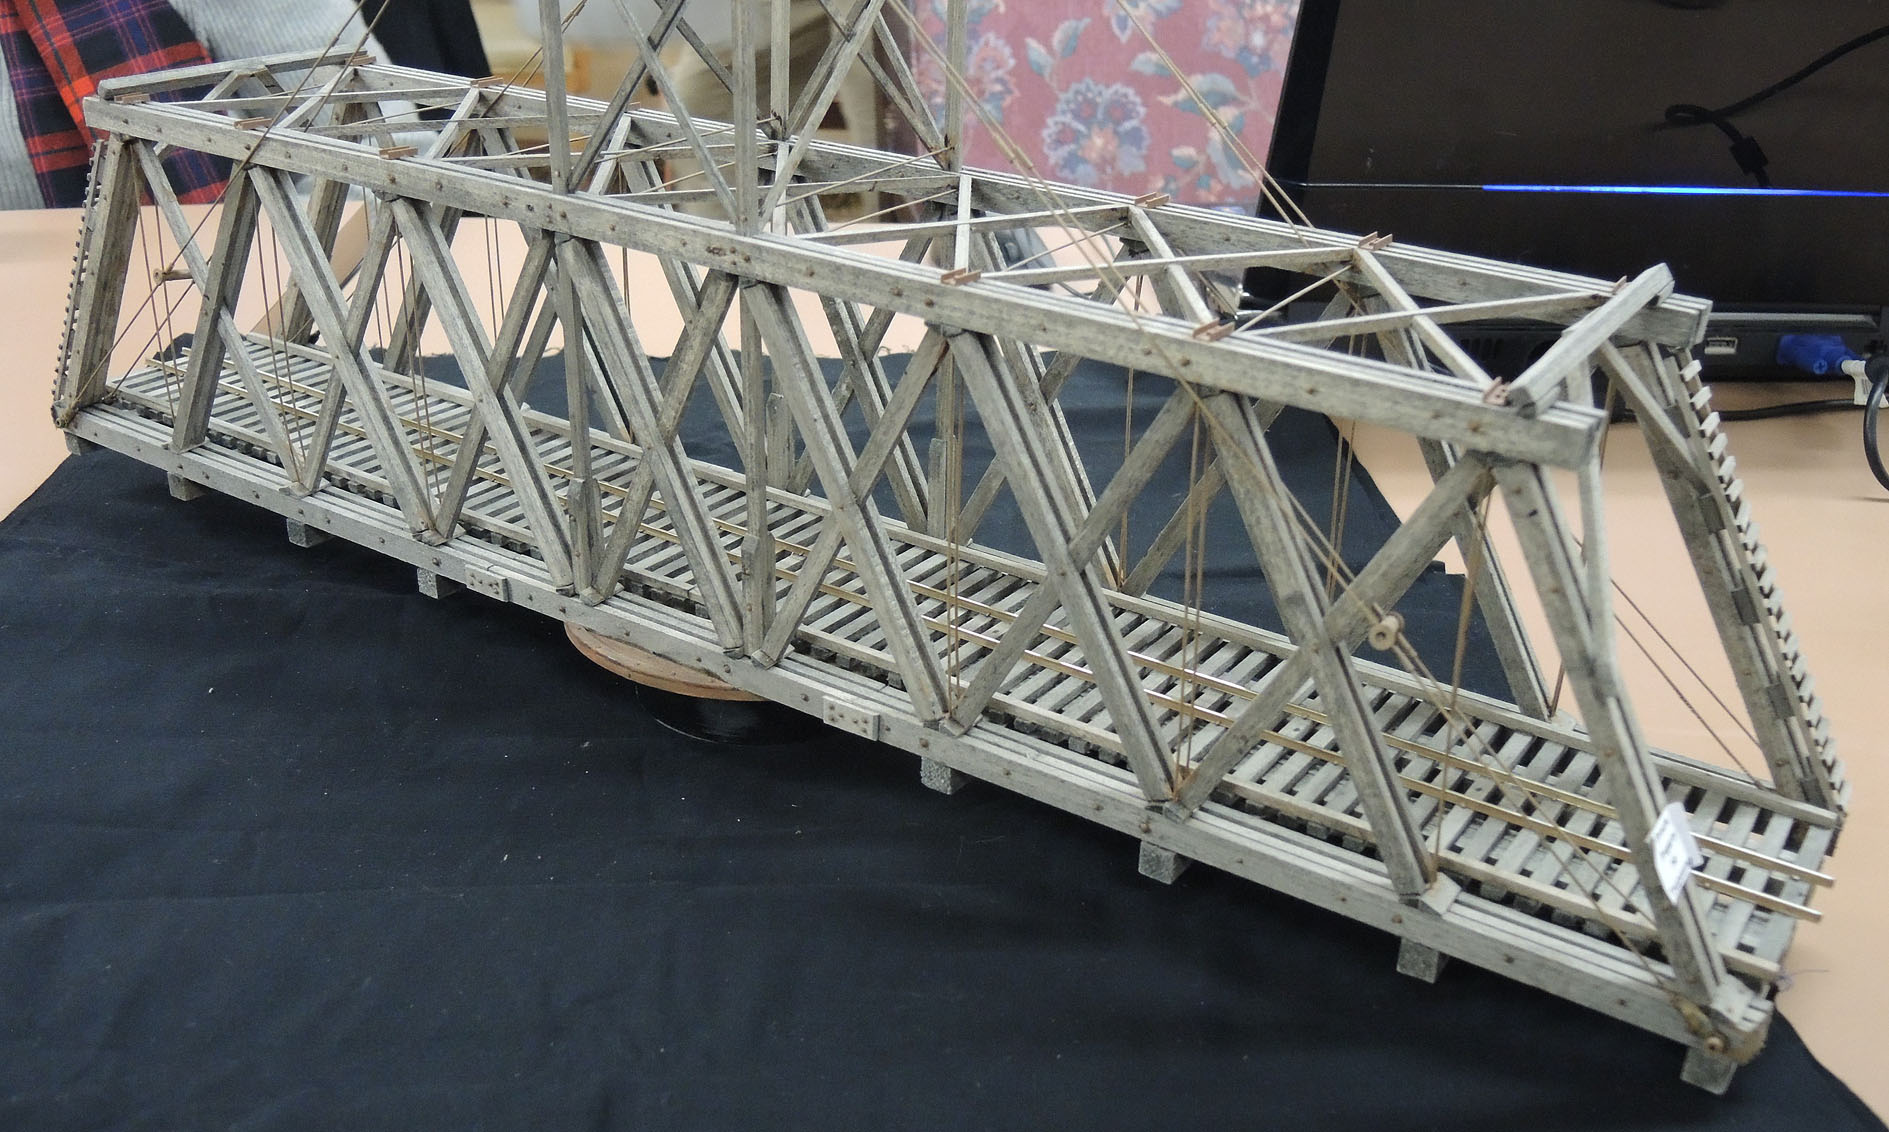
Fig 7 – Another View of Swing Bridge
Specifically it’s a model of the Carcross, Yukon Territory, Swing Bridge. The bridge was built to let steamers out of Lake Bennett, but ironically it was only “opened” a few times; in a 1998 restoration the swing mechanism and no-longer-needed supports and pilings were removed, so it swings no more. However, this truss bridge still handles WP&YR excursion traffic and pedestrians. BK’s model does indeed swing on his layout. He drew his own drawings of the bridge. The hardest part, BK said, was the cabling on top (visible in Fig 6); string and thread sagged, and he finally settled on stainless steel leader wire for fishing, which worked well, but was tricky to paint. The wood beams of the truss and deck were weathered with an india ink wash.
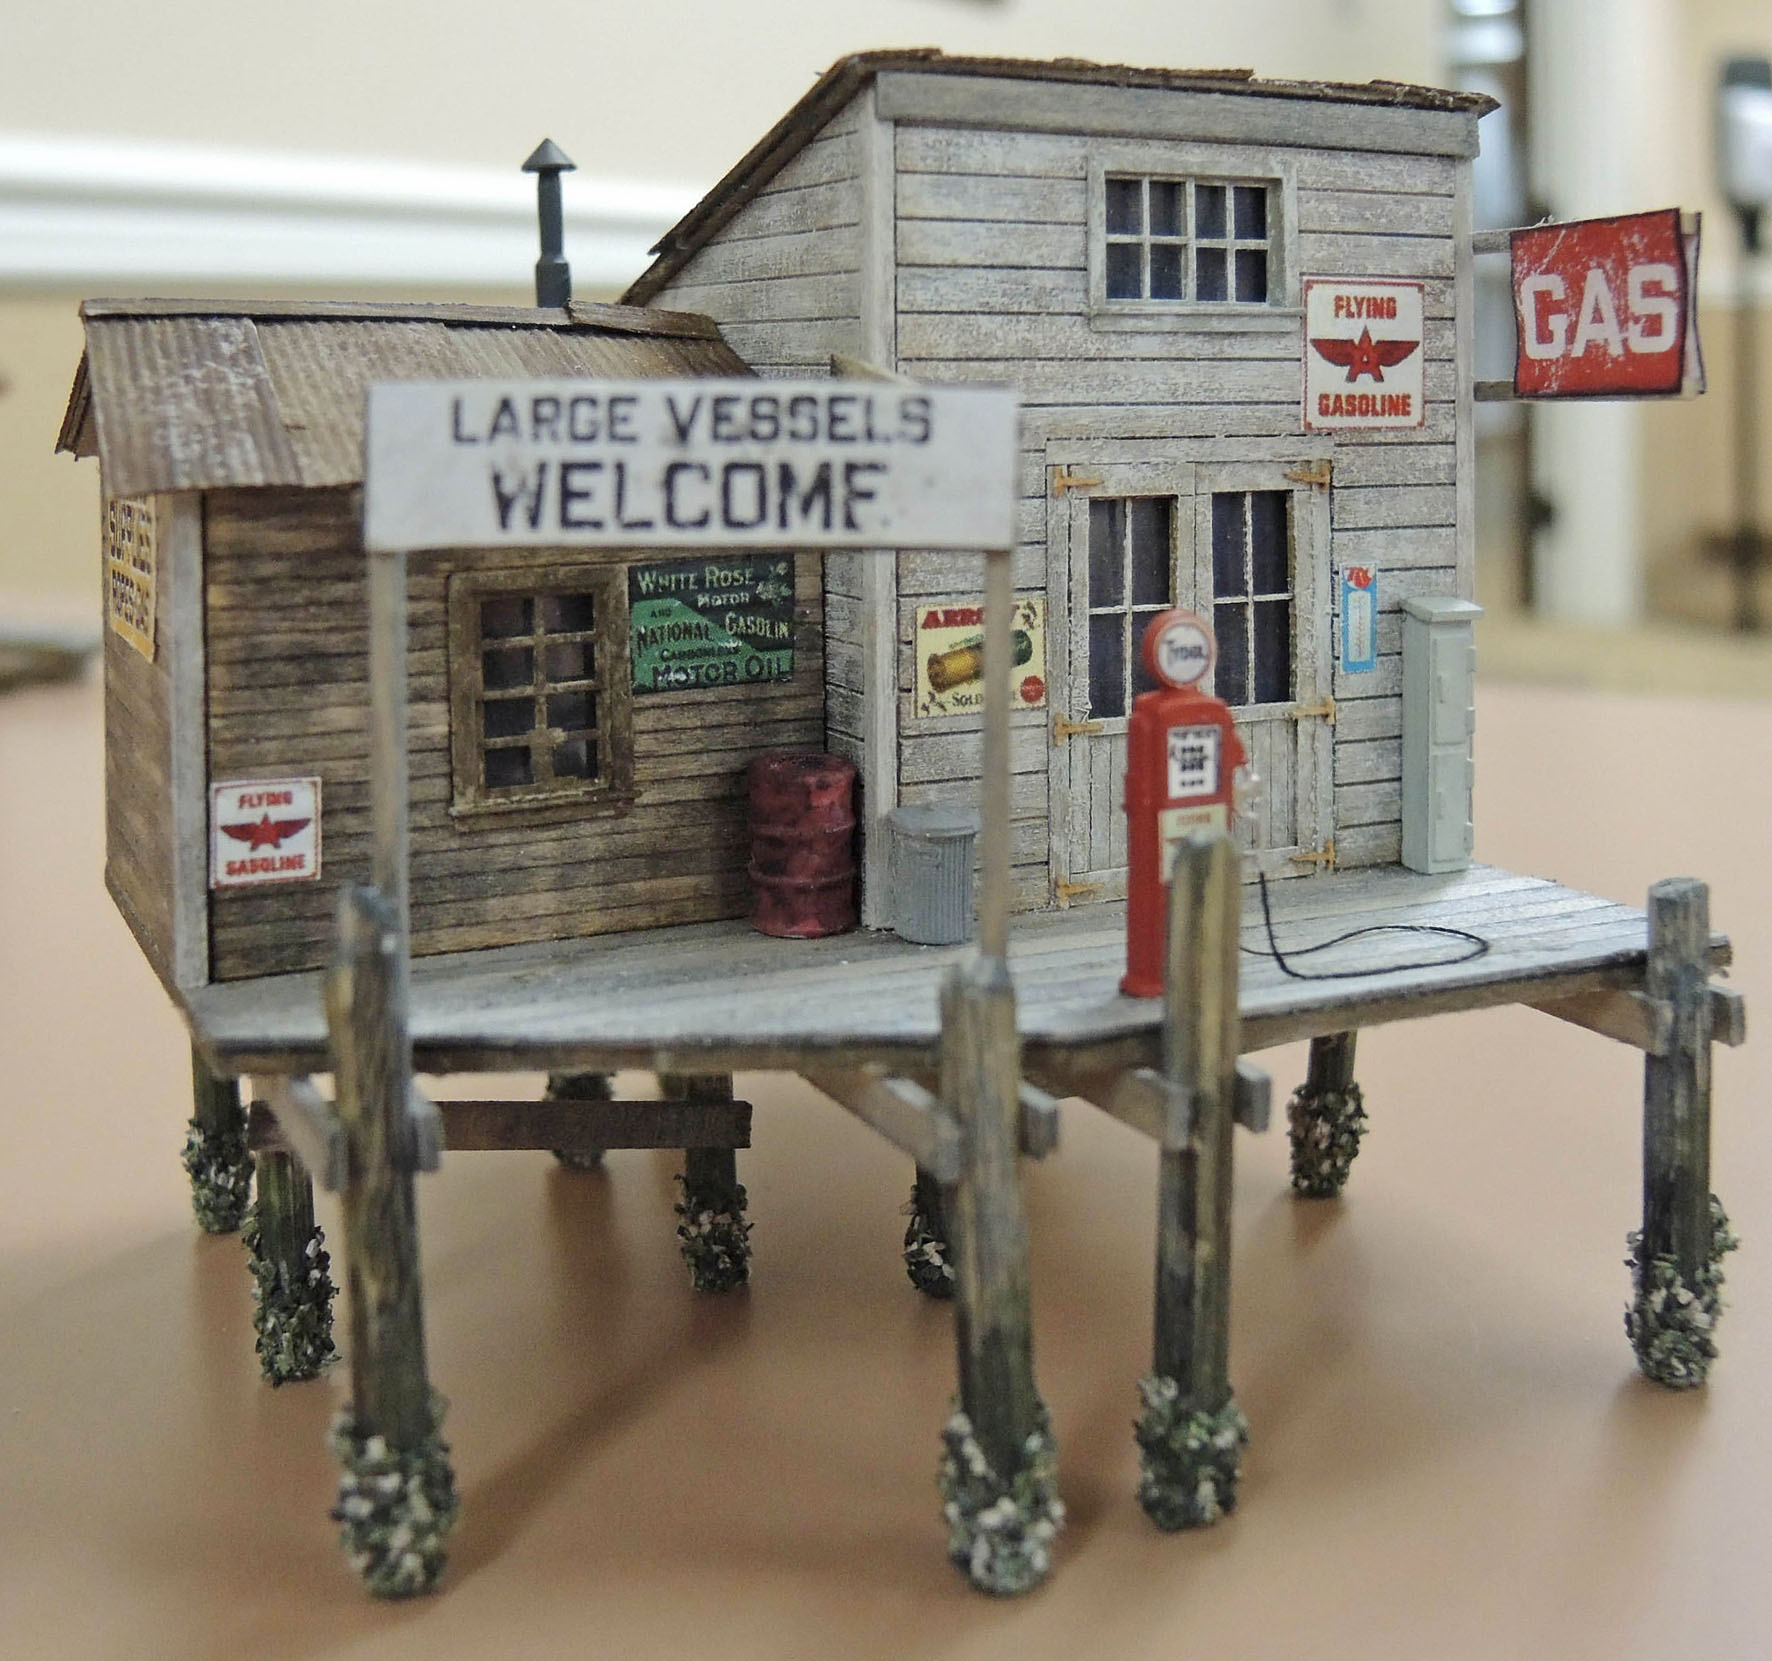
Fig 8 – Al Carter’s Marshall’s Gas Dock
Al Carter described his “Marshall’s Gas Dock” (Fig 8), a FOS Scale Models kit. This nicely-built HO-scale structure was “stained” entirely with Prismacolor Premier Art Markers, twin-tipped, artist-quality markers available in 200 colors (www.prismacolor.com/markers), which can be found at Michael’s, Dick Blick and other suppliers. The roof is the new Northeastern Scale Lumber corrugated “metal” roofing material, which is actually an embossed paper product. The barnacles are fine black and white ballast and find green ground foam, plus a wash of AK Interactive’s “green slime.” On the topic of using markers for coloring stripwood and siding, Ted Becker brought in a Western Scale Models “Blacksmith Shop” for which he used Windsor and Newton ProMarkers, another brand of twin-tipped markers sold by Michael’s and others. Both of these brands of markers have a broad chisel nib and a fine bullet nib. Mark Malmkar has successfully used stain markers found at Home Depot, dark walnut and pickled oak for example, and (if you can find them) Floquil pens in grime, earth and mud colors.
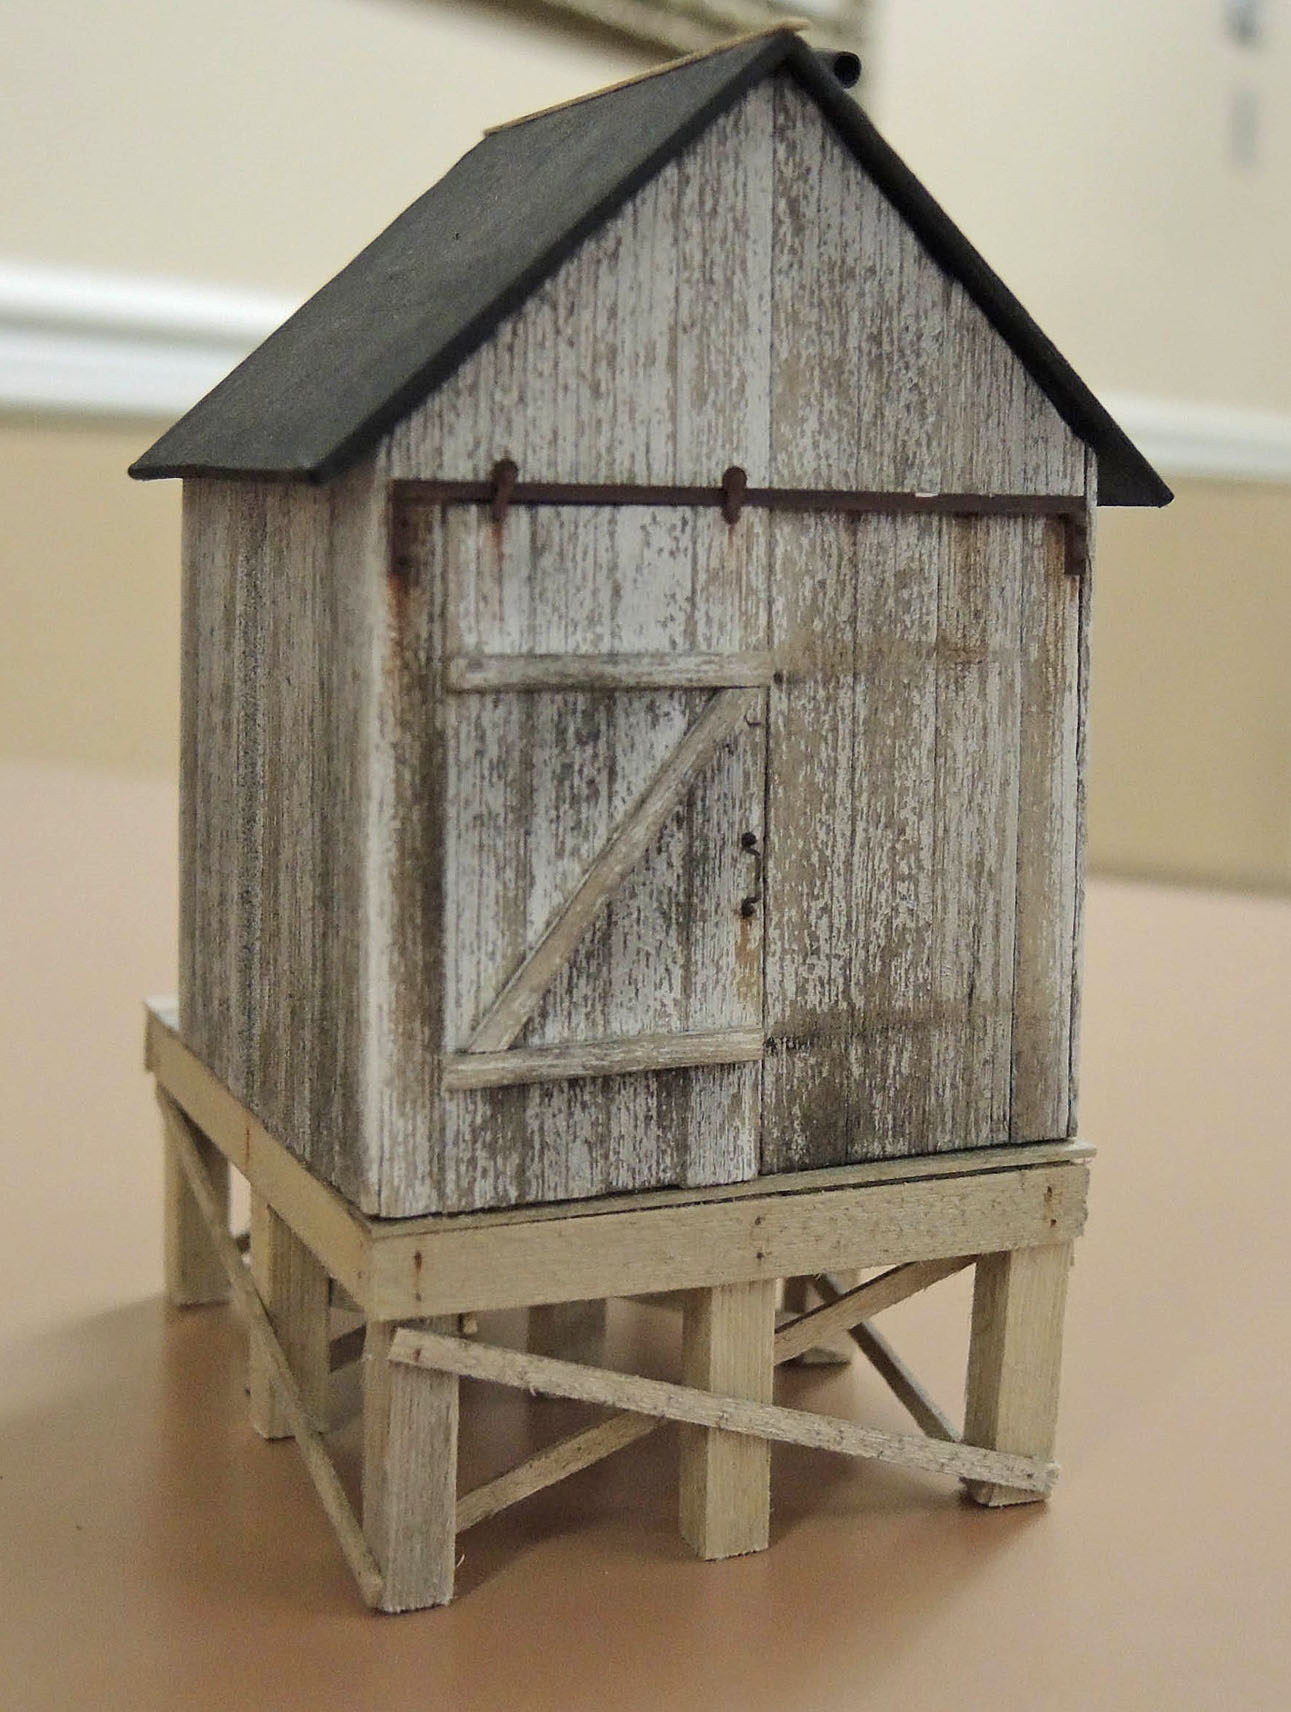
Fig 9 – Rich Blake’s Sandhouse
Rich Blake discussed some methods he used to scratchbuild the O-scale small sandhouse shown in Fig 9. He described what he called a “dynamic jig,” as contrasted to the custom jigs shown earlier by Alan Murray and John White. Rich uses a piece of foamboard with a sheet of quadrille (or similar) paper and wax paper layered on it, and pins for positioning the stripwood pieces to be glued: simple and effective. The flaked paint on the sandhouse is nicely done. There are several ways to achieve this appearance. Rich’s method: (1) seal the wood; (2) paint with turpentine and let dry; (3) apply the acrylic paint in the desired color and let dry; and (4) press masking paint over the surface and peel up. The tape will rip pieces of the acrylic up to produce the effect shown.
Many small-group discussions after the presentations on other methods and materials used underscored how much everyone enjoyed, and learned from, tonight’s topic.
No Comments Yet