By David Yadock
Dry Gulch & Western, A Photo Series Part 6
The Dry Gulch & Western has a varied list of motive power. I currently use quite a variety of different brands and wheel arrangements. There are Broadway Limited, Bachmann, Con-Cor, Proto 2000, modified Kato, Trix, and modified Athearn locomotives on the roster. The vast majority of the locomotives are sound equipped. I have begun (finally) lettering the locomotives for my railroad. Yes, this took a while, but it is slowly progressing. I have also begun the task of re-motoring some of my brass locomotives. I plan to add quite a few of them to the layout since I have been collecting them for years. They really should not be in cardboard boxes all of their life! Unlike John Allen, I have several diesels on the layout. Several Kato NW2’s usually “play” in the yards at Ellison and Newport. They are painted in the early SP tiger stripe configuration. I have two cow and calf sets for that purpose. There is a rather large fleet of Santa Fe F7 diesels on the layout. I originally started with a vintage Athearn F7 A and B powered set that I did a sound decoder installation. Since then I have added some Proto 2000 F7s also in the Santa Fe Warbonnet paint scheme. Did I also mention I have a couple of BLI Pennsy Sharknose diesels that run freights on the layout? Yes, I am a Pennsy fan, so those locomotives are allowed to run on my layout. So, let’s get back to the layout photos.
In photo 26 you are still looking back at Ellison, Taylor Junction, and all points beyond. This gives you a good view of both large control panels. These panels house most of the turnout controls for layout. Since they are only a couple of feet apart from each other it makes one-person operation of the layout’s mainline fairly easy. Continuous running of trains can be accomplished by changing direction of just two turnouts.
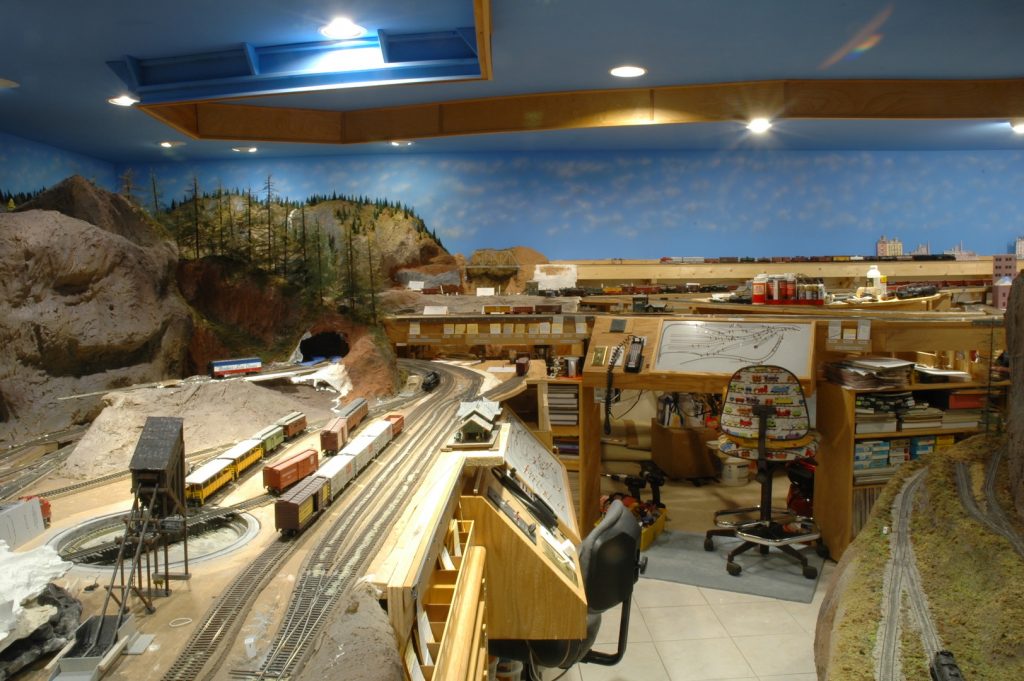
Photo 27 is a view of the very first bridge I built for the Dry Gulch & Western. It is located directly behind the tall gray mountain spire in photos 22 and 23 of part 4 of this series. It is a tall curved wooden trestle that carries the mainline. If it looks familiar this is my attempt to create the Ryan Gulch scene from the famous Gorre & Daphetid. This photo also shows the aisle in the floor to ceiling area of the layout. The blue colored carpeting mimics the color of a river.
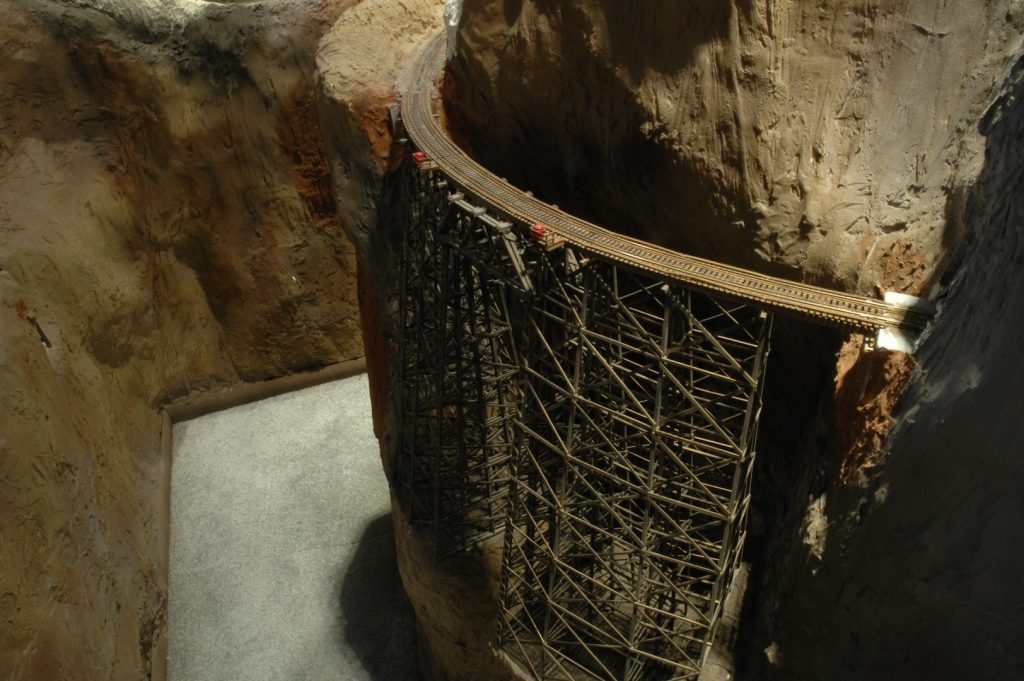
Photo 28 shows the view looking down the canyon. At the center top of the photo is the town of Alpine. Just around the bend from the wooden trestle is the hamlet of Raade Springs. Further around from the wooden trestle is the town of Potter Flats.
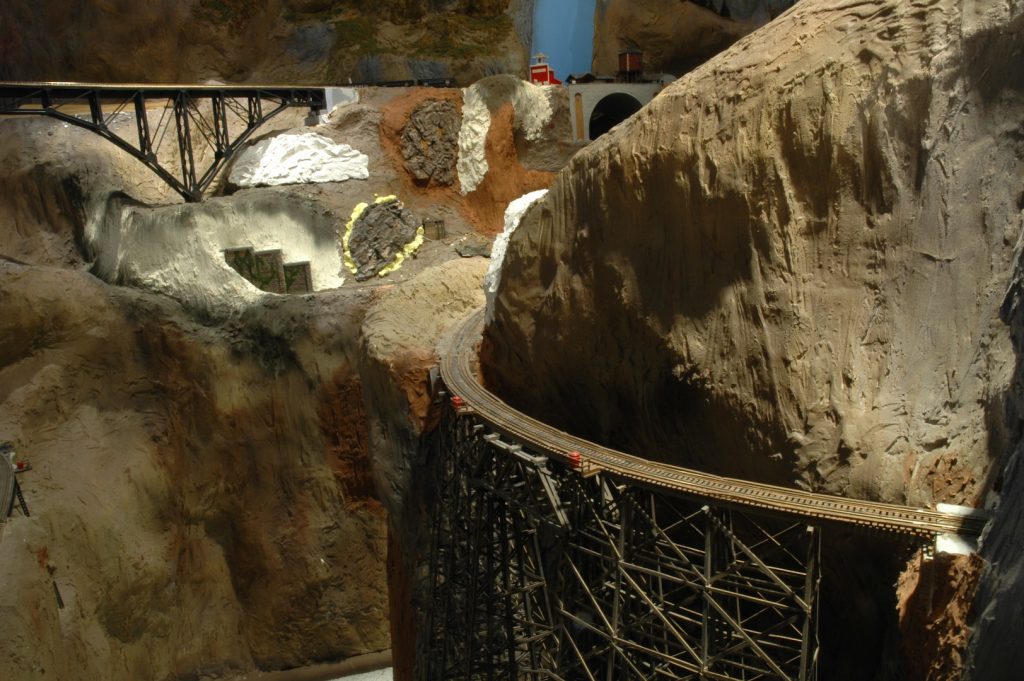
Photo 29 gives you the first view of Potter Flats. There is a mine and an oil drilling operation at that location. The little building above the rock outcropping in the foreground is Raade Springs station. (Please note that there is a lot of the scenery in this area that isn’t quite finished yet. That has significantly changed since Covid-19 and those pesky “stay at home” orders. At the end of this photo series I will try to post updated photos of this area.) On the left of this photo is my version of French Gulch, another borrowed or should I say “liberated” scene from the Gorre & Daphetid. Can you spot the large access hatch in this photo? It is almost in the dead center of the photograph.
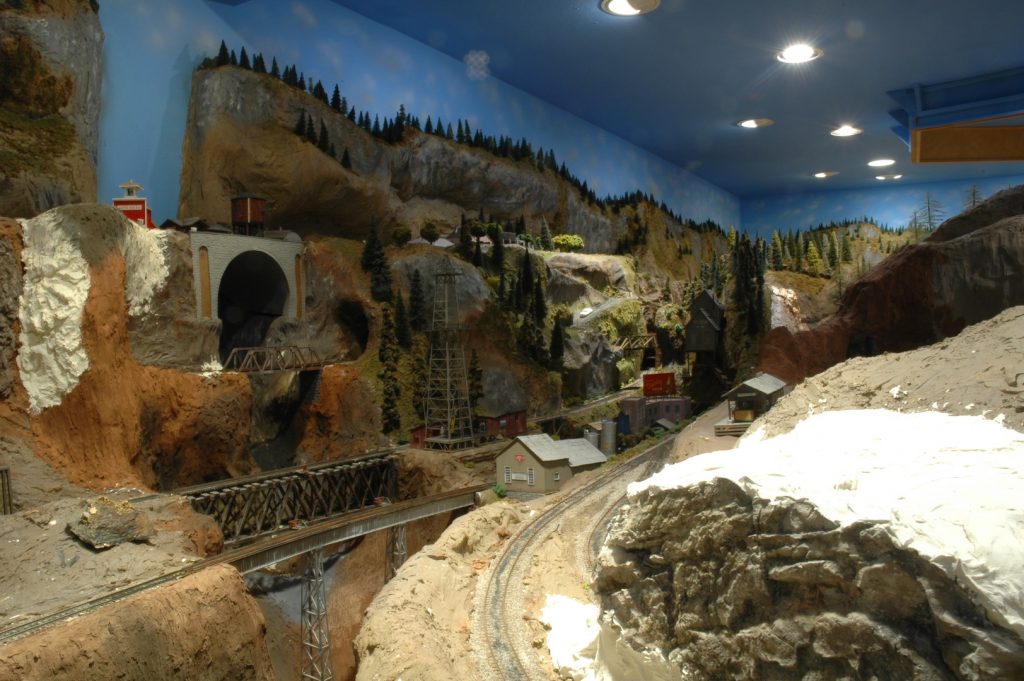
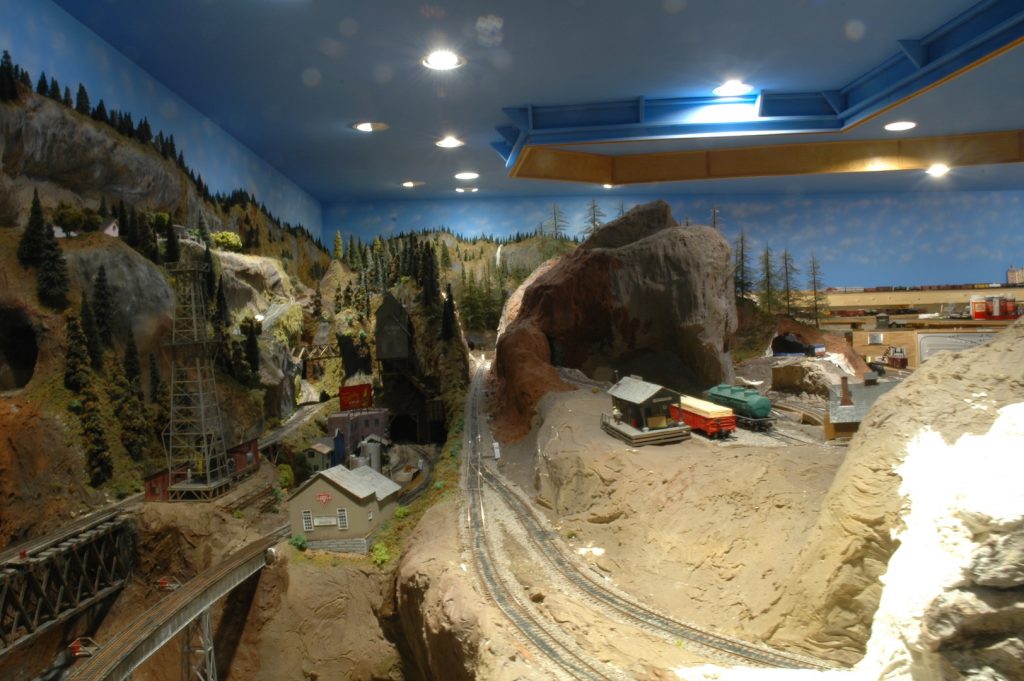
Photo 30 gives you a really good view of how things fit on the layout. It also shows the advantage of correctly placed view blocks. Let’s go across this photo from left to right. On the extreme upper left is the town of Alpine. As you go down into the valley you encounter Potter Flats. The rail line running straight up the photo travels to Gornitzka Crossing and beyond. The switch that sends the rail line off into the tunnel in the foreground is a sort of “backdoor entrance” to the town of Dry Gulch. Notice how the view blocks hide Gornitzka Crossing! In this photo to the right is Raade Springs with its small station. Even further to the right is Dry Gulch.
That is it for this week. Next time we will look at some more scenery under construction along with some of the bridges that hop from mountain to mountain. Did you folks ever find that access hatch in photo 29? Keep looking!
David
David, How long did it take you to build the curved trestle in photo 27? Looks like a big job.
To build the trestle I constructed a large jig that was set up to allow for height adjustment of the various length trestle bents. It took a while to build the jig but when it was done the bents popped out of it every two hours allowing for when the glue was dry. The other time consumer was making all the cross bracing. At the time I was too cheap to buy pre-cut scale wood so I make all of it from thin sheets of basswood. Cutting all the strips took forever! Setting up the curve was probably the hardest part of the project. I started by determining the curve with flex track. Using Walthers Goo I then glued and clamped long balsa strips to the underside of the flex track doing a couple of inches at a time. The balsa was easy to use since it flexed really easy and conformed to the curve. All in all, the whole thing took about 2 months to complete.