By David Yadock
DRY GULCH & WESTERN, A PHOTO SERIES PART 3
A little more about the Dry Gulch & Western. As you can see in previous photos the layout is illuminated with 37 recessed can light fixtures. They are really nice to have unlike surface lighting, that type of lighting usually detracts from the layout scenery. All the bulbs are LED large spotlights and were swapped out a few years ago. Each light is between 800 and 1100 lumens. Originally there were quartz lights that lit the layout but they produced a tremendous amount of heat in the train room. The cabinets in the room are constructed out of birch veneer plywood and I custom made them to fit the layout. They provide a large amount of shelf storage space.
Now on to the layout. Turning to the left from the previous photo series and moving down the main aisle of the train room we finally see a hint of Allentown on the left in photo 11. We can also see more of the actual layout and the mountainous scenery. About dead center in the photo is the Dry Gulch control panel. All control panels are back lit to allow for night operations.
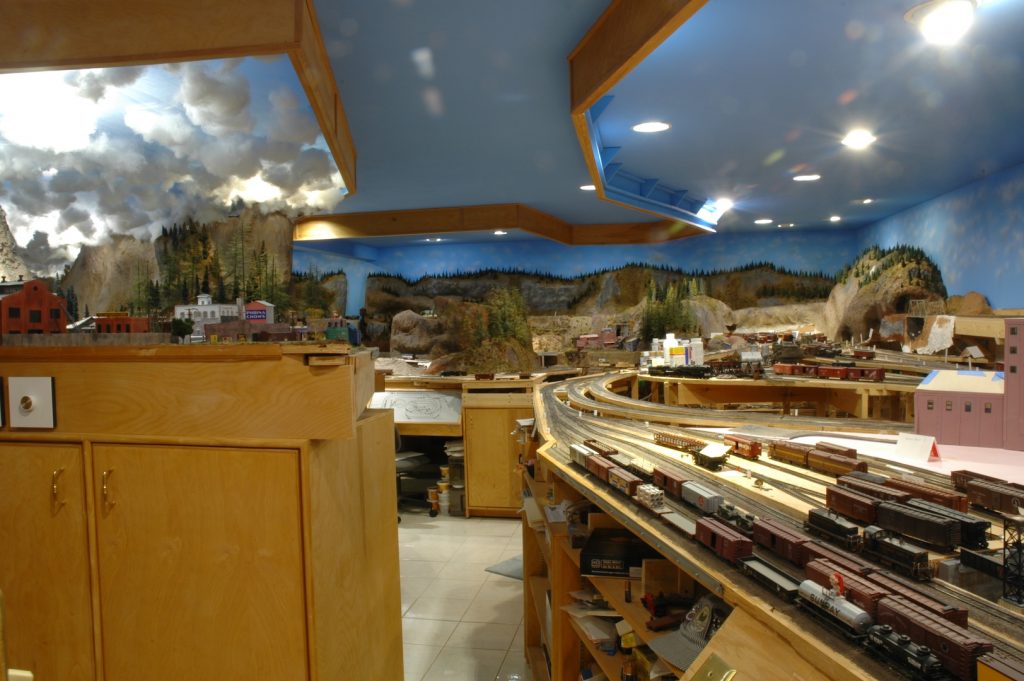
Photo 12 shows the turntable and that SP cab forward. Yes, amazing how flat surfaces collect “stuff”, a lot of my paints and supplies have taken residence near the turntable! This photo shows the staging yard, the high line (mainline) passes directly in front of that yard, goes over a bridge, and then enters a tunnel. The mainline continues around the room corner. Those mountains help hide the room corner. Please note the two tracks that make a sweeping curve at the bottom of the photo. This is one of the junction areas that join the high line to the river line. The closest track at the bottom of the photo goes to Taylor Junction and on to the river line. The next track up goes to South Ellison Yard and on to the high line.
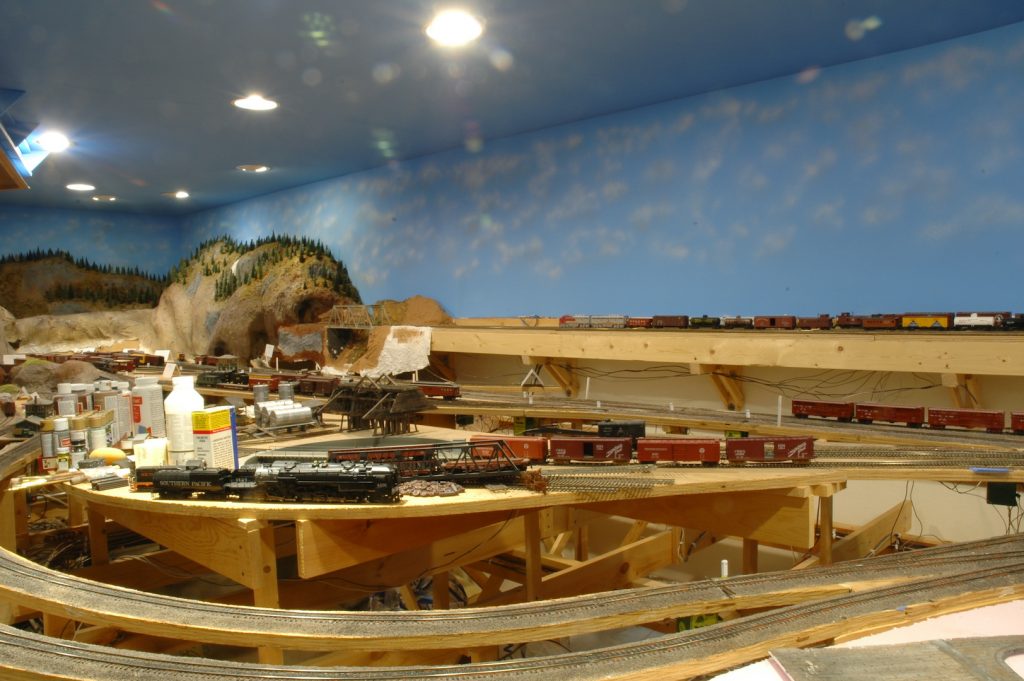
Photo 13 gives a great view of some of my paints and paint brushes! In the dead center of the photo is Taylor Junction. Directly above all my paints is South Ellison Yard. It is a 3 track thru yard. It functions as a ready track and small sorting yard. Tucked into the corner between the mountains is the city of Ellison and its 7 track stub yard. I did install one thru track in the yard to allow for easier passenger train entrances and exits. The yard somewhat follows John Alllen’s design and includes on the right of the yard his famous “cut-off” track. Yes, that is another junction track to allow trains to go from the high line to the river line. It enters a tunnel, dives down and then tucks around Ellison yard. The track comes out of a tunnel at Gornitzka Crossing, that town is located to the left of that stand of tall timber trees. Yes, it features a scratch-built rendition the famous two-level station that was on the Gorre & Daphetid.
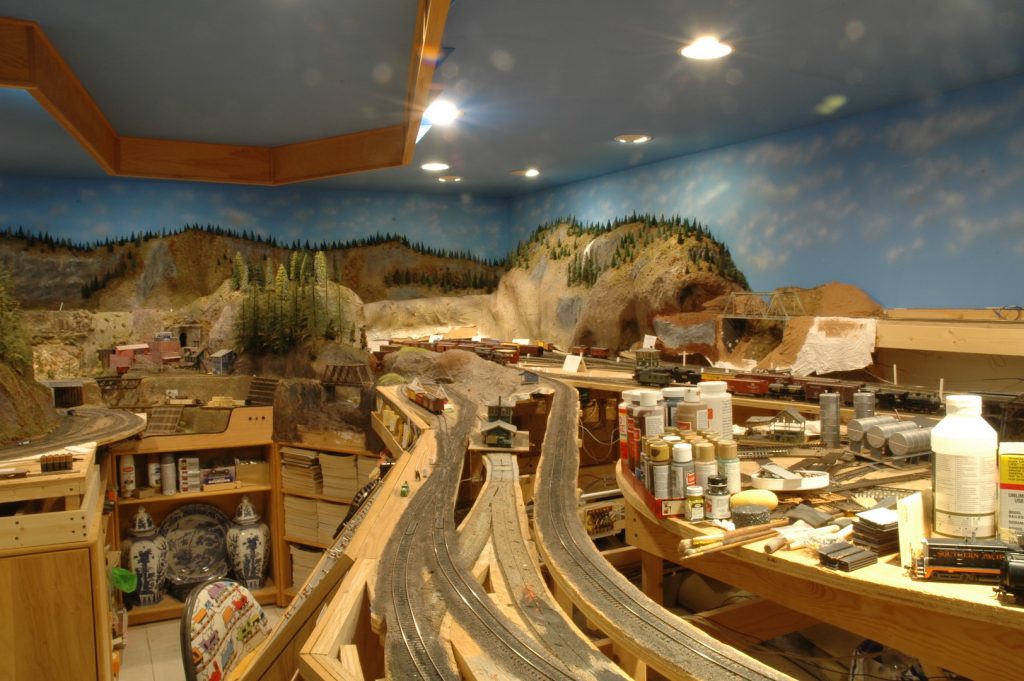
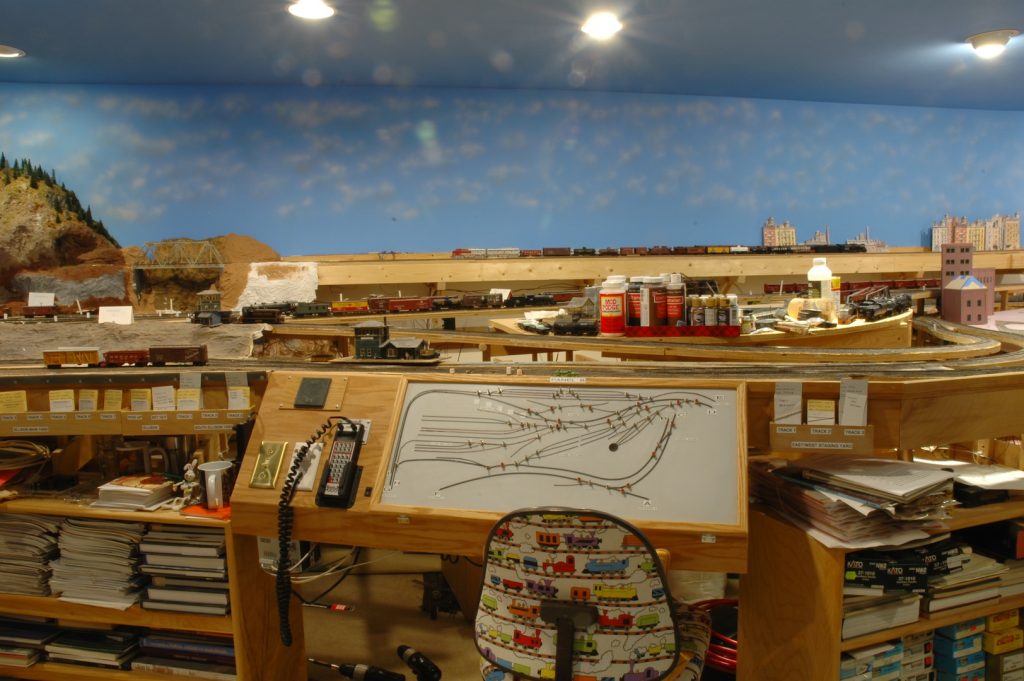
Photo 14 gives a view of the Ellison control panel and my collection of paints. You can see that I use car cards for my train operations. Taylor Junction station is right above the control panel. The first track at the bottom right of the photo takes you directly to Newport yard. The second track up takes you to Newport station while the third track comes from Newport station.
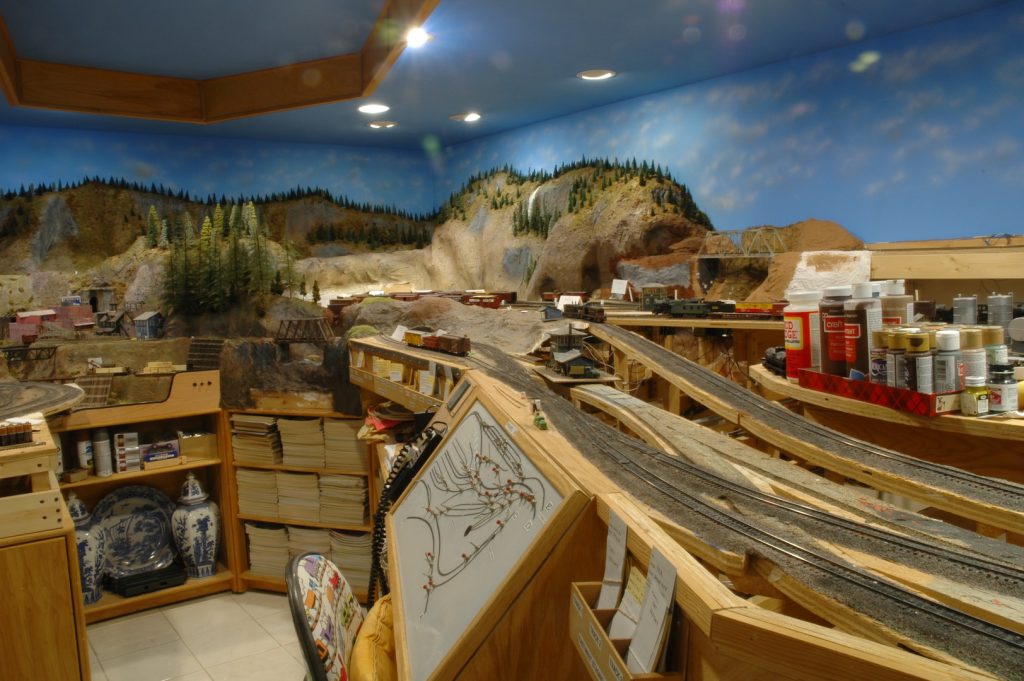
Photo 15 gives a front view of the control panel and car card boxes. Again, Taylor Junction station is right above the control panel. It is a Campbell kit. Directly above the station is South Ellison Yard. To the extreme right you can see how Newport station serves both lower level tracks and upper level tracks.
That’s it for this portion of the tour. Next time we will travel further down the mainline and see more close-up photos of the scenic Gornitzka Crossing area.
David
Well done David. Thanks for sharing.
Russ Segner
Enjoying the series-thanks for doing it.
Nice job on the cabinets too!